DIY Wavy Daybed Bench Featuring Soft Velvet
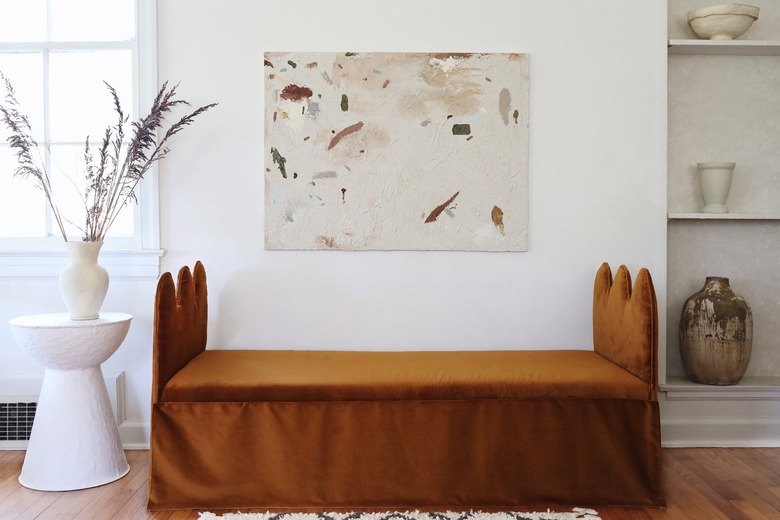
Wave hello to one trend we can't seem to get enough of—curvilinear decor. Case in point: we've already made a wavy cork board, a wavy vase, and a wavy candleholder. This time, we went bigger and bolder in our DIY projects and built a bench, which is actually large enough that one could also feasibly call it a daybed. And with its velvety smooth fabric and rhythmic lines, we can totally see it being the perfect spot to curl up with a good book, binge-watch a show, or even take a power nap. If you'd like to make your own DIY daybed/bench, join us in this step-by-step tutorial as we share the full how-to below—no sewing needed. (However, woodworking is involved, so get ready to break out those power tools!)
 Trisha Sprouse
Things Needed
-
12-inch bench legs, (4)
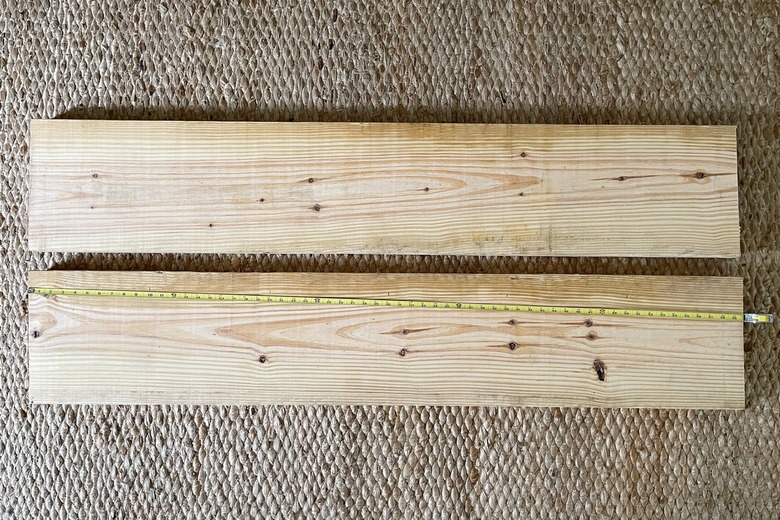
1. Cut the bench seat pieces.
Cut the two 2-by-12-inch wood boards into the desired length for your bench. In our case, we cut both pieces of wood to 60-inch lengths—and we had this done for free at the hardware store to make it easier for transporting in the car.
 Trisha Sprouse
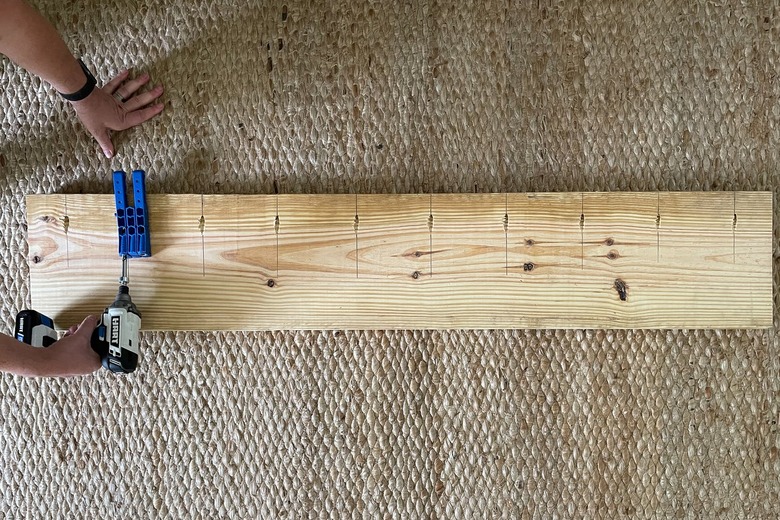
2. Drill pocket holes on one bench seat.
Set the pocket hole jig and the stop collar on the drill bit to 1 1/2 inches, clamp the jig to the long edge of one of the 2-by-12-inch boards, and drill evenly spaced pocket holes down the length of it. We drilled a hole three inches in from each end of the board, and then drilled holes every six inches between those two holes. All in all, we drilled 10 holes.
 Trisha Sprouse
3. Attach the bench seat pieces together.
Glue the long edge of the 2-by-12-inch boards together with wood glue, and then a drill 2 1/2-inch pocket hole screw into each of the holes you pre-drilled. This will join the two boards together, producing a bench seat that is 24 inches wide.
 Trisha Sprouse
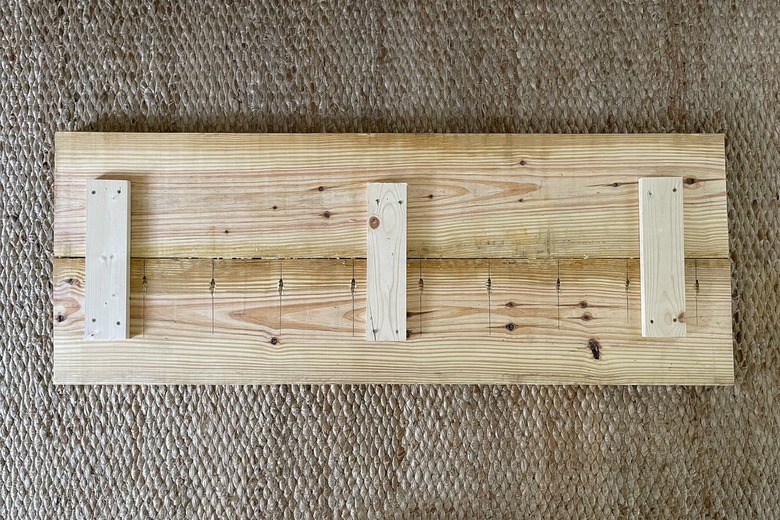
4. Add support to the bench seat.
Cut the 1-by-4-inch wood board into three 14-inch pieces. Attach them to the underside of the bench seat (the side with the pocket holes) using 2-inch wood screws—one board in the center, and one board on each end. This will add further support to the seam of the bench seat.
 Trisha Sprouse
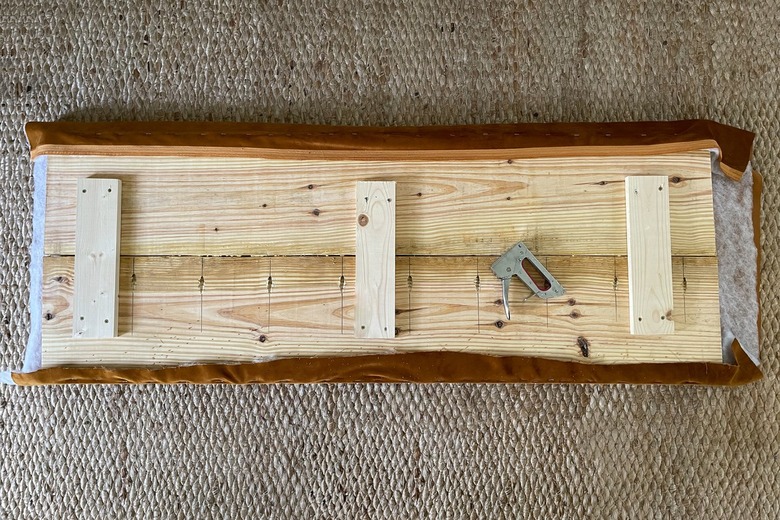
5. Upholster the bench seat.
Cut the 2-inch upholstery foam to the same size as the bench seat. In our case, we cut it to 24 inches by 60 inches. Also, cut a piece of batting and upholstery fabric that are each two inches longer on all sides than the bench seat. Lay the fabric piece on the ground with its wrong side facing up, and place the piece of batting on top. Put the piece of foam on top of the batting, and finally place the bench seat on top of the foam with its underside facing up.
Pull the fabric and batting tightly up over the foam, and staple it to the underside of the bench seat. It's best to the staple the long sides first, and then do the corners last, folding and stapling the fabric neatly like a present. Trim away any excess fabric.
 Trisha Sprouse
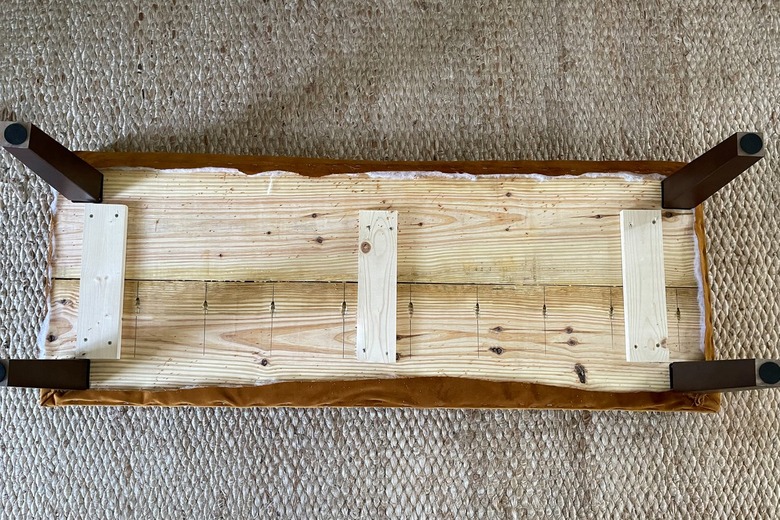
6. Attach the bench legs.
Attach the hardware plates for the bench legs in each of the four corners of the bench seat. Then screw the bench legs into the plates. (Note: we selected these bench legs from Amazon for their height and sturdiness, not for their aesthetic, since we will be hiding them with a fabric skirt.)
 Trisha Sprouse
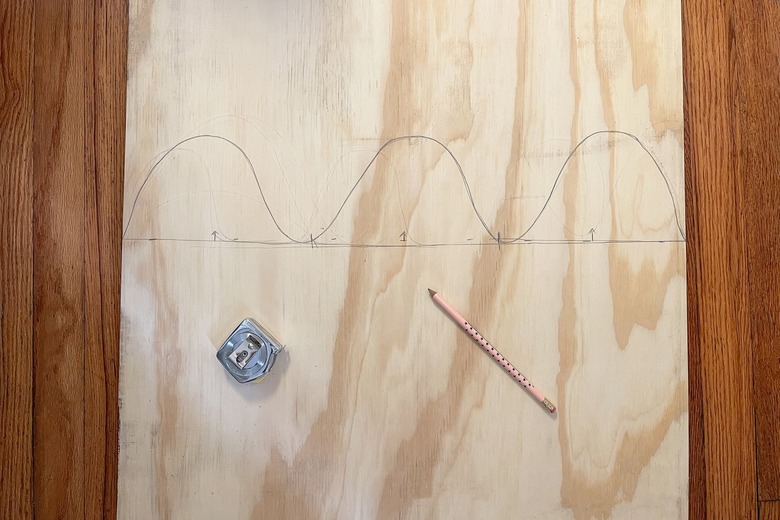
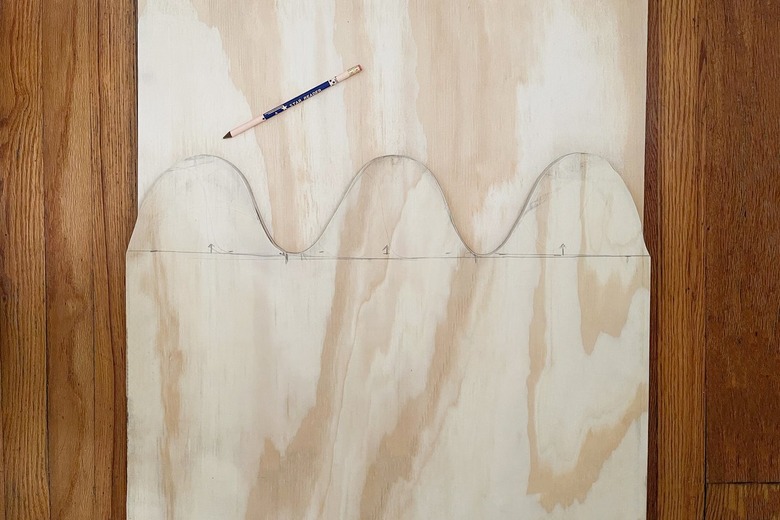
7. Draw the first wavy bench arm.
Mark the desired height of your bench arms on one of the plywood sheets (we made ours 28 inches high). Then draw a wavy shape on the plywood, making sure the crests of each wave touches the desired height of your bench arm. Since we wanted three waves, we divided the width of the board by three and made sure each wave crest was centered at one of the one-third marks. We freehanded the shape, but you could also use a bowl or plate to create the rounded portions.
P.S. We had to erase and re-draw the shape a few times, so don't be afraid if you mess up on your first attempt.
 Trisha Sprouse
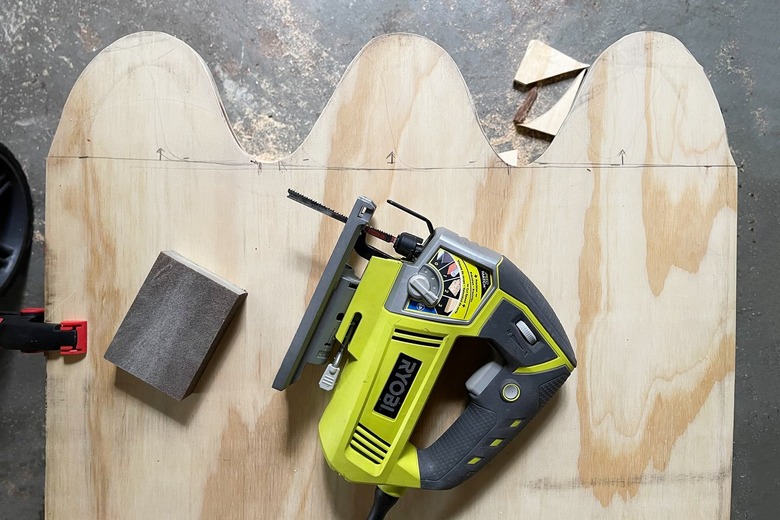
8. Cut out the wavy bench arm.
Cut out the wavy shape with a jigsaw. Sand any rough edges.
 Trisha Sprouse
9. Trace and cut the second wavy bench arm.
Trace the wavy shape onto the second piece of plywood, and cut it out with a jigsaw. Again, use a sander to smooth any rough edges.
 Trisha Sprouse
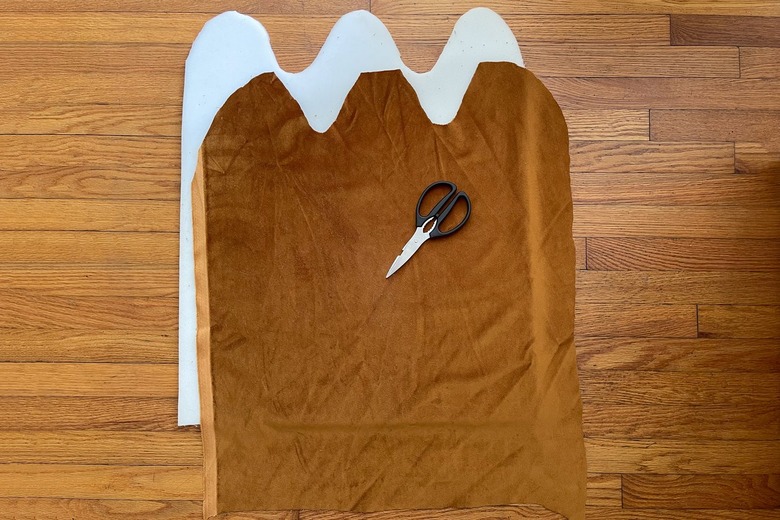
10. Cut foam, batting, and fabric for the bench arms.
Trace the wavy bench arm onto a piece of 1/2-inch upholstery foam, and cut out four separate pieces of foam with the same shape. Also trace and cut out four pieces each of batting and upholstery fabric that are two inches longer on all sides than the bench arm.
 Trisha Sprouse
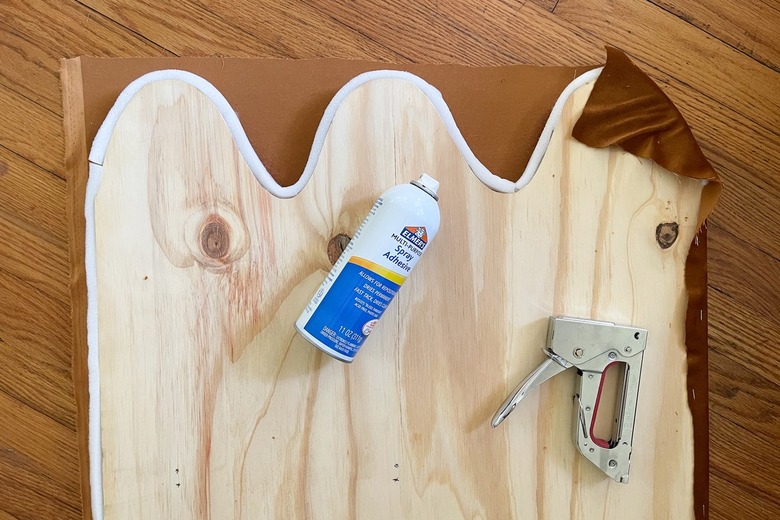
11. Upholster the inner bench arms.
Spray one side of the wavy bench arm with spray adhesive, and attach one of the foam pieces to it, pressing and smoothing it out as you go. Lay one piece of fabric on the ground with the wrong side facing up, place a piece of batting on top, and then place the foam-covered side of the bench arm on top. Pull the fabric and batting tightly up over the foam and staple it to the other side of the bench arm. When you get to the wavy portion, cut slits in the fabric so you can pull it tightly around the rounded edges. Trim away any excess fabric. Repeat on the other bench arm. (Note: you're only upholstering one side of each bench arm here. Leave the other side un-upholstered for now.)
 Trisha Sprouse
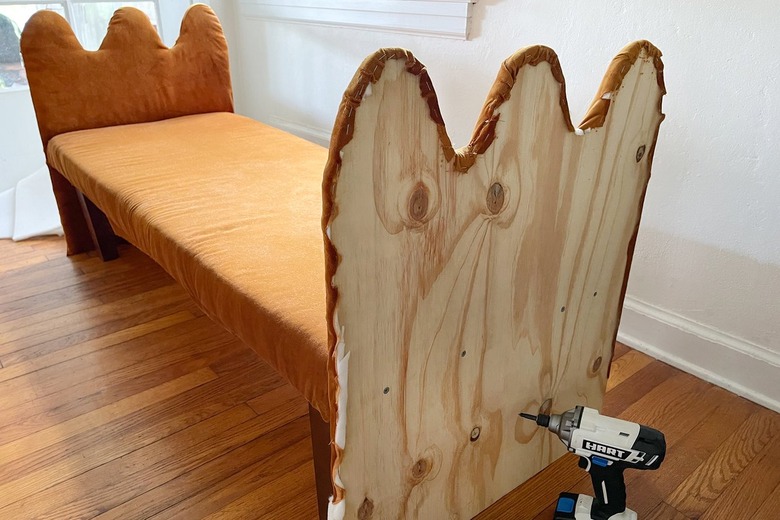
12. Attach the bench arms to the bench seat.
Have a helper hold one of the bench arms upright 90 degrees against the side of the bench seat, with the fabric-upholstered side facing in towards the bench seat and the bare wood side facing out. Drill four evenly spaced 3-inch wood screws through the outer bench arm and into the bench seat (be sure to pre-drill the holes first). Repeat on the other bench arm.
 Trisha Sprouse
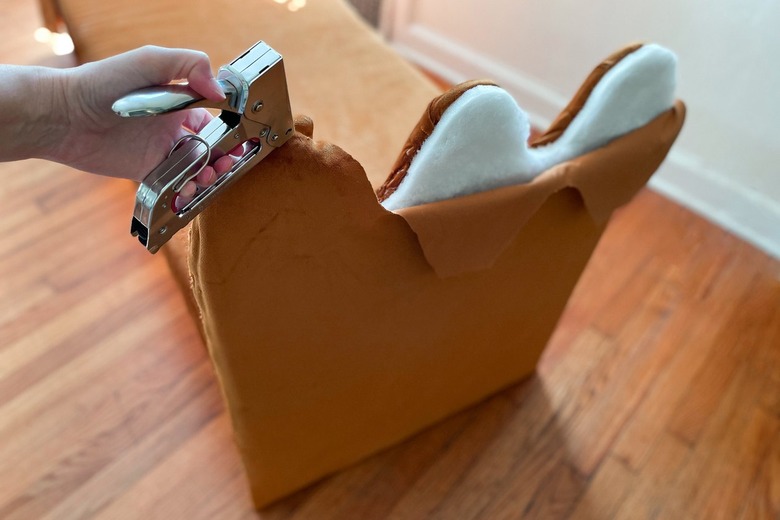
13. Upholster the outer bench arms.
Attach one of the foam pieces you pre-cut earlier to the outer bench arm using spray adhesive, and then do the same to attach a piece of batting to the foam. Then place a piece of the upholstery fabric on top of the batting with the right side facing out. Pull and staple it tightly around the edges of the bench arm, making sure to place all the staples around the rim of the bench arm, to make it easier to hide them later. Again, cut slits around the wavy portion to make it easier to get a tight fit around the curves.
 Trisha Sprouse
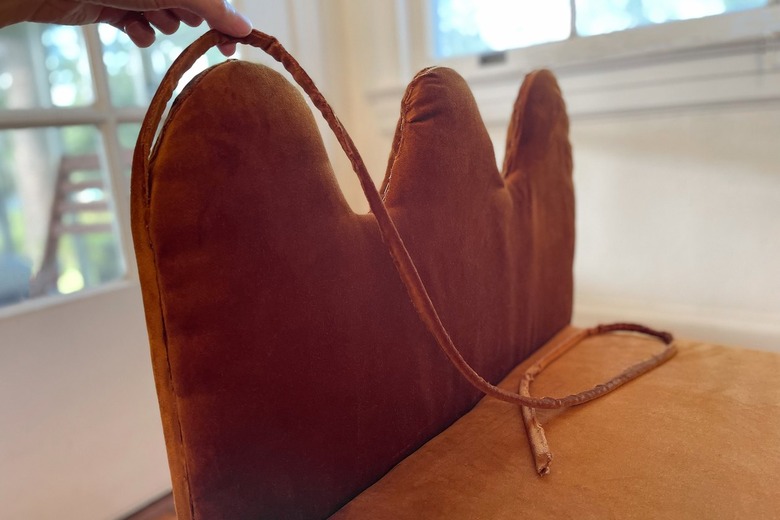
14. Attach piping to hide the staples.
Using a hot glue gun, attach piping around the rim of the bench arms to hide the seam and staples. It's best to use a sparing amount of glue to avoid having it ooze out from under the piping.
Tip
You can buy piping that coordinates with your upholstery fabric, or you can make your own so that it matches it exactly. Simply cut a long strip of upholstery fabric that's wide enough to wrap around a piece of cotton cord. Tightly wrap the fabric around the cord, and hot glue the seam closed.
 Trisha Sprouse
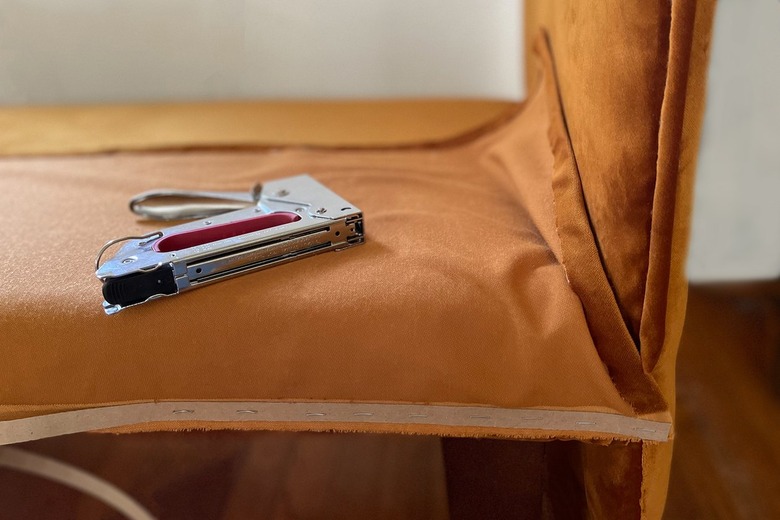
15. Upholster the bench skirt.
To make the fabric skirt, first measure the height from the bottom of the bench seat to the floor, and the width from one bench arm to the other one. Cut a piece of fabric that is two inches longer on all sides than these dimensions. Hem each side by folding over the raw edge by 1/2 inch, and either hot glue the fold in place or use permanent fabric fuse. Repeat to make a second fabric skirt.
Lay the fabric skirt on top of the bench with its wrong side facing up. Line the bottom edge of the skirt up with the bottom edge of the bench seat. Place the cardboard upholstery strip on top of the fabric skirt, and staple it along the bottom edge of the bench seat. Once you get to the end, snip off the excess cardboard strip, and fold the fabric skirt down over the cardboard strip. This should give you a nice crisp line along the top of the bench skirt. Repeat with the other fabric skirt on the other side of the bench.
 Trisha Sprouse
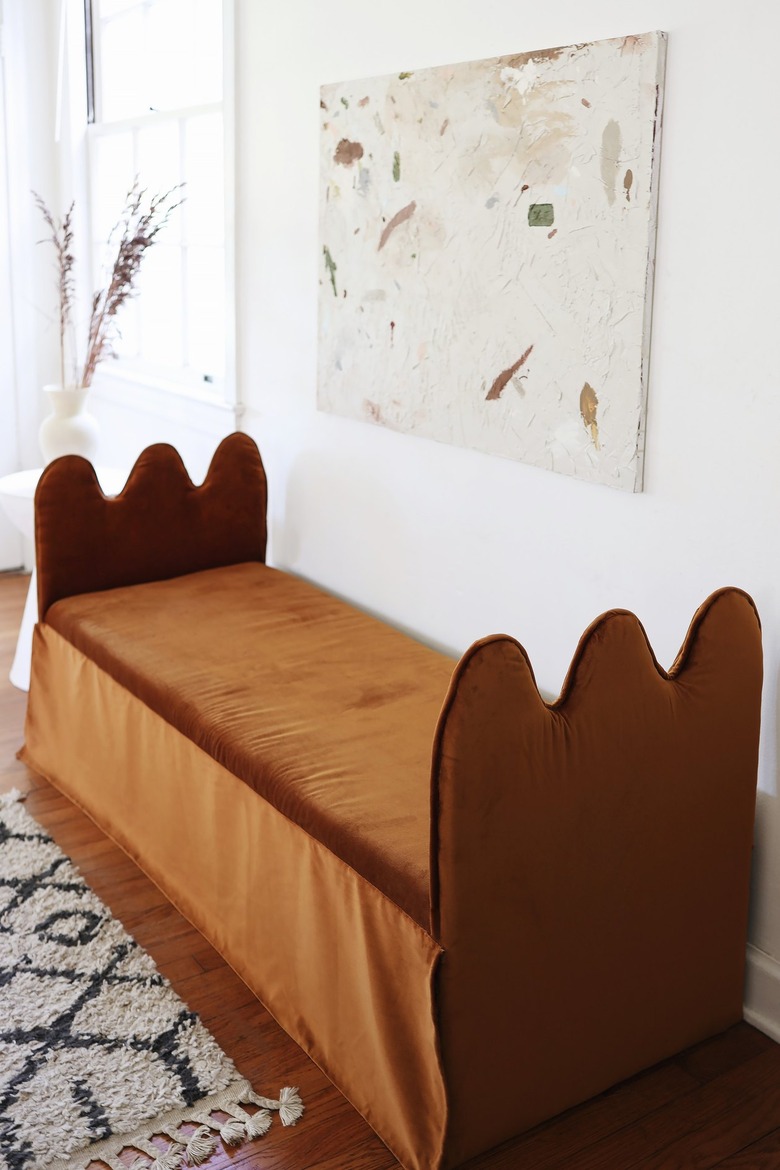
Now sit back and relax on your stylish new piece of furniture, and enjoy the wavy vibes it adds to your space! We love this look for an entryway, a guest room, or along a wall in the living room. Take pics and share with us on IG @hunkerhome.
 Trisha Sprouse