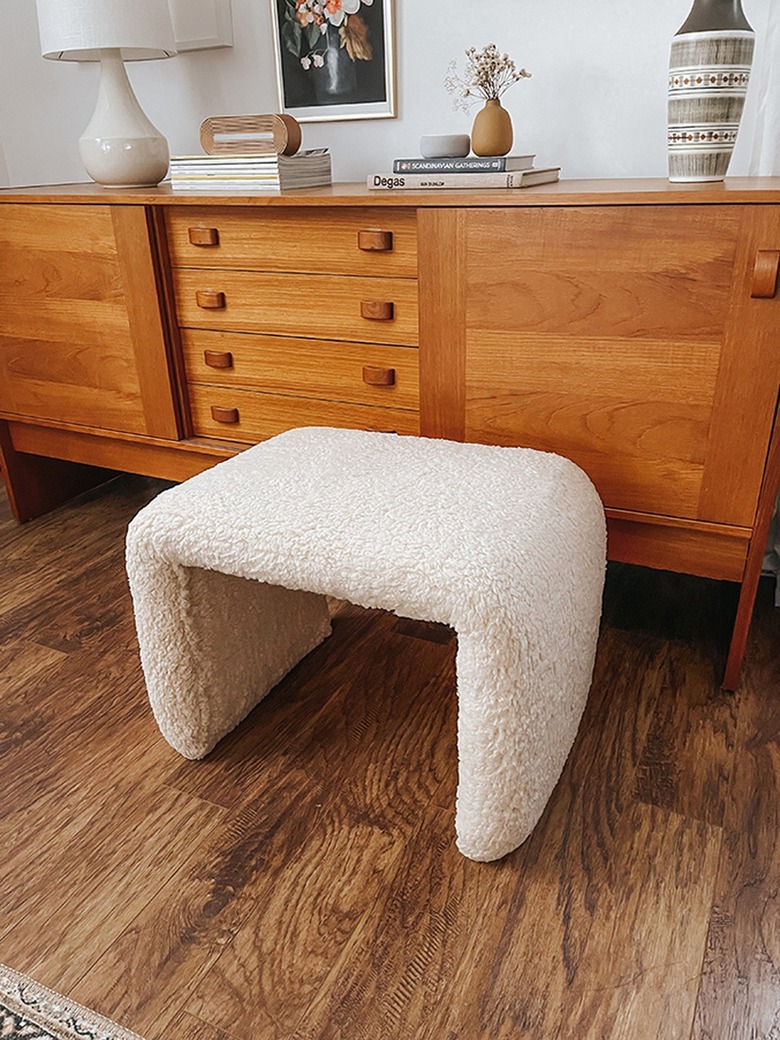
From Blanket To Shearling Bench Seat DIY
We may receive a commission on purchases made from links.
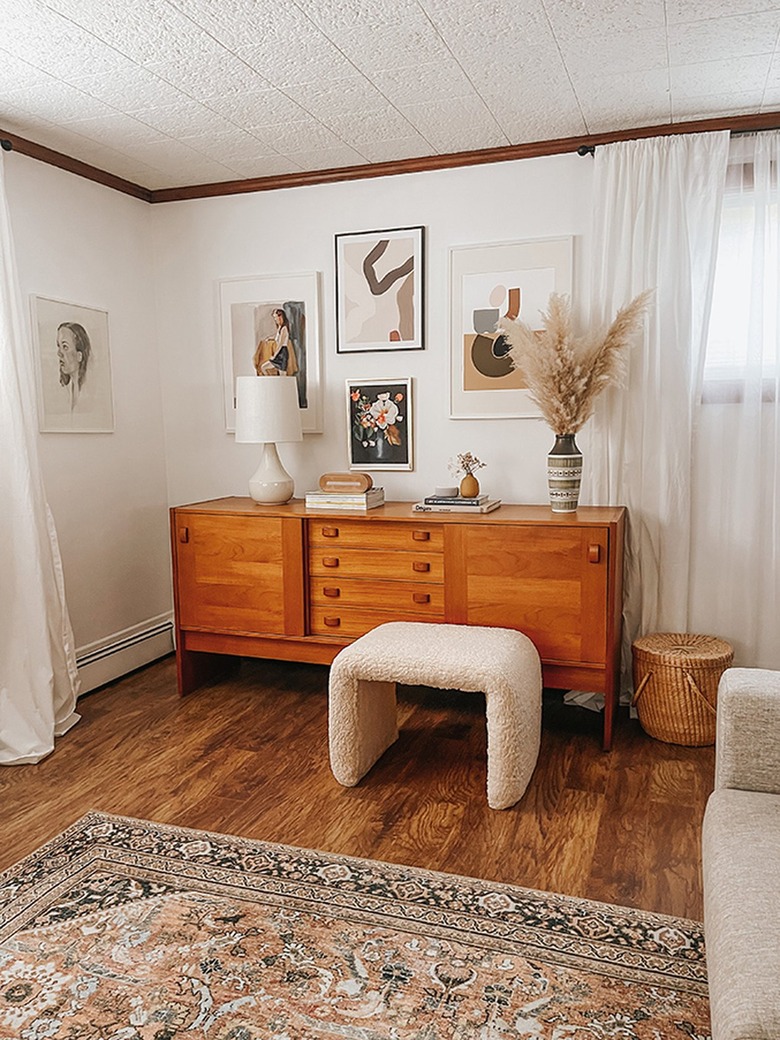
Would you believe that this ultra cozy shearling bench seat began as a blanket? We got inspired to make our own high-end design after seeing this cute creation by Leanne Ford. If you love making decor for your home and are comfortable with woodworking projects, this handmade seat is your next DIY to try.
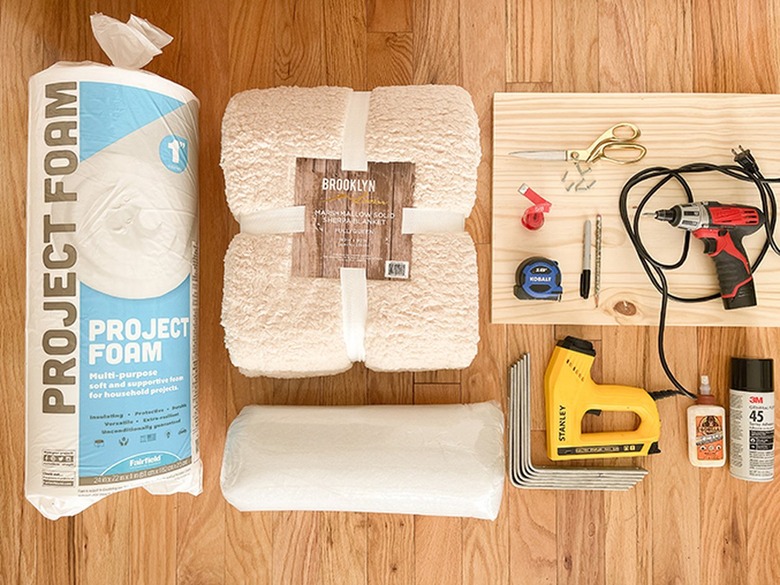
Things Needed
-
Pencil and marker
-
Screws
-
Thick foam padding (we doubled up 1-inch foam to create thicker seating)
-
Staple gun
 Carrie Waller
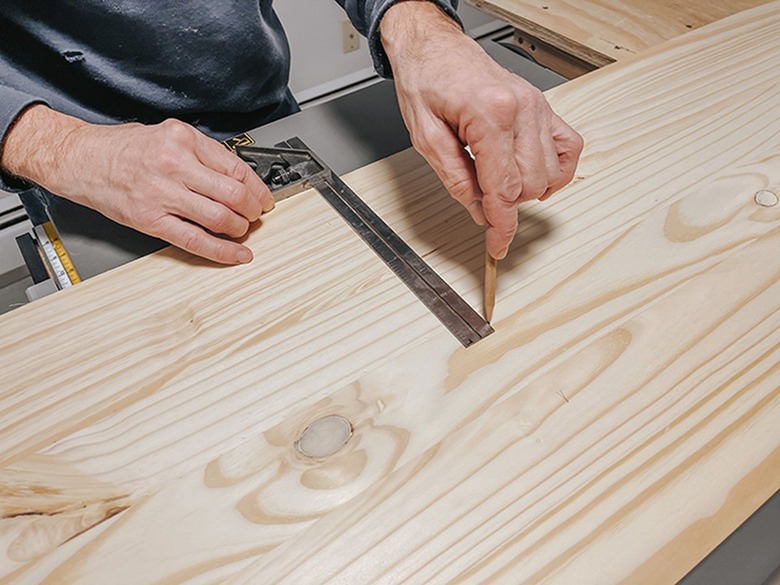
Step 1
Decide on the measurements for your seat. Use measuring tape, a pencil, and a carpenter's square to draw an even line on the wood panel to match your chosen measurements. We measured and marked the two vertical side panels first (ours each measured 15 inches long), and then the middle horizontal top section (ours measured 20 inches).
Tip
If you're not sure which measurements to use, find something similar on a home decor retail website and use those dimensions.
 Carrie Waller
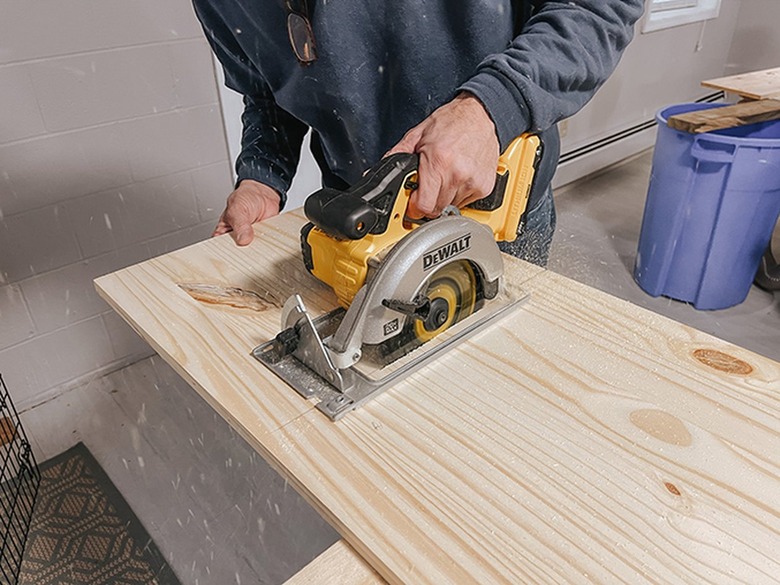
Step 2
Cut the measured and marked sections out of the single wood panel using a circular saw and/or table saw.
Tip
To make this even easier (or if you don't own a circular saw or table saw) ask your local hardware store to cut the pieces of wood for you.
 Carrie Waller
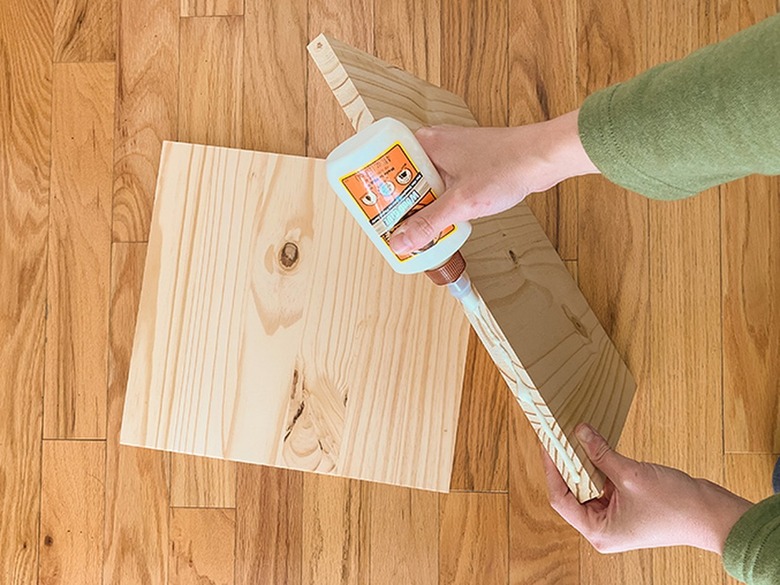
Step 3
Run a line of wood glue along the top edges of both vertical side panels.
 Carrie Waller
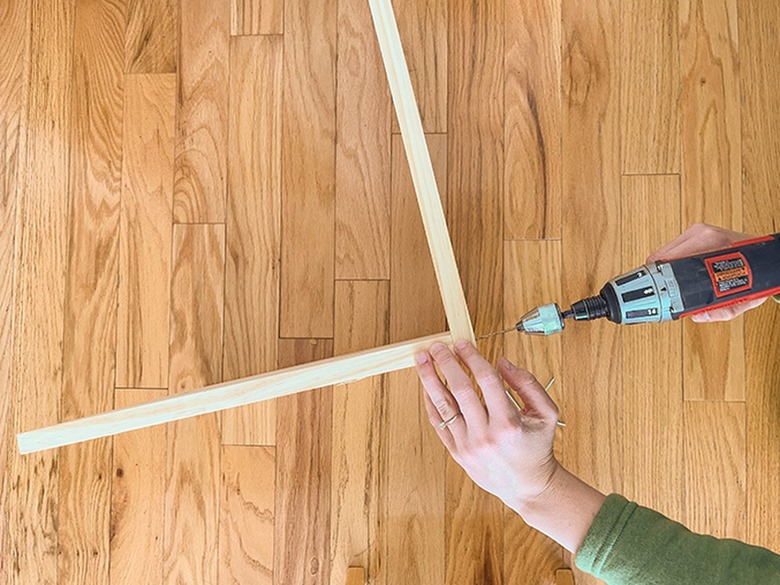
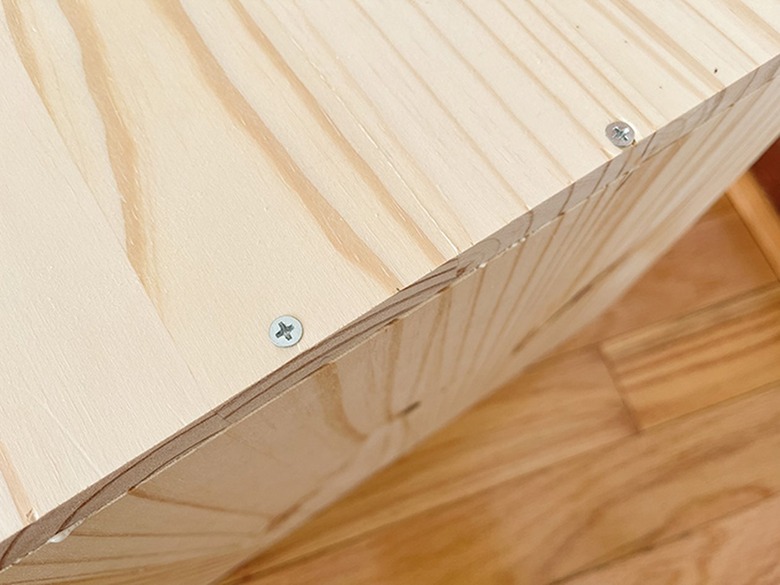
Step 4
Place the horizontal top panel on top lining up the edges so it's an even 90-degree angle on either end. Pre-drill holes along the top outside edge of the stool top on either side, and then sink screws through the holes to attach the side panels to the top panel. Don't worry if it's not pretty! All of the screw heads will be hidden from view, so just focus on a functional, sturdy fit.
 Carrie Waller
 Carrie Waller
 Carrie Waller
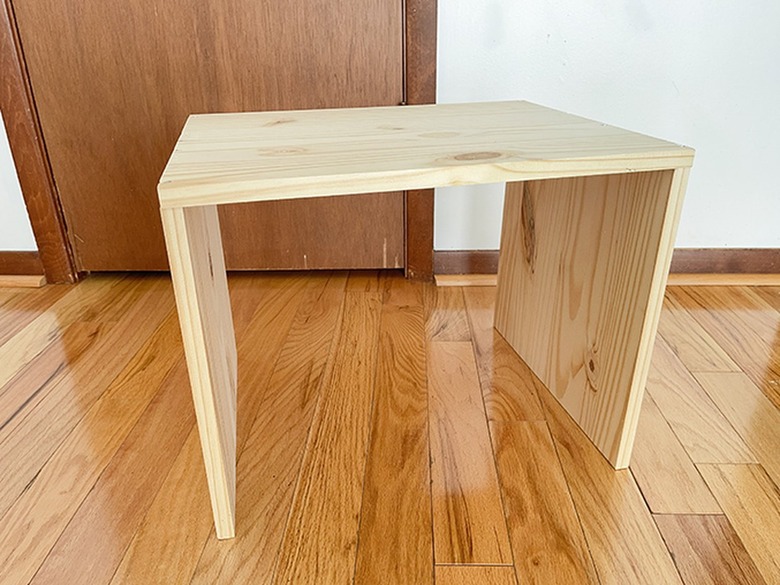
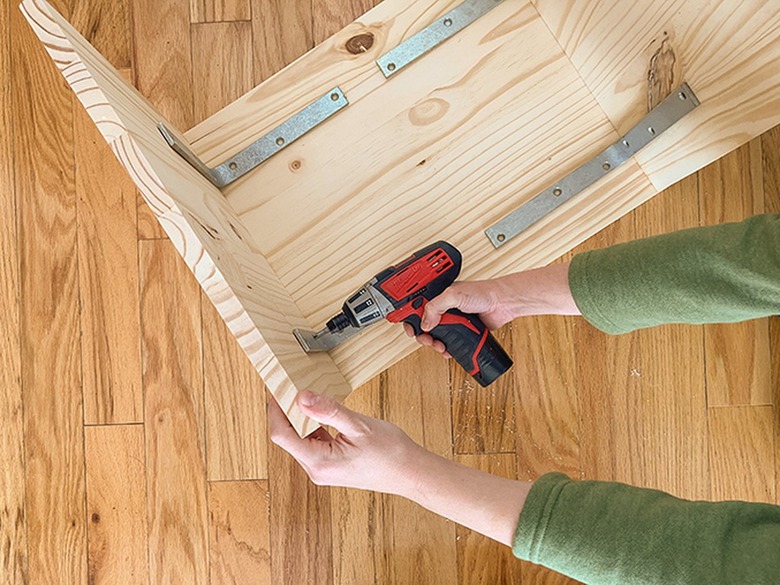
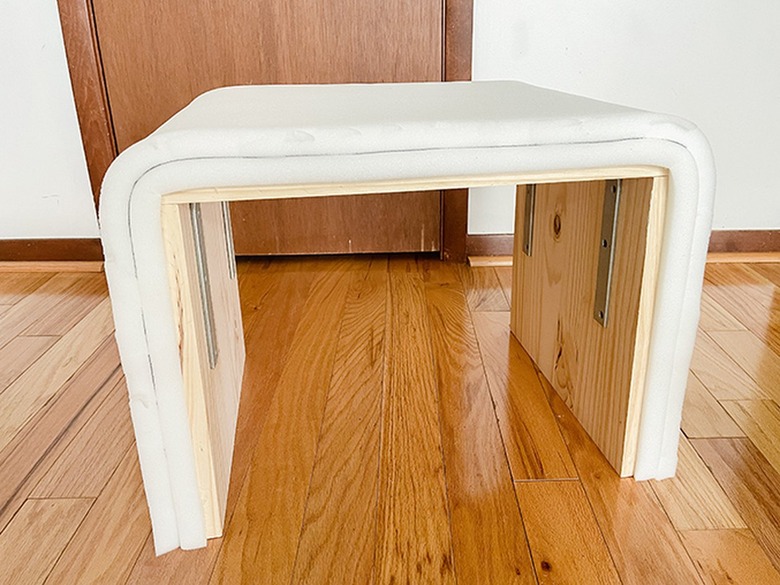
Step 5
Install a pair of L-brackets on each inner 90-degree angle of the stool to help add more stability. Again, no need to make it look pretty or even measure for equal spacing since all of this will be hidden under batting and fabric. Just make sure it's sturdy. Allow the glue to dry overnight.
 Carrie Waller
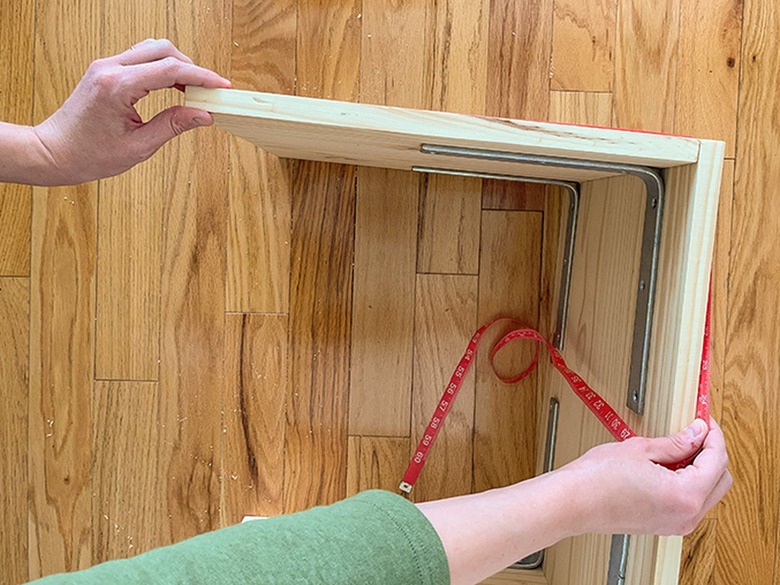
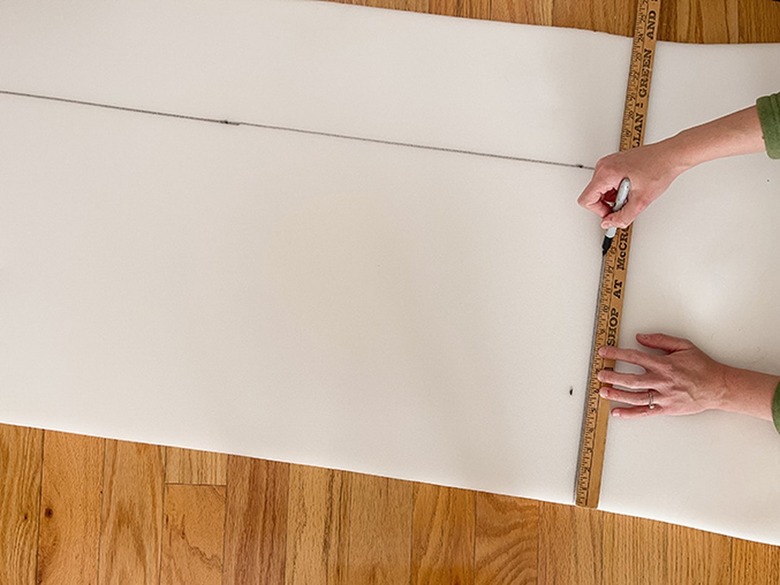
Step 6
Use fabric measuring tape to measure the length of the entire outer plane of the stool. Transfer that measurement to the foam using a marker, adding a few extra inches on either end just in case you need it. Measure the width of the stool, too, and draw that line on the foam.
 Carrie Waller
 Carrie Waller
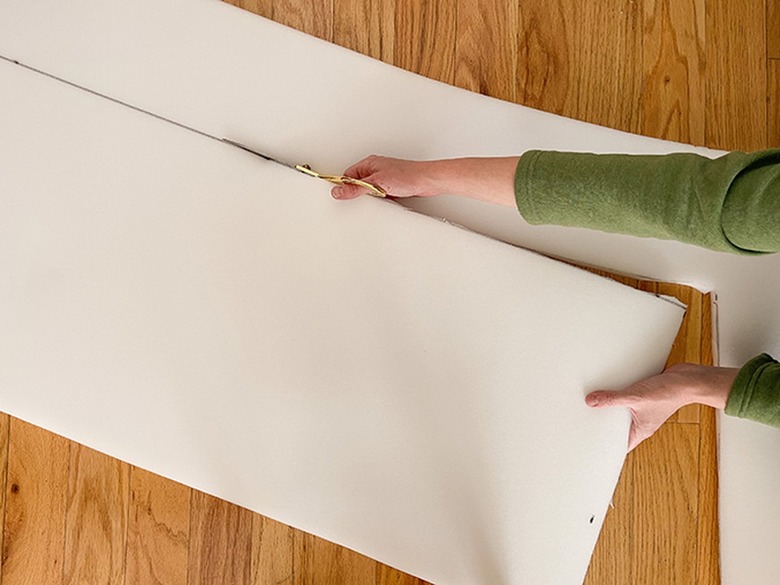
Step 7
Cut the foam to size along both measured lines.
 Carrie Waller
Step 8
Take the completed wooden form of the stool outside. Spray a thin, even layer of spray adhesive on the entire outer plane of the stool, and immediately press the cut foam over the stool. If you're doubling up the foam to get added depth, like we did, repeat the steps, using spray adhesive to stick a second layer of foam over the first.
 Carrie Waller
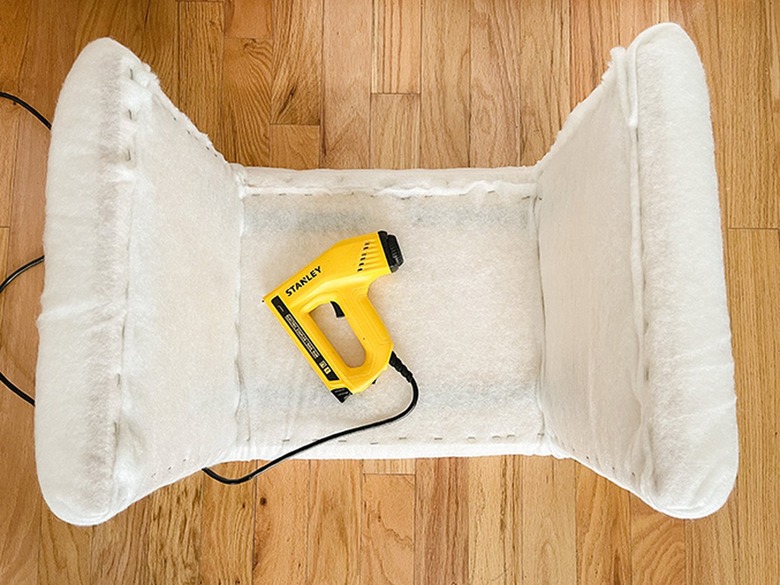
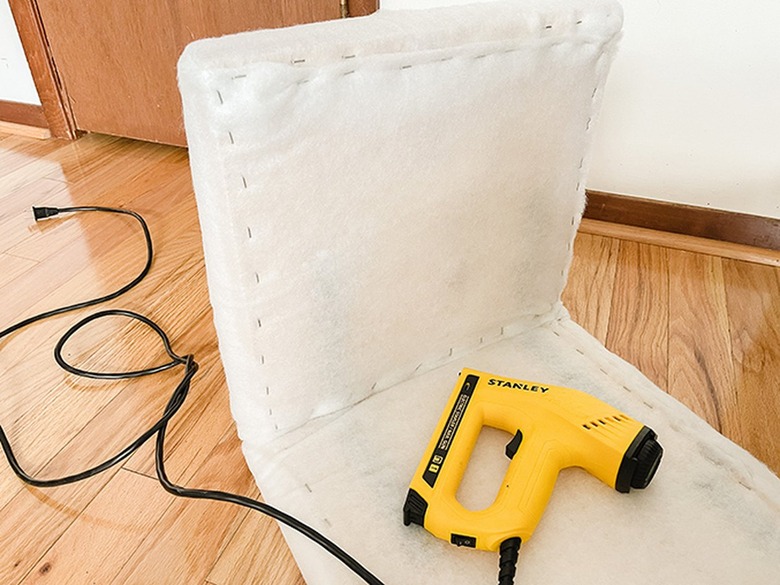
Step 9
Hold the foam in place and wrap batting around the foam and along the underside of the stool to cover all remaining exposed wood. Staple the batting to the stool using a staple gun. Do this all the way around the stool. Cut off the excess batting with scissors.
 Carrie Waller
 Carrie Waller
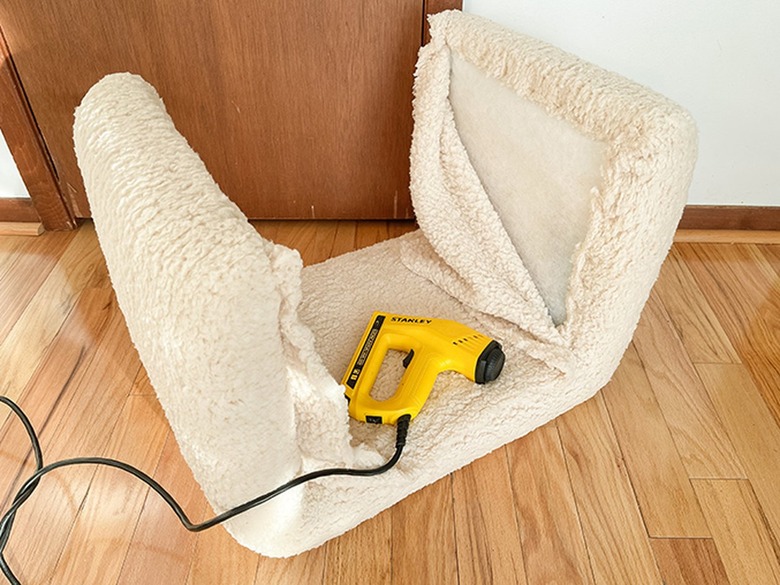
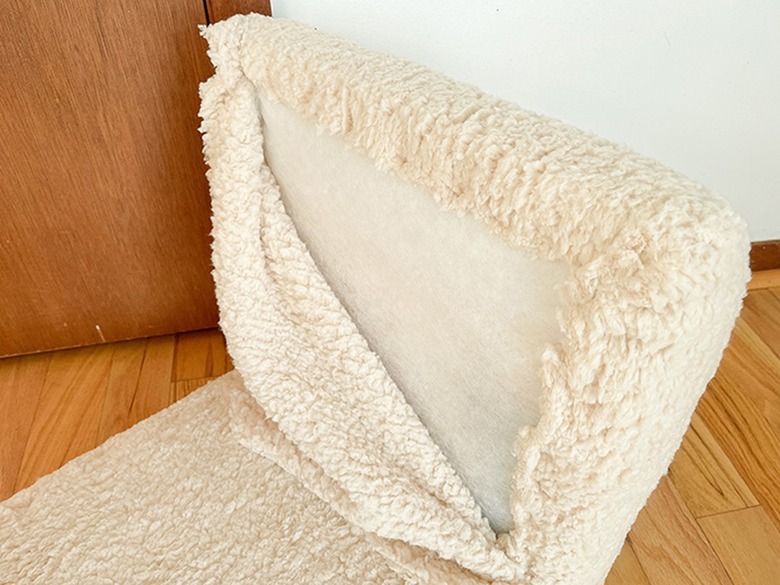
Step 10
Repeat the previous step, but this time you'll be using the shearling blanket to completely cover the batting. Cut off the excess with scissors, and you're finished!
 Carrie Waller
 Carrie Waller
 Carrie Waller
 Carrie Waller