Are You DIY Shy? This Coffee Table Tutorial Will Totally Convert You
We may receive a commission on purchases made from links.
Imagine just how much satisfaction you'll get from telling inquiring pals that you actually built this coffee table all on your own! We pinky promise that you can pull off this midcentury-inspired project yourself — and that it'll be the talk of the internet the next time you whip out your phone to snap a flat-lay picture for Instagram.
 Carrie Waller
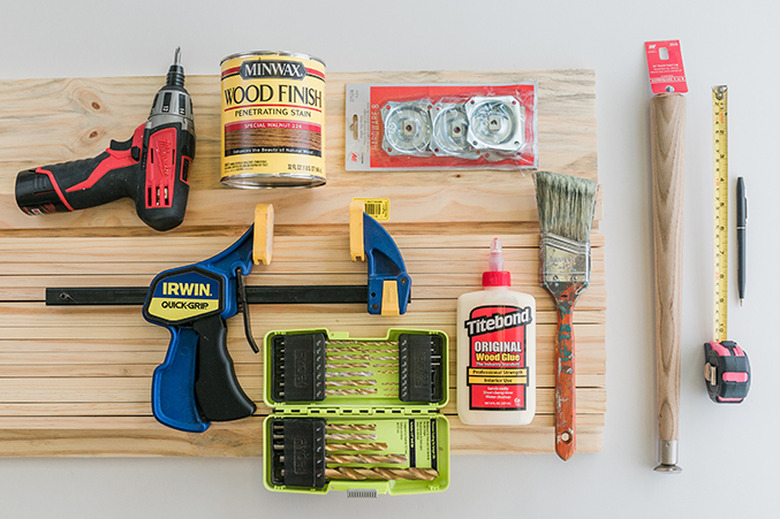
Things Needed
-
Paint grade panel, 21/32 inches by 16 inches by 36 inches, (1)
-
Pencil or pen
-
Tapered wood legs, 15 ½ inches each, (4)
-
Craft boards, ½ inch by 2 inches by 36 inches, (15)
-
Clamp (optional)
-
Disposable or old paintbrushes
-
Paper towels or old rag
 Carrie Waller
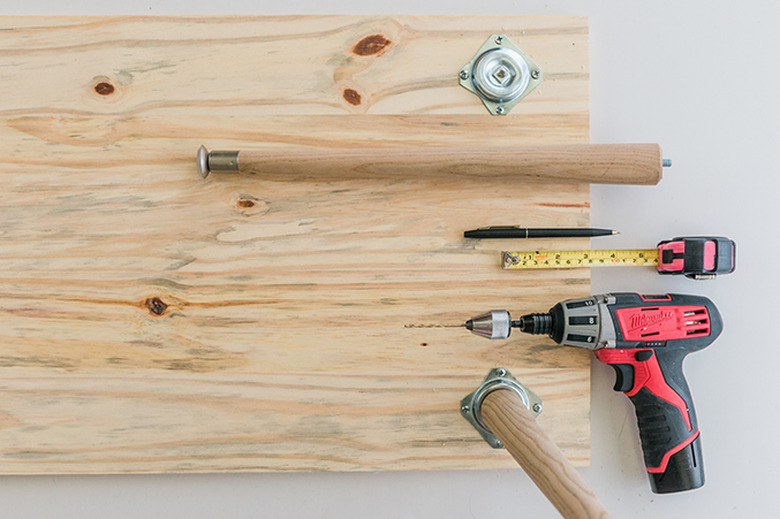
Step 1
Step 1
Turn your large paint grade panel over so that it's facedown on a flat surface. Use your measuring tape and pen or pencil to find the spot 2 inches in from the side and 3 inches in from the end of the panel on all four corners. Mark the spots with your pen, and then center each of the four angled leg mounting plates over the marks. Twist the plate until the angle is facing its respective corner, then pre-drill holes into the panel through the screw holes in the plate. Screw the plates into place using your drill or screwdriver.
 Carrie Waller
Step 2
Step 2
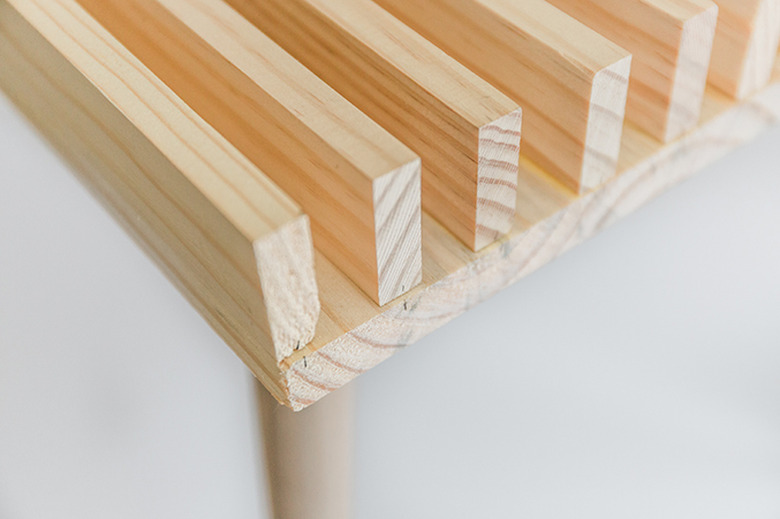
Flip the now-completed coffee table base over, and lay your wood slats upright on the tabletop. Move the slats around so that they span the length of the coffee table base, with roughly 1 inch of space in between each slat. You can use your measuring tape (or an extra wood slat) to get the spacing exact, but trust us that it's OK to just eyeball it — that's what we did.
Once you have the spacing measured out, carefully hold the slats in place, one at a time, and draw light pencil lines between the ends of each slat and the coffee table base below it. Do this on both ends of the coffee table. This will help you line things back up in the next step.
 Carrie Waller
Step 3
Step 3
Pick up the first wood slat, and run a line of wood glue along the bottom edge. Press the glued slat gently in place on top of the coffee table base, making sure to press down along the entire length of the slat so it feels secure. Check to make sure the marks you made in the previous step are lined up on each end. You have about a minute to wiggle things around to get the slat straight before the glue starts to set.
Repeat on all of the wood slats across the length of the tabletop, and then allow the table to dry overnight. You can either temporarily clamp a second panel down on top of the finished coffee table to help the slats stay firmly in place while they dry, or, if you don't have clamps handy, you can gently place stacks of heavy items on top to keep the slats from moving around.
 Carrie Waller
Step 4
Step 4
Use an old or disposable paintbrush to coat the entire coffee table (slats, foundation, and legs) with one to two coats of stain. Wipe off the excess stain after each coat with an old rag or paper towel. Allow the stain to dry for several hours, then coat the finished piece with one to two coats of Polycrylic protective finish. You don't need to wipe off the excess sealer. Note that you'll need to follow the package instructions that come with your specific stain and sealer for precise directions and wait times.
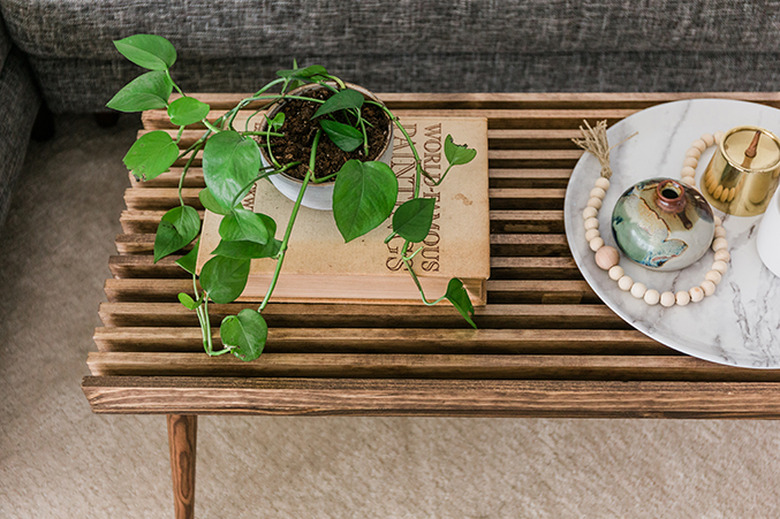
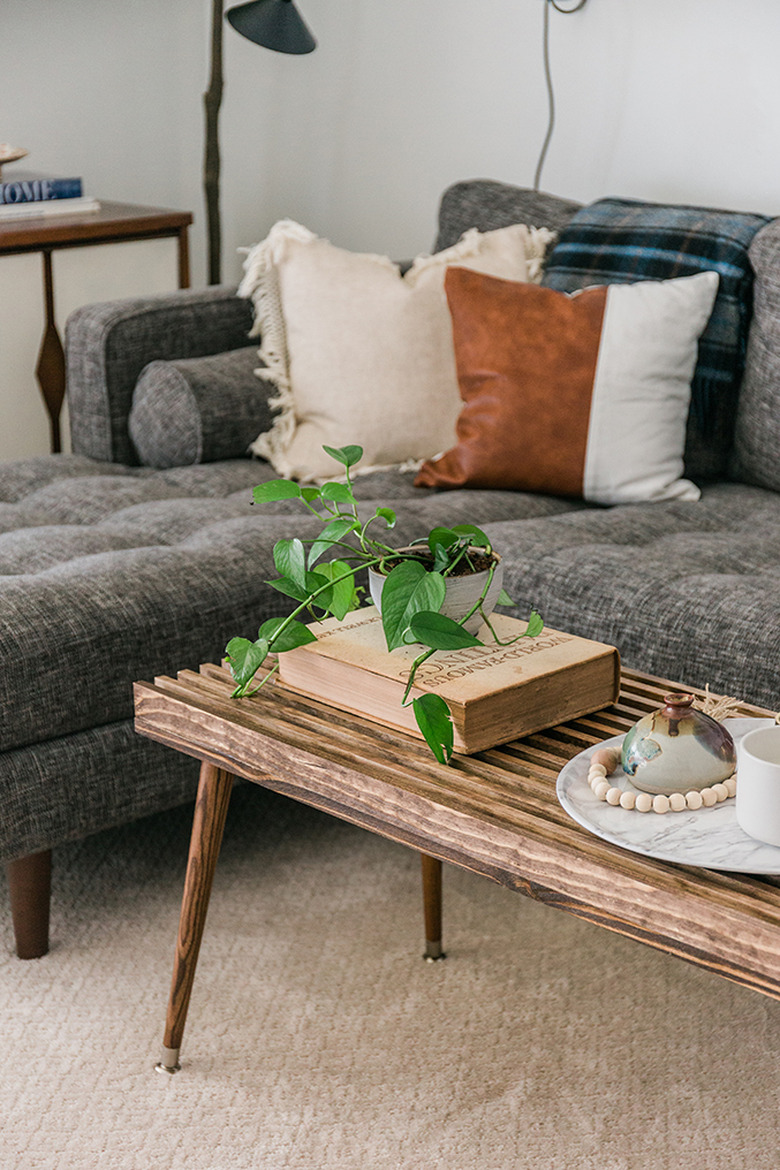
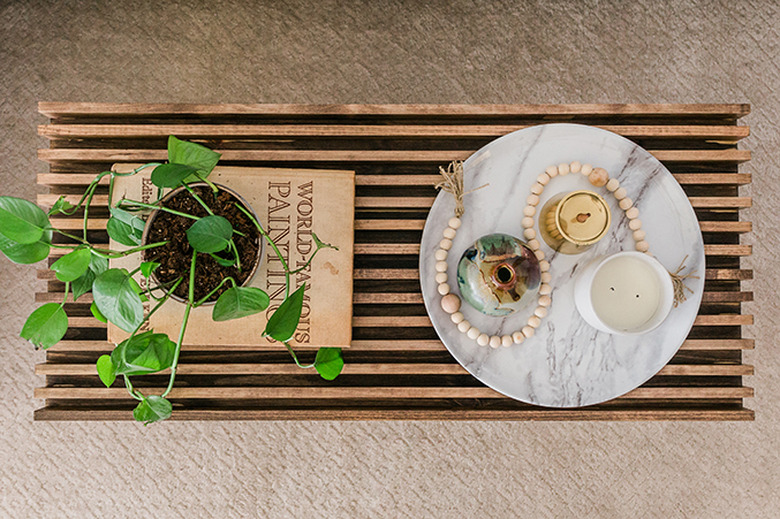
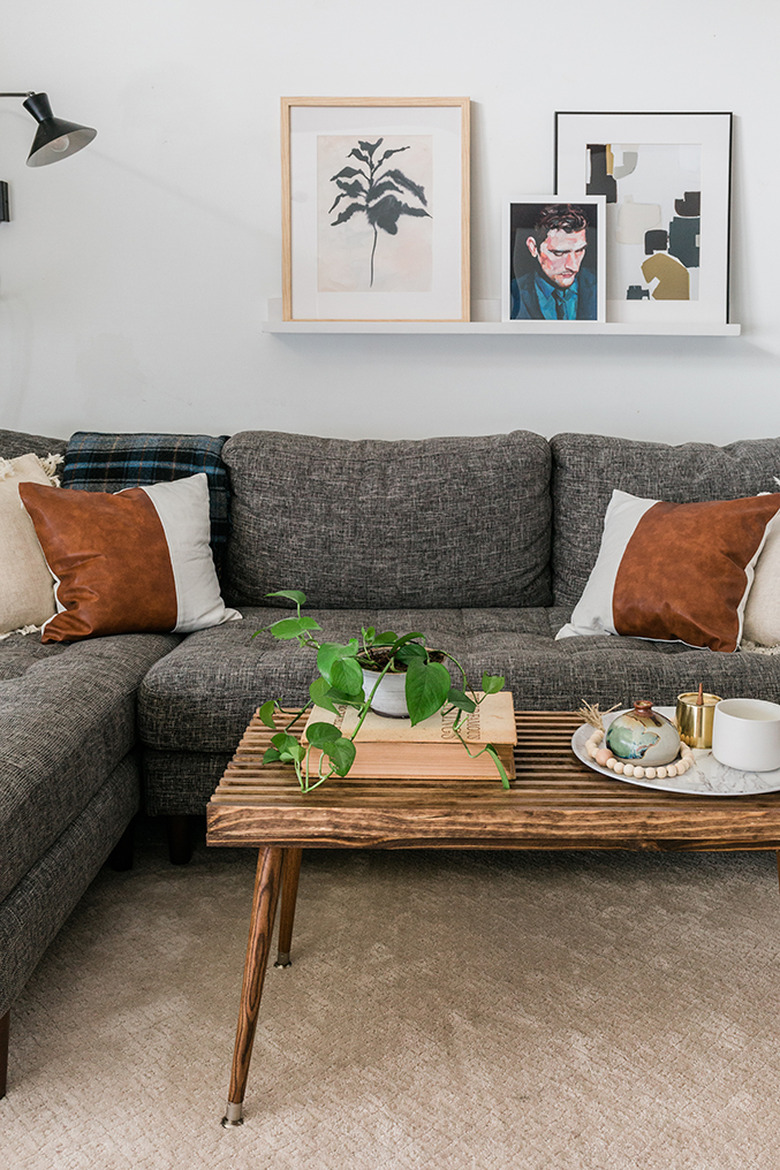
Let the table dry overnight, then set in place. We laid the finished table with a tray and large coffee-table book to allow for sturdy spots to place drinks and other decorative objects, but an alternate idea is to have a sheet of clear plexiglass cut to size for the top from your local hardware store — that way you'll still be able to appreciate the linear design underneath but have more surface area for objects!
 Carrie Waller
 Carrie Waller