This Rattan Lamp DIY Is Our New Favorite Affordable Dupe
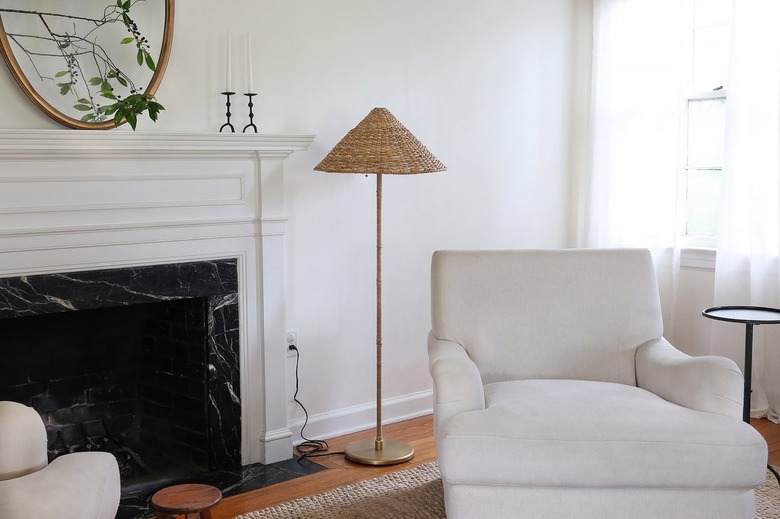
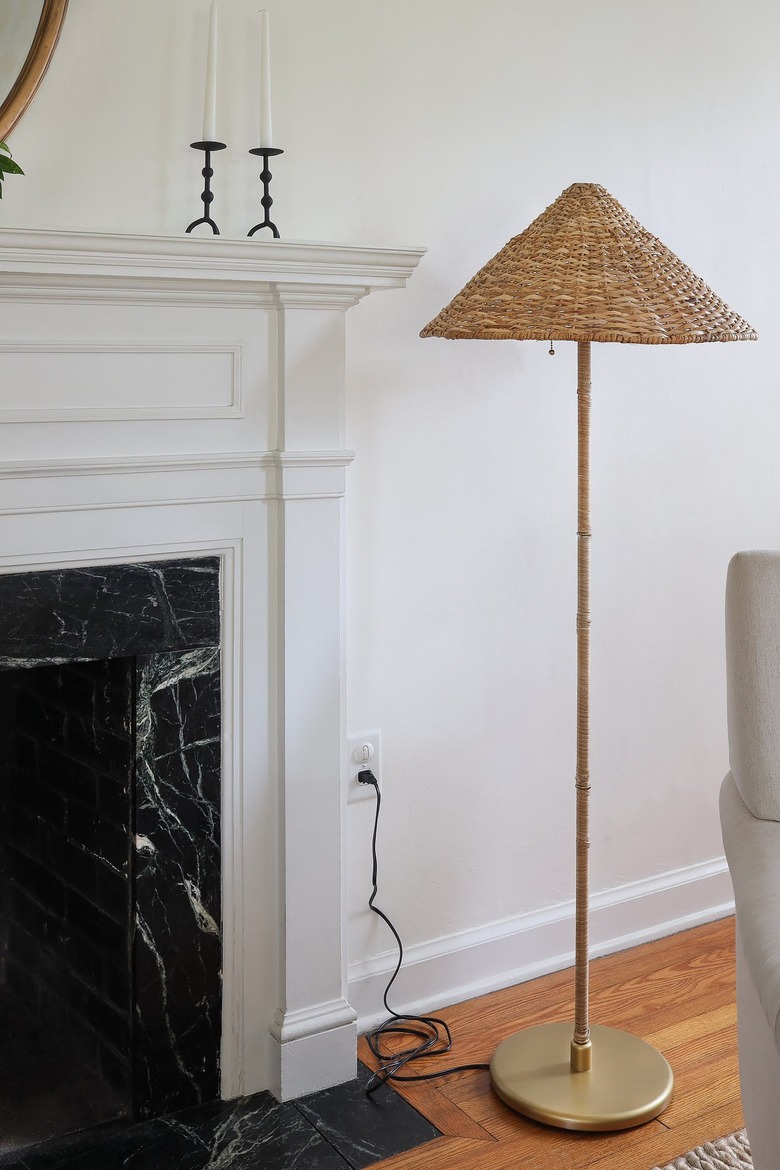
Lighting can create such a mood for a space, especially if it's a sleek floor lamp with a statement-making shape. Case in point: we fell hard for the conical shade and fabulous texture of this high-end rattan lamp. But the $1,1145 price tag quickly turned us into internet sleuths, scouring the web to find a more affordable dupe. Alas, we realized we could simply hack a $30 IKEA lamp to get a very similar look for a fraction of the price!
Things Needed
 Trisha Sprouse
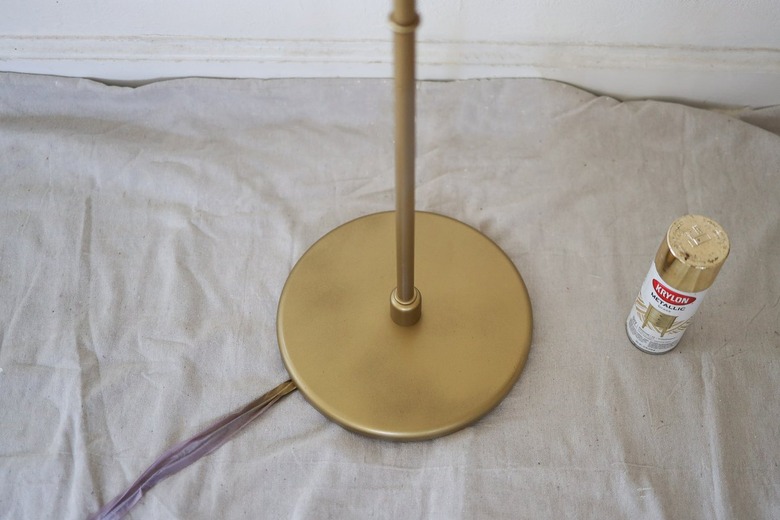
Step 1
Spray paint the base of the floor lamp with a gold spray paint. Be sure to paint in a well-ventilated area. A few light coats ensures good coverage.
 Trisha Sprouse
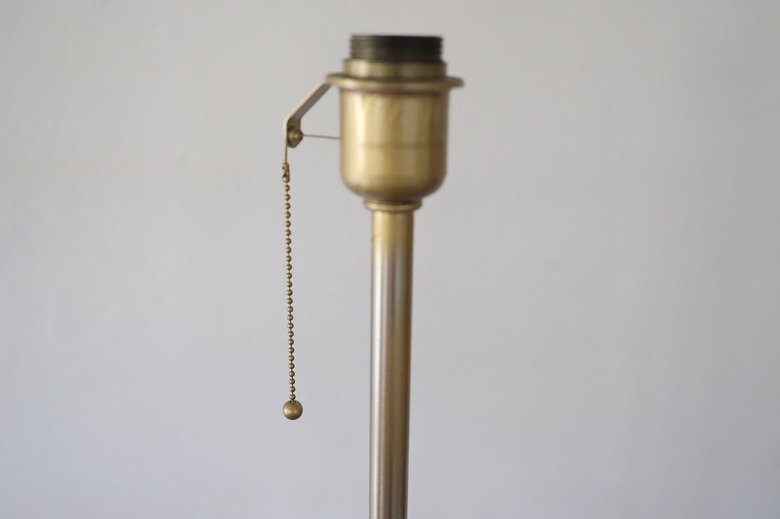
Don't forget to paint the pull switch as well. Let the paint dry completely — about an hour.
 Trisha Sprouse
Step 2
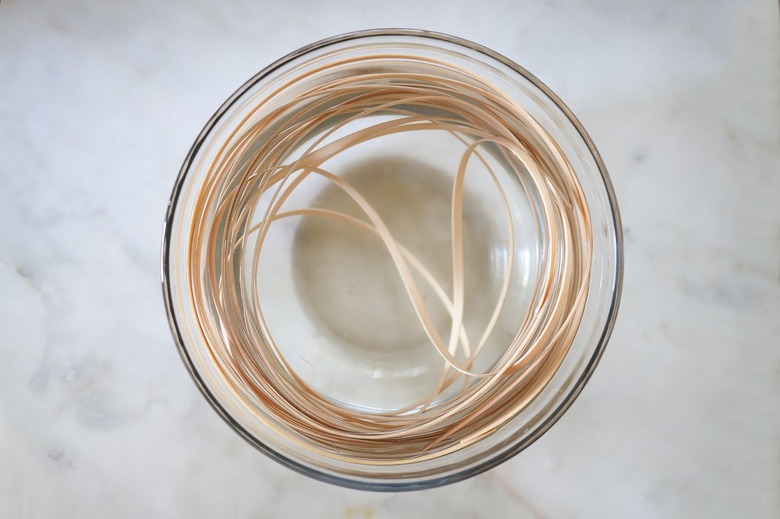
While the final coat of spray paint is drying, soak the reed in a bowl of warm water for about 15 minutes. This makes it much easier to wrap it tightly around the lamp, so don't skip this step.
 Trisha Sprouse
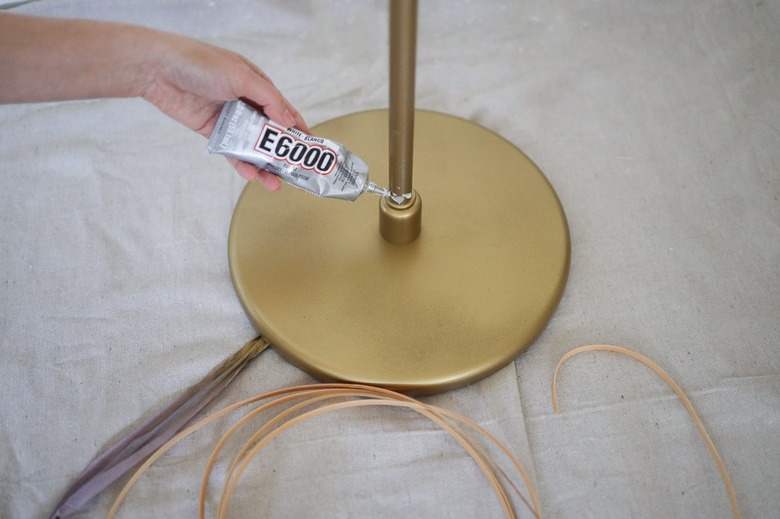
Step 3
Pipe a bit of permanent glue at the base of the lamp.
 Trisha Sprouse
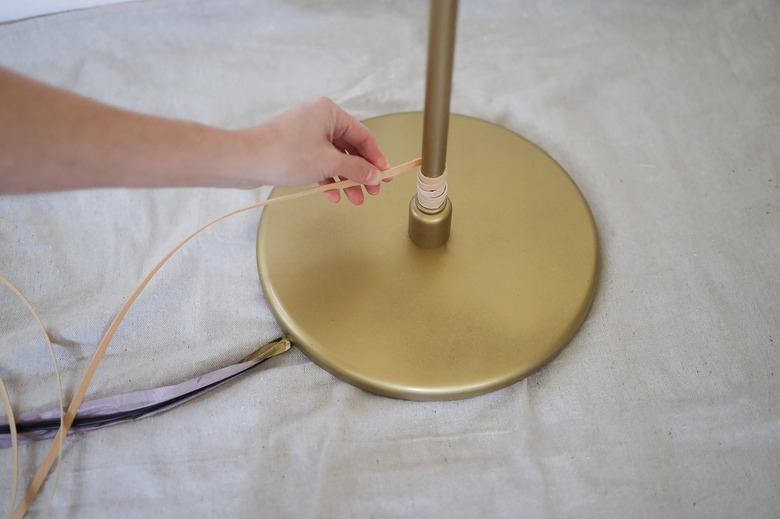
Step 4
Wrap the reed around the base of the lamp, leaving a 2-inch tail above the glue line.
 Trisha Sprouse
Step 5
Wrap the reed tightly around the glue line and continue wrapping it tightly over the tail you left out.
 Trisha Sprouse
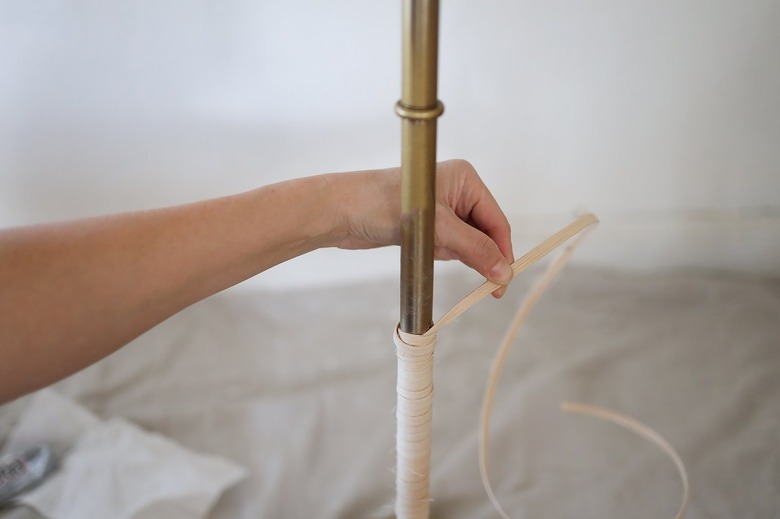
Step 6
Keep wrapping the reed around the lamp post, pulling each row taut as you wrap. When you get to the end of your reed, leave the last two rows super loose.
 Trisha Sprouse
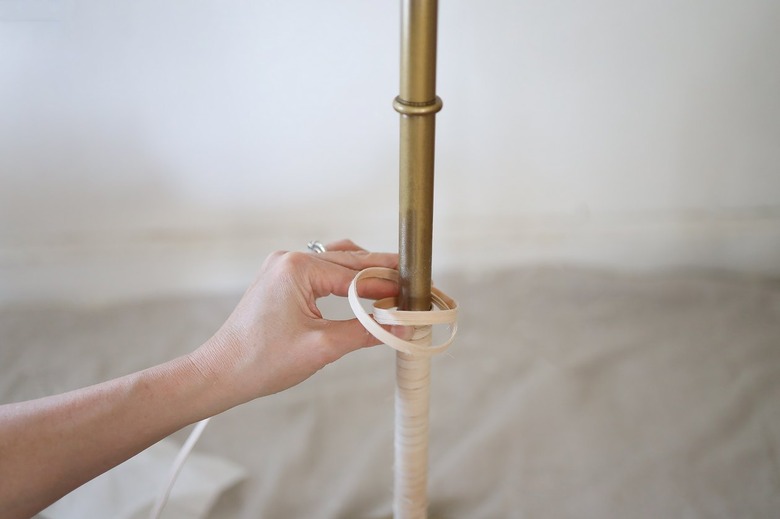
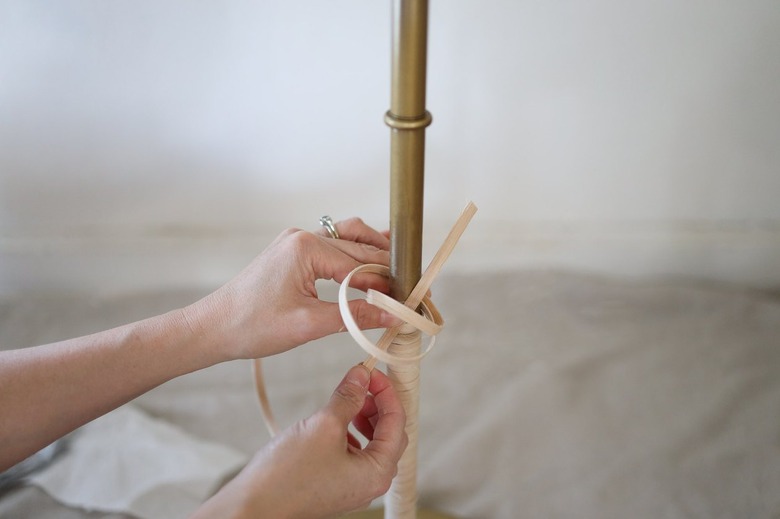
Step 7
Thread the tail of the reed through the two loops.
 Trisha Sprouse
Step 8
Pull the tail tightly to secure the reed with a knot.
 Trisha Sprouse
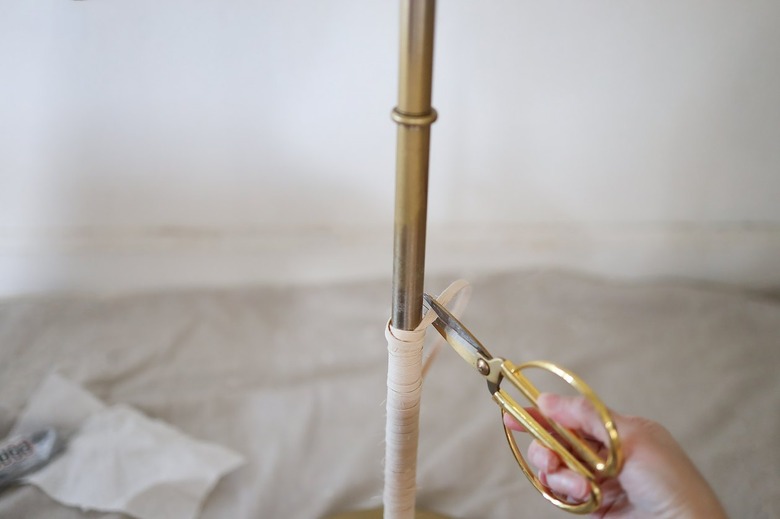
Step 9
Let the reed dry (it will shrink up and make the knot tighter and more secure), and then snip off the tail of the reed. Start your next reed directly above where you left off, continuing to wrap it in the same manner until the entire lamp is covered. Secure the last row at the top with a bit of glue, like you did at the bottom.
 Trisha Sprouse
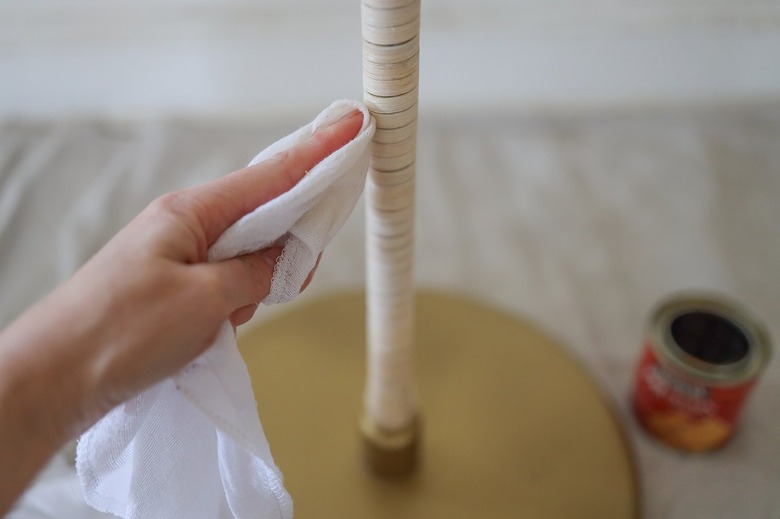
Step 10
Once the entire lamp has been wrapped with reed, wipe a coat of pre-stain wood conditioner on the reed. Let it dry for 15 minutes. This will help the reed absorb the wood stain more evenly and help avoid any blotchiness.
 Trisha Sprouse
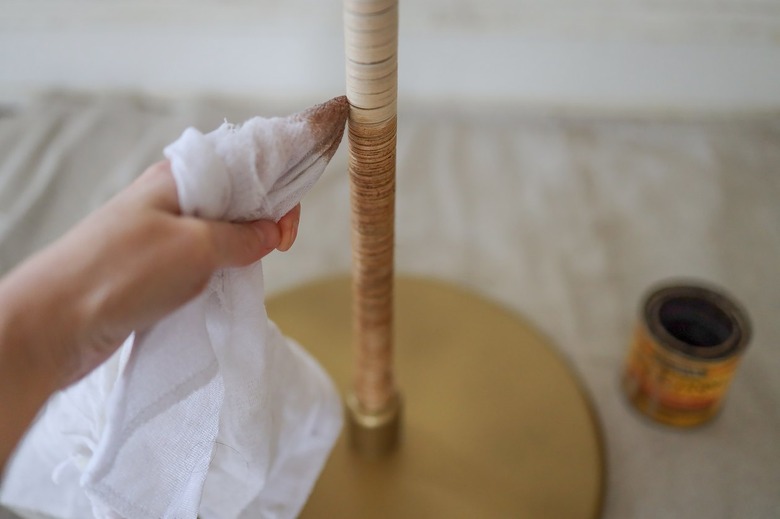
Step 11
Wipe a coat of wood stain on the reed (we used the color "Golden Oak"), and let dry. If a darker color is desired, you can wipe on a second and third coat of stain.
 Trisha Sprouse
Step 12
Since this lamp shade is designed for use with a harp, you'll need to clip a lampshade adapter onto the light bulb before placing the shade on top.
 Trisha Sprouse
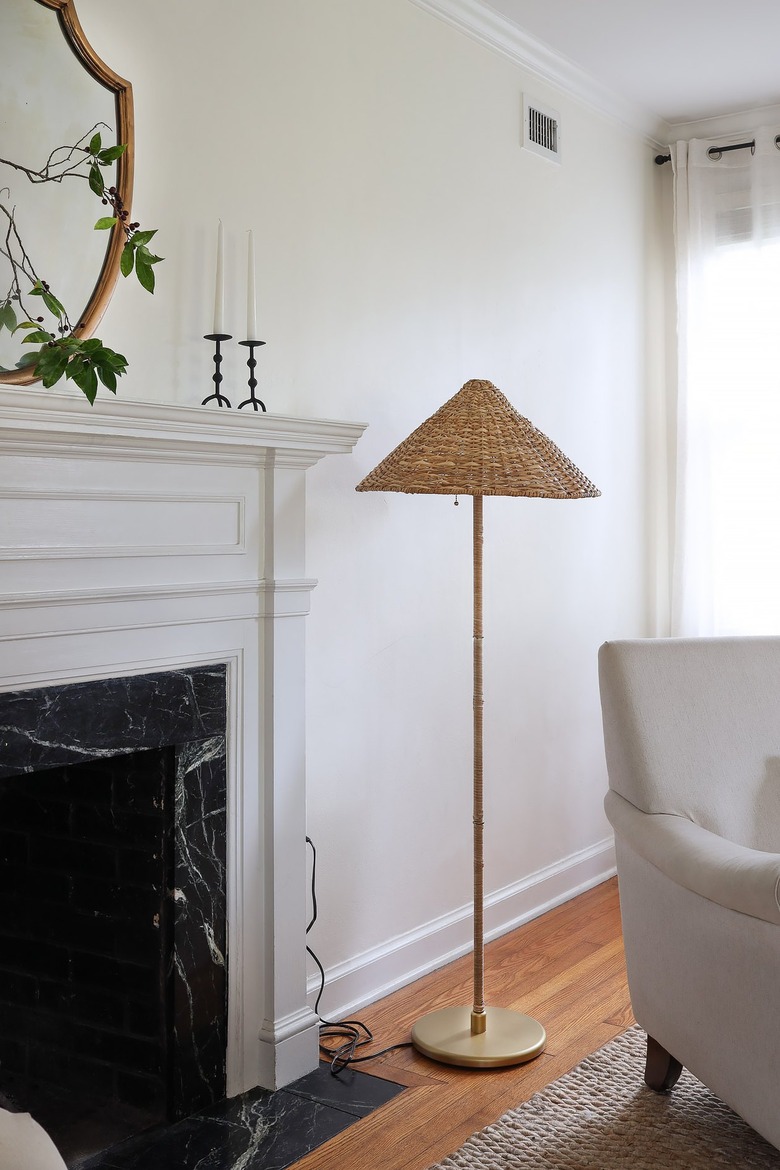
Your new lamp is ready to turn heads in your space with its sleek style!
 Trisha Sprouse