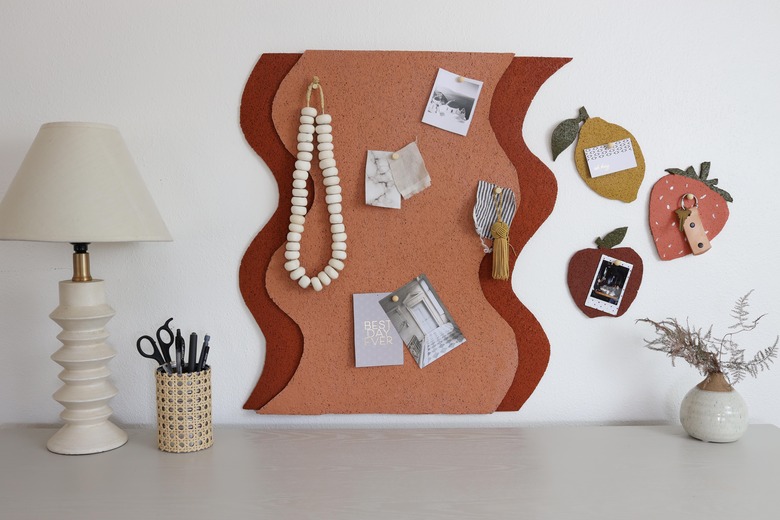
On Trend Wavy Corkboard
We may receive a commission on purchases made from links.
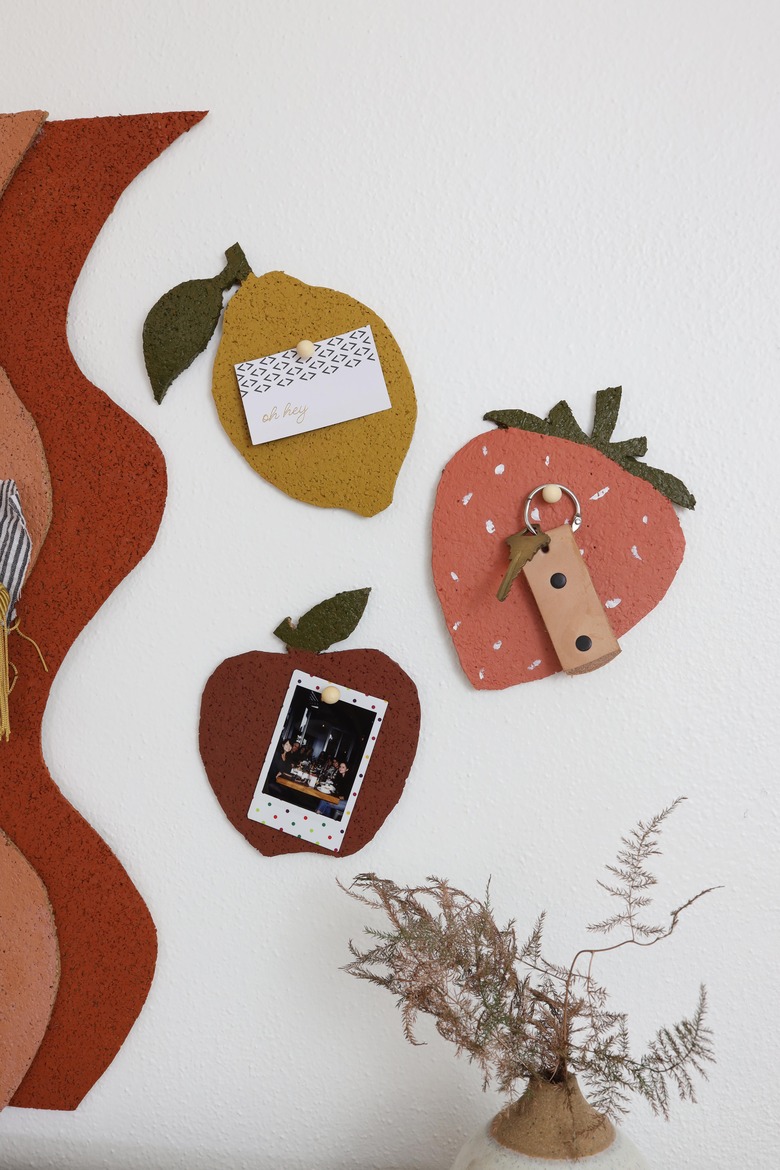
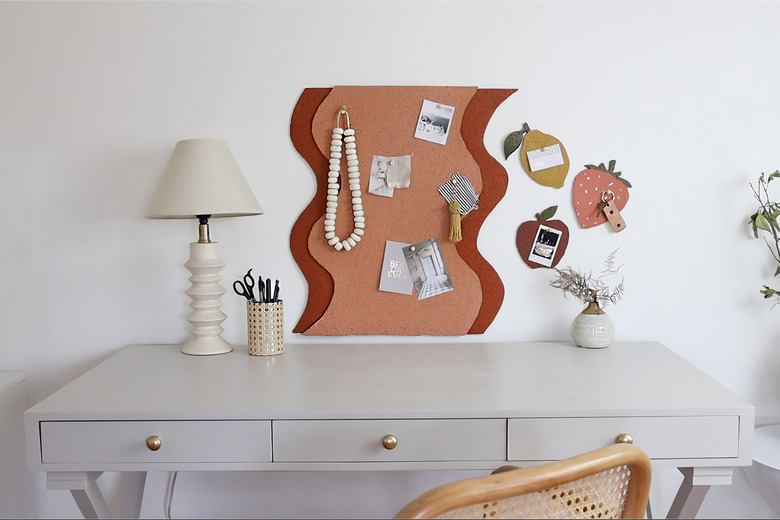
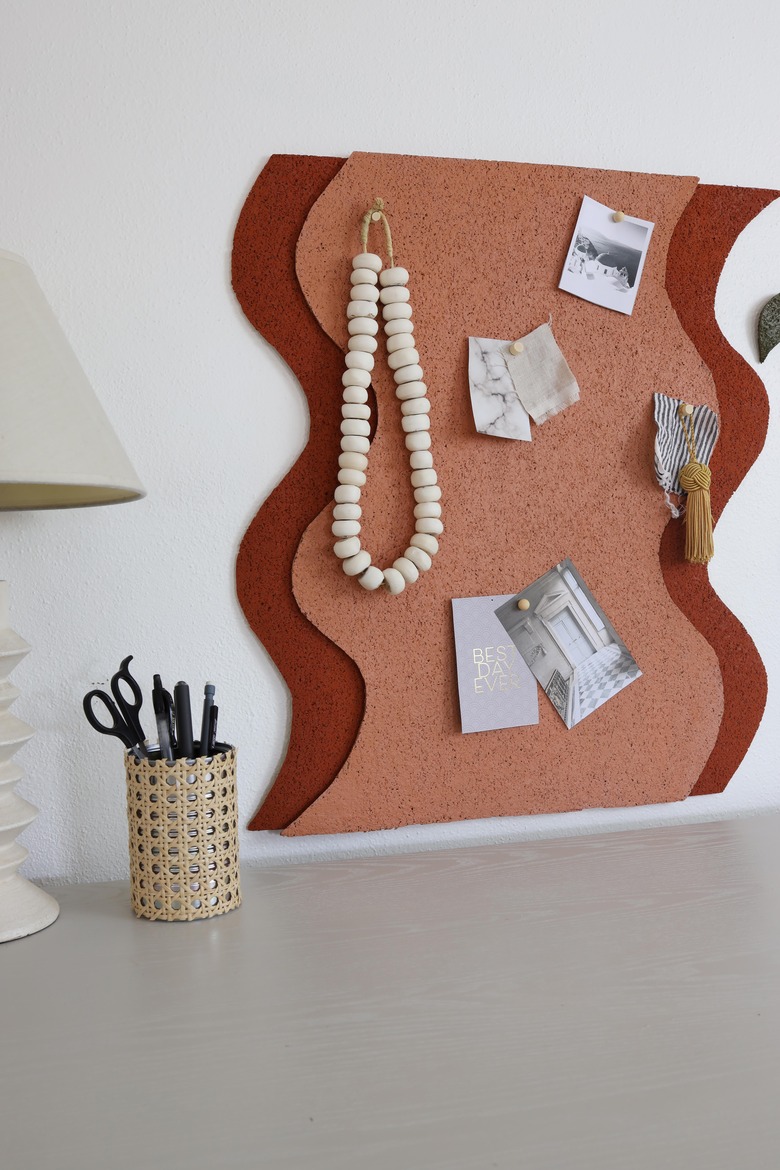
Stay ahead of the curve with this DIY bulletin board featuring the "it" shape of the design world. Wavy decor is still very much in, and we're swooning hard for the statement-making squiggly lines and earthy colors of this corkboard. It brings a whole new level of style to office organization, especially when paired with playful, trendy fruit shapes. Whether you're pinning memos, calendar reminders, or inspo pics to your bulletin boards, we promise your WFH view will be anything but boring.
 Trisha Sprouse
 Trisha Sprouse
Things Needed
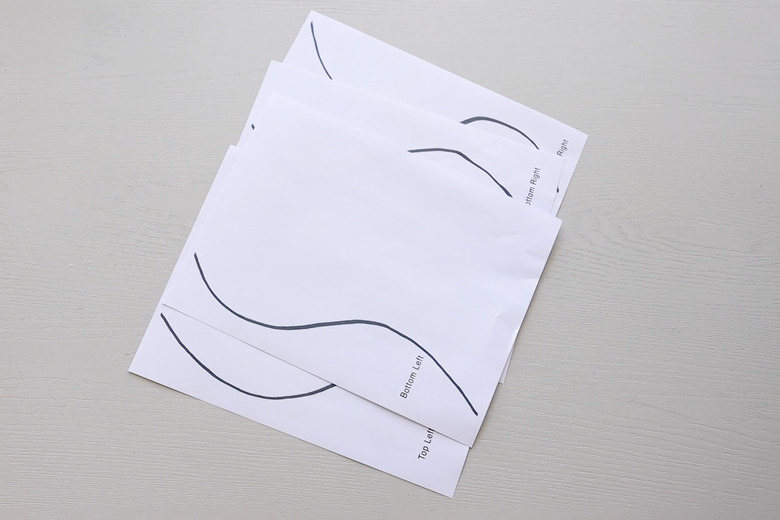
Step 1
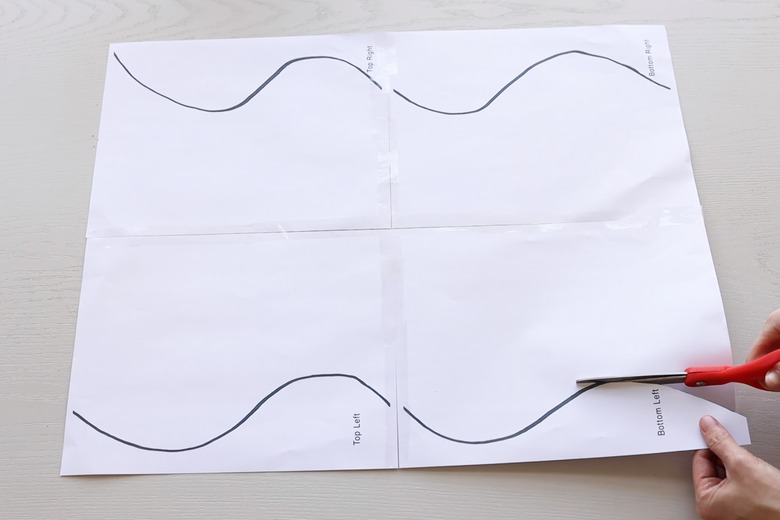
Print out the free templates. Note: The wavy template has four pages.
 Trisha Sprouse
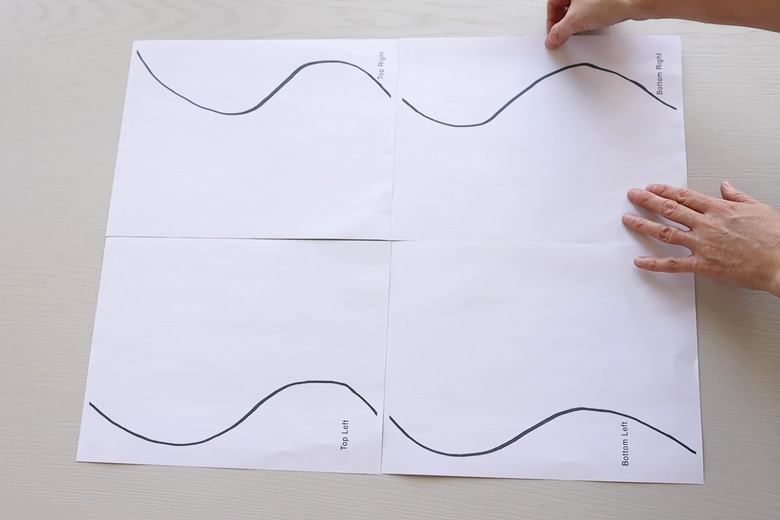
Step 2
Place the four pieces of the wavy-shape template together, and tape them to each other.
 Trisha Sprouse
Step 3
Cut out the templates with scissors.
 Trisha Sprouse
Step 4
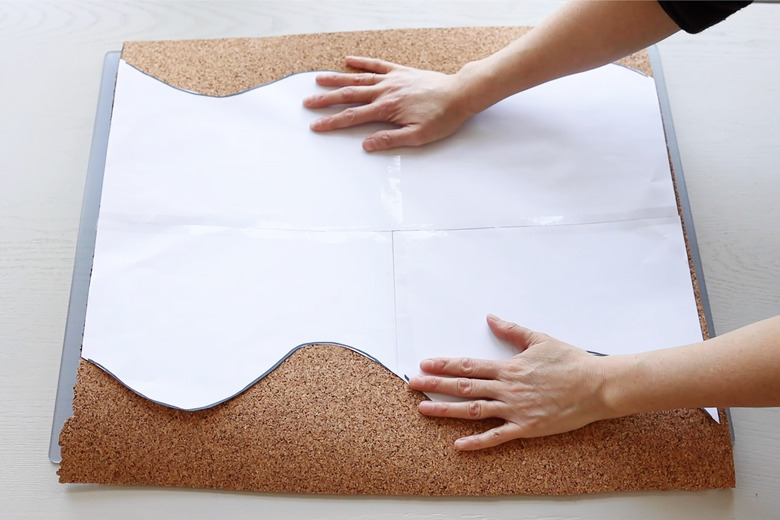
Unroll the cork on a flat surface (a cutting mat is recommended), and place the template on top of the cork.
 Trisha Sprouse
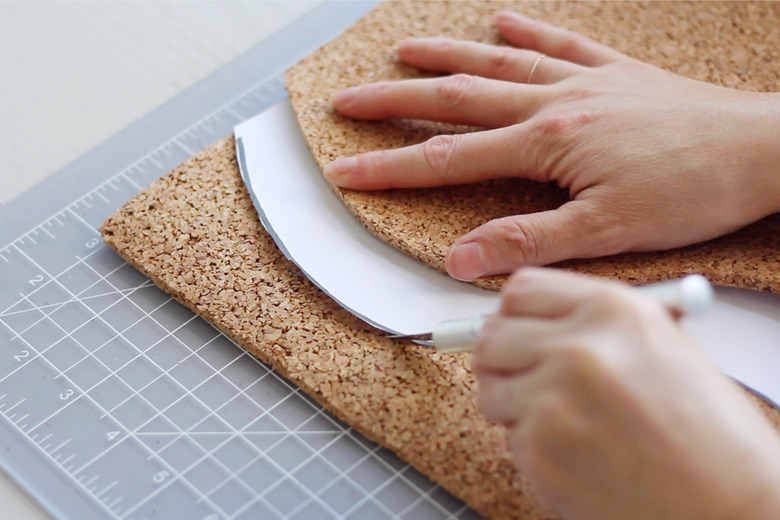
Step 5
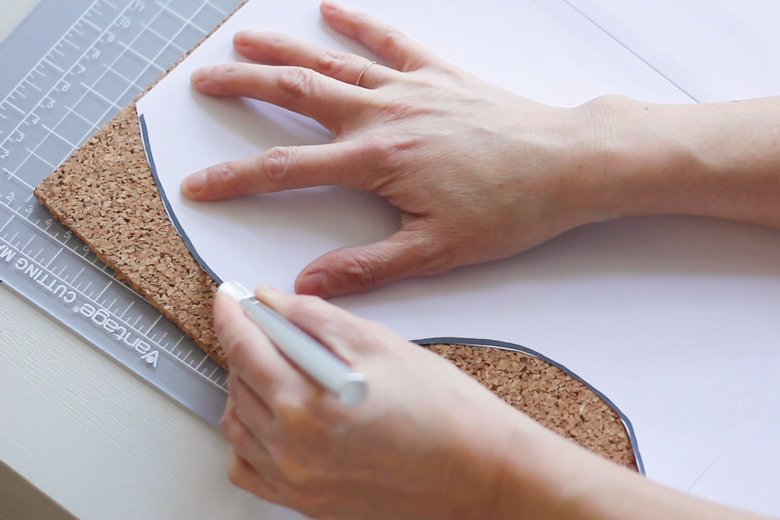
Using a craft knife, carefully cut around the edges of the template.
 Trisha Sprouse
Step 6
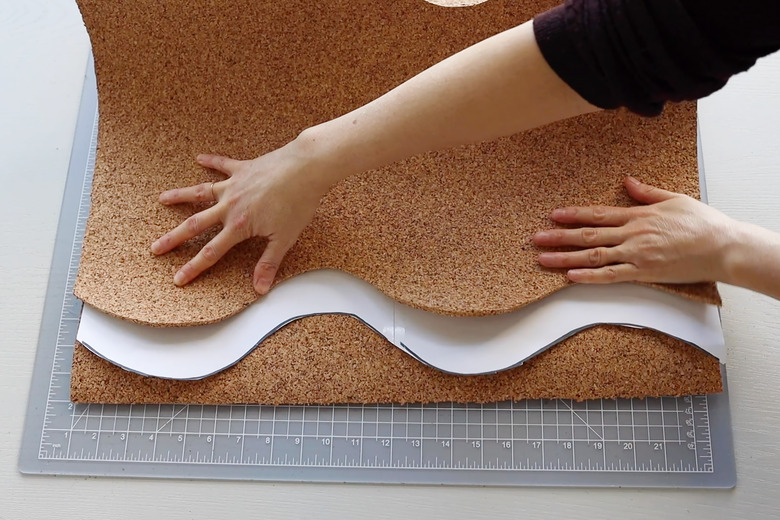
To create a larger second wave shape, place the template on a new piece of cork. Arrange the first wave shape that you cut on top, but leave a 2-inch border around the edge.
 Trisha Sprouse
Step 7
Cut around the edges on this side of the template with a craft knife. Then rearrange the template on the cork so you have another 2-inch border on the other side. You should now have a second wave shape that is two inches wider on each side than the first wave shape.
 Trisha Sprouse
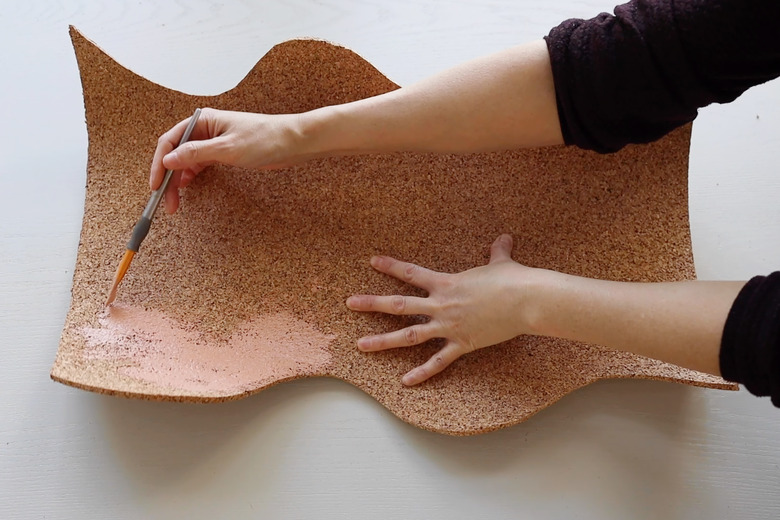
Step 8
Paint the cork pieces in your desired paint colors, and let dry. We used acrylic craft paint, but you can also use spray paint, chalk paint, or latex paint.
 Trisha Sprouse
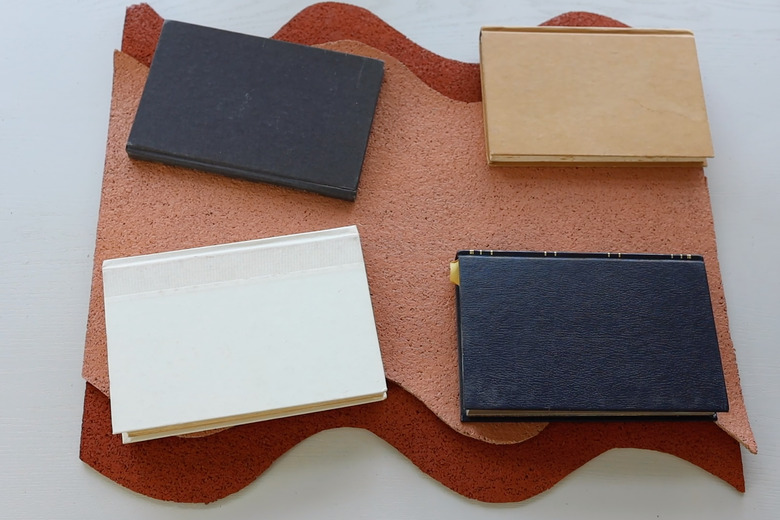
Step 9
Coat the back of the smaller wave piece with glue (we used liquid nails, but hot glue also works), and glue the two wave pieces together. Use heavy books or weights to keep the cork board flat while it dries.
 Trisha Sprouse
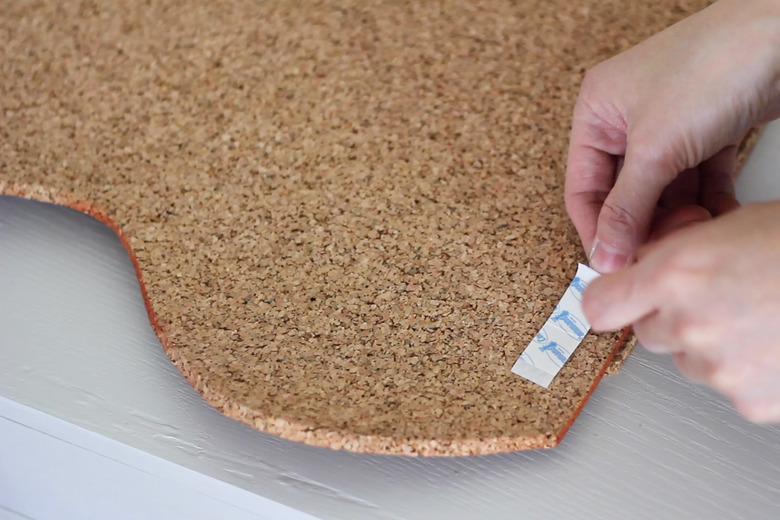
Step 10
Attach adhesive mounting tape on the back of the cork board — across the top, middle, and bottom.
 Trisha Sprouse
Now hang the bulletin board on the wall, and pin your favorite photos, cards, notes, or other items to stay organized in style!
 Trisha Sprouse
 Trisha Sprouse