Kitchen remodels are lengthy and expensive undertakings. And while many components are best left to the pros (electrical, cabinetry, and plumbing, to name a few) there are some that are ripe for DIY enthusiasts looking to play an active role in their culinary transformations and save a bit of cash at the same time. If you fancy yourself a homeowner that's handy with a paintbrush, try painting your kitchen cabinets. And believe it or not, tiling a backsplash is easier than you might think. You can even DIY some kitchen countertops. That's right.
For a countertop material to qualify as DIY-friendly, it must meet three criteria. First, it must be readily available to consumers, not just to the pros. Second, it must be easy and inexpensive to transport or ship to your location. And third, it must be relatively easy to work with using standard tools. These requirements quickly rule out all-natural stone and quartz slabs, which don't meet any of the three criteria. Metal options, like stainless steel, zinc, and copper, are difficult to work with and are usually hard to come by. Wood, such as butcher block countertops, is iffy: It's not hard to work with, but it's not normally sold in counter-long slabs, although it can be an option for small counter sections.
Video of the Day
Video of the Day
The best countertop materials to tackle as a DIY project are plastic laminate and solid-surface. These materials are durable, easy to clean, and exceptionally low-maintenance. Tile, concrete, and contact paper, while DIY-friendly and customizable, have some maintenance drawbacks that make them less appealing. Nonetheless, they're worth considering as DIY kitchen countertop options as long as you're aware of the limitations.
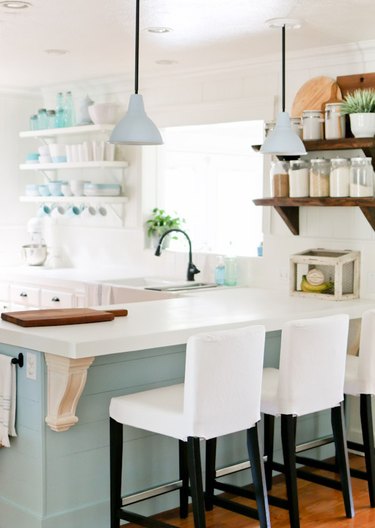
Laminate DIY Countertop
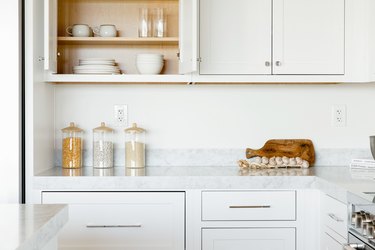
Plastic laminate counters are one of the most affordable and DIY-friendly. The material is also readily available in a wide range of colors and styles, including faux marble countertops. Plus, they are incredibly low-maintenance and don't require the annual upkeep associated with many other higher-end materials. Keep in mind that laminate can be damaged by knives and hot pans, and it can't be repaired.
As a consumer, you can buy exactly the same laminate that the pros use (you want countertop grade), and you can pick it up at a local home improvement store or laminate distributor. You can even have it shipped right to your home. It comes in lightweight sheets up to 60 inches wide and 12 feet long (the sheets can be rolled up). The cost of laminate runs from $10 to $40 per square foot before installation. The other main materials you need are particleboard, contact adhesive, wood glue, and screws. For tools, you will need the basics plus a standard or laminate router with a laminate (flush-trimming) bit.
Laminate kitchen countertops are little more than a top layer that is glued to a particleboard substrate (base) with contact adhesive. There's no room for error once the laminate is glued down (it can't be moved), but the final trimming process is made easy and pretty foolproof with the router and special bit. You can fabricate the countertop in your work area, then carry it for installation, or you can build it in place. For a backsplash, you can make laminate-and-particleboard strips, but if you really want to dress up your counters, opt for a custom tile backsplash.
If you're not up for building a custom laminate countertop, you can take the much quicker approach of installing prefabricated sections of post-form countertops. Post-form laminate is a ready-to-install countertop with an integrated backsplash and a seamless front edge. It is sold in sections of various lengths and a limited selection of laminate styles. You can pick up whichever pieces you need at a local supplier and cut the sections to fit, as needed. Straight sections come with bare or finished ends, and you can finish off any cut ends with laminate cap pieces. Corner sections have a mitered end (cut at 45 degrees) to make 90-degree turns.
To install post-form laminate, you add strips of lumber or plywood on top of the cabinets to support and raise the countertop. Then, you simply set the post-form sections in place and screw through the strips of lumber to secure them in place. For the corners, you'll join two mitered sections together, using adhesive and special hardware known as take-up bolts (sold with post-form pieces). You can also custom-cut or sand the top edge of the backsplash to make it conform to contours in the wall for a snug fit.
DIY Project Overview: Most Underrated Material
Skill Level: Intermediate
Time Required: A couple of days
Budget: Approximately $470
Check out this step-by-step guide from Jennifer over at The Craft Patch Blog to bring the look of black stone counters to your cook space at a fraction of the price with laminate.
Laminate sheets are readily available online and at home stores such as Lowes and The Home Depot. While this is a manageable DIY project, it does take time and is best done with some help. The trickiest parts are building the MDF countertop bases, gluing the actual laminate down (you only have ONE chance to adhere it properly because once it touches glue you can't lift it up again), and routing the edges. Because it's only available in up to 12-foot sheets, some countertop seams might be unavoidable depending on the length of your counters.
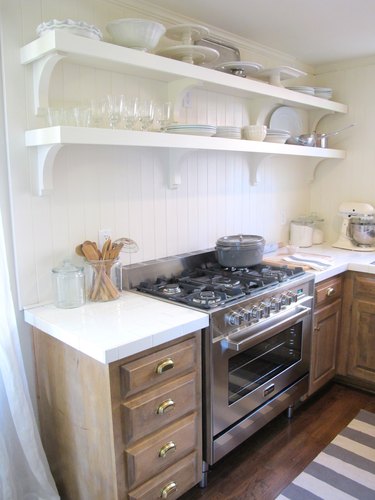
Solid Surface DIY Kitchen Countertop
The most attractive — and best all-around performer — when it comes to DIY countertop materials is solid-surface. This has historically been considered a pro-only material, but numerous amateurs have found it's surprisingly easy to work with, and now you find more suppliers who will sell to consumers. The only specialty materials you need are the solid-surface sheeting itself and a special color-matched epoxy for gluing and hiding seams. You can find both through online distributors and, in some cases, local suppliers. To save the most money, look for a supplier who sells remnants. The price of solid surface countertops ranges from $37 to $67 per square foot.
Solid-surface material is sold in sheets of 1/4-inch, 1/2-inch, and 3/4-inch thicknesses, 30 inches or 36.6 inches wide by 12 feet long. It can be cut, routed, sanded, chiseled, filed, and buffed with standard woodworking tools, but it dulls blades and tools quickly, so it's best to use carbide blades and cutters whenever possible.
Like laminate, solid surface is glued to a substrate (usually plywood or MDF) for rigidity. You can cut strips off of the main sheet of solid-surface to create the backsplash and countertop edges, and you can shape the exposed edge of the finished countertop with a router. For a more advanced installation, you can also install an undermount sink for the coveted "no-rim" sink effect. The color-matched epoxy is dispensed with a special caulking gun and does a great job of hiding the seams, just like a professional job.
DIY Project Overview: Best-Looking Material
Skill Level: Advanced
Time Required: A few days
Budget: Approximately $1,000
Solid surface countertops work equally well with different aesthetics, from modern to traditional. Blogger Cami of Tidbits and her husband DIYed solid surface countertops in their farmhouse kitchen with great results.
Solid surface is a man-made material available in a variety of colors and patterns that's favored for its smooth look. It's nonporous so dirt and stains don't penetrate, making regular sealing unnecessary. If stains or scratches do occur, (because it happens) they can be sanded out, making it a great option for households with kids or those who favor a less intensive maintenance routine. For a completely seamless appearance, you can pair solid surface counters with coordinating integrated sinks.
Despite the intimidating-sounding nature of working with solid surfaces, it's a manageable DIY project requiring attention to detail, knowledge of tools, and a few days of your time, depending on how large the kitchen is.
Tile DIY Kitchen Countertop
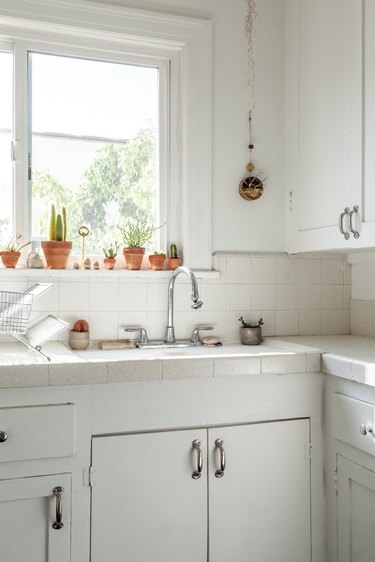
Tile often graces kitchen backsplashes and floors, but don't sleep on the material as a viable option for new countertops. Because it's available in so many materials (glass, ceramic, porcelain, cement, to name a few), colors, sizes, and it's easy to work with, it actually makes for one-of-a-kind kitchen counters. Plus, it's also one of the most cost-effective DIY kitchen countertop options available, ranging from $1 to $10 per square foot on the low-end to $5 to $30 per square foot on the other end of the spectrum.
The possibilities with tile are limitless: Achieve a sleek minimal look with large-format granite tile, combine ceramic or porcelain tile with a hand-painted tile, or incorporate specialty edge tiles or custom mosaic treatments. If you can't be bothered with cutting boards, hot pads, and annual upkeep, glazed ceramic tiles are about as low-maintenance as it gets — not requiring sealing or specialty cleaners, and they can stand up to hot pans and errant knives.
With all that tile has going for it in the "pro" category, you may be wondering what makes tile countertops less desirable. The difficulties with tile are that the grout joints are prone to stains and are hard to keep clean on a daily basis. While the tiles themselves don't require sealing, grout joints should be sealed for stain- and moisture-resistance, and their sandpapery surface makes them magnets for dirt and grime. These same drawbacks are drastically compounded if you make the mistake of choosing rough, tumbled, natural-cleft, or otherwise textured and/or unglazed tile for the main counter surface. Tile grout requires continuous upkeep and cleaning to prevent bacteria and stains, so make the grout lines as thin as possible and seal annually.
DIY Project Overview: Most Customizable Material
Skill Level: Beginner
Time Required: One day
Budget: Approximately $40
Or take a page from blogger Jenny Steffens and simply tile directly over your existing countertops. She installed basic white tile over existing laminate counters as an interim solution before a larger kitchen renovation. As far as do-it-yourself kitchen countertops go, tile is about as easy as it gets, and rarely requires a custom counter base because it can be installed on top of many existing materials.
But if starting from scratch, begin with a plywood base (screwed to the cabinets) and add a layer of cement board secured with thin-set adhesive and screws. From there, it's a standard tile job using thin-set adhesive, and you grout the counter, backsplash, and all exposed edges at the same time. Once the grout has cured, you seal it carefully with a food-safe sealer.
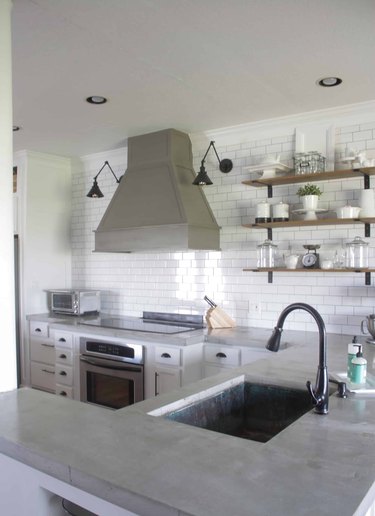
Concrete DIY Kitchen Countertop
Concrete could win as the "best monolithic" material since it's usually all one piece that's poured in a big concrete mold. You can make small counter sections in a workshop setting, but large countertops are too heavy and potentially too fragile for DIYers to lug around, so they're usually fabricated on top of the cabinets — a process called casting/pouring in place. Or, if you like the look, but want a less-intensive process, you can always go with a concrete overlay to cover your existing counters.
Concrete counters are undeniably cool and can be customized with pigments, stains, or even embedded pieces of metal and other materials. But don't let its utilitarian association fool you into thinking it's an affordable option — concrete countertops are actually quite pricey, ranging from roughly $65 to $135 per square foot. However, they are compatible with undermount sinks and can even be cast with an integrated sink for a seamless transition from countertop to basin. And while impervious to heat and most scratches, the material is susceptible to food stains — a big drawback for kitchen counters. Another factor to consider is that concrete, like natural stone counters and tile grout, must be sealed periodically for stain resistance, and many people find that it's still not all that stain-resistant.
Although concrete countertops are generally associated with industrial or modern interiors, they actually work well with a range of design styles from traditional to boho. And since they're poured on-site, they can be tailored exactly to your counter depth, length, and desired thickness, virtually eliminating unsightly seams. They're not a low-maintenance material and require annual resealing. Due to the weight of the material, cabinets and even flooring may need to be reinforced.
DIY Project Overview: Best Alternative Material
Skill Level: Intermediate
Time Required: 7 to 10 days
Budget: Approximately $8 to $15 per square foot
If you love the texture and industrial vibe of concrete counters, but don't love the cost of having them professionally installed, consider challenging yourself to a DIY project. Cara from The Inspired Workshop went for DIY concrete countertops in her timeless cook space and the results are beautiful.
The basic fabrication process involves building a concrete form, or mold, with plastic-coated particleboard or, if casting in place, a cement board base and an edging material. The concrete is mixed (using a special countertop mix is easiest) with color and additives, as applicable, then it's simply placed in the mold by hand. Once it is leveled off, the wet concrete is allowed to dry for a while, then it is floated, followed by more waiting and some troweling, before it is left to cure. The finishing touches may include edge-filling, grinding, polishing, sealing, and waxing, as desired. Seal concrete countertops after allowing them to cure for a few weeks.
Contact Paper DIY Kitchen Countertop
Hands down the least expensive option when it comes to kitchen countertop makeovers is contact paper. Love the look of marble? No problem. Dreaming of terrazzo? Done. There is a seemingly endless supply of colors and patterns to choose from, and you just can't beat the price. However, with that being said, contact paper is ... well, paper, after all, so it is not the most long-lasting or durable countertop idea. But it is a handy solution for renters who want to cover unsightly counters and anyone can install it in less than a day.
DIY Project Overview: Least Expensive Material
Skill Level: Beginner
Time Required: One day
Budget: Approximately $20 to $30
Whether you have a rental, like Chloe Rey, or you're just working with a tight budget, this DIY project is the countertop solution you've been searching for. What it may lack in durability and longevity, it makes up for in style and versatility. With a couple of hours of work and about $20, Chloe was able to breathe new life into her dated kitchen. Follow her lead and take your home improvement game to the next level with freshly painted cabinets. And while you are at it, swap the old hardware for current knobs and pulls to really makeover your space.