Create A Cube Riser For Easy Shelf Styling
We may receive a commission on purchases made from links.
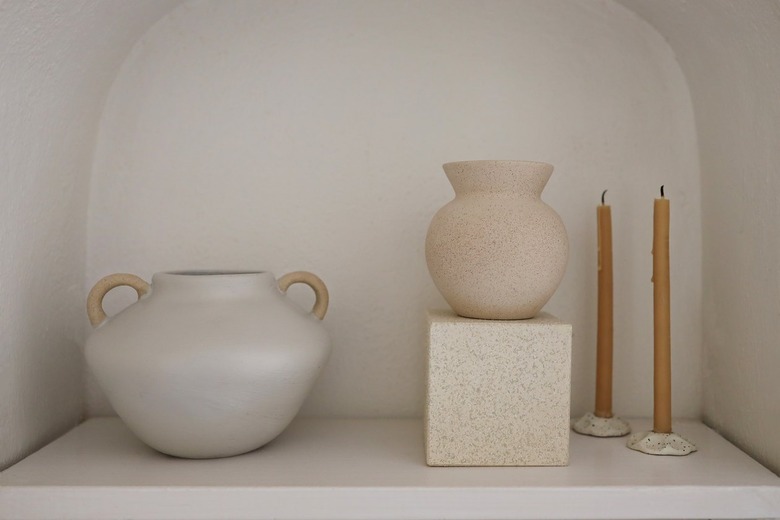
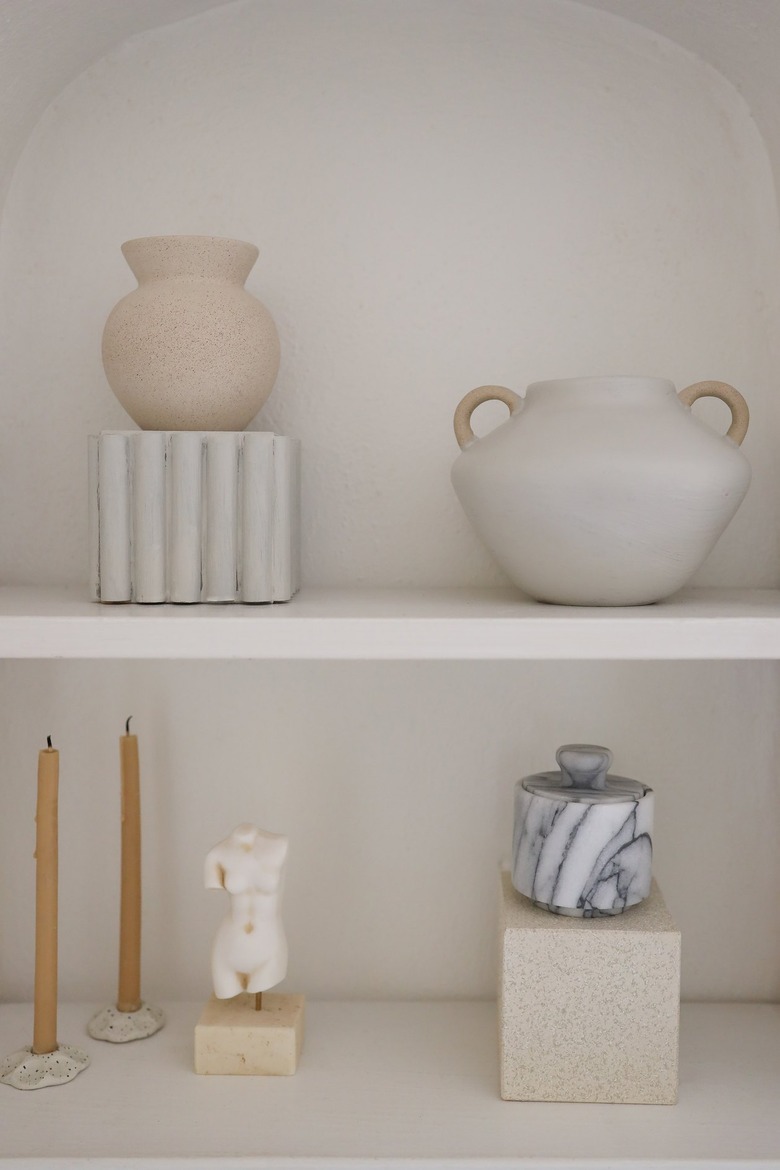
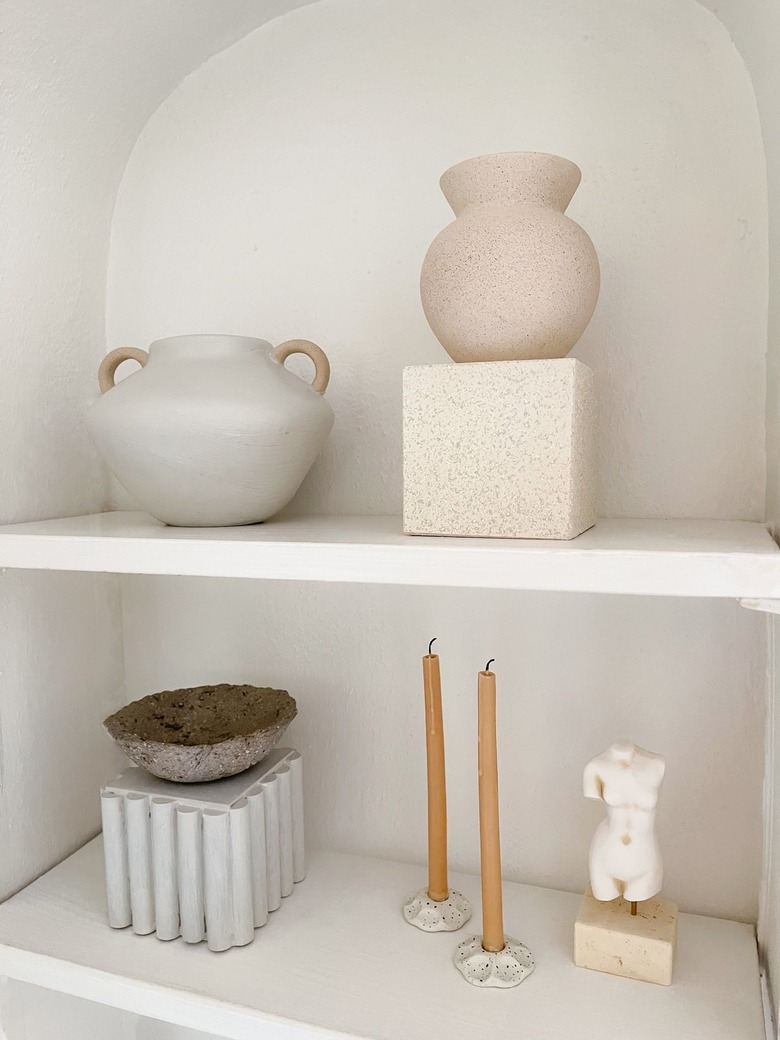
Have a bunch of items on your shelf or bookcase that all too similar in size? Elevate some of your artful objects on cube risers. They create varying heights and add visual interest to your home decor. (Prop stylists love this styling trick!) In this tutorial we've turned simple $5 wooden cubes from the craft store into gorgeous risers, one featuring a textured travertine finish and one with a fluted pattern. It's an easy DIY that anyone can tackle. Ready to take your #shelfie game to the next level?
 Trisha Sprouse
Tip
Before you begin, read: Top 5 DIY Tools According to an Expert DIY Creator. Also, listen to Trisha talk about DIYs and content creation on the Being Home With Hunker podcast.
Option 1: Travertine Texture
Step 1
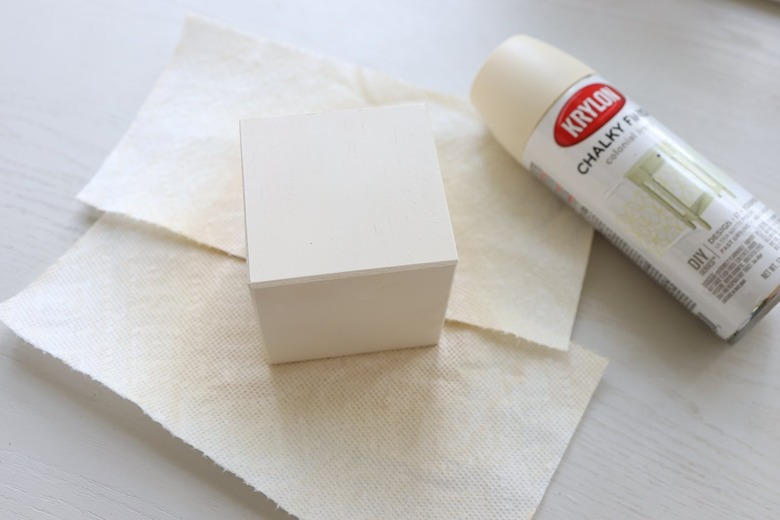
Spray paint the wooden cube on all sides with a cream-colored spray paint. A few light coats ought to do it. Be sure to work in a well-ventilated area.
 Trisha Sprouse
Step 2
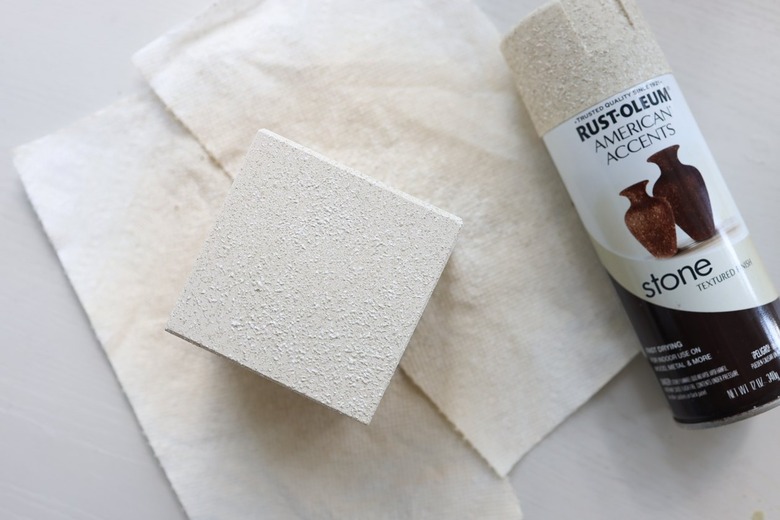
Once the cream-colored spray paint has dried, spray a coat of textured stone spray paint on all sides of the cube. Let the paint dry. If more texture is desired, you can spray an additional coat(s).
 Trisha Sprouse
Option 2: Fluted Pattern
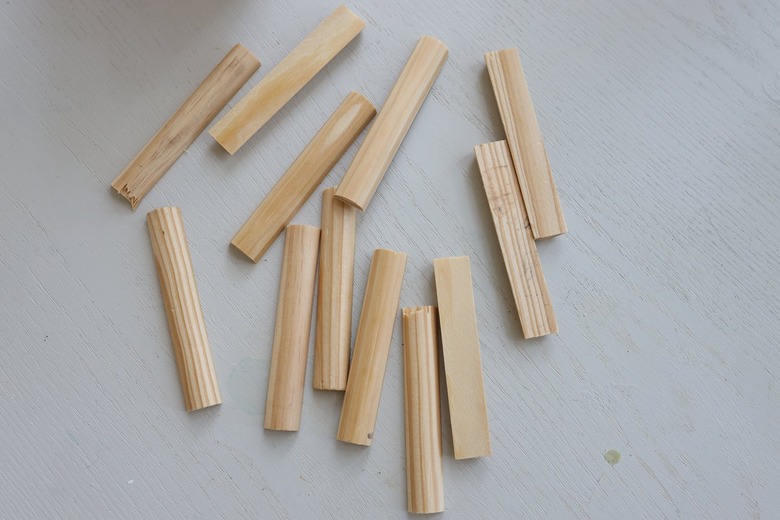
Step 1
Cut the half-round molding into three-inch pieces with a saw. You'll need 20 total pieces to cover the four sides of the cube with dowels. (You don't need to cover the top and bottom).
 Trisha Sprouse
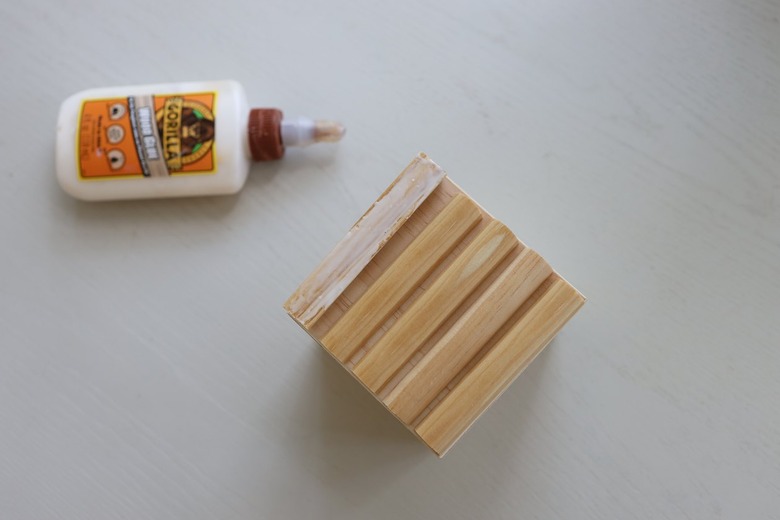
Step 2
Glue the flat side of the dowels to the wooden cube — five evenly-spaced dowels on each of the four sides. Press them firmly in place and let dry for 30 minutes.
 Trisha Sprouse
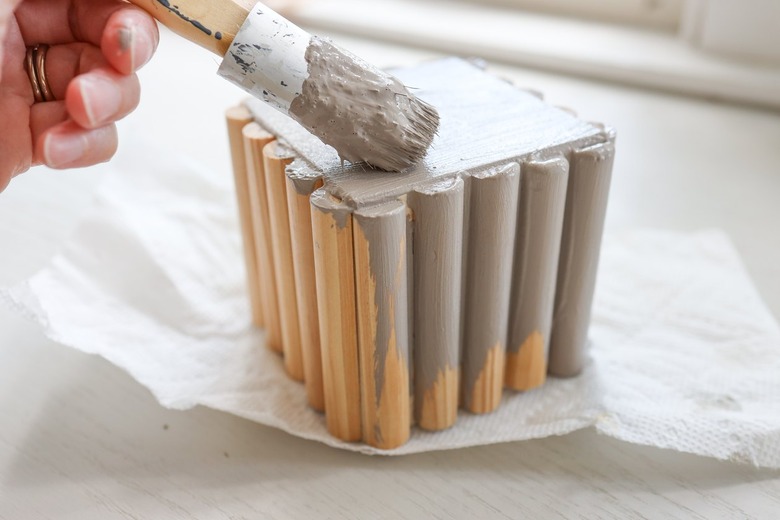
Step 3
Paint the fluted riser with whatever craft paint color you like. Allow it to dry completely.
 Trisha Sprouse
Now, have fun styling any bookshelf or living room or dining room built-ins with your new cube shelves! These display risers offer the perfect minimalist solution for elevating eye-catching decor.
 Trisha Sprouse