Elevate (Literally) An Uber-Popular IKEA Shelf
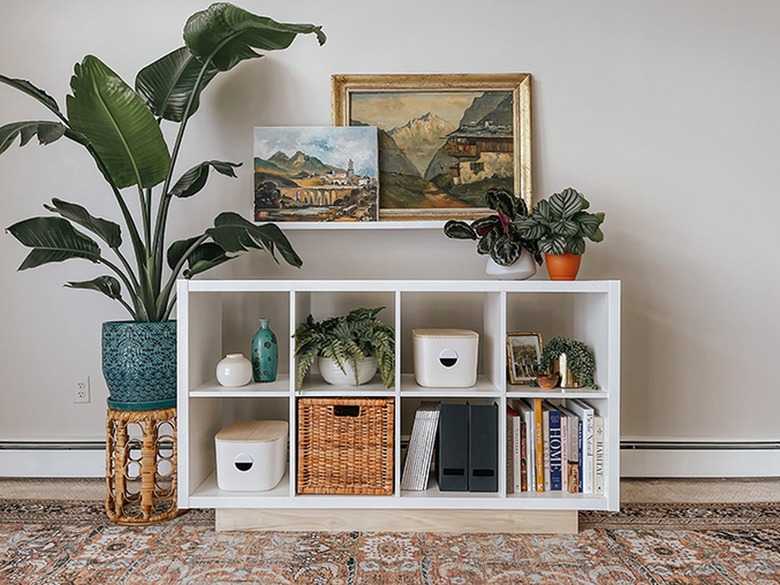
Your creative side just isn't satisfied leaving an off-the-shelf IKEA Kallax shelf alone, but what to do? We've got the perfect solution to give this plain white unit some elevated style using wood and removable faux terrazzo wallpaper. Keep scrolling to learn how to pull off this simple DIY glow-up in just one afternoon.
 Carrie Waller
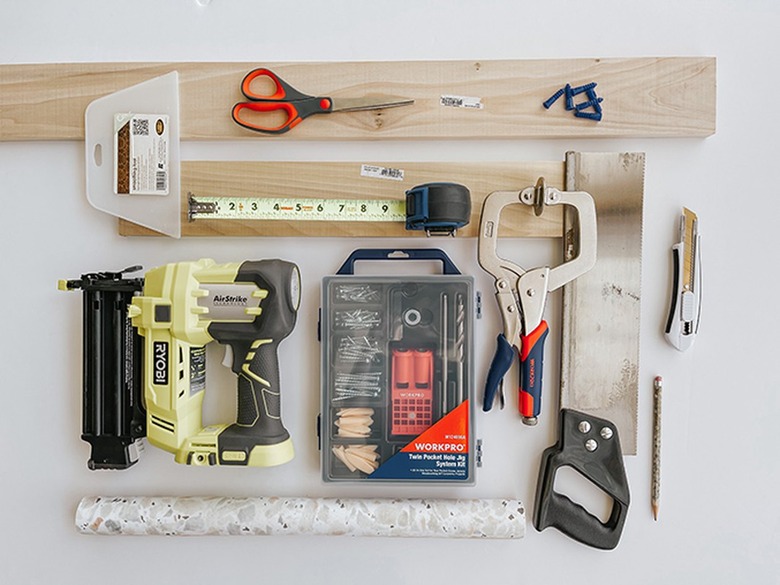
Things Needed
-
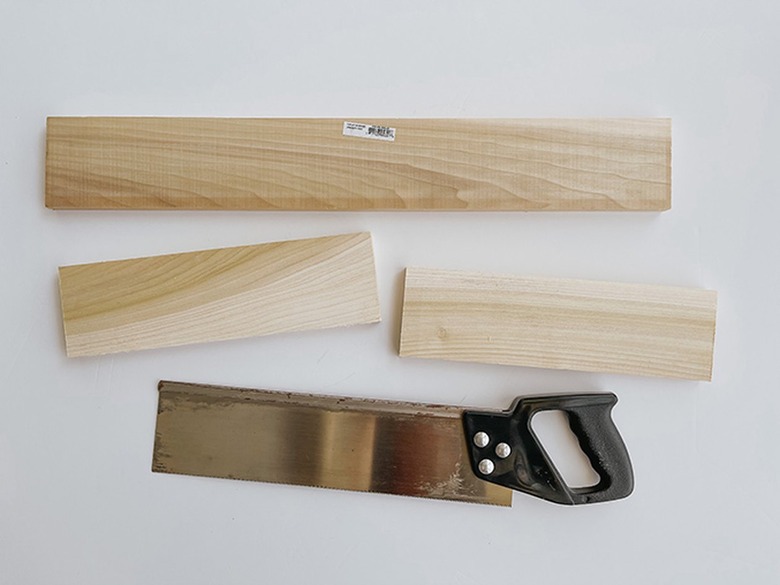
1-inch-by-4-inch-by-4-foot poplar board, (2)
-
1-inch-by-4-inch-by-2-foot poplar board, (2)
-
Pencil
 Carrie Waller
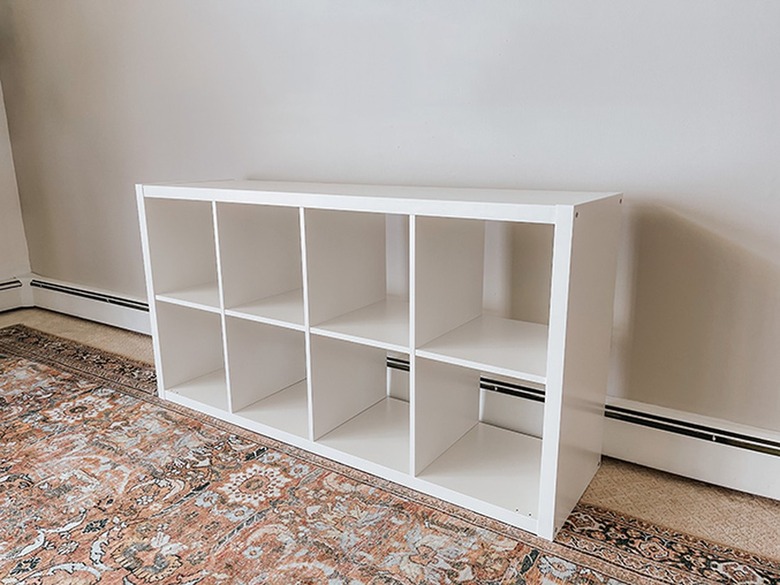
Step 1
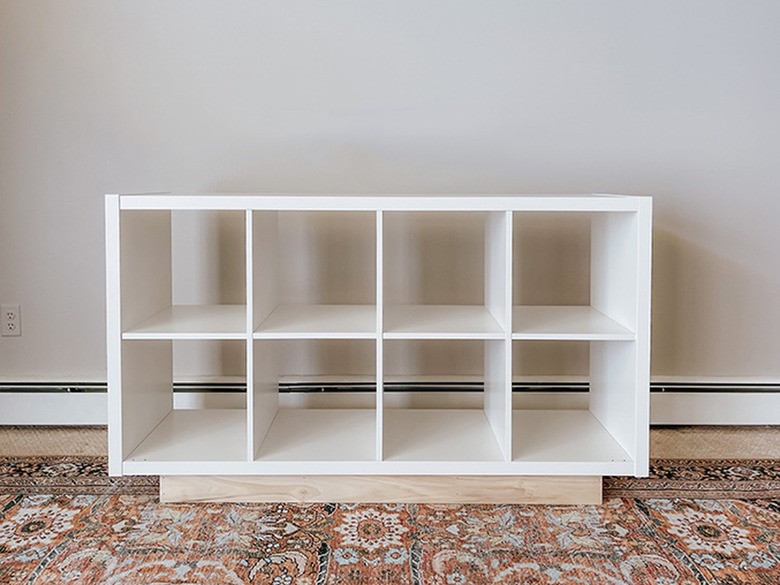
Assemble the IKEA Kallax shelf according to its package directions. Lay the shelf out flat on the ground, long ways.
 Carrie Waller
Step 2
Measure and mark the two 1-inch-by-4-inch-by-2-foot poplar boards in half, then cut them down to size using either a hand saw and miter box or compound miter saw. You'll end up with four 1-foot boards.
 Carrie Waller
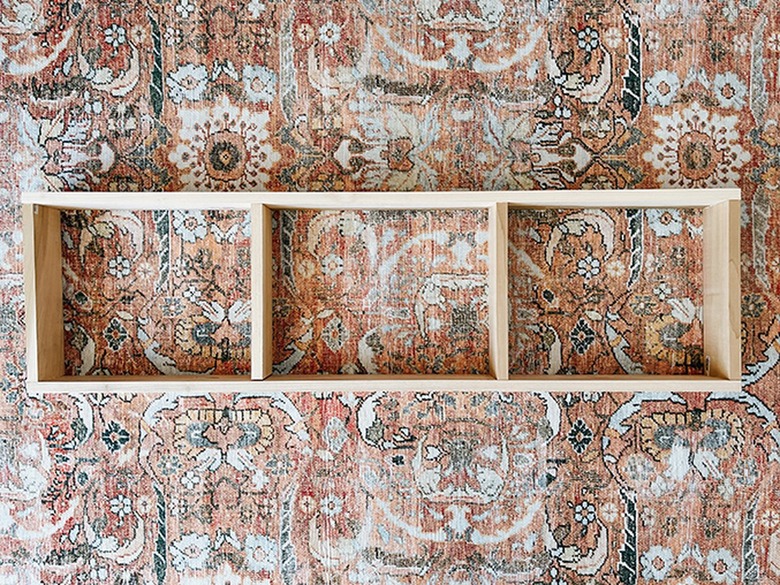
Step 3
Lay the two 1-inch-by-4-inch-by-4-foot poplar boards out on the ground or your work surface thin-side-up so that they're parallel to each other with room in between. Lay the four cut 1-foot boards perpendicular in between the two 4-foot boards. Space the 1-foot boards out evenly with two on either end and two in the middle, as pictured below.
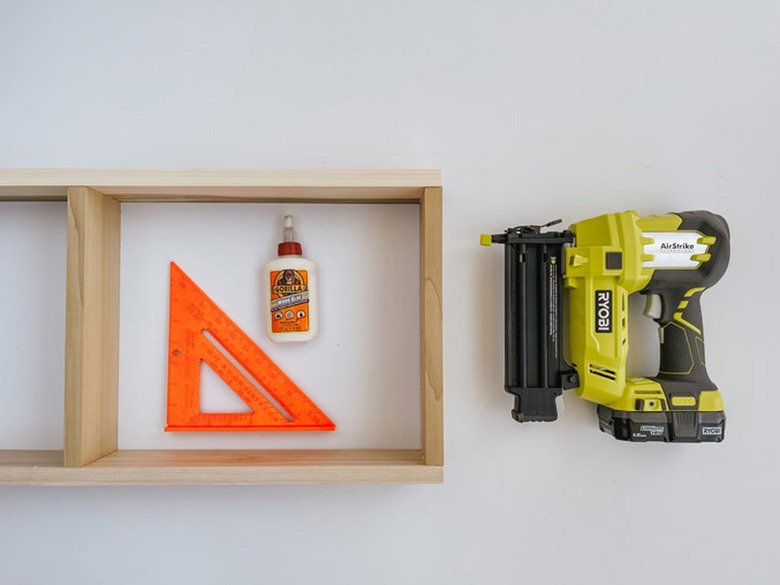
Now, you'll assemble the pieces to form a wooden base for your IKEA shelf. To do so, add a small amount of wood glue to the ends of the 1-foot boards, spread out the glue evenly with your fingertip, and nail them to the 4-foot boards from the outside using a brad nailer and 1 1/2-inch brad nails. Use a speed square periodically to confirm nice 90-degree corners as you go. Allow the glue to set for one hour before moving the completed base.
 Carrie Waller
 Carrie Waller
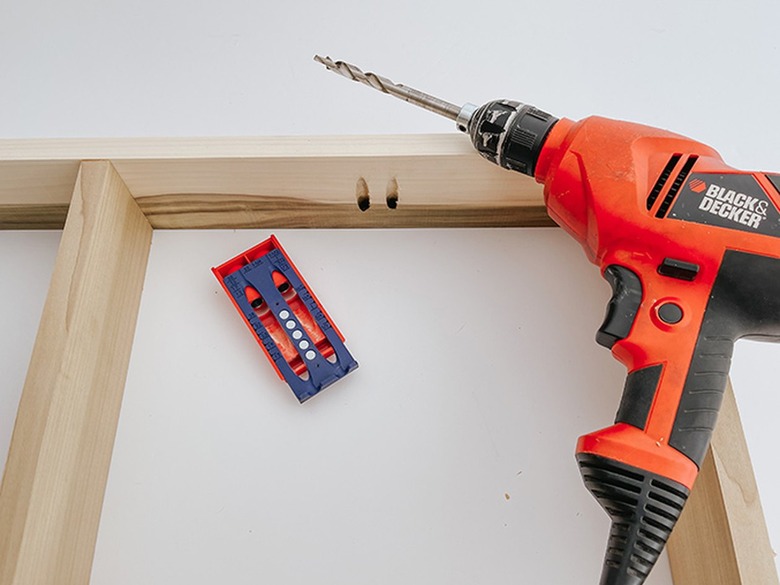
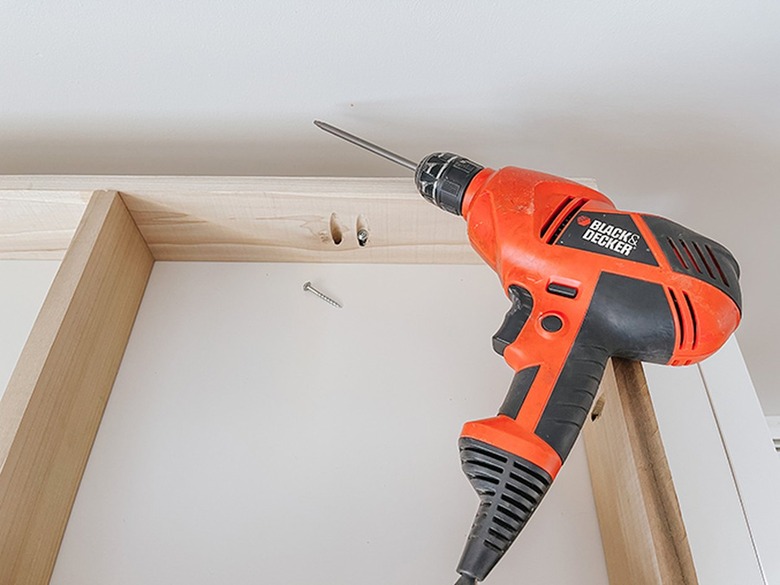
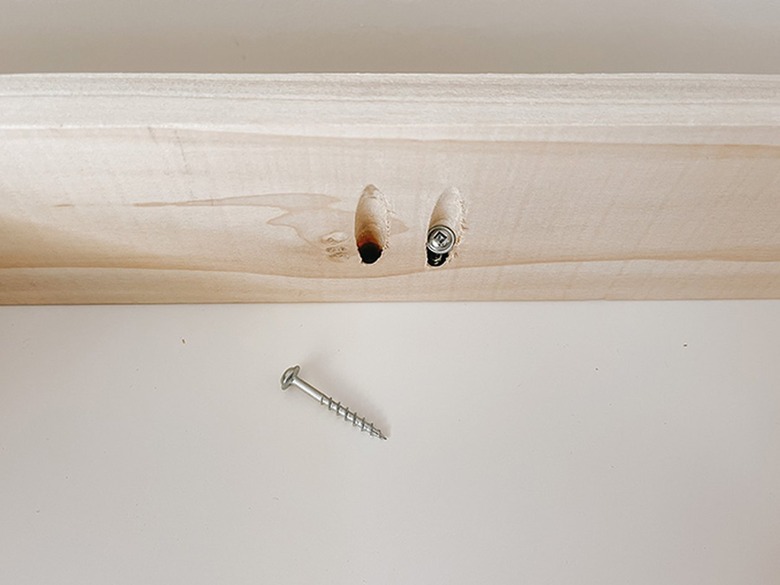
Step 4
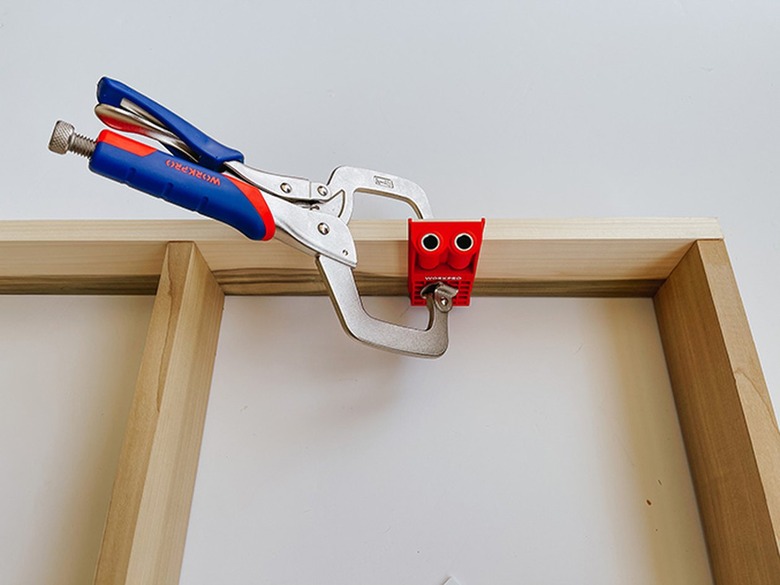
Follow the directions that come with your particular pocket hole jig kit to add pocket holes periodically around the edges of the wooden base you created. Make sure all of the holes are oriented in the same direction around the entire base. A clamp will help you keep the jig in place as you drill. We drilled pocket holes into the long sides of the wooden base in between each of the 1-foot spacer boards, and one set of pocket holes on both outside short edges.
 Carrie Waller
 Carrie Waller
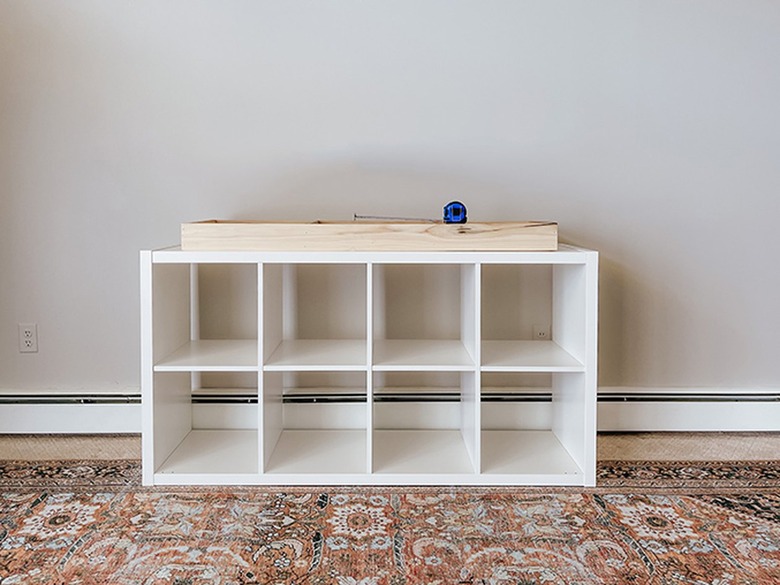
Step 5
Decide which side of your IKEA Kallax shelf you want facing up (they're both the same, so this can just be whichever side is already facing upward). With the underside of your Kallax shelf facing up, lay the wooden base on top, making sure your pocket holes are oriented down toward the shelf. Use measuring tape to center the base on the Kallax shelf, then use a drill to screw the wooden base to the underside of the shelf. You may want to install plastic anchors in the shelf ahead of time where the pocket holes sit for added stability. Once the base is fully screwed on, flip the Kallax shelf right-side-up.
 Carrie Waller
 Carrie Waller
 Carrie Waller
 Carrie Waller
Step 6
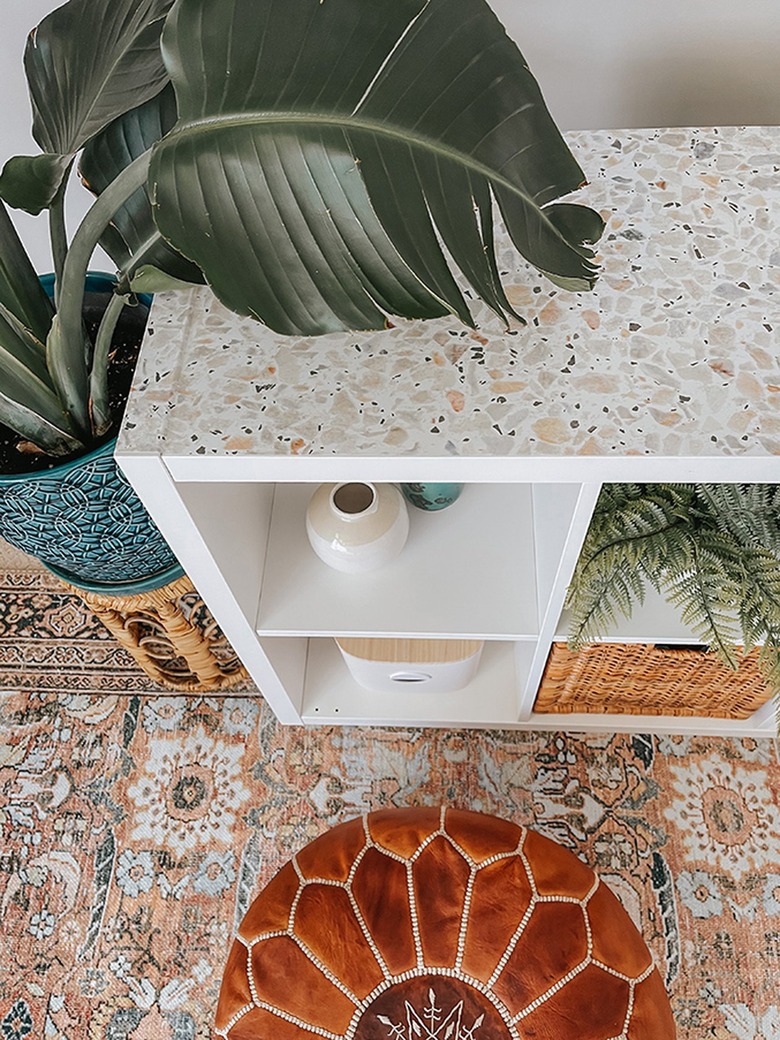
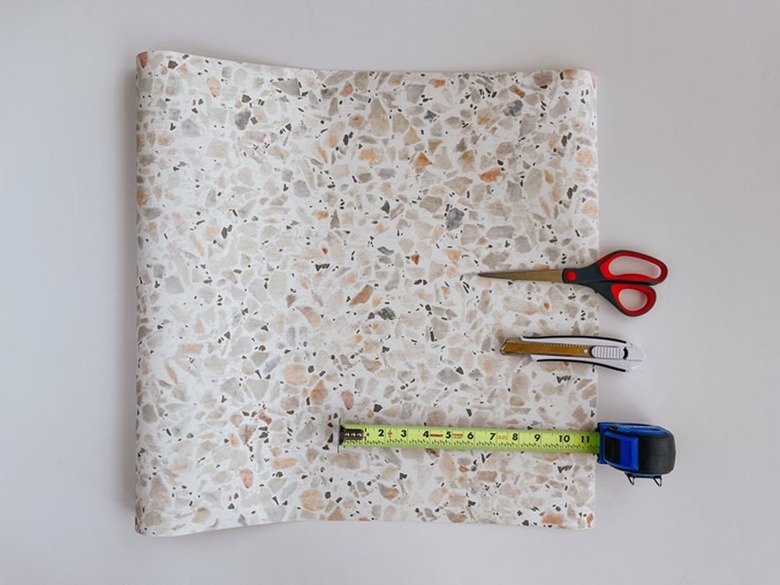
Measure the combined length of the top and both sides of your Kallax unit. Unroll a length of the terrazzo pattern peel-and-stick wallpaper to match the length your measured, and add a few inches so you have a bit of extra wallpaper to play with in the next step. Cut the wallpaper with scissors, then measure the depth of the shelf and mark the exact measurement of that depth onto the wallpaper with a pencil in several places along the length of the paper. Use a yardstick to connect the marks into one long drawn line, then cut the paper to size.
 Carrie Waller
Step 7
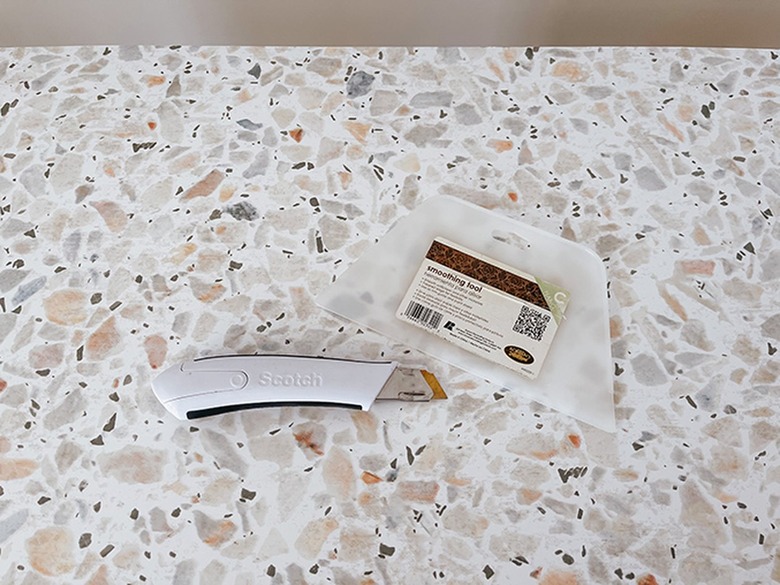
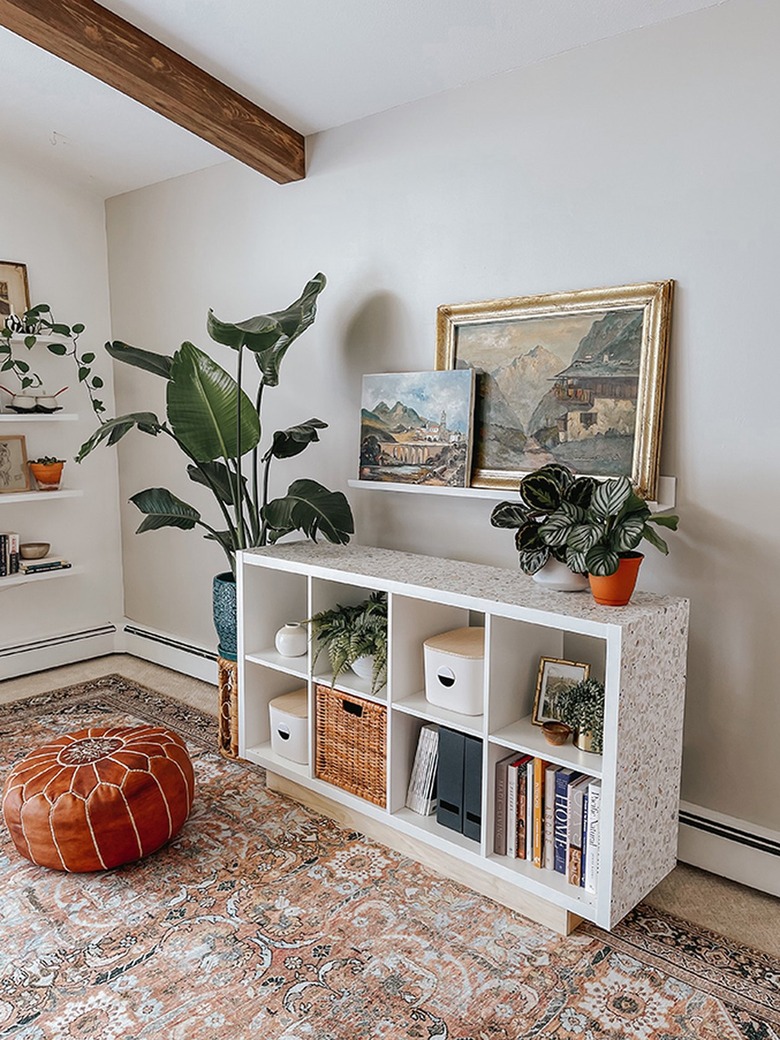
Lay the cut wallpaper over the Kallax shelf so that the extra inches hang down beyond the shelf on either side. Peel back a portion of the backer paper at one end, and slowly stick it to the side of the shelf, making sure to line up the edges of the wallpaper to the edges of the shelf. Repeat across the entire length of the wallpaper strip, peeling back a little bit of the backer paper at a time, and then pressing the wallpaper in place using the wallpaper smoother. You can smooth any air bubbles that might form out the sides of the wallpaper using your smoother. Once you're done, fold the excess wallpaper up on the underside of the shelf , and then use a sharp utility knife to trim off any excess wallpaper. Style your upcycled IKEA Kallax shelf with all of your favorite plants, decor, and books to finish.
 Carrie Waller
 Carrie Waller