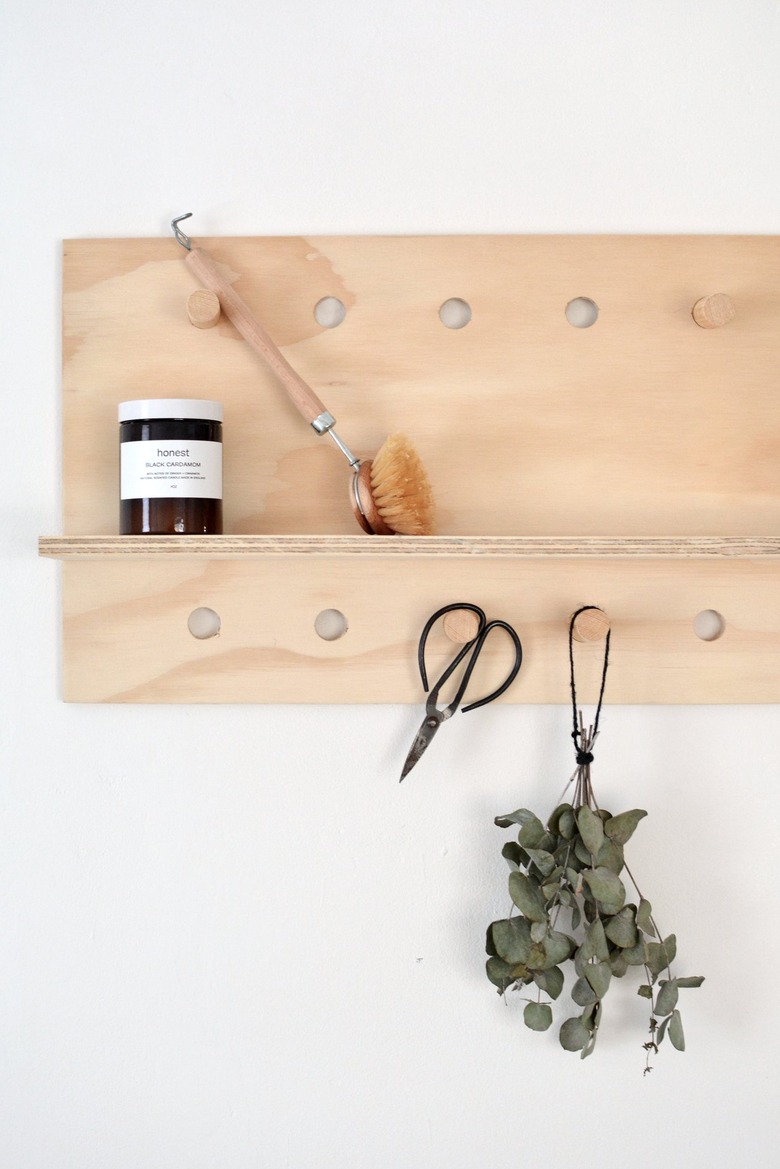
This Pegboard/Shelf Is The DIY You Never Knew You Needed
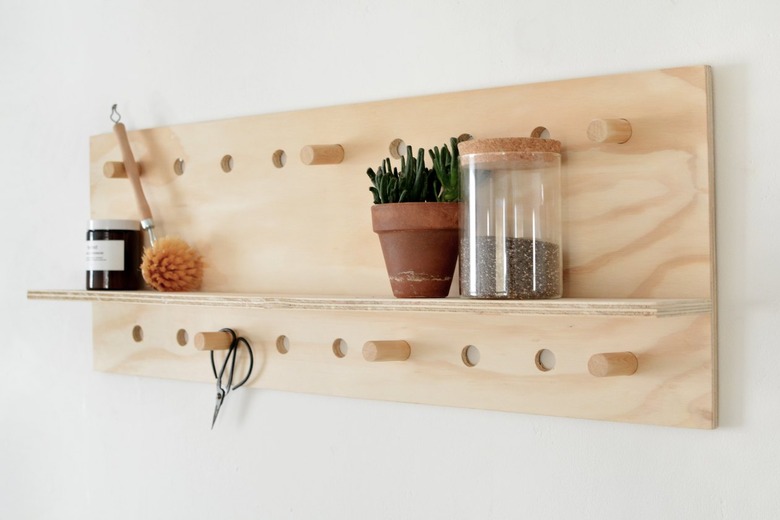
For basic decorating and organizing needs, this pegboard/shelf design is the space-saving solution you never knew you needed. It's easy to make and provides some welcome added storage. Plus, it's not all function; this undemanding do-it-yourself gives off some serious Scandinavian decor vibes, with its simple, natural beauty. (You know we love our plywood projects here at Hunker!) But be warned: you may find yourself spending hours arranging the perfect shelfie!
Things Needed
-
Plywood
-
Hammer
-
Hacksaw
-
Wooden dowel, 1 inch thick, and 12 to 20 inches long
-
Power Drill, with a 1-inch spade or Forstner drill bit
-
Nails, 1 inch
-
Tape measure
-
Sandpaper
Step 1
Ask your local hardware store to cut your plywood sheet to size for you. You'll need one piece measuring 11 inches by 33 inches, and a second smaller piece that measures 4 inches by 33 inches. (Alternatively, you can use your own measurements to make a bespoke length to fit your own requirements.)
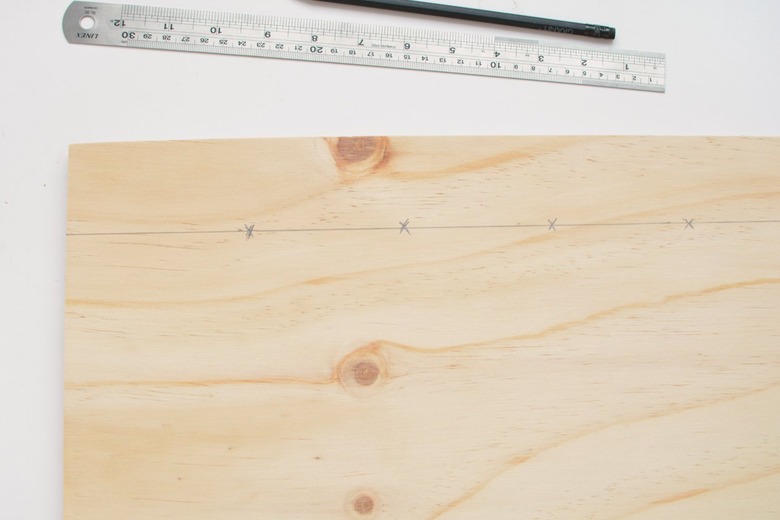
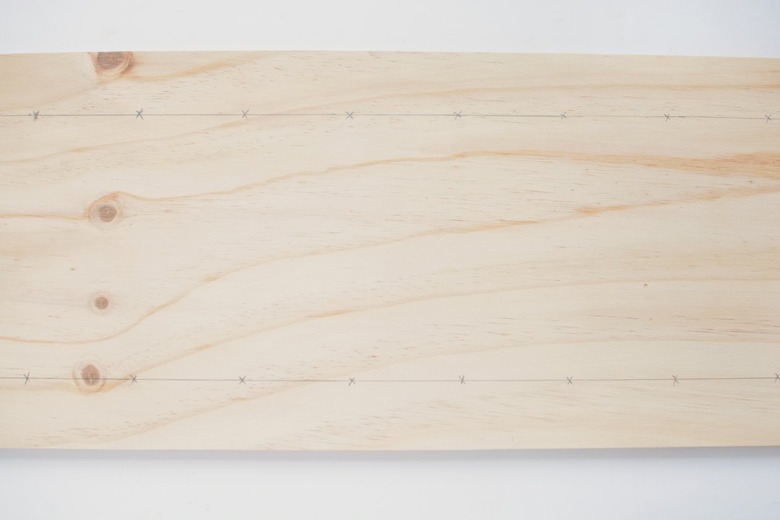
On the larger piece of plywood, mark where the pegs will be located. For the upper row of pegs, draw a horizontal line two inches from the top. Mark drill points at 3-1/4 inch intervals along this line.
 Caroline Burke for Hunker
Step 2
Now, for the lower row of pegs, draw a horizontal line two inches from the bottom of the plywood and mark drill points at 3-1/4 inch intervals.
 Caroline Burke for Hunker
Step 3
Drill at the marked points using a 1-inch size spade or Forstner drill bit. Try to keep the drill as straight as possible since this will help the pegs sit level. Lightly sand the holes with sandpaper to remove any rough edges.
 Caroline Burke for Hunker
Tip
If you're drilling over a surface you don't want to damage, place the plywood over some scrap wood.
Step 4
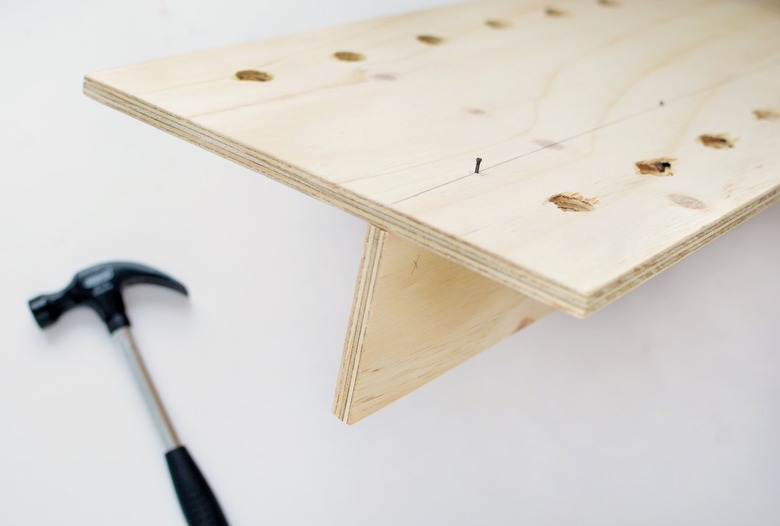
Mark a line where you want the shelf to sit on the larger board — ours is four inches up from the bottom. Flip the plywood over and mark a line at the same height on the other side. Hold the shelf in place, and then tap in some 1-inch nails through the back to attach the shelf. (You can also glue the shelf in place before you nail into it.)
 Caroline Burke for Hunker
Step 5
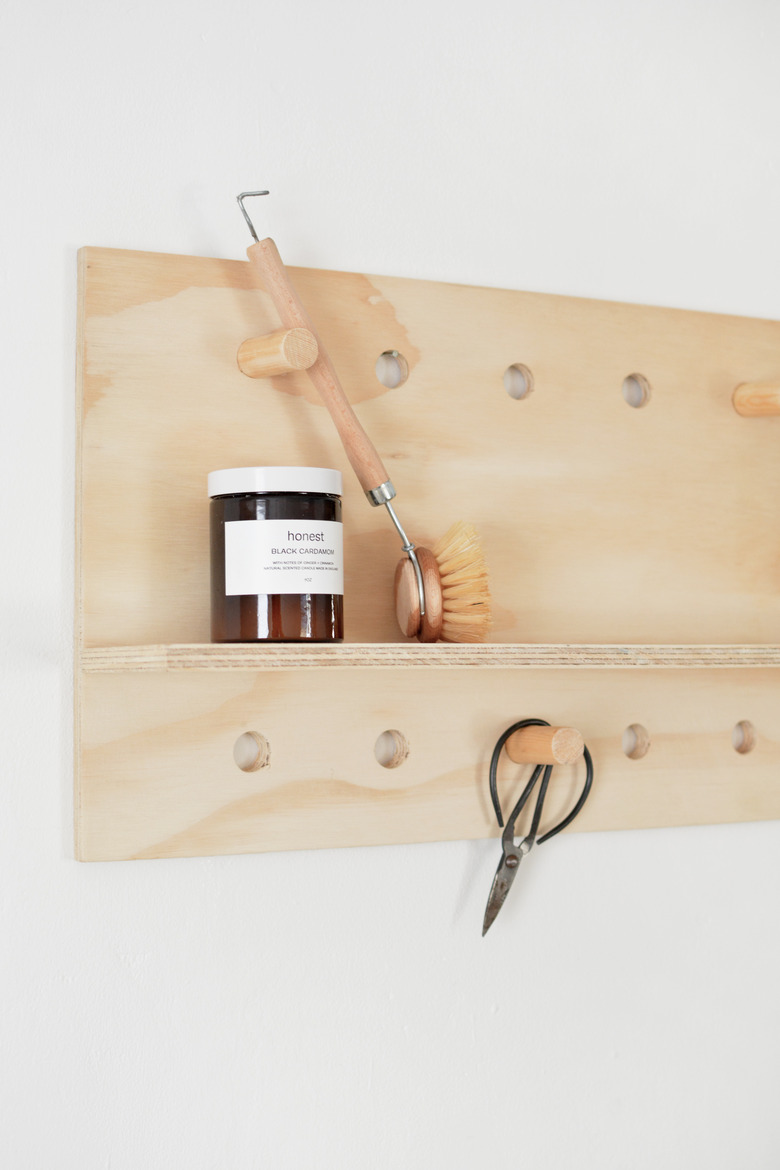
Take the wood dowel and cut it into 2-inch pieces using a small hacksaw. You only need to put pegs in some of the holes otherwise you'll lose that pegboard effect. Somewhere between five to 10 wooden pegs should suffice.
You can use a thinner or thicker wooden dowel if you wish — just remember to keep the drill bit the same width as the dowel so that the pegs will fit.
 Caroline Burke
Sand any rough edges before twisting or lightly hammering the pegs into the holes.
 Caroline Burke
Hang, and enjoy styling your new shelf!