DIY Hauntingly Chic Plaster Bones Picture Frame
We may receive a commission on purchases made from links.
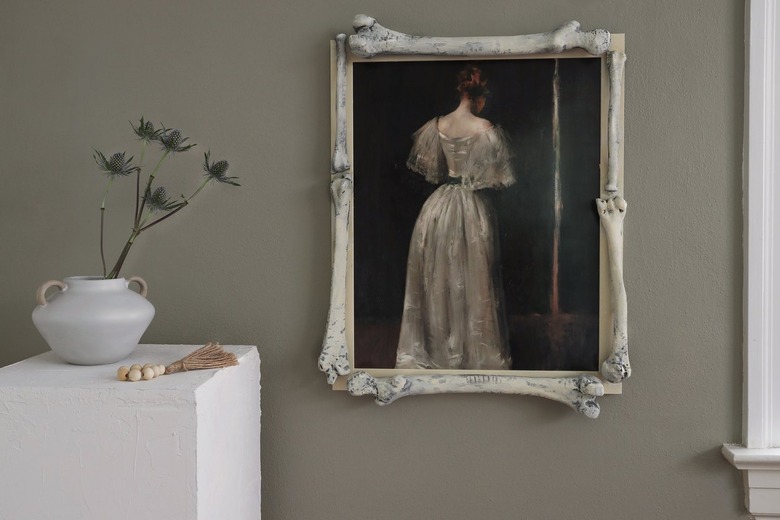
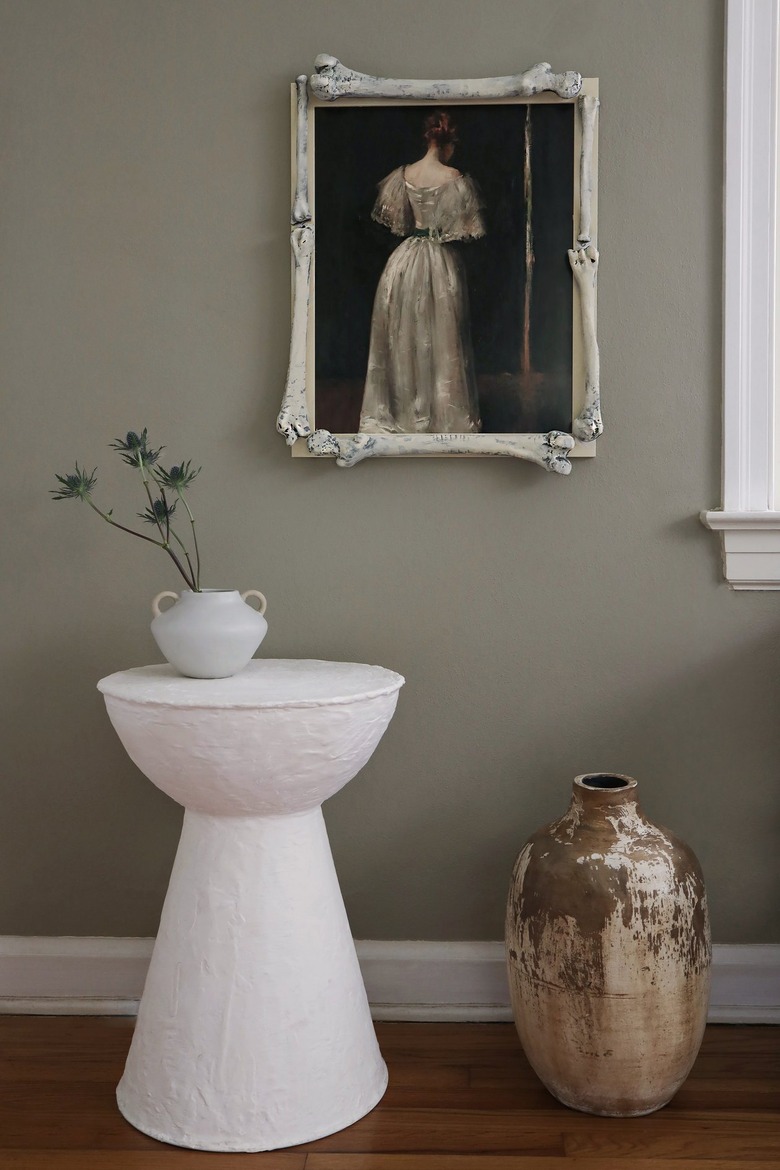
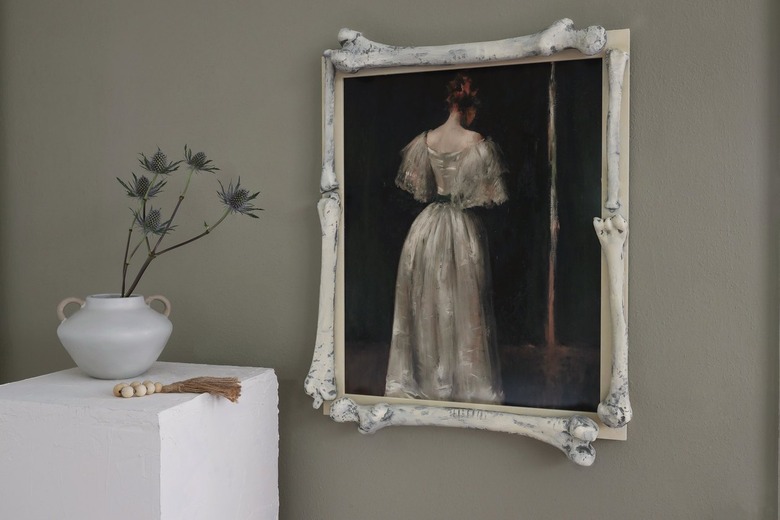
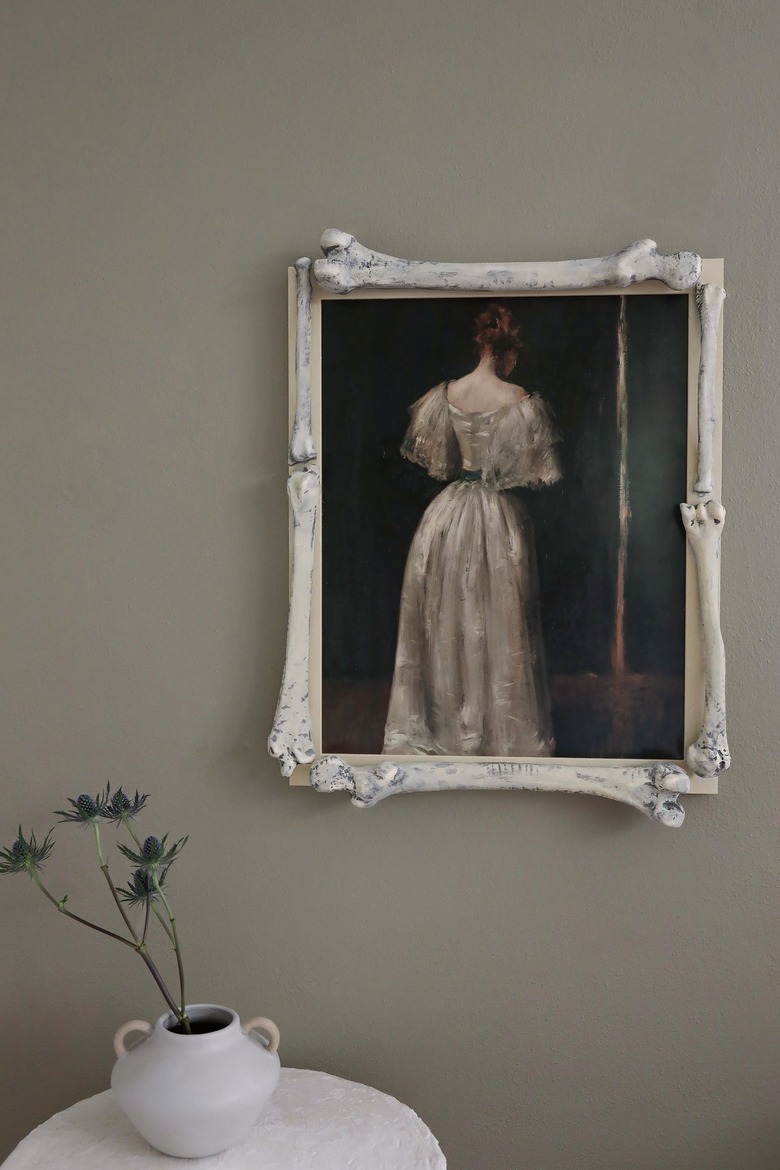
Add a spooky yet stylish touch to your Halloween decor this season by framing your art with bones. But not just your average plastic prop bones — these bones are painted with plaster to produce a more authentic look. When piled around the edges of a frame, regular portraits appear more like apparitions, and landscapes or objects take on a more unearthly feel. Make just one frame to haunt a small corner of your space, or make several to create a bone-chillingly cool gallery wall. Scroll to the bottom for our many art prints ideas.
Things Needed
 Trisha Sprouse
Step 1
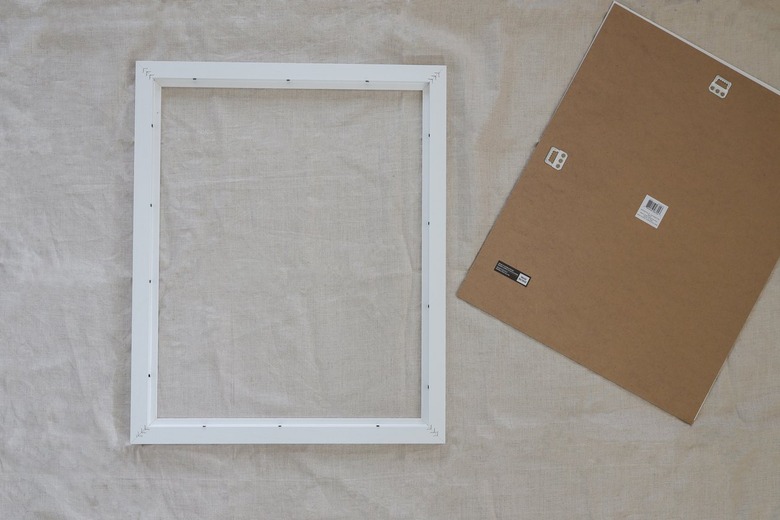
Remove the backing and glass from the picture frame. Here, we've used an inexpensive 16-by-20-inch frame, but you could also use an old thrift store frame.
 Trisha Sprouse
Step 2
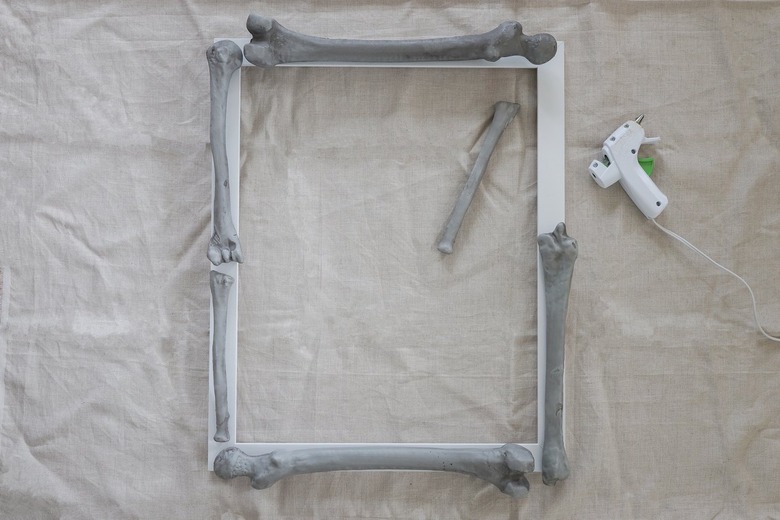
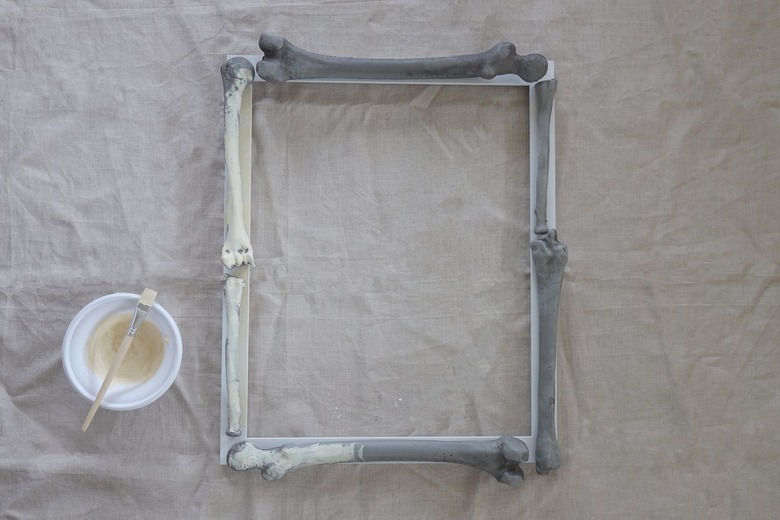
Arrange several plastic bones around the front side of the frame so that they fill the entire perimeter. Use bones of varying sizes and shapes to add visual interest. Once you're happy with the arrangement, secure the bones to the frame with either hot glue or super glue.
 Trisha Sprouse
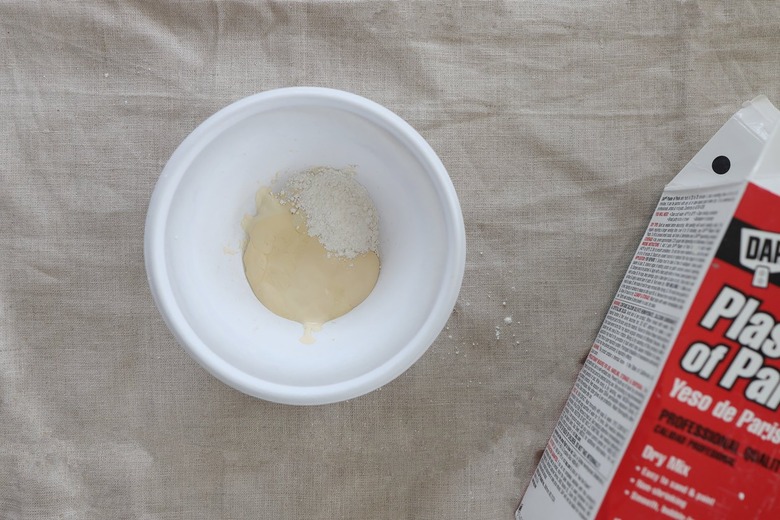
Step 3
In a disposable bowl, add one cup of paint (either latex or acrylic craft paint works) and one tablespoon of Plaster of Paris. Mix them together to create a thick chalky-style paint. To give the bones a more aged look, we opted for an ivory-toned paint color. The plaster will enhance this effect by producing a matte textured finish.
 Trisha Sprouse
Tip
Don't have any Plaster of Paris on hand? You can substitute it with baking soda in a pinch.
Step 4
Dip your paintbrush into the plaster paint, and brush some of it off onto a paper towel before painting it onto the bones. This will ensure light coverage, as you don't want to completely cover up the darker crevices with paint. Paint several light coats, making sure to apply paint over any exposed areas of the frame as well. Allow each coat to dry at least ten minutes.
 Trisha Sprouse
Step 5
Once the last coat of paint has fully dried (about 30 to 45 minutes), you can add your artwork and secure the glass and backing to the frame. We were able to have a 16-by-20-inch digital poster printed at our local pharmacy's one-hour photo service. You can find many spooky downloadable art options on Etsy, using search terms like "dark academia," "vintage Victorian," "gothic art," and "moody art." Here are a few suggestions:
Moody Portrait / Vintage Vampire / Moody Victorian / Multiple Moon Exposures / Dark Floral / Dark Castle / Vintage Snake X-ray / Spider Specimen Chart / Altered Art Portrait / Moody Moonlight Landscape / Dark Academia / Vintage Bat Chart / Skull and Candle
 Trisha Sprouse
Now hang, and enjoy the spooky style it adds to your space. It's perfect wall decor for a modern "haunted house!"
 Trisha Sprouse