DIY Clay Wind Chimes For Your Home
We may receive a commission on purchases made from links.
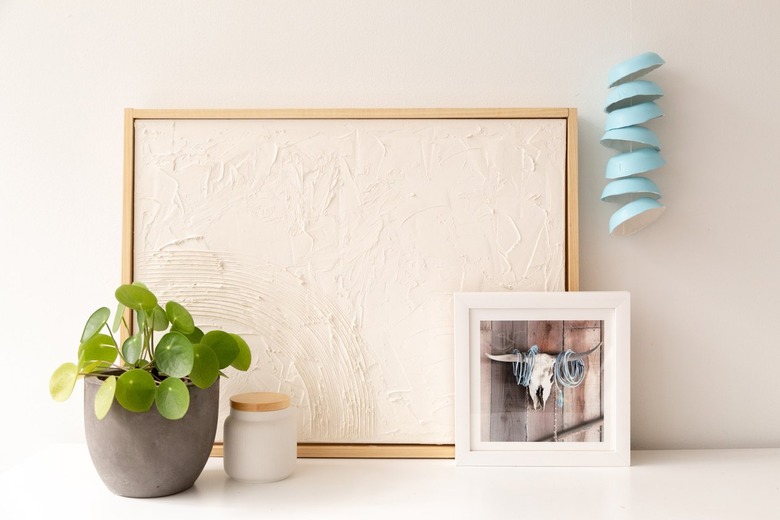
Making home decor pieces is a favorite type of DIY project: from artwork to hanging shelves, we just love it. Adding handmade pieces to your home is such a special touch to interior design, don't you agree?
These DIY wind chimes are made from air dry clay. If you haven't used this type of clay, now is the time! It is easy to use and dries so quickly. We love using this medium for other craft ideas like this clay project.
So, time to get crafty. Read more for all the details in this fun and easy step-by-step tutorial.
 Sara Albers
 Sara Albers
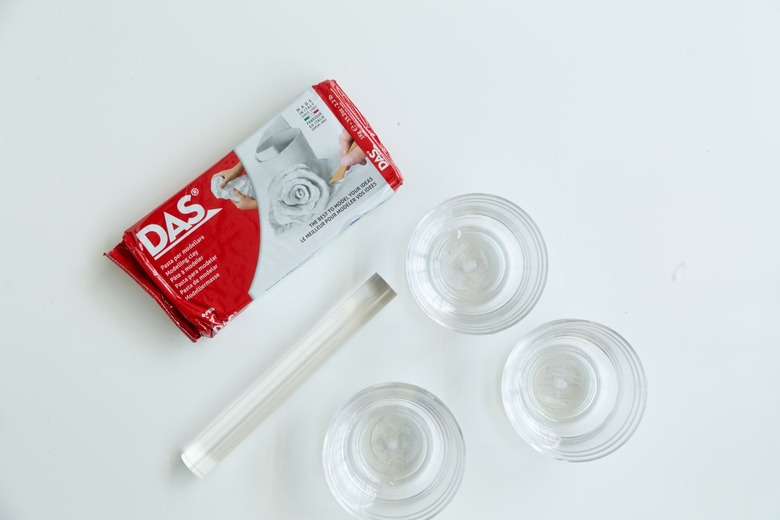
Things Needed
-
Small bowls, 8 (We used 2-ounce bowls, but you can use any size you wish)
-
Sanding block
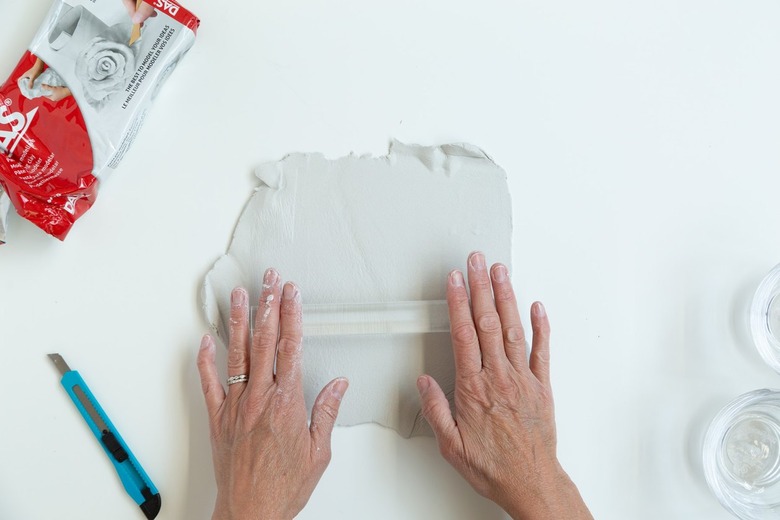
Step 1
Roll out the air dry clay 1/4 inch thick .
 Sara Albers
Step 2
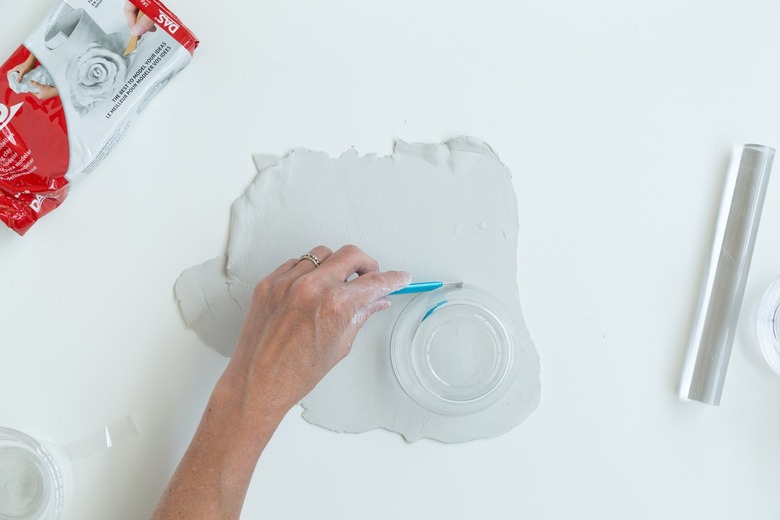
Cut clay into a circle (around the bowl).
 Sara Albers
Step 3
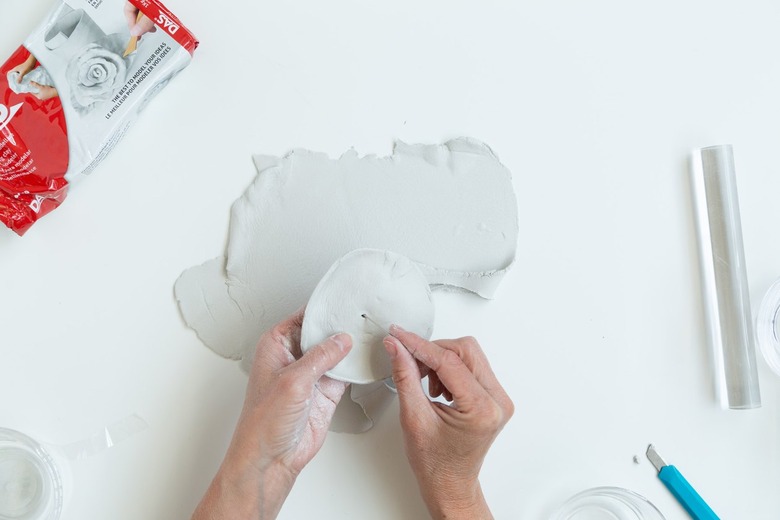
Press a hole into the center of the clay circle.
 Sara Albers
Step 4
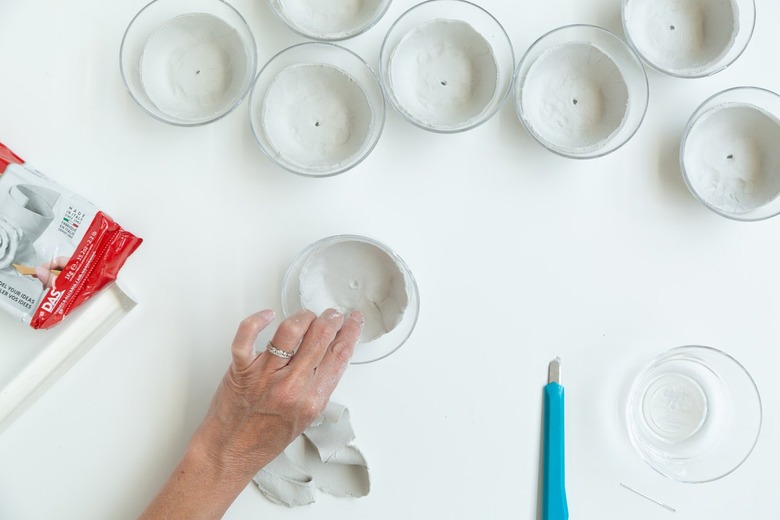
Press the clay circle into the bowl and allow to dry overnight. After it's dried, smooth the edges of the clay on the side of bowl.
 Sara Albers
Step 5
Gently sand the edges of the clay bowls once they have dried completely .
 Sara Albers
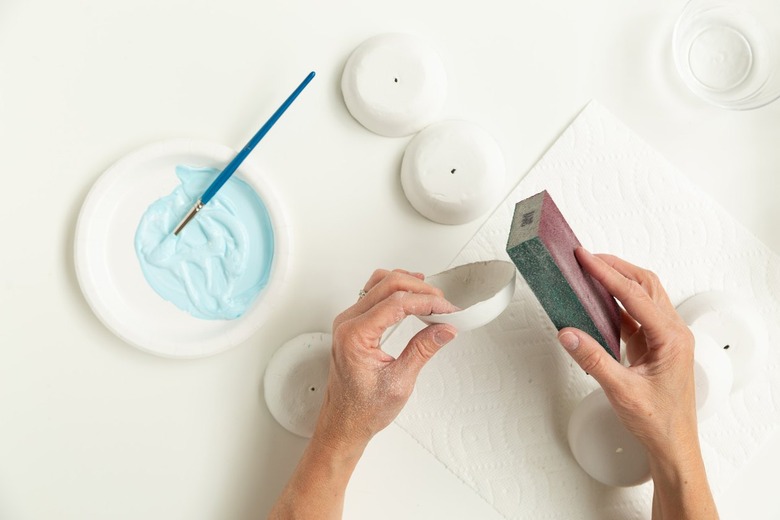
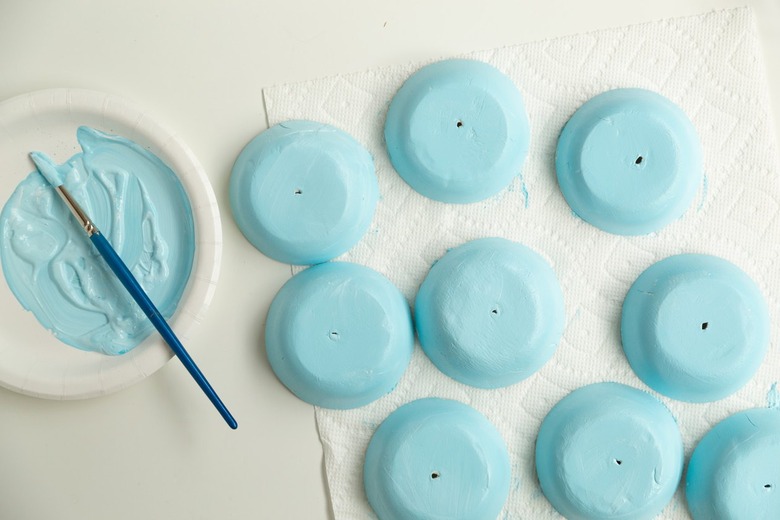
Step 6
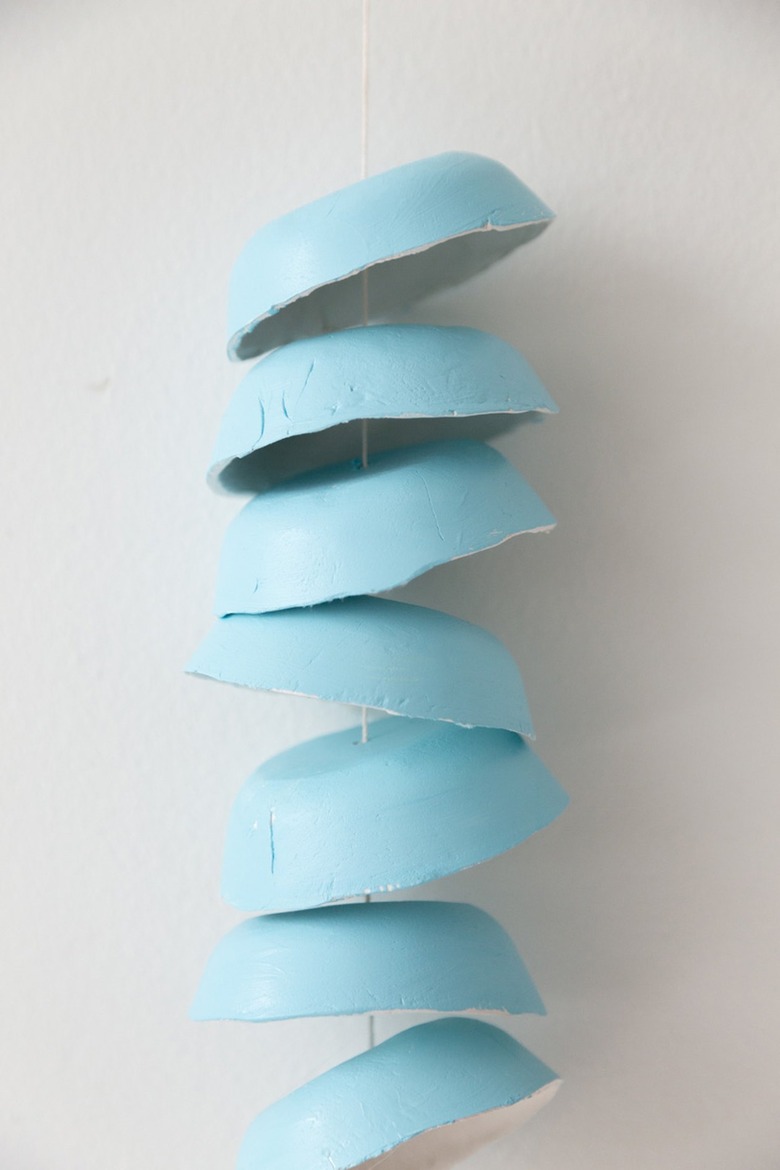
Paint the clay bowls with craft paint. We chose this blue color to make a colorful wind chime, but you could use a terra cotta, white, black ... really, any color that matches your decor!
 Sara Albers
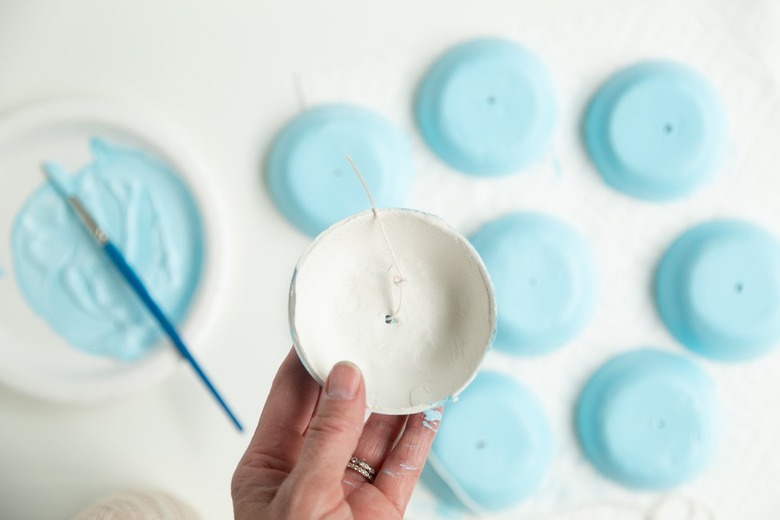
Step 7
Use twine to thread the clay bowls together. (You could also use fishing line.) Tie a few knots on the twine and then thread through the hole. You can add a bit of hot glue if needed.
 Sara Albers
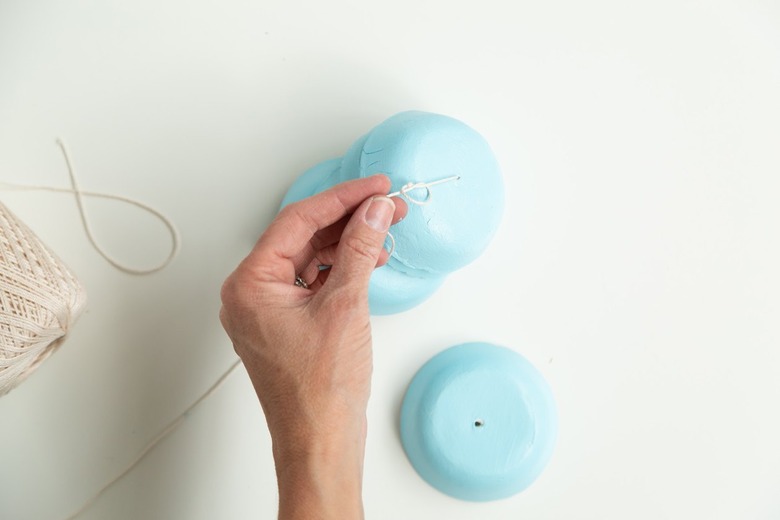
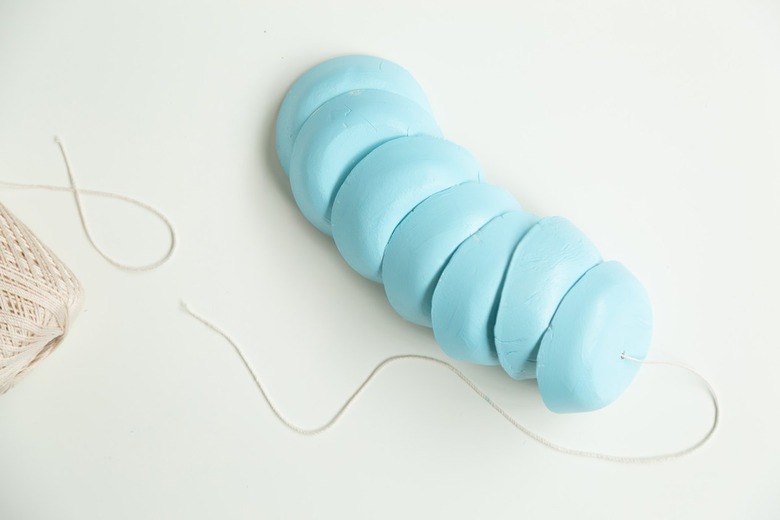
Step 8
Continue adding the clay bowls, leaving about two inches of twine in between.
 Sara Albers
 Sara Albers
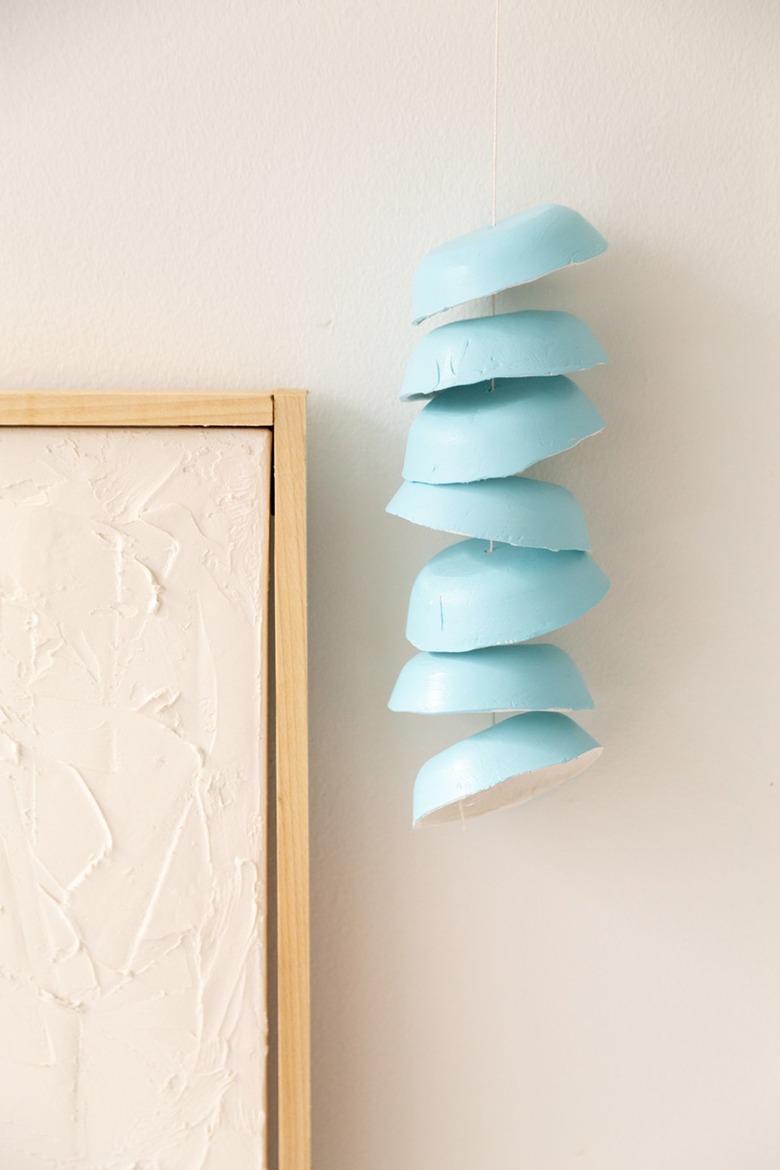
And you're done! Hang your beautiful wind chime in your home as a wall hanging or in your garden as pretty garden decor.
 Sara Albers
For other easy DIY decor ideas, check out this wall hanging using pieces of driftwood or this bohemian wood bead wall hanging.