Make Holiday Tree Luminaries Using Clay
We may receive a commission on purchases made from links.
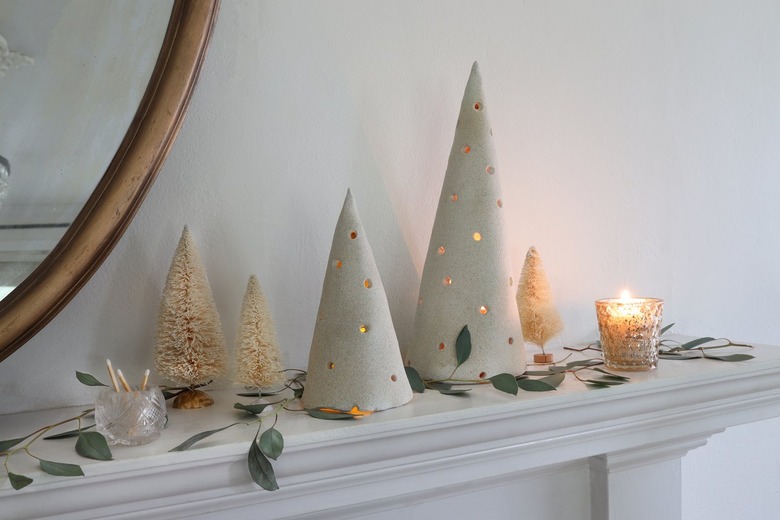
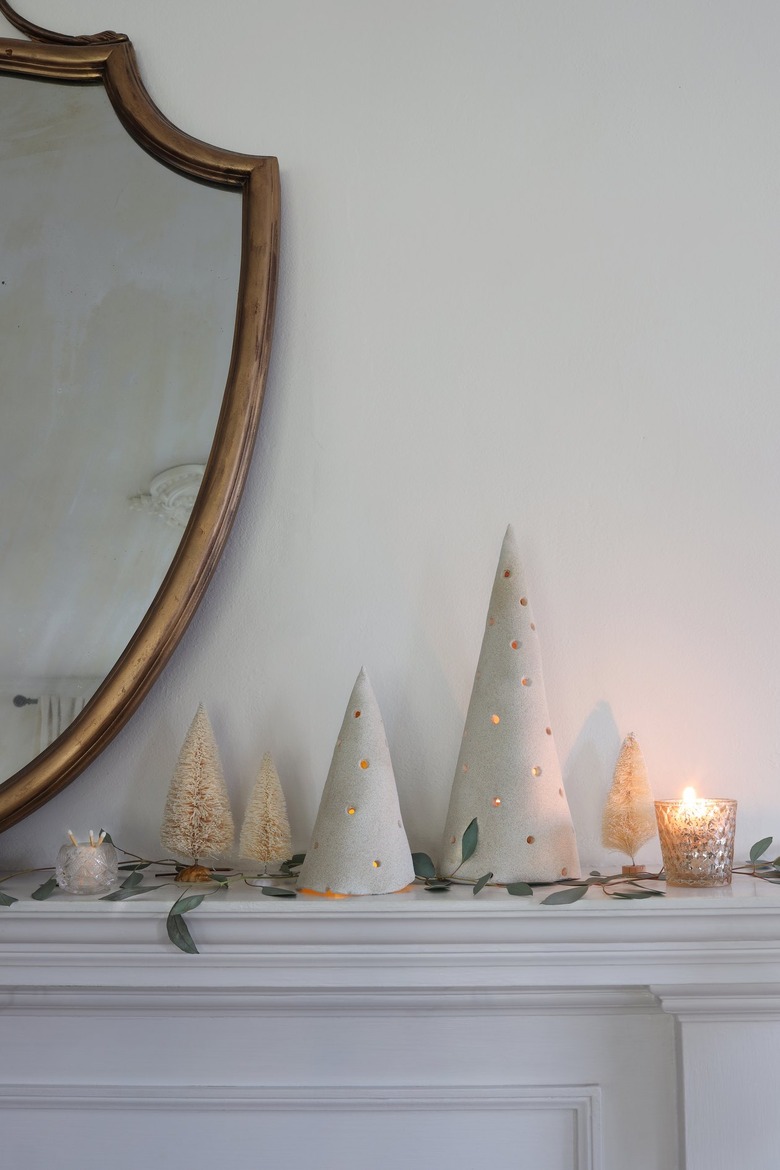
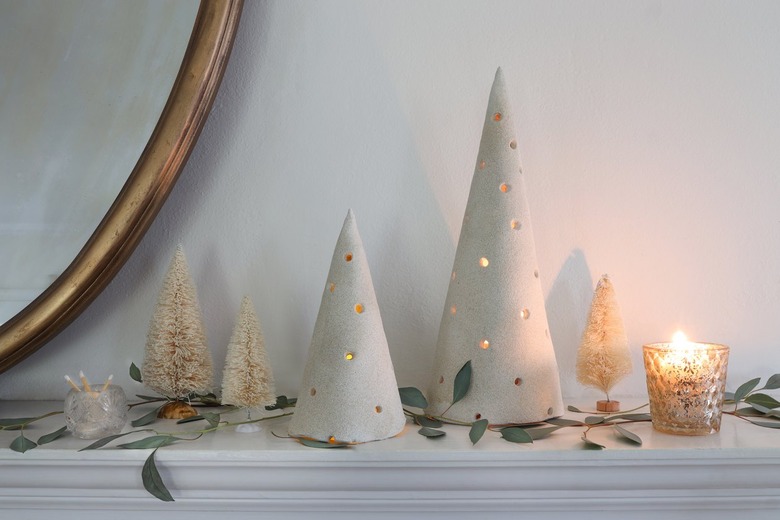
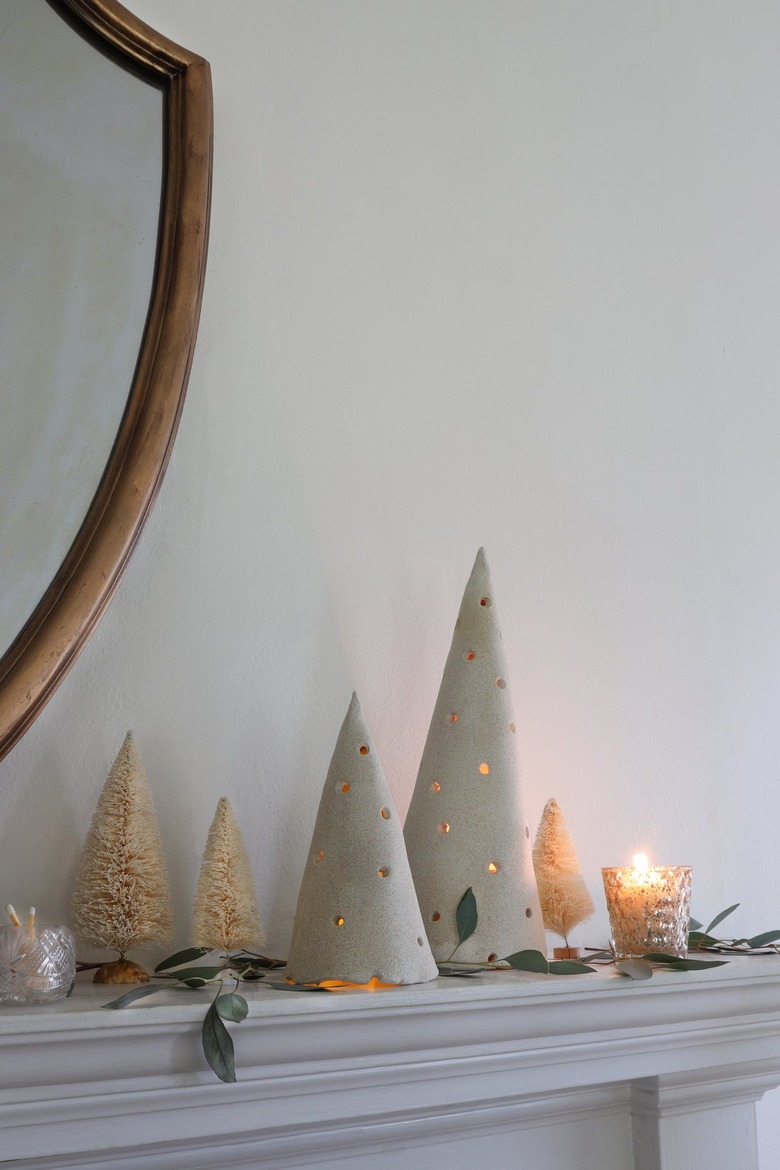
The holidays are a time to add coziness and good cheer to our spaces. If there's one element that can instantly evoke those warm and cozy feels, it's candlelight. And when you place beautiful tree-shaped luminaries over a candle, well, you've got yourself a holiday home run. These gorgeous lanterns are made from air dry clay, and are easy to customize according to size, color, and shape. Place them on a mantel or table, and let it glow, let it glow, let it glow!
Things Needed
 Trisha Sprouse
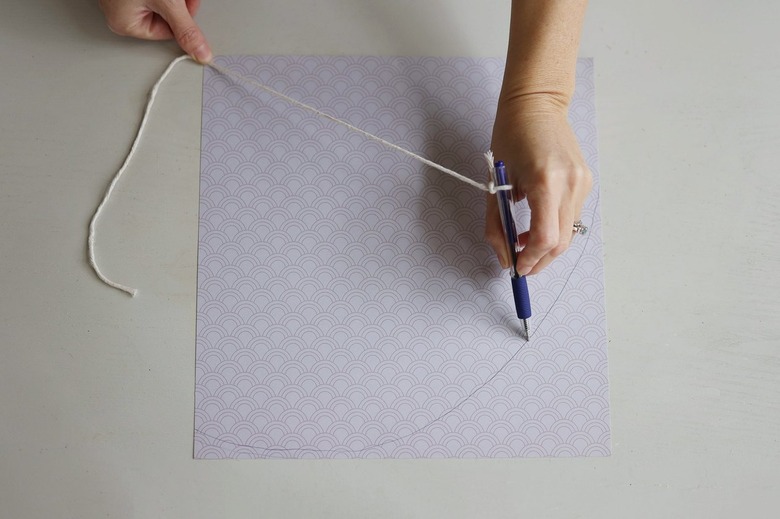
Step 1
Cut a long piece of string, and tie one end to a pen or pencil. Hold the loose end of the string at one corner of the cardstock or poster board (the longer you leave the string length, the taller your tree will be). Pull the string taut, and drag the pen across the paper to create an arc.
 Trisha Sprouse
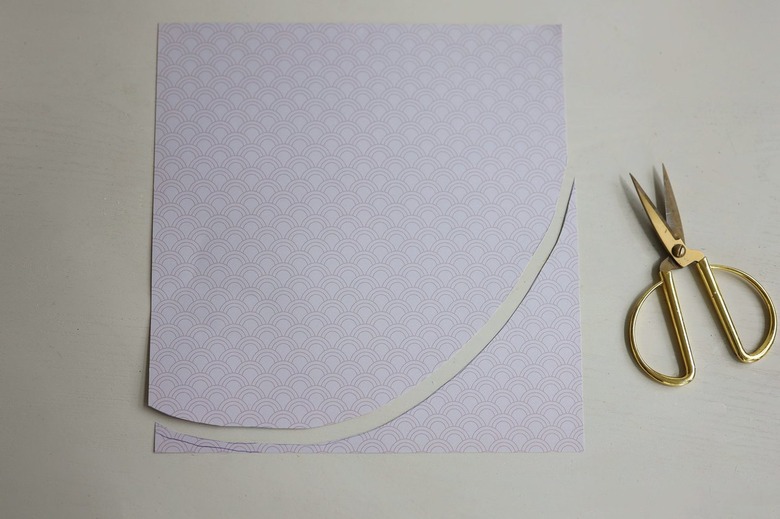
Step 2
Cut out the arc shape with scissors. This will act as the template for your clay cone.
 Trisha Sprouse
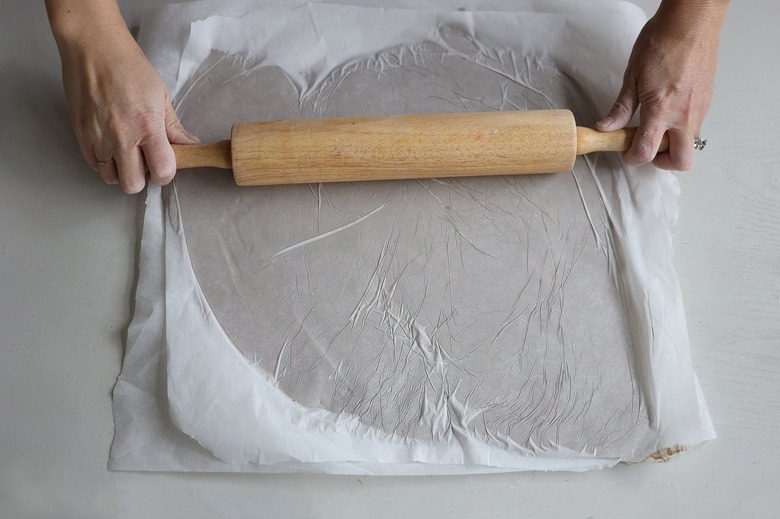
Step 3
Place a handful of air dry clay between two pieces of wax paper, and use a rolling pin to flatten it out until it's about 1/4-inch thick.
 Trisha Sprouse
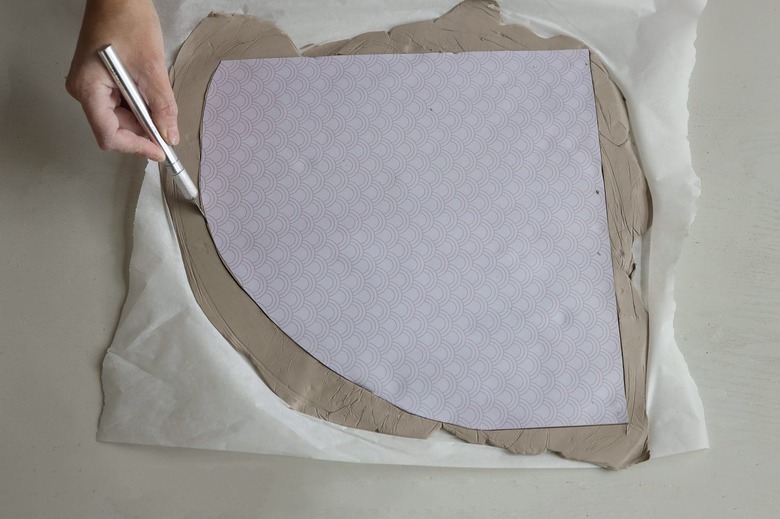
Step 4
Place the paper template on top of the clay, and use a utility knife to cut out the shape.
 Trisha Sprouse
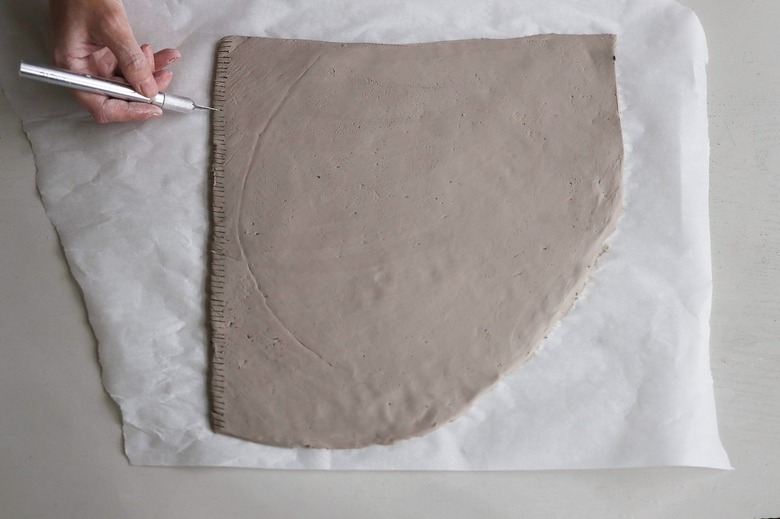
Step 5
Score one of the straight edges of the clay with little lines — this will help give the seam more "tooth" when you form it into a cone.
 Trisha Sprouse
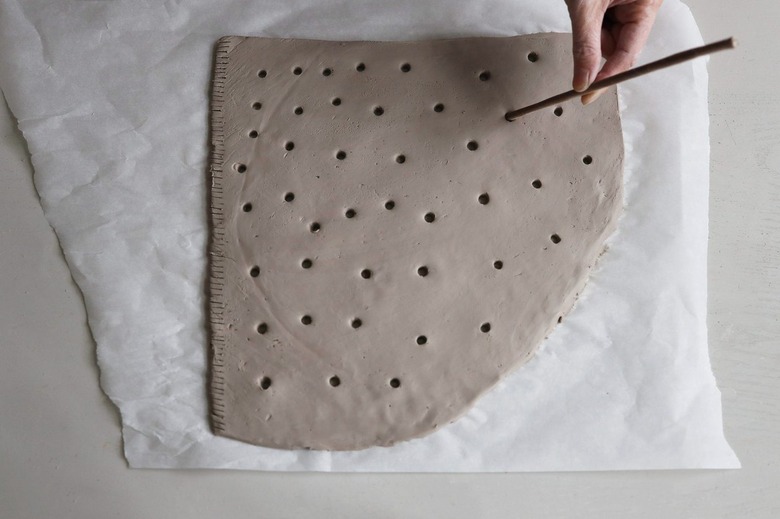
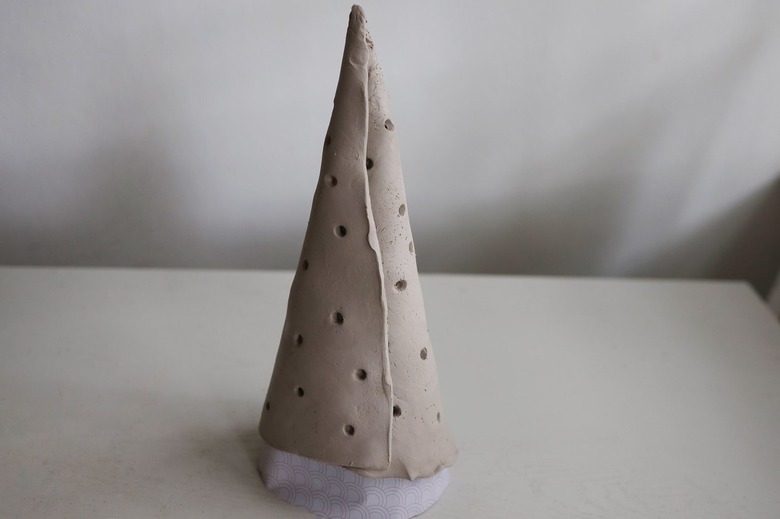
Step 6
Use a drinking straw to cut out little holes in the clay and create a pattern for the light to shine through. You could also use tiny cookie cutters in various shapes like triangles, snowflakes, or stars. Or feel free to cut out shapes freehand if you feel inclined!
 Trisha Sprouse
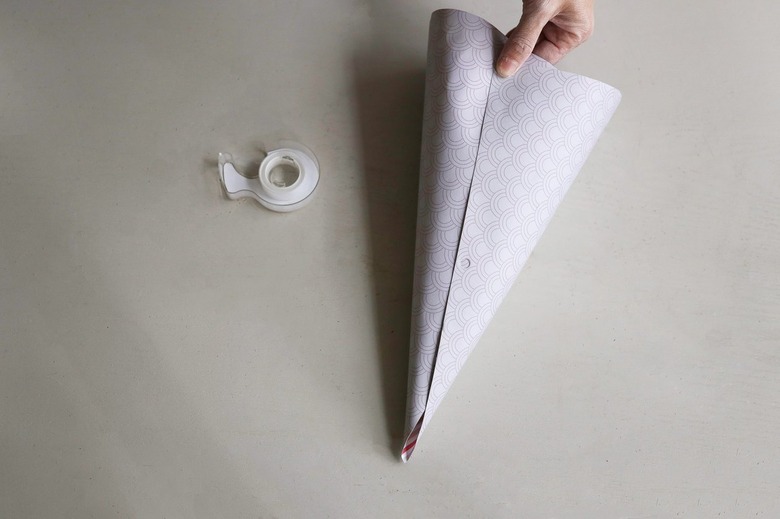
Step 7
Roll the paper template into a cone shape, and either tape or glue the seam together.
 Trisha Sprouse
Step 8
Drape the clay around the paper cone and form it into a cone shape.
 Trisha Sprouse
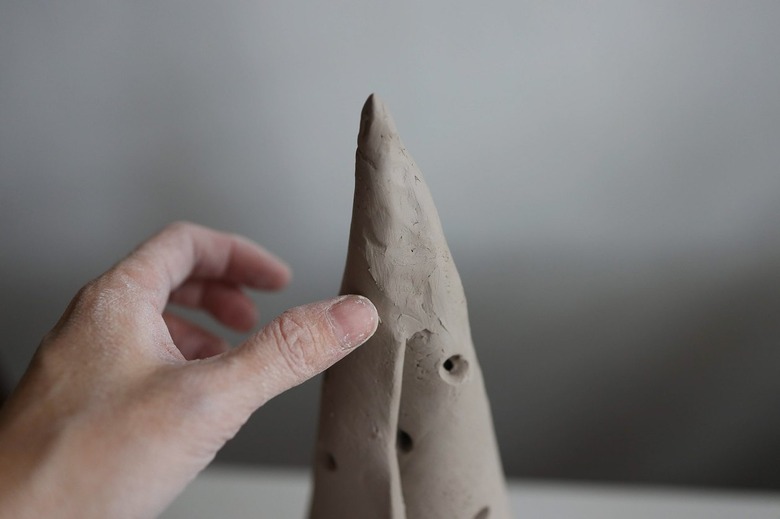
Step 9
Press the seam firmly together, and then smooth it out (wet your fingers with a little water if necessary).
 Trisha Sprouse
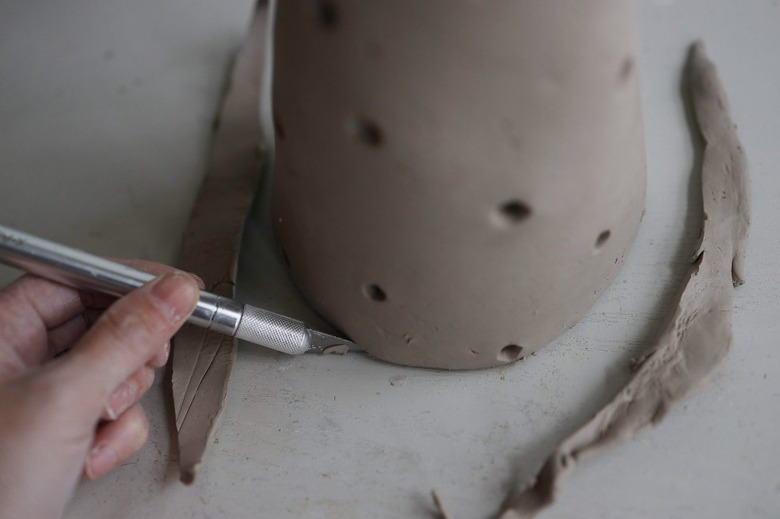
Step 10
Trim the paper cone that's inside so the clay can rest flat on the surface. Trim the clay, if needed, to ensure it's level. Let the clay dry for a day or two.
 Trisha Sprouse
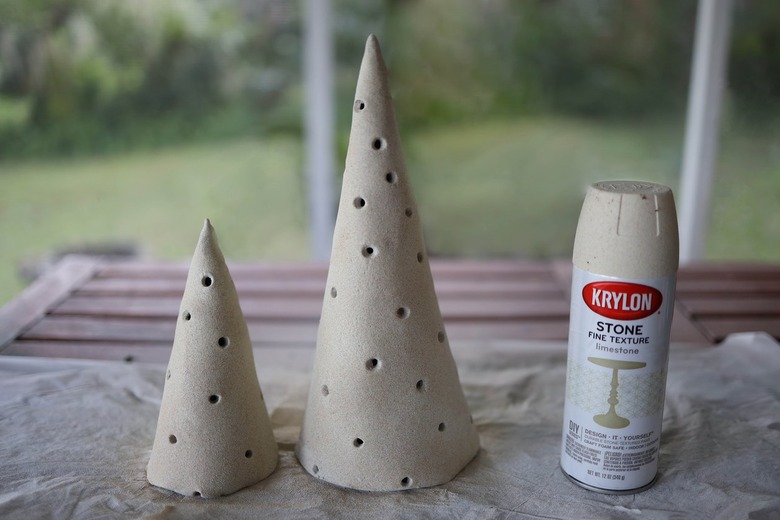
Step 11
Once the clay is completely dry and hardened, remove the paper cones and spray paint the clay cones any color you'd like. We opted for a textured limestone paint.
 Trisha Sprouse
Now all you have to do is place a candle (either real or LED) underneath the cones, and enjoy the festive flickering of flames from beneath your beautiful luminaries.
 Trisha Sprouse
 Trisha Sprouse