These Charming Clay Christmas Tree Ornaments Are So Easy To Make

We may receive a commission on purchases made from links.
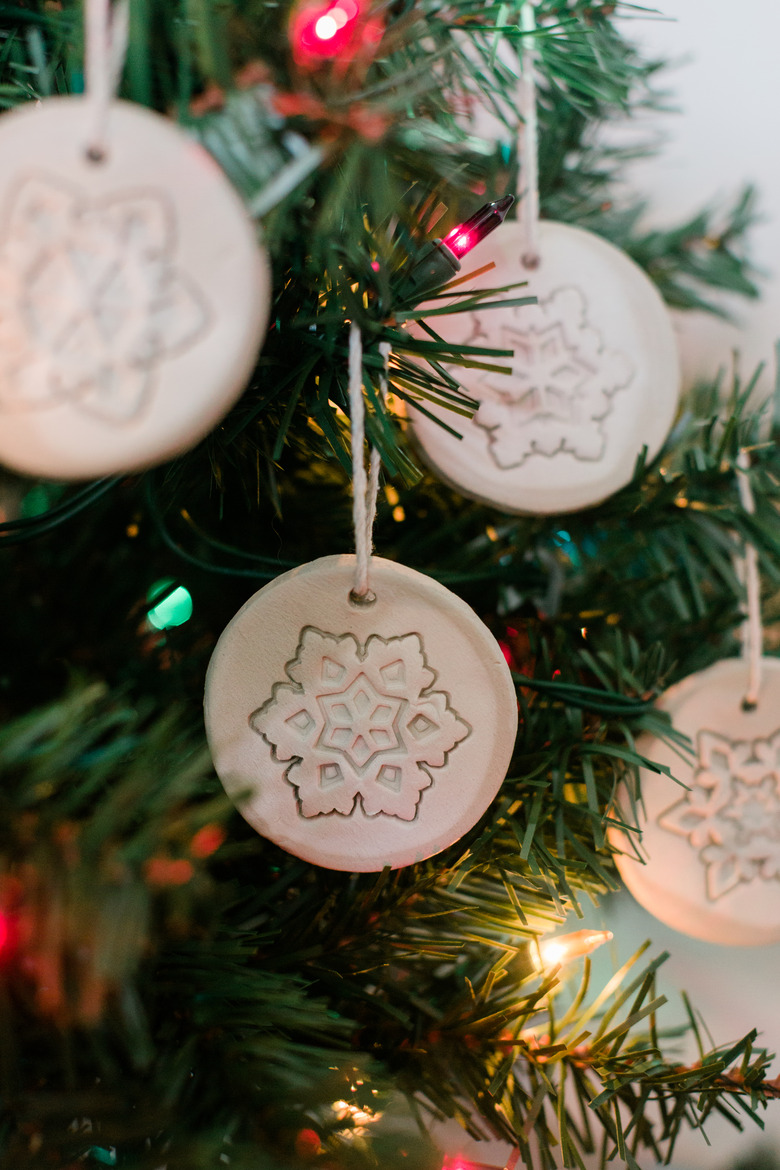
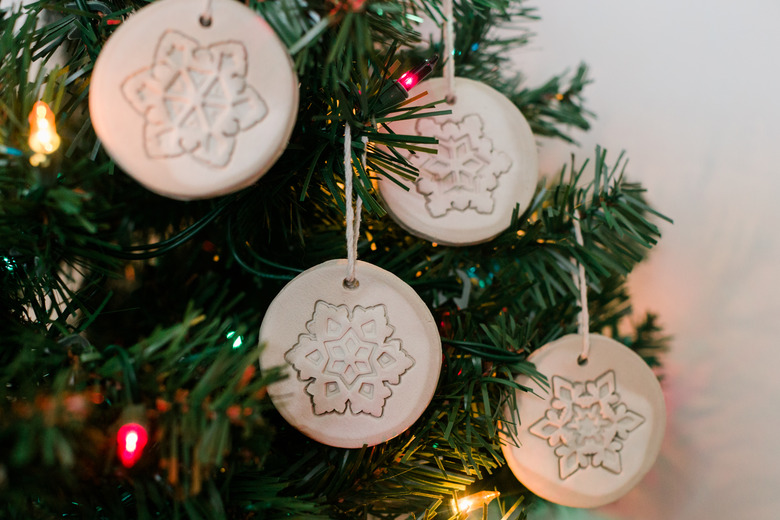
Why not customize your holiday tree this year with adorable air-dry clay ornaments? We decorated these using reusable sugar cookie stamps, and the effect is downright divine when hung on a lit (or even an unlit) Christmas tree. All you need are a few materials and one hour. It's so easy!
 Carrie Waller
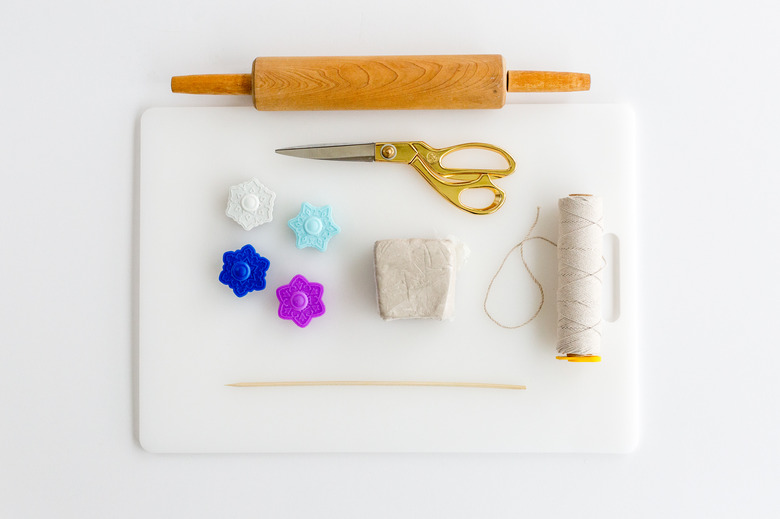
Things Needed
-
Round cookie cutter or drinking glass
-
Dish of tap water
-
Bamboo skewer or toothpick
 Carrie Waller
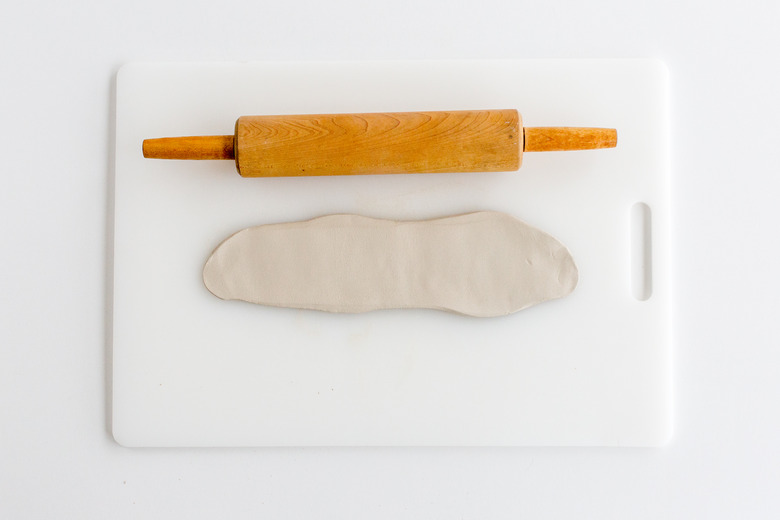
Step 1
Roll out the clay on a cutting board using a rolling pin until the clay is roughly 1/4-inch to 1/2-inch thick.
 Carrie Waller
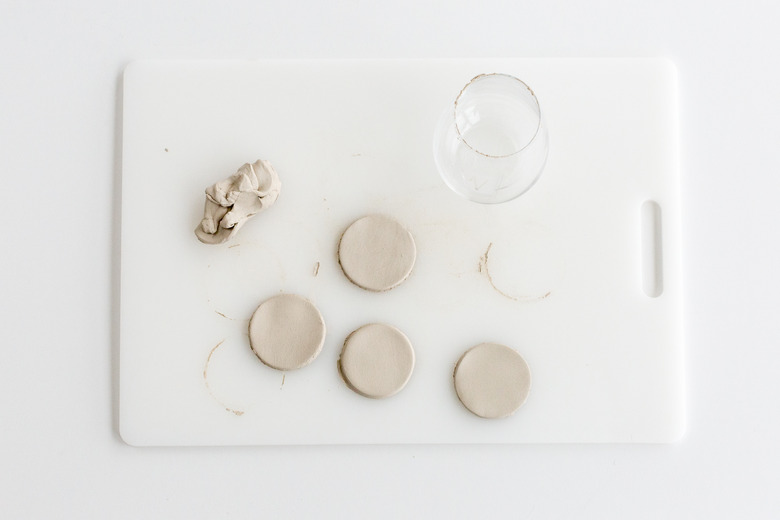
Step 2
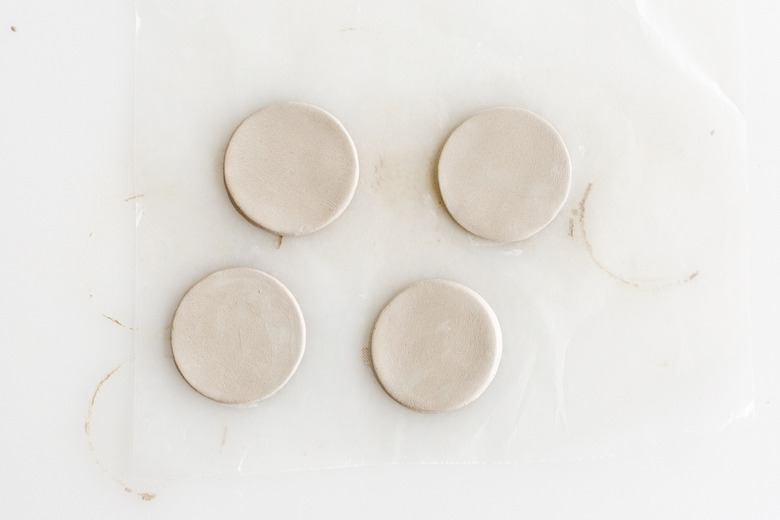
Use a round cookie cutter to slice the flattened clay into individual circles about three inches in diameter. If you don't have a round cookie cutter on hand, you can use a drinking glass to cut the clay.
 Carrie Waller
Step 3
Fill a small dish with tap water, and then wet your fingertips. Rub gently along the cut edges of the clay circles to even them out. Lay the clay circles on wax paper for easier handling in the following steps.
 Carrie Waller
Step 4
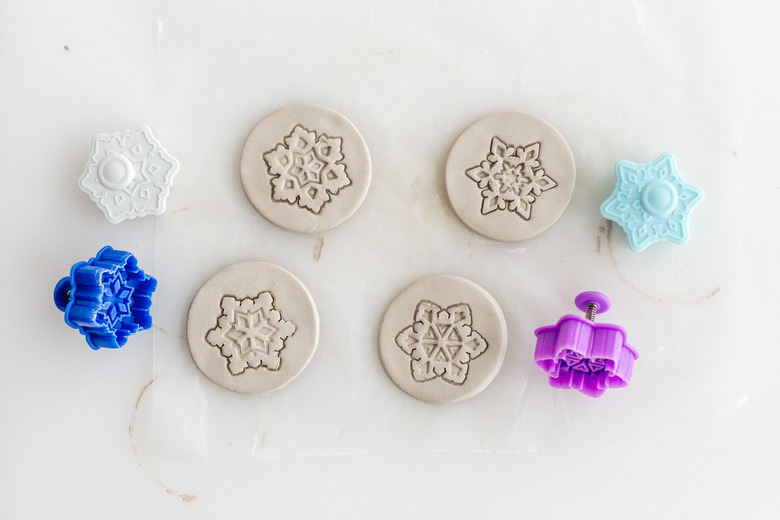
Stamp the center of the wet clay circles with holiday-themed designs. We used snowflake sugar cookie stamps for this tutorial.
Tip
If you wet the stamp face before pressing it into the clay, it will be easier to pull out of the clay when done stamping.
 Carrie Waller
Step 5
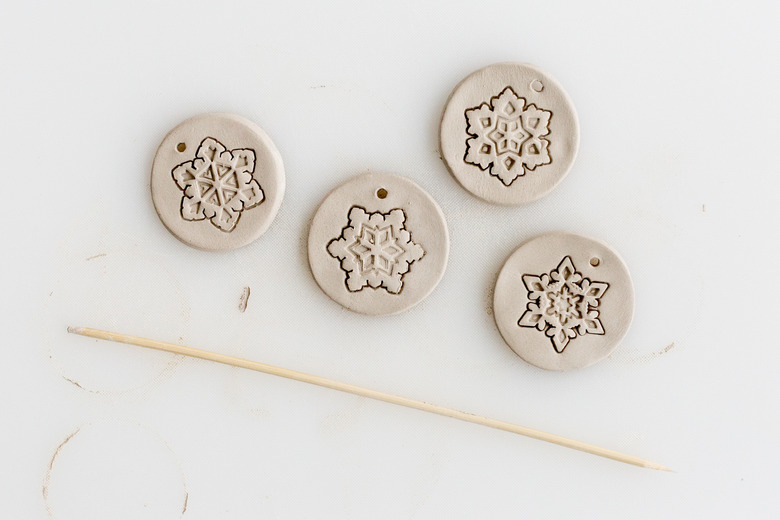
Before the clay starts to harden, use a bamboo skewer or toothpick to poke a 1/4-inch hole through the clay. You may need to even out the edges of the holes with your wet finger again.
 Carrie Waller
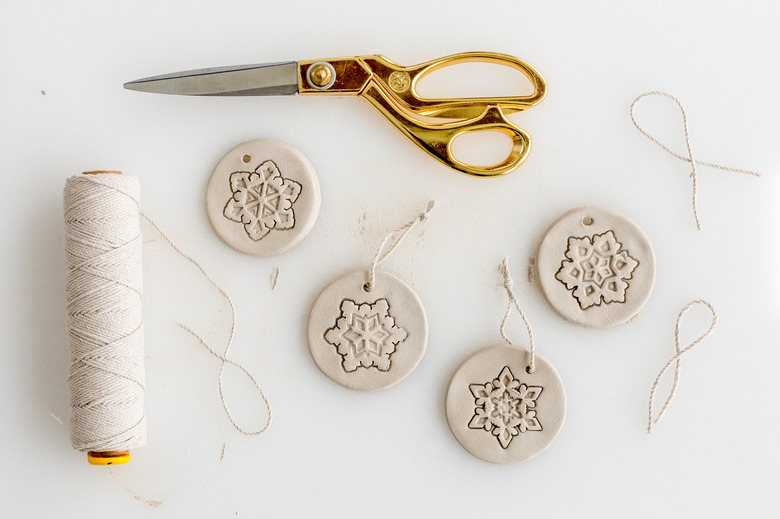
Step 6
Cut the string into individual 6-inch pieces, and then pull each one through the holes of your stamped clay circles. Tie the string together at the ends to create hangers for your ornaments.
 Carrie Waller
Step 7
Allow the ornaments to sit out for a few days, uncovered, until the clay feels dry to the touch. Finally, hang them on your tree. Note that the color of the clay will continue to even out as they slowly air dry over the course of the next few weeks. They can also be painted with acrylic paint if you'd like to give the ornaments a brighter finish to match your favorite festive holiday decor.
 Carrie Waller
 Carrie Waller