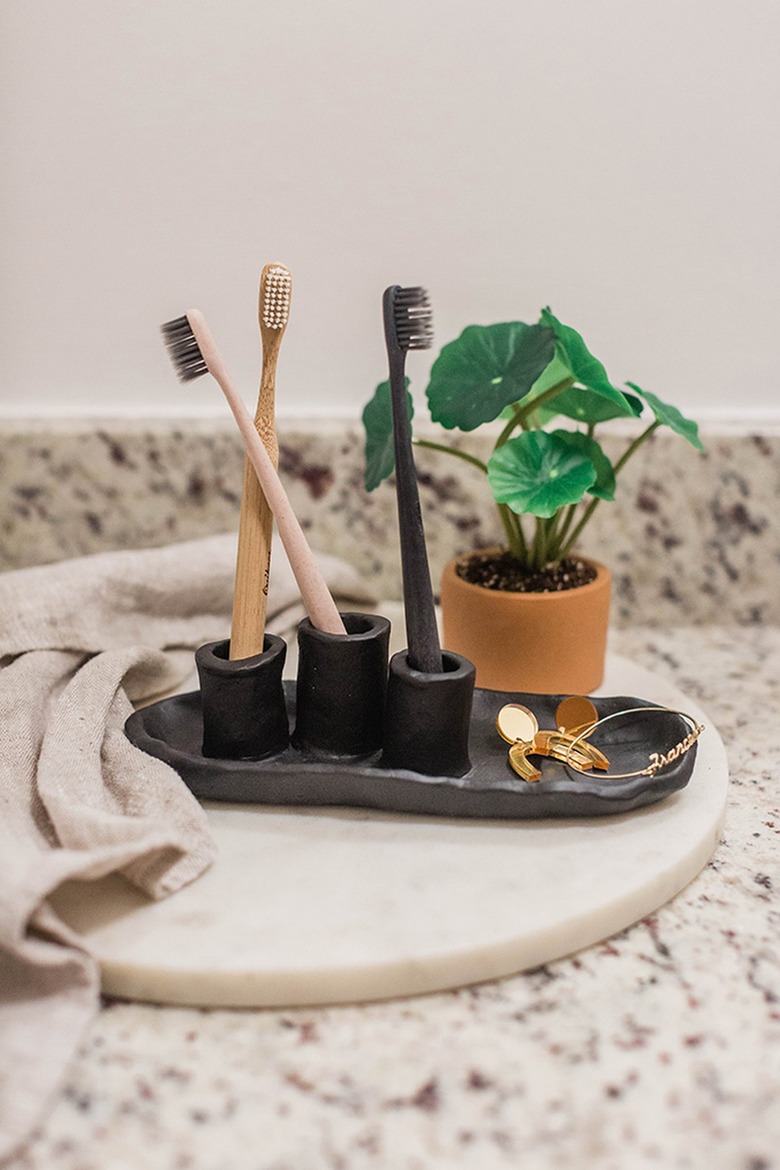
We Used Air-Dry Clay To Create This Toothbrush Holder

We may receive a commission on purchases made from links.
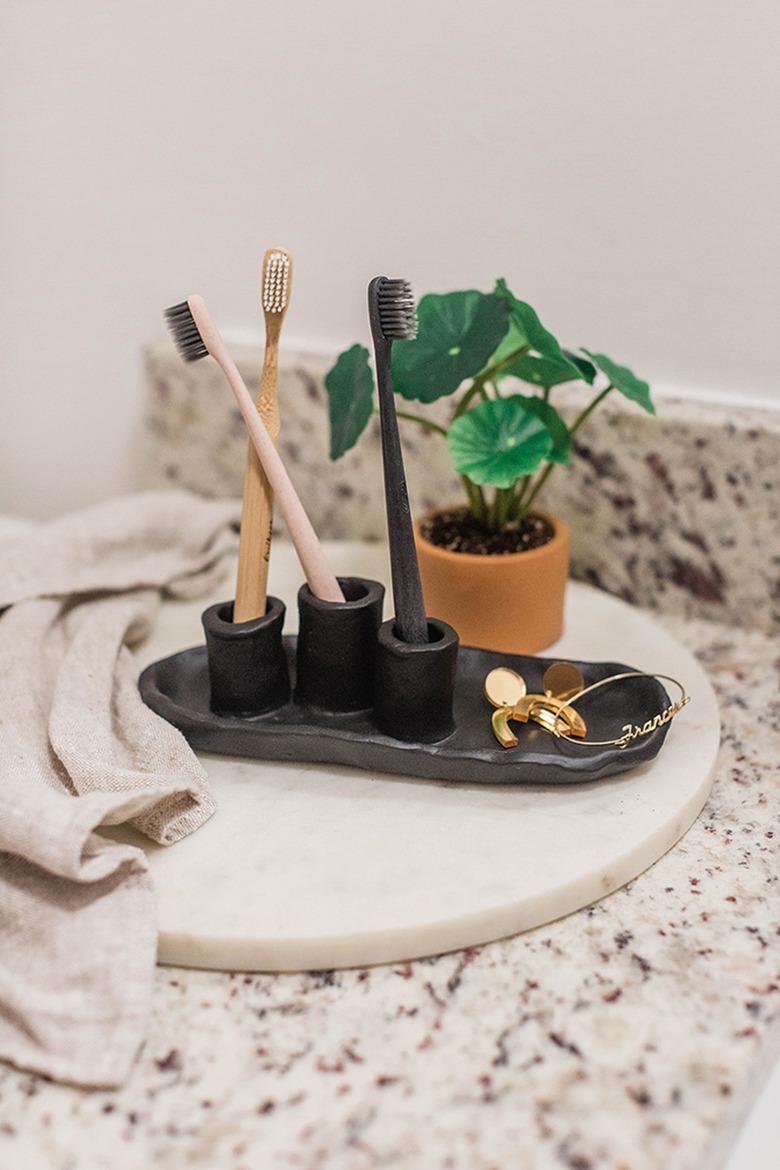
Why use that old mug to hold your toothbrush when you can make your own adorable holder out of air-dry clay? This is the perfect project for a weekend afternoon. And if you're not keen on using it for your toothbrushes, try using it as a pencil holder at your desk or to show off air plants in your entryway.
 Carrie Waller
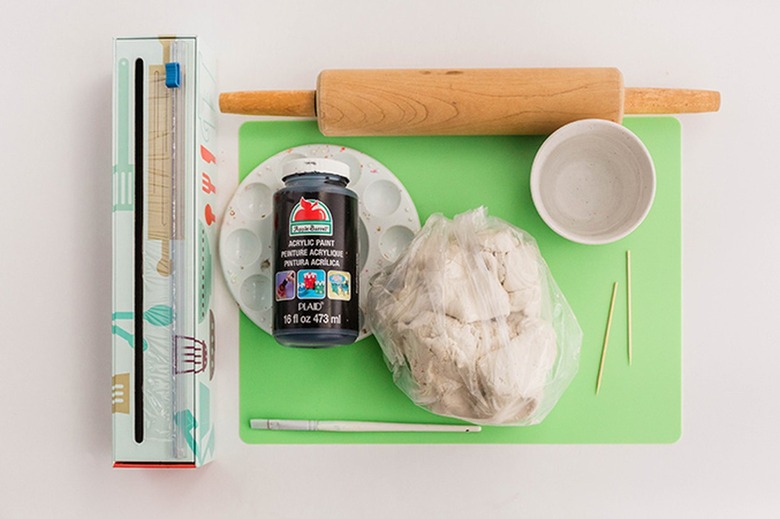
Things Needed
-
Toothpick or needle tool
-
Bowl of water
-
Plastic wrap
 Carrie Waller
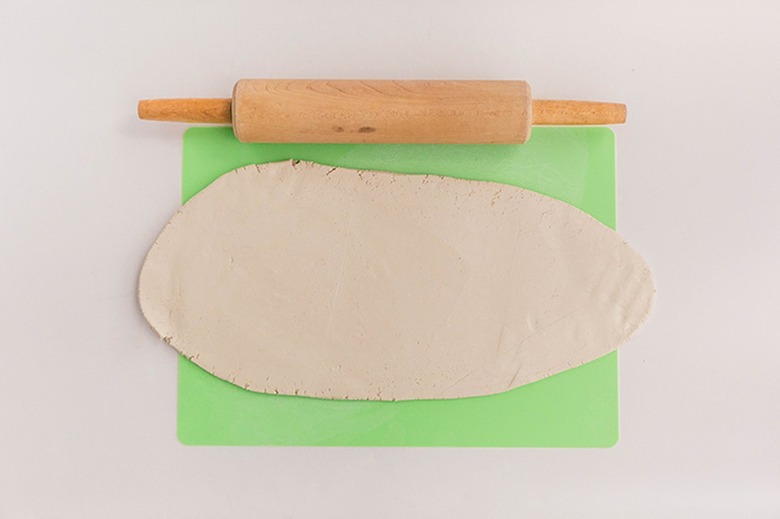
Step 1
Create a ball of clay that is roughly the size of a grapefruit. Use a rolling pin to flatten the ball of clay on a cutting board. You'll want it to be about 1/4-inch thick.
 Carrie Waller
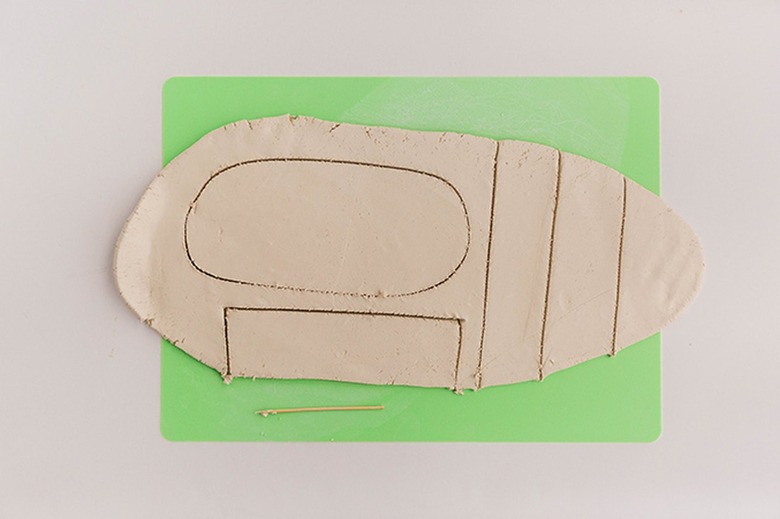
Step 2
Mark and cut out the individual shapes for your toothbrush holder using a toothpick or needle tool. You'll need an oval shape, about 6-inches-by-3-inches, and three 2-inch-by-4-inch strips.
 Carrie Waller
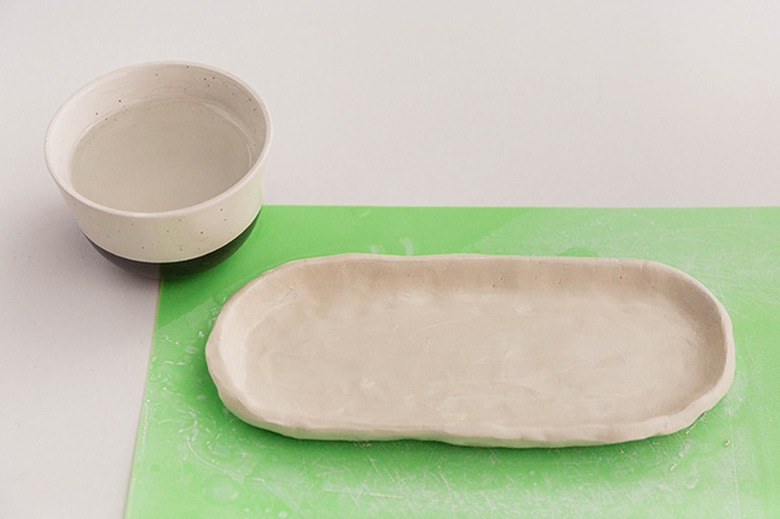
Step 3
Pinch the edges of the oval between your fingers, and gently curve the clay upwards to create a wall that goes all the way around, like a platter or bowl. Smooth the edges out by dipping your fingers in water and moving them over the wet clay. Don't overdo with the water, though, or else you'll be left with a big mess! Less is more.
 Carrie Waller
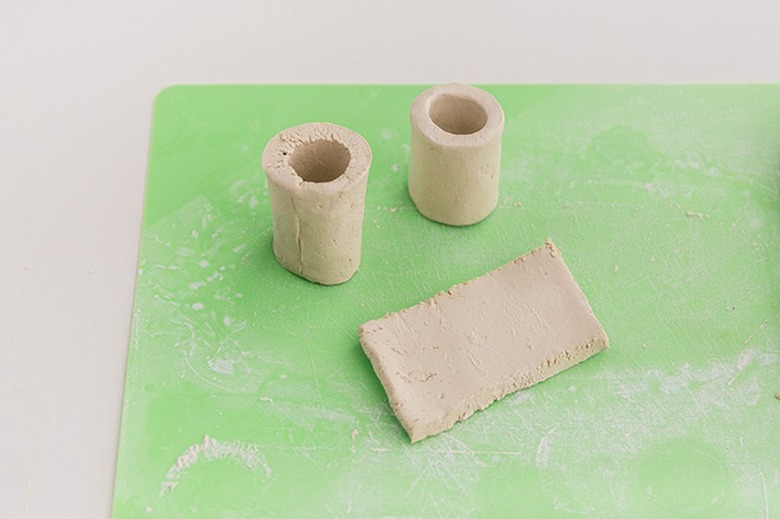
Step 4
Next, move on to the strips. Curve them around, one at a time, so that their short ends meet to create a cylinder. Gently push and rub the clay together to make the seam disappear. Use water again to smooth everything out.
 Carrie Waller
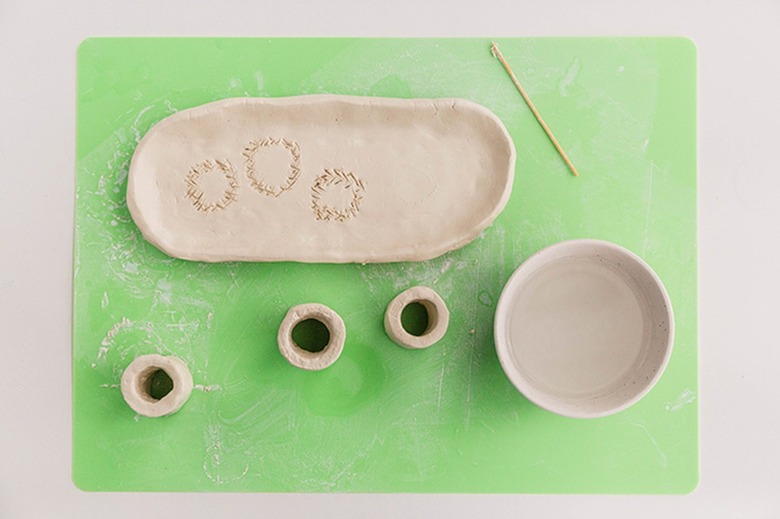
Step 5
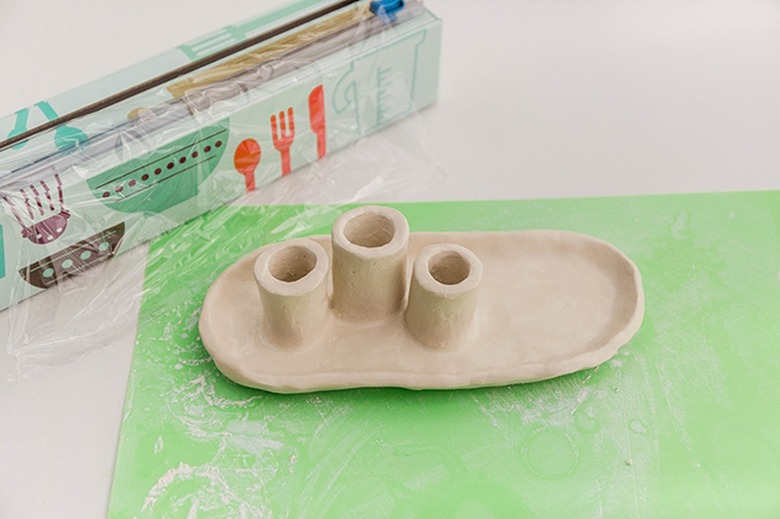
Decide where you want the cylinders to go — this will be what holds your toothbrushes upright. We put ours a little off to the side so we could use the other open half of the platter to hold jewelry. Use your toothpick or needle tool to create score marks on the clay platter roughly where you want the cylinders. These score or scratch marks will help the clay edges attach securely to one another. Gently press the clay cylinders in place, and smooth the clay seam between those and the platter with your fingertips to make it all one piece.
 Carrie Waller
Step 6
Smooth any remaining rough edges with your wet fingertips, and then lightly cover the clay with plastic wrap. The plastic wrap doesn't need to cover the toothbrush holder entirely. The plastic is just there to make sure the clay doesn't dry out too quickly and crack. Remove the plastic wrap after 24 hours, and then allow the clay to dry uncovered for another 48 to 72 hours.
 Carrie Waller
Step 7
Once the clay has completely dried out, paint it whatever color you'd like, spray it with waterproof sealant, and then you're ready to put your DIY toothbrush holder to work on your bathroom vanity or sink.
 Carrie Waller