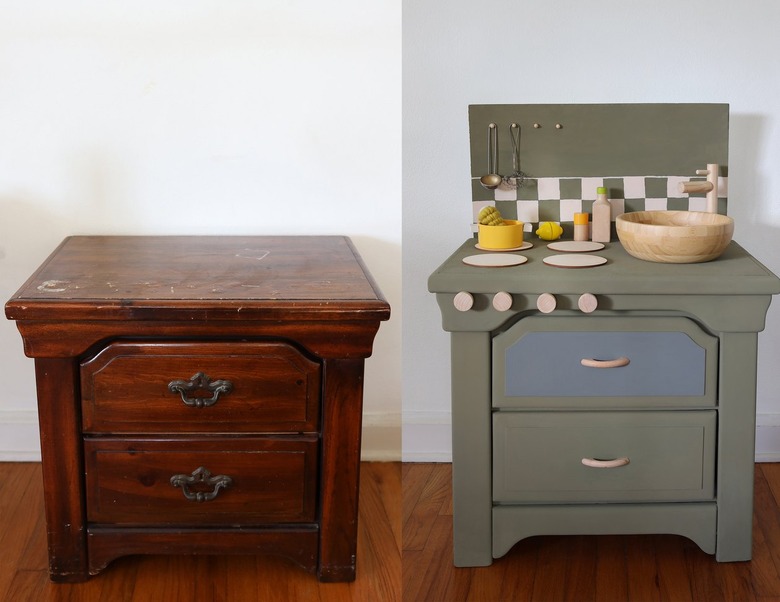
Turn A Nightstand Into A Cute Play Kitchen
We may receive a commission on purchases made from links.
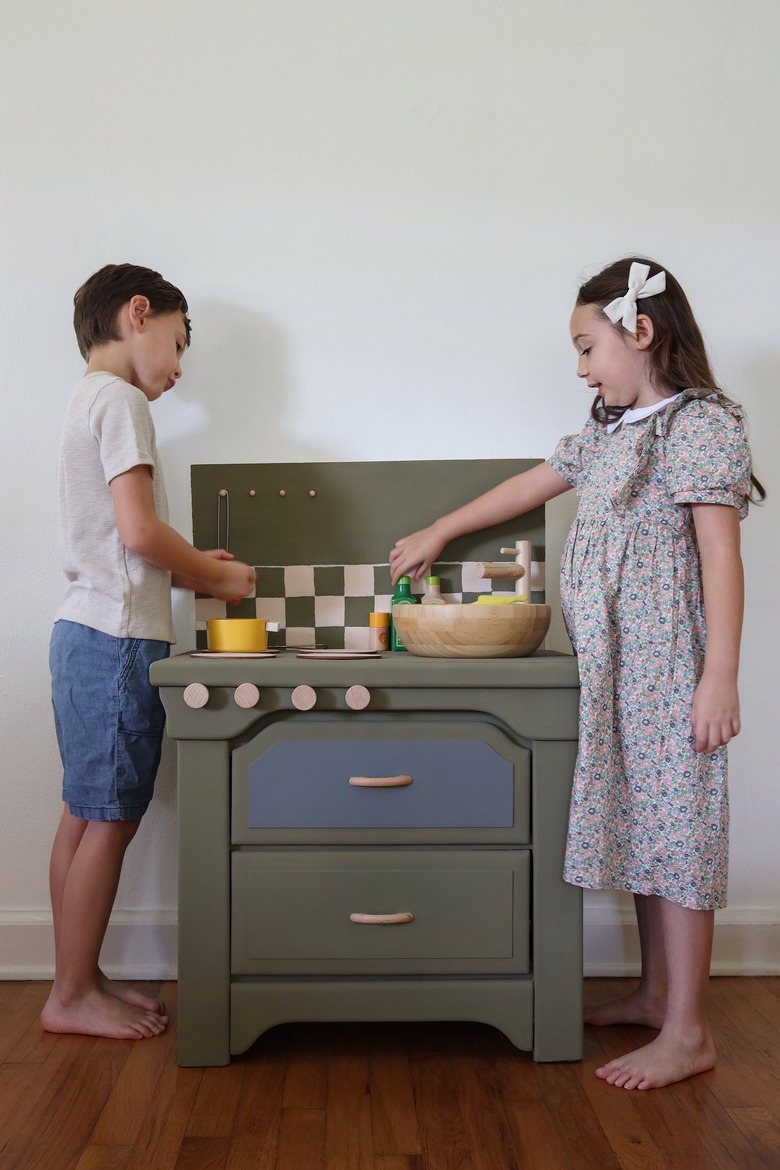
Creating a cute playroom or creative corner for your kids? With a bit of paint and accessories, you can easily transform an outdated or secondhand nightstand into an adorable play kitchen. Your little ones will love this because you can completely customize it to the suit their favorite colors and interests (you can even enlist them to help with the painting and gluing). Besides being a more budget-friendly option than buying a brand new toy kitchen, it's also a more sustainable one too!
 Trisha Sprouse
 Trisha Sprouse
Things Needed
-
Old nightstand
-
Cloth or paper towel
-
Paintbrush or roller
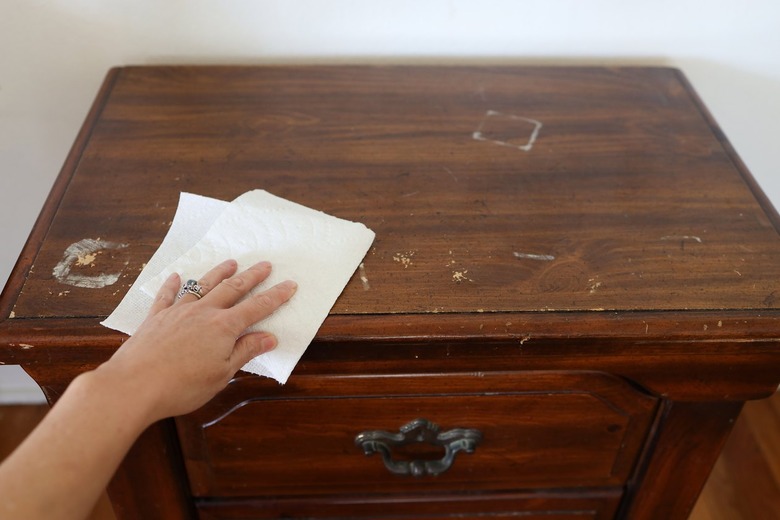
1. Clean the Nightstand
Wipe the entire nightstand thoroughly with a damp cloth or paper towel to remove any dust or grime. Allow it to dry completely. This will ensure better paint adhesion. If your surface has any major peeling or bubbling, you may need to sand those areas down before wiping it clean.
 Trisha Sprouse
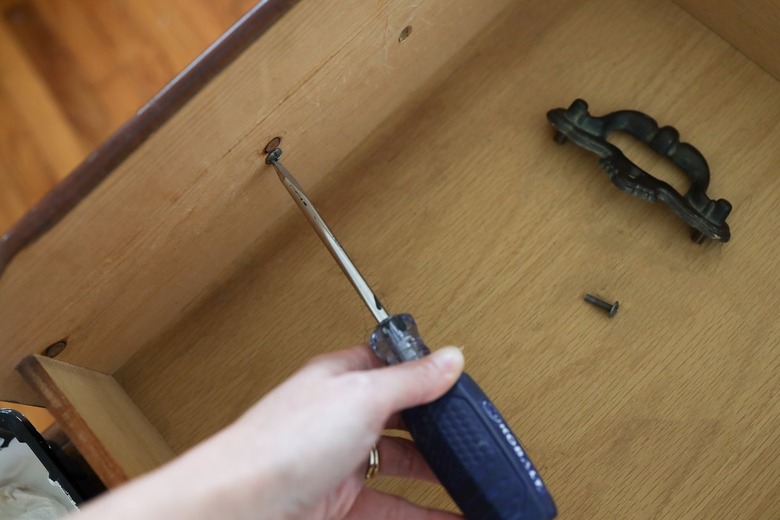
2. Remove the Hardware
Use a screwdriver to remove the existing drawer hardware. The screws should be located on the inside of the drawer.
 Trisha Sprouse
3. Fill the Hardware Holes
Push wood filler into the existing drawer holes until they are a bit over-filled, and then smooth it out with your finger or a paper towel. Allow the wood putty to dry for a couple of hours, and then sand it smooth so that it blends in with the surface of the drawer.
 Trisha Sprouse
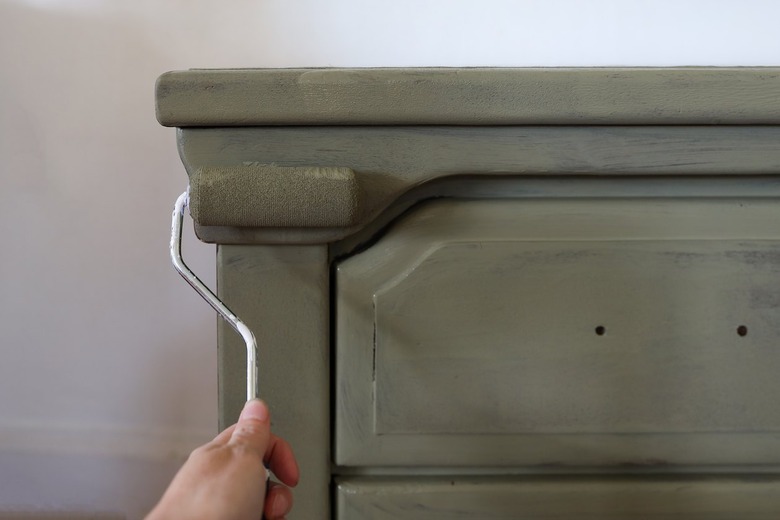
4. Paint the Nightstand
Use a paint brush or a small roller to paint the entire nightstand. You'll likely need to apply two to three coats for full coverage. We used a chalky-style paint so we wouldn't have to sand or prime the surface prior to painting. However, if you already have a latex or acrylic craft paint that you'd like to use, simply mix one tablespoon of baking powder with 1/2 cup of paint, and voila! You've just turned it into chalky-style paint!
 Trisha Sprouse
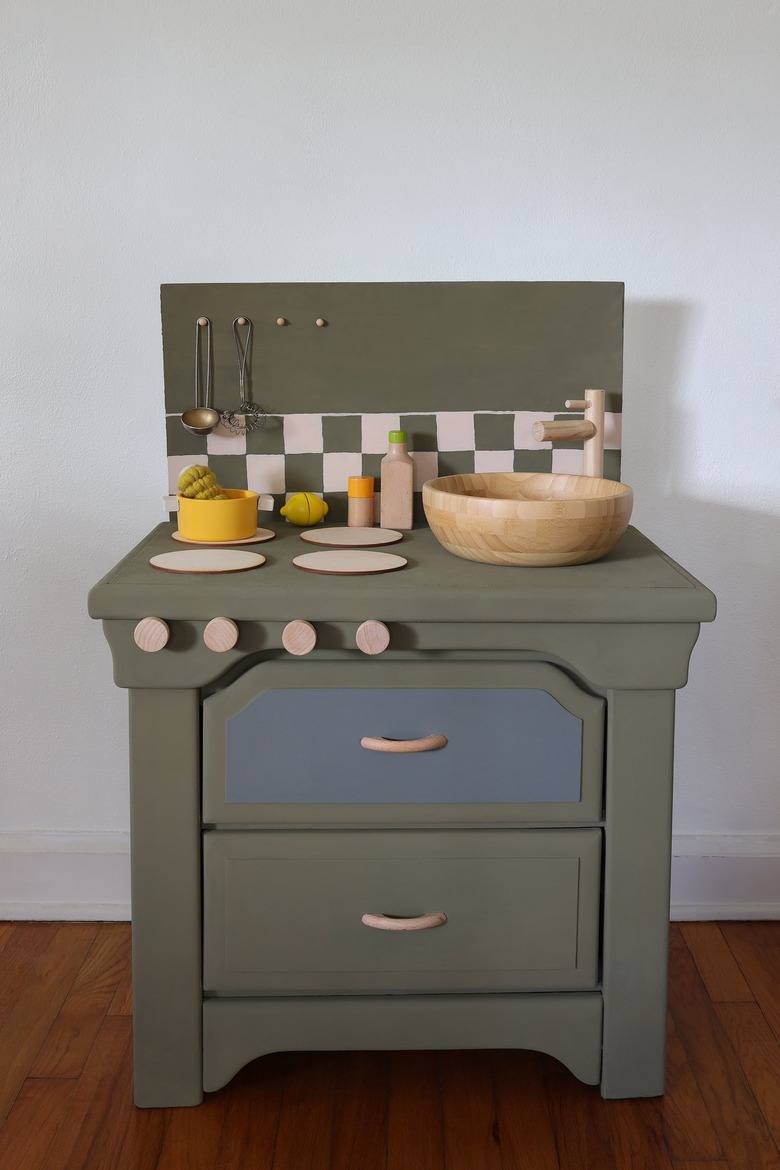
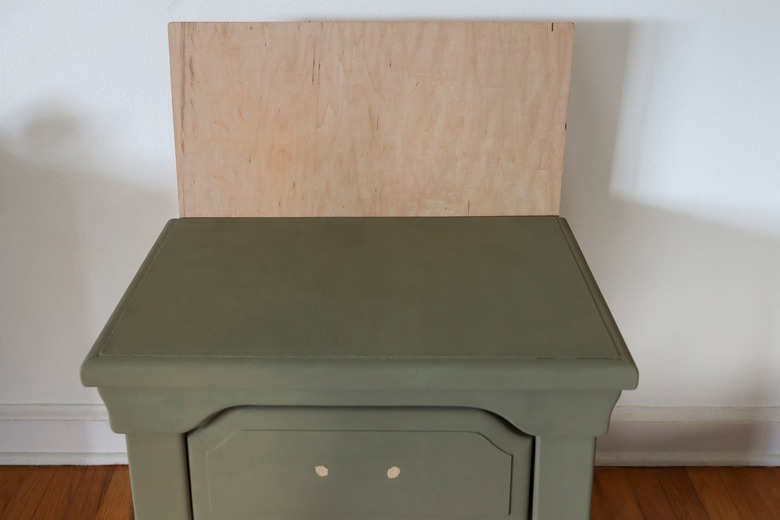
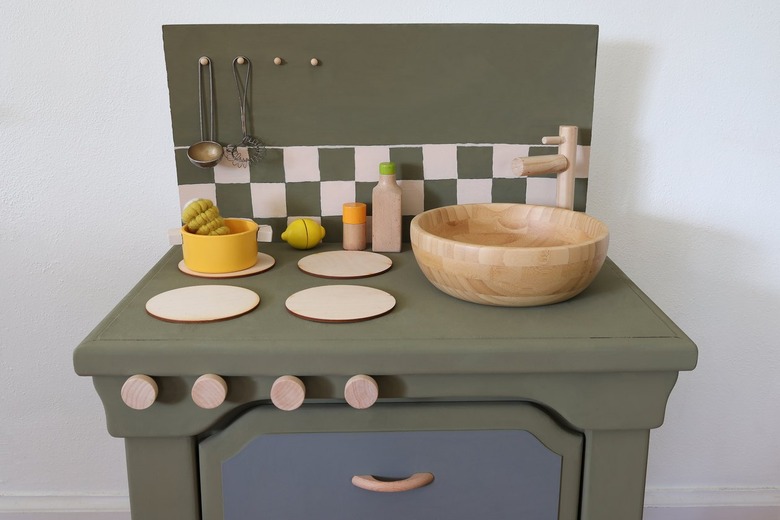
5. Attach the Backsplash
Place a plywood sheet on the back of the nightstand so that most of it sits above the surface to create a backsplash. Attach the bottom of the plywood to the backside of the nightstand with wood screws—five screws drilled across the bottom and two on each side.
 Trisha Sprouse
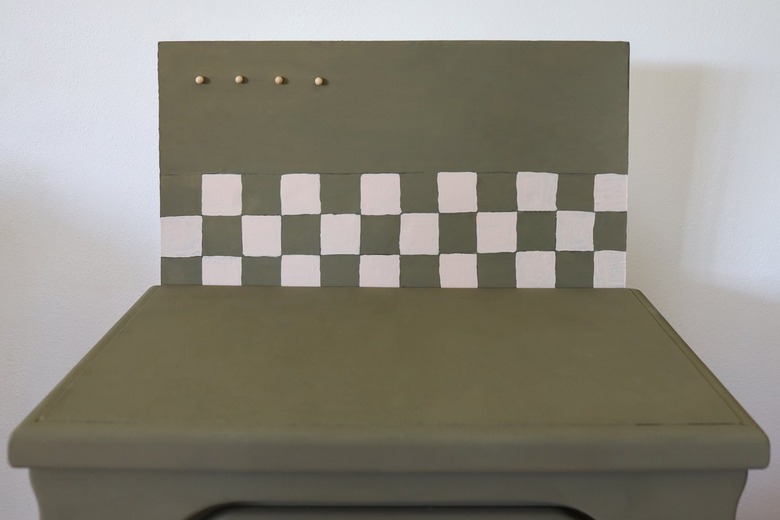
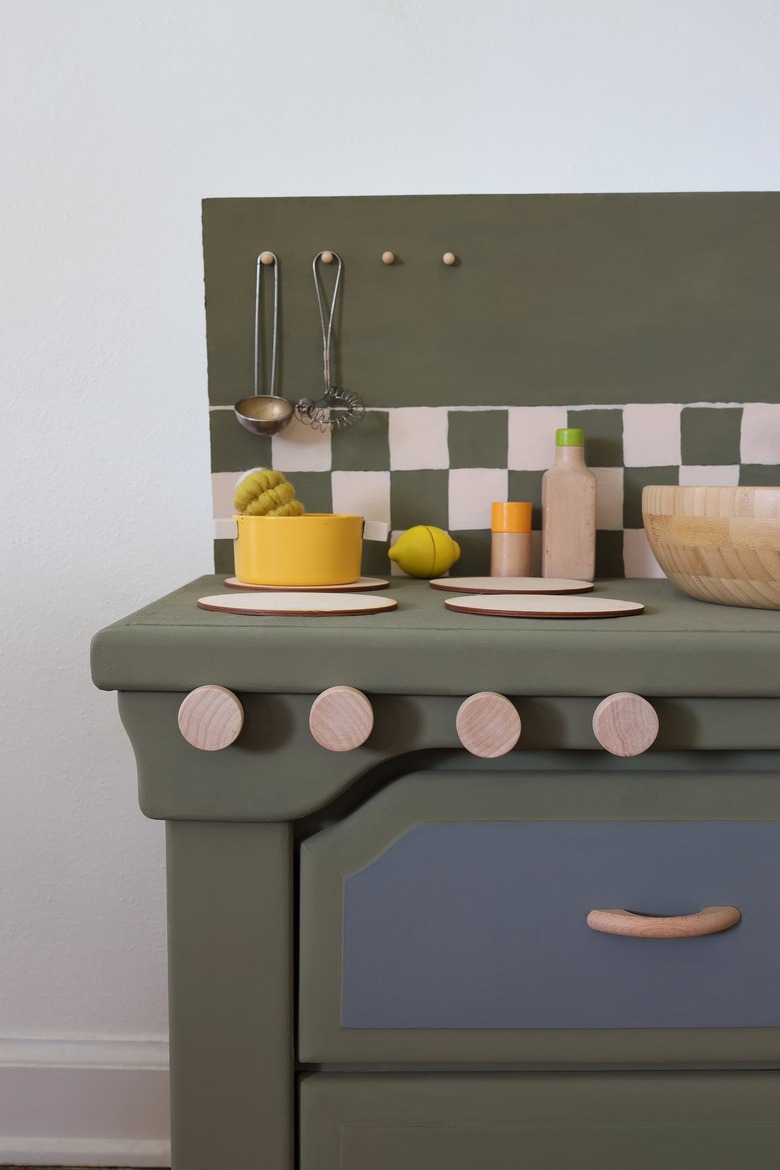
6. Paint the Backsplash
Paint the plywood to match the nightstand. We opted to create a small checkerboard pattern at the base for a touch of retro flair. We also glued four wooden beads near the top to act as hooks for hanging cooking utensils, cutting boards, and pot holders.
 Trisha Sprouse
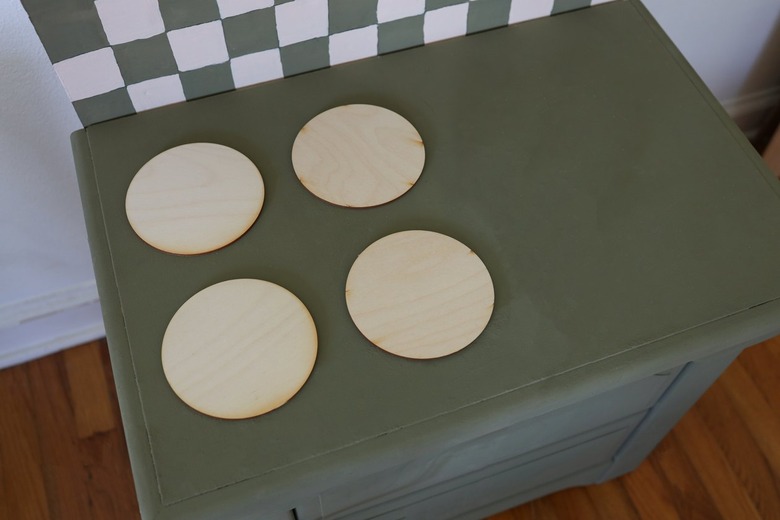
7. Attach the Stove Burners
To create the play stove, on one half of the nightstand's surface, glue four evenly-spaced wood circles with wood glue to create the stove burners.
 Trisha Sprouse
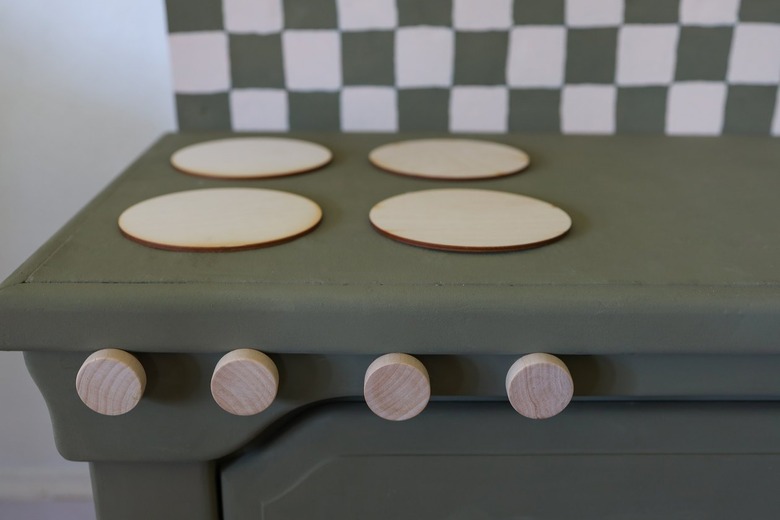
8. Attach the Stove Knobs
Glue four evenly-spaced wood knobs below the stove burners to create the stove knobs.
 Trisha Sprouse
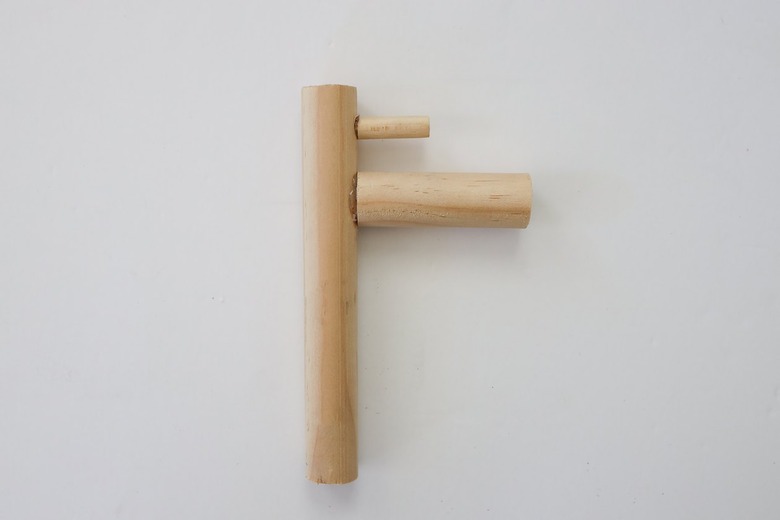
9. Make the Faucet
Use a saw to cut the 1-inch dowel into one 7 1/2-inch long piece and one 3-inch long piece, and cut the 3/16-inch dowel into one 1 1/2-inch long piece. Glue the shorter 1-inch dowel piece perpendicularly to the longer piece with wood glue to create the spout, and then glue the 3/16-inch dowel piece directly above it to create the faucet handle.
 Trisha Sprouse
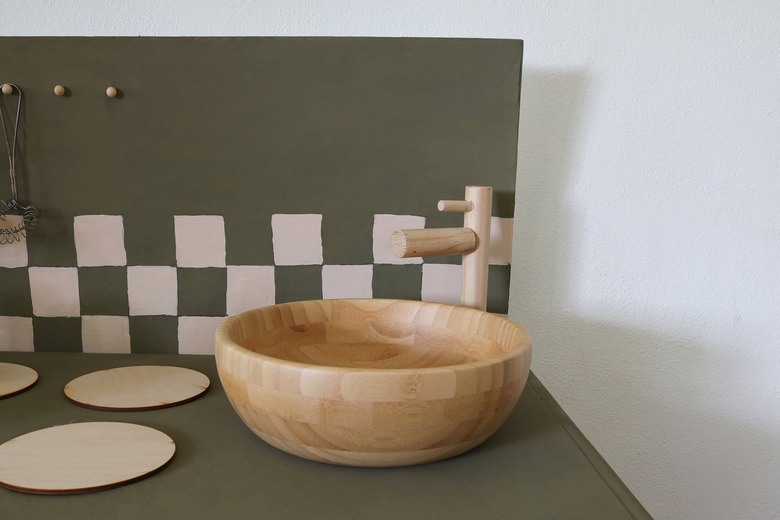
10. Attach the Sink
Glue the wood bowl on the other side of the nightstand's surface, and then position the faucet behind the bowl so that the spout is over the bowl. You may need to hold the faucet upright for a bit (or prop it up) until the glue is tacky enough to hold it.
 Trisha Sprouse
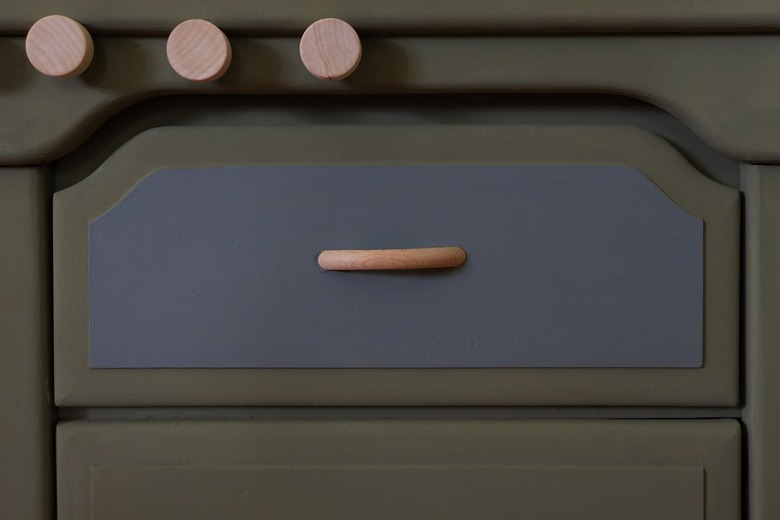
11. Create the Oven
Paint the inner portion of the top drawer with gray paint to create the look of oven glass, and then attach the new wood handles.
 Trisha Sprouse
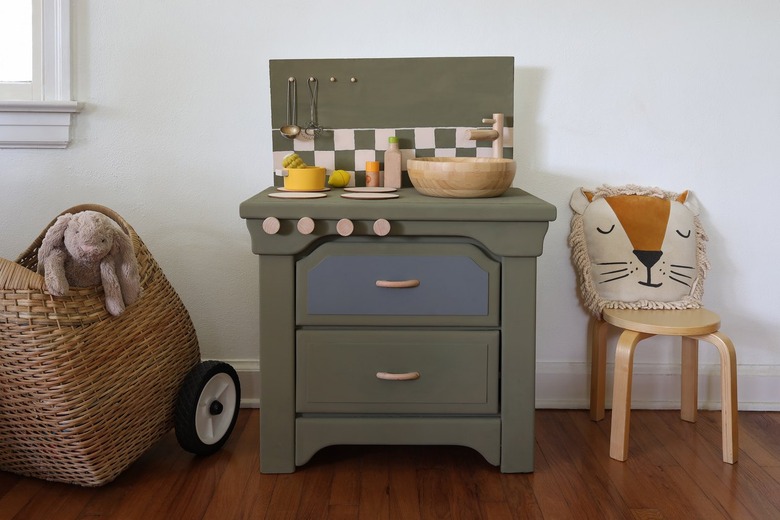
Once all of the wood glue has dried overnight, the new DIY play kitchen is ready for action! Just add some pretend play food and let the "cooking" begin!
 Trisha Sprouse
 Trisha Sprouse
 Trisha Sprouse