Frankenstein Two IKEA Products To Create This Wall Organizer
We may receive a commission on purchases made from links.
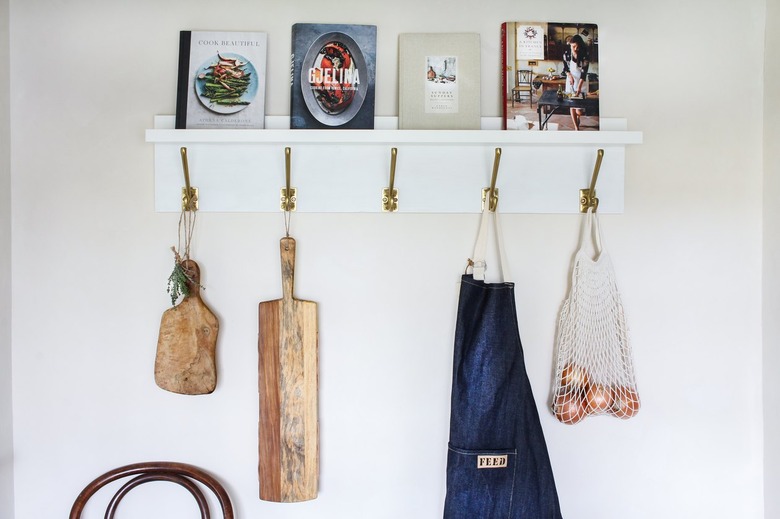
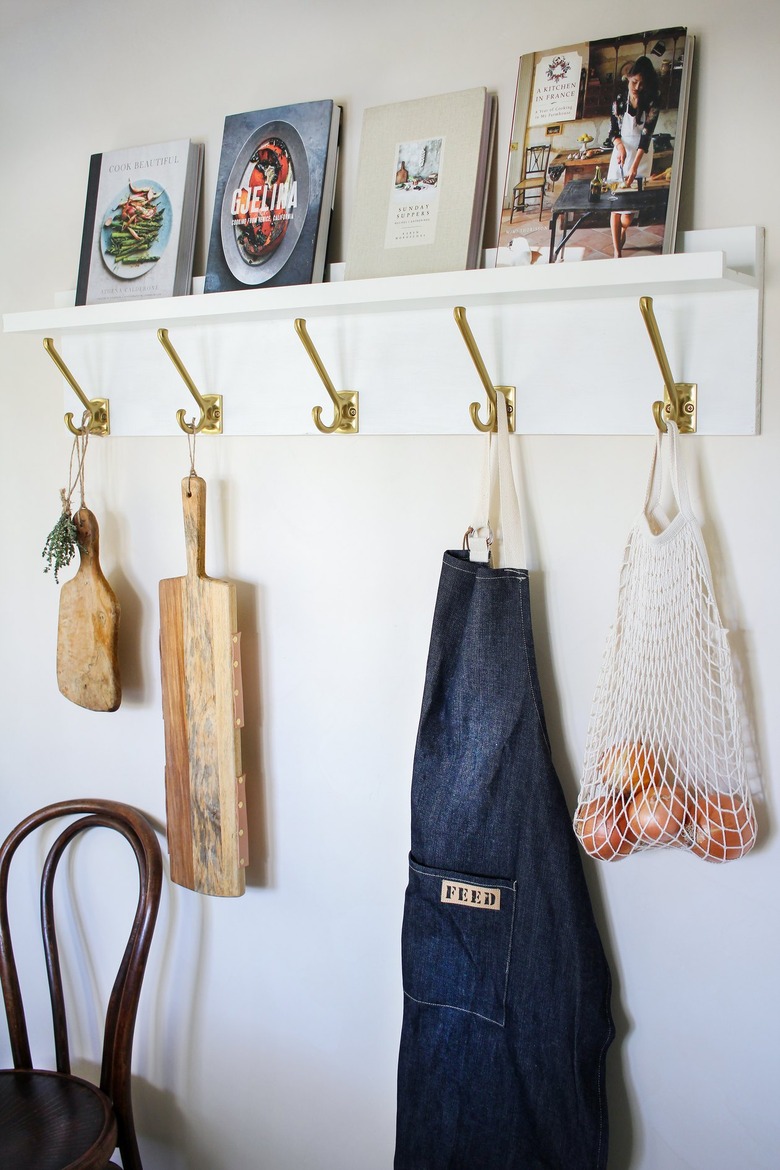
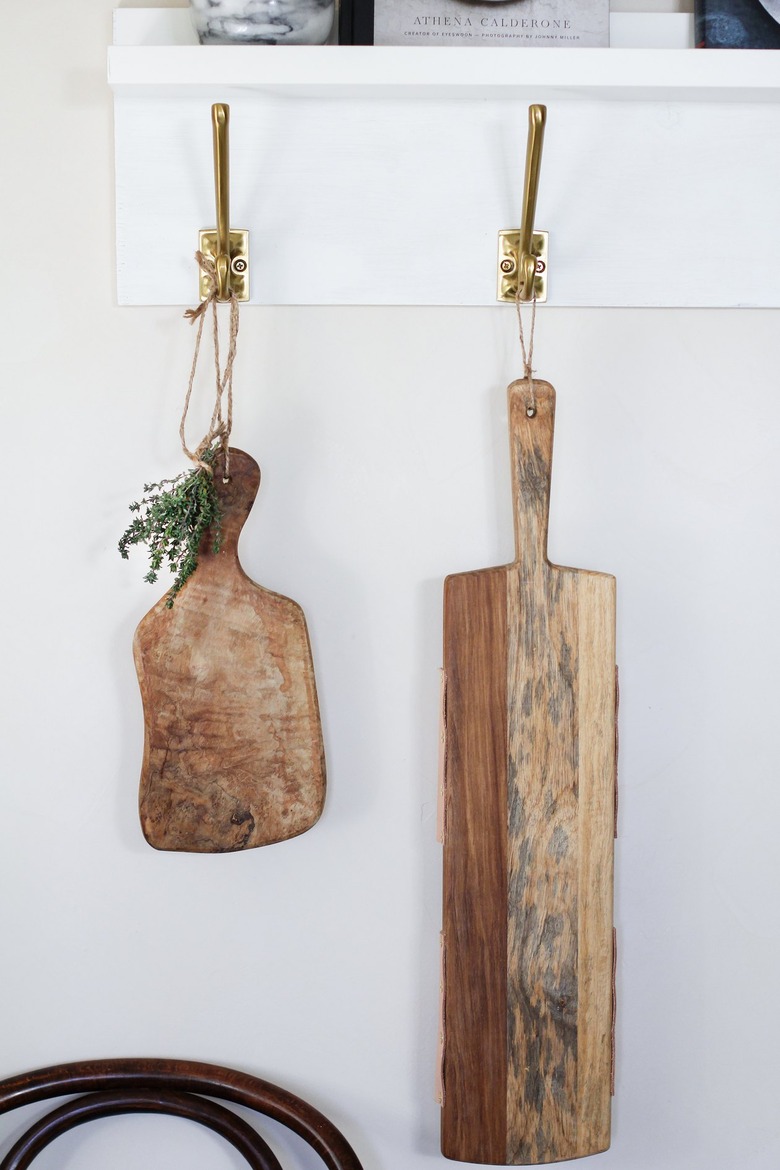
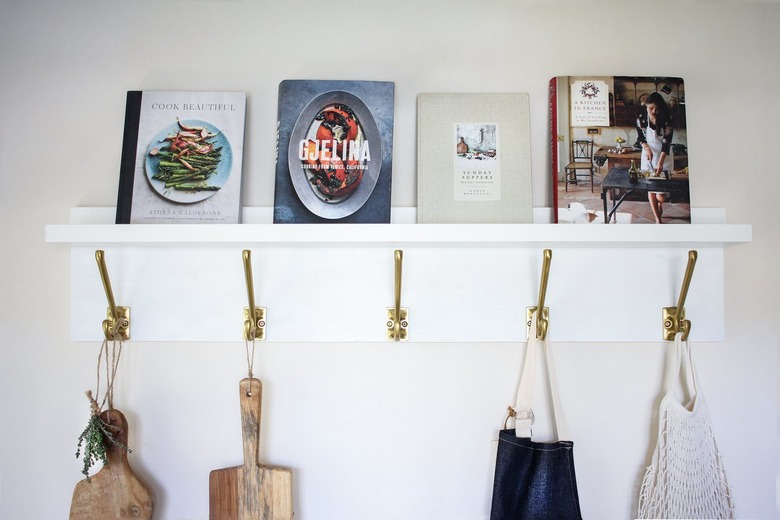
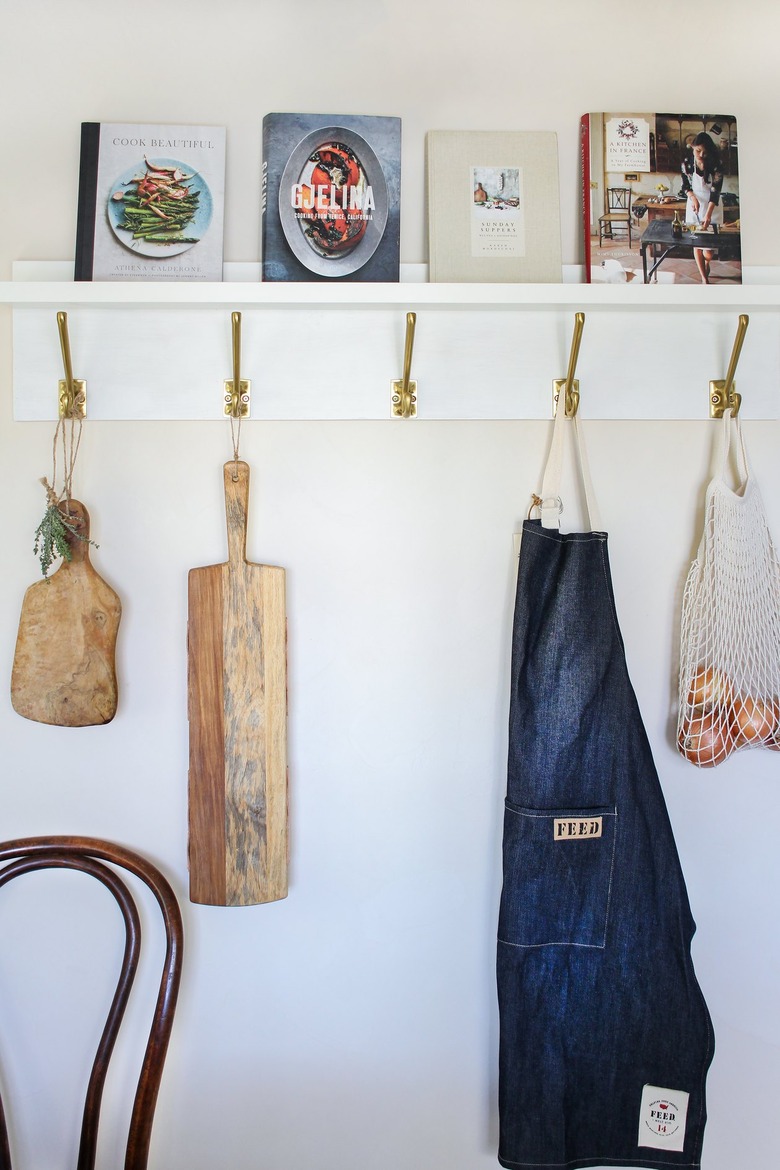
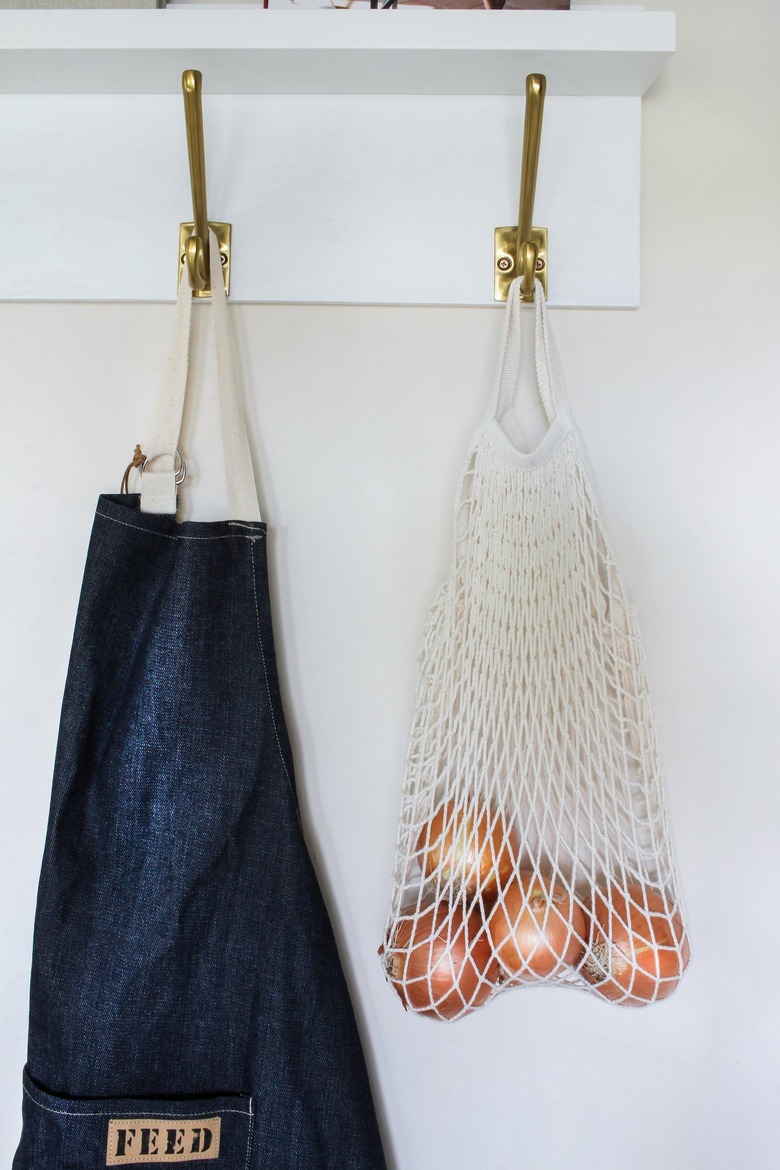
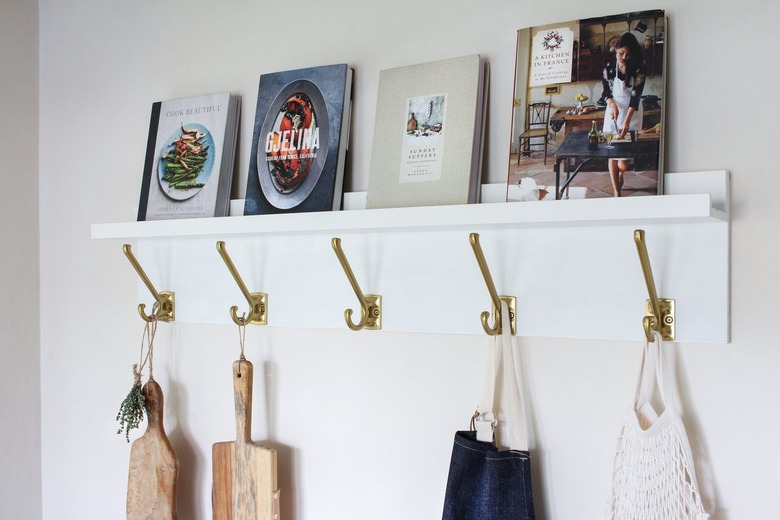
If you're short on storage space in the kitchen or struggle with cluttered counters, a wall organizer is your best friend. And you'll be happy to know you only need two simple (and very affordable) items from IKEA to whip up this DIY version: the Mosslanda picture ledge and Kampig wall hooks. The ledge imparts the look and feel of a beautiful gallery wall, while the hooks (more utilitarian in function), serve as vertical storage for any number of kitchen tools, cutting boards, produce, or even pots and pans. Together, they create a functional yet eye-pleasing #shelfie that will seriously up your organizational game.
 Trisha Sprouse for Hunker
Things Needed
-
Kampig hooks, ( 5 )
-
1-inch-by-10-inch wood board
-
Medium-grit sandpaper
-
Paintbrush
-
Clear topcoat sealer (optional)
-
Power drill
-
Screwdriver
-
3/4-inch brass wood screws, ( 10 )
-
2 1/2-inch brass wood screws, ( 3 )
-
Drywall anchors (optional)
 Trisha Sprouse for Hunker
Step 1
Step 1
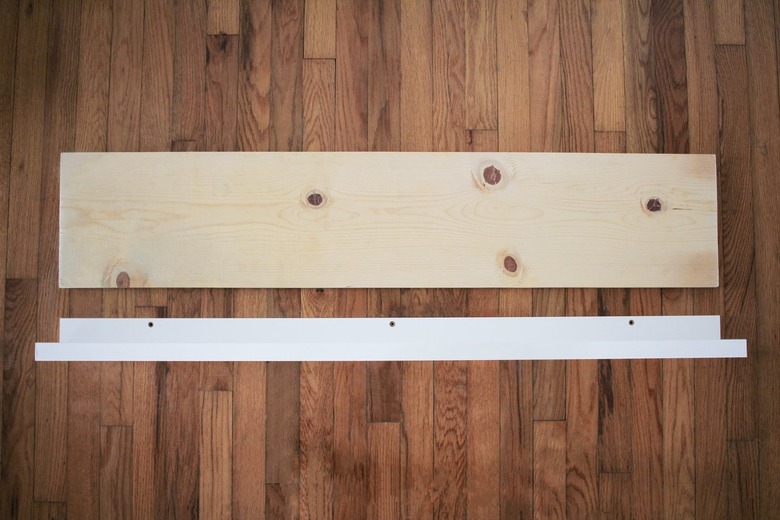
Have your hardware store cut a 1-inch-by-10-inch wood board to 45 1/4 inches long, which is the same length as the MOSSLANDA picture ledge.
 Trisha Sprouse for Hunker
Step 2
Step 2
Sand around the edges of the board to smooth out any rough areas, and also sand the top surface to prepare it for painting. Wipe away any residual sanding dust.
 Trisha Sprouse for Hunker
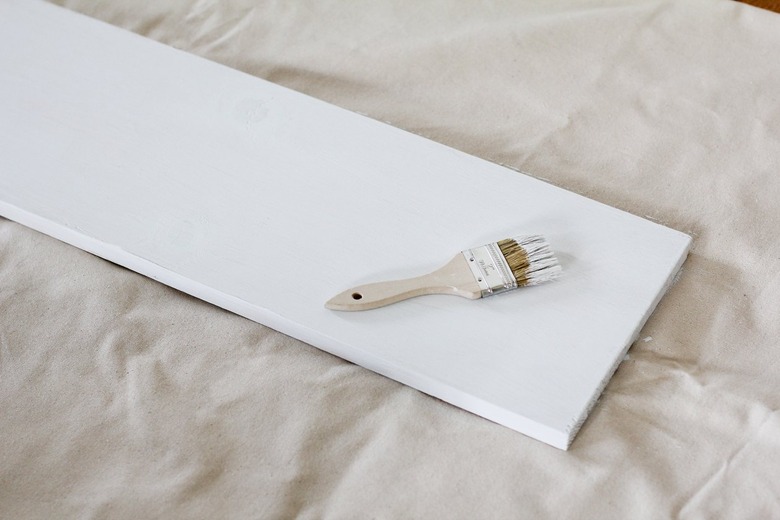
Step 3
Step 3
Paint the top and sides of the board with white paint to match the picture ledge. I used this white chalk paint, which wasn't an exact match, but close enough. You'll likely need to paint at least two coats, letting the first coat dry completely before applying the second one.
Optional: Once the paint has dried, you can topcoat it with a clear protective sealer (like this one or this one), but it isn't absolutely necessary since it won't be a high-traffic surface.
 Trisha Sprouse for Hunker
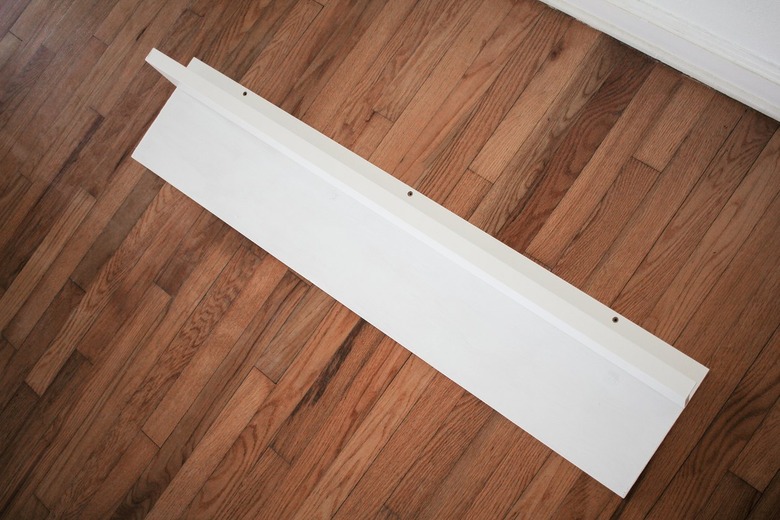
Step 4
Step 4
Place the MOSSLANDA picture ledge on top of the painted wood board, and line up the tops of both items exactly.
 Trisha Sprouse for Hunker
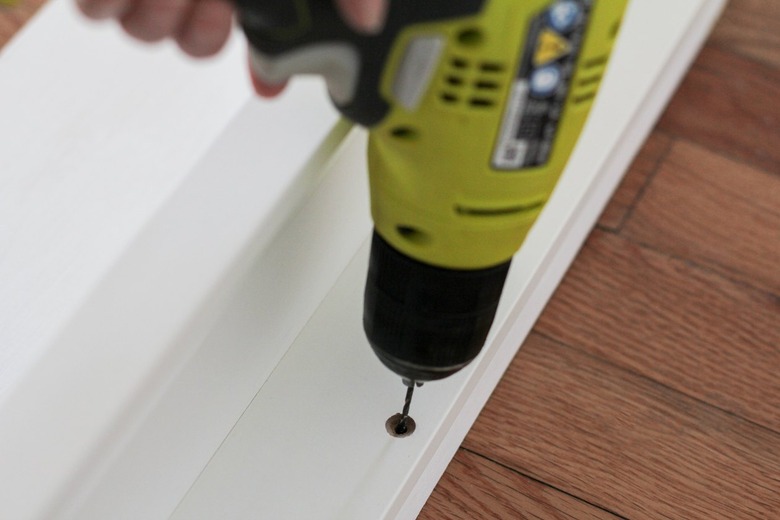
Use a power drill to drill pilot holes through the three holes on the picture ledge all the way through the wood board. (You'll use these holes to attach both pieces to the wall later.)
 Trisha Sprouse for Hunker
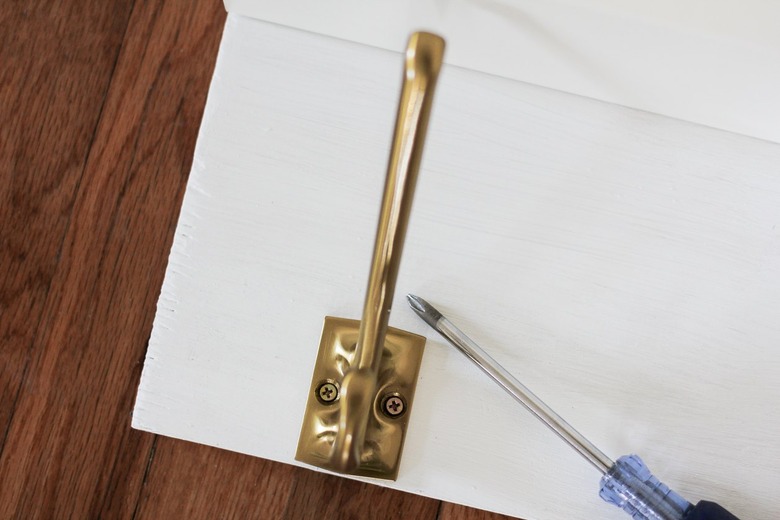
Step 5
Step 5
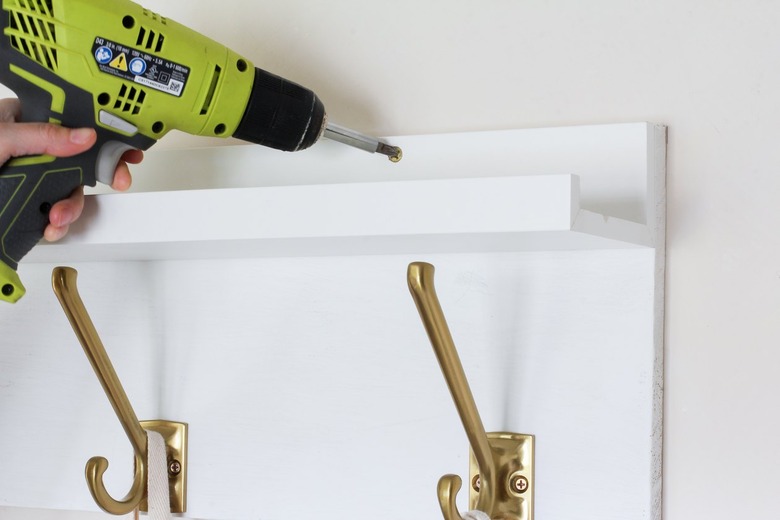
Arrange the KAMPIG hooks along the bottom of the board, spacing them out evenly.
 Trisha Sprouse for Hunker
Once you finalize the arrangement of the hooks, pre-drill pilot holes through the holes in each hook, and then secure them in place with a screwdriver and 3/4-inch wood screws. (I used brass screws to match the hooks.)
 Trisha Sprouse for Hunker
Step 6
Step 6
You'll need a helper to assist you with attaching the kitchen organizer to the wall, and you'll need to use screws long enough to clear the thickness of both the board and the picture ledge. I used 2 1/2-inch wood screws (again, brass, to keep the look cohesive).
 Trisha Sprouse for Hunker
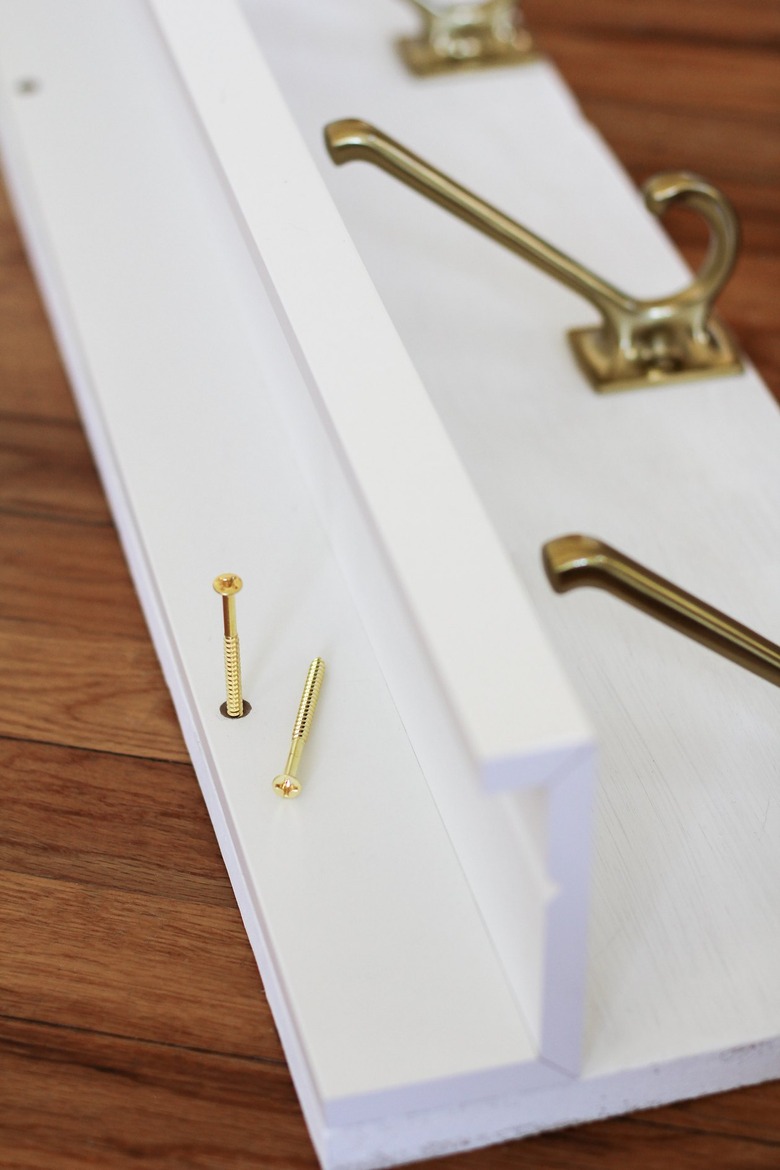
First hold the wood board against the wall and then line up the three holes on the picture ledge with the three holes on the board. Drill screws through the holes in both pieces and into the wall. It's best to drill the screws into studs in the wall, but you can use drywall anchors if there aren't any studs present.
 Trisha Sprouse for Hunker
Now you're all set to show off your beautiful cookbooks, cutting boards, and favorite kitchen accessories. You could even use the ledge to display a mix of bowls, artwork, or other supplies. Whatever you choose to display, your formerly under-utilized wall space is sure to be transformed into a gorgeous design element in your kitchen.
 Trisha Sprouse for Hunker
 Trisha Sprouse for Hunker
 Trisha Sprouse for Hunker
 Trisha Sprouse for Hunker