Wood Backsplash Ideas & Installation Guide
When it comes to home decor, a wood backsplash can bring a nice touch of organic warmth to any kitchen outfitted with metal appliances and synthetic materials such as vinyl and laminate. It also provides a great counterpoint for stone countertops and monochromatic cabinets. And there are multiple ways for homeowners to bring this design idea into the cook space, whether they choose beadboard, plyboard wood planks, recycled wood, shiplap siding, or even hardwood flooring for the backsplash. If you go the less traditional flooring route, fear not: The tongue-and-groove boards are great for durability, easy to install on the walls, and structurally stable.
There are a few cons to this material, though. Wood is naturally porous and soaks up liquids, and it's flammable. However, as long as you don't apply this backsplash behind the stove and seal the wood properly to cut down the porosity, you're good to go.
28 Wood Backsplash Ideas
28 Wood Backsplash Ideas
You've decided to go with a wood backsplash in your kitchen. But what kind of wood and which style is best? We did some hunting and found 29 wood backsplash design ideas to get you inspired. From farmhouse style to midcentury modern, take a look and start making that mood board.
1. Try a bleached look.
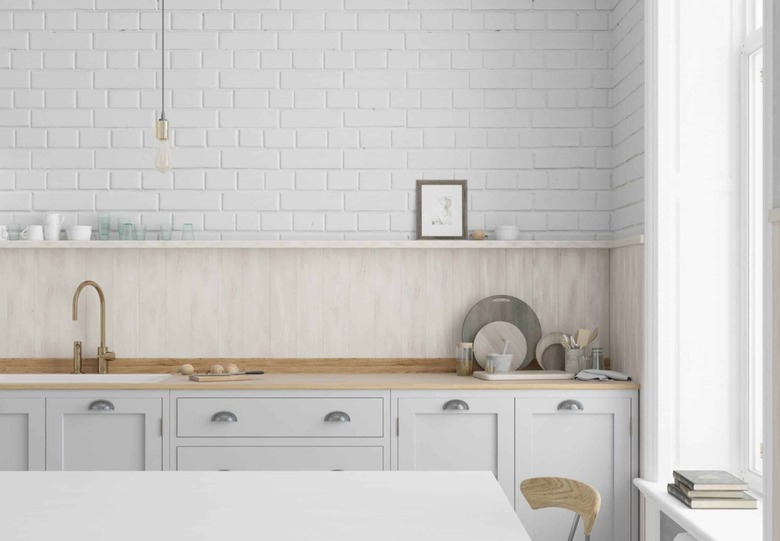 Kitchen Infinity
This look we spotted on Kitchen Infinity is super soothing, right? The white tones in the entire kitchen — check out those beautifully painted bricks — are accented perfectly with the super light stain on the striking wood backsplash.
2. Get into a cozy cabin feel.
 Sanford Creative
Install wood paneling in a natural finish that matches the kitchen cabinets if you want a cook space that feels like a cozy cabin all year long.
3. Go all the way with gray.
 Heidi Caillier Design
This elegant kitchen design from Heidi Caillier keeps things simple with the same soft gray color scheme on both the cabinets and wood backsplash. We're loving how that brass faucet finishes things off with a bit of glam.
4. Make it feel modern but farmhouse.
 The Harper House
The modern farmhouse trend doesn't seem to be going anywhere anytime soon. But instead of revamping your entire cook space to get this look, simply bring in horizontal shiplap for a subtle touch of rustic charm that will look just as good on your kitchen walls as it does in this space from The Harper House.
5. Keep it light and bright.
 Stephen Paul for Hunker
Keep things light. The simplicity of bright wood counters and matching backsplashes creates a whole midcentury look we can really get behind. The effect is timeless.
6. Try installing panels on an angle.
 Stefan Suchanec for Rory Creative
Want boho vibes? Peep how this kitchen was reworked from a simple space into something groovy. Installing the wood panels diagonally adds depth and feels organic.
7. Keep it low.
 Describe the Fauna
A backsplash doesn't have to reach all the way up to the ceiling to be impactful. This simple wood look from Describe the Fauna does the job and is super chic. Done and done.
8. Pick a cheery paint color.
 Rickett & Sones
We dare you not to smile when looking at this charming retro kitchen from Rickett & Sones. The beadboard walls are literally the color of sunshine, which looks fantastic with the dark wood backsplash. Go this route if you want a bit of brightness in your cook space.
9. Make things moody with dark wood and light green.
 Heidi Caillier Design
Here's another beautiful look from Heidi Caillier. This time she pairs soft sage green cabinets and a wood backsplash with a rich wood counter for a moody look that you can easily recreate at home. Somehow this traditional space feels very on-trend.
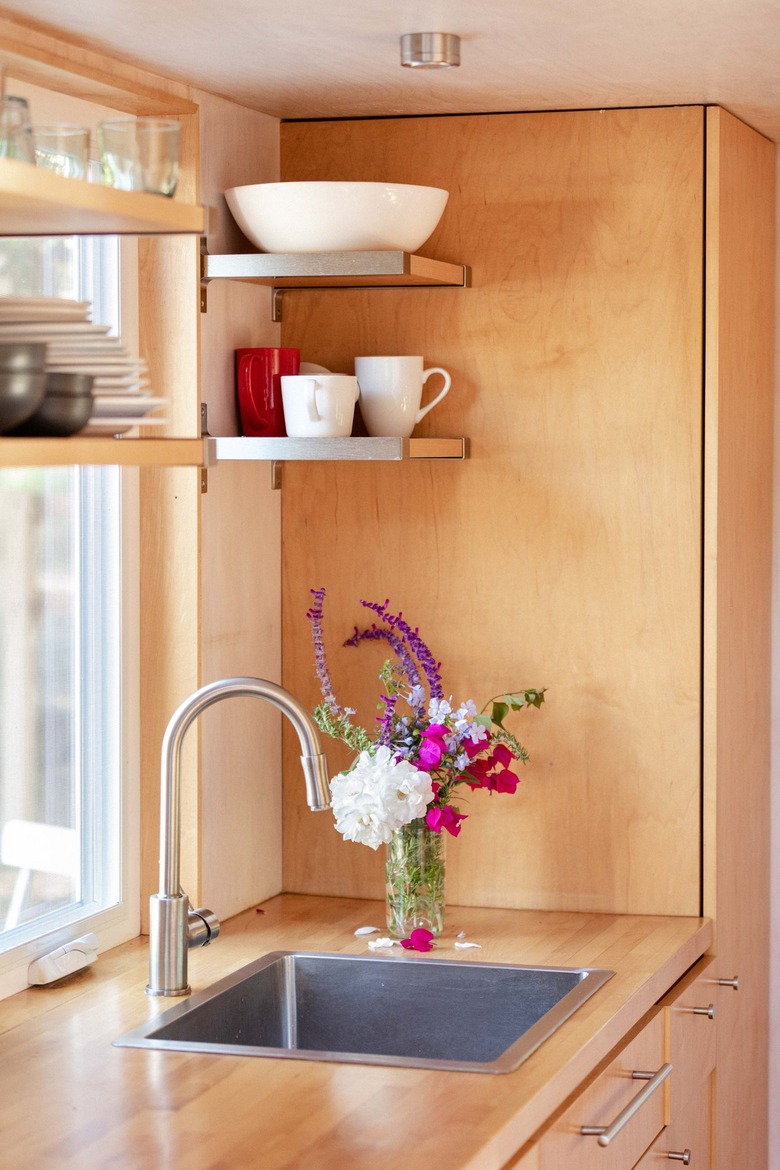
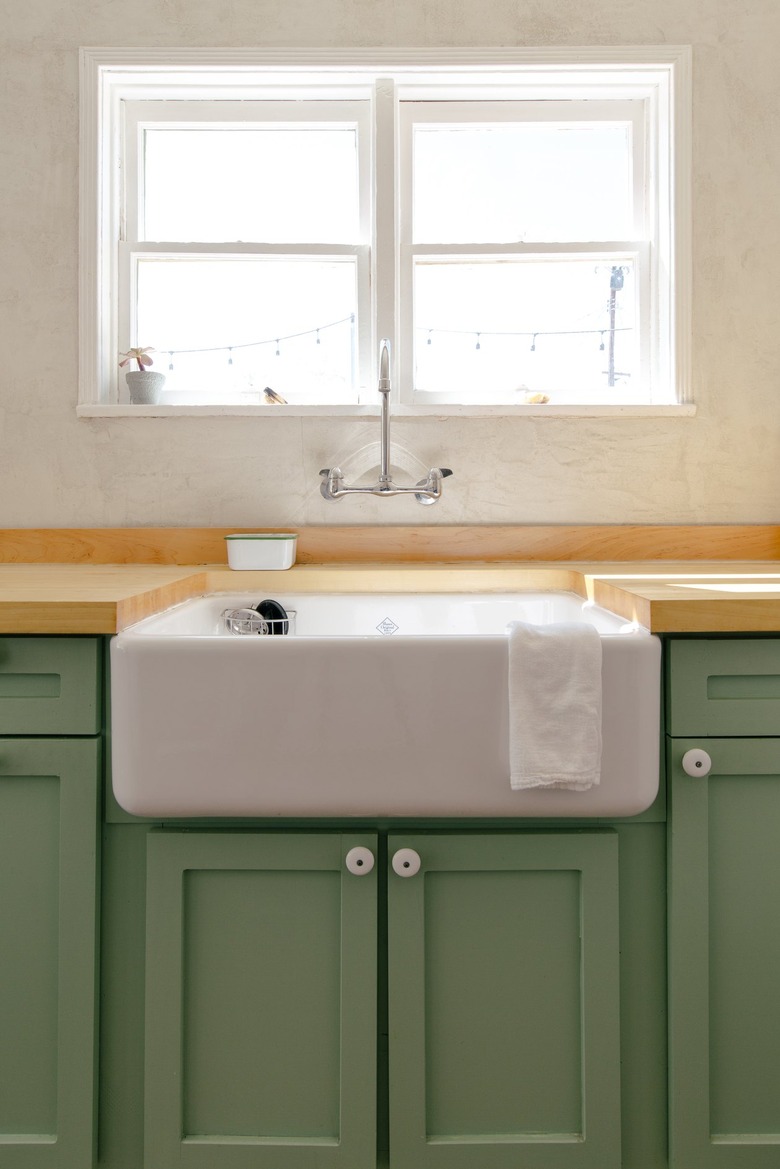
10. Make a moment with one wall only.
 Uncommon Projects
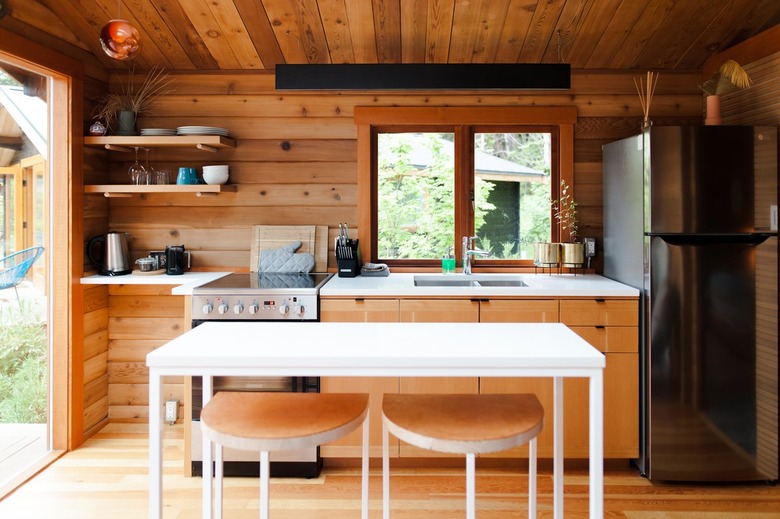
This look from Uncommon Projects features a one-wall wood backsplash in a natural finish inside a nook around the sink. We love the open shelves with a matching finish that work to elevate the entire space.
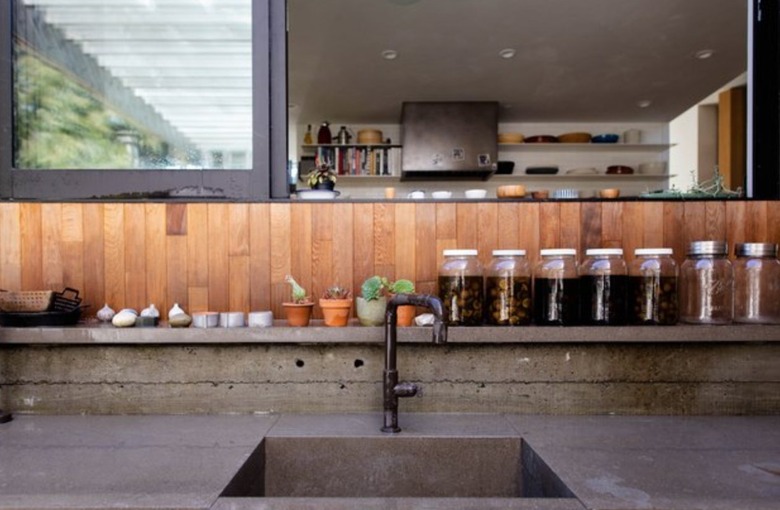
11. Add some accent lighting to show off your backsplash.
Codi Ann Backman
A concrete counter is accompanied by wood panels to finish off this gorgeous industrial kitchen. The use of accent lighting helps showcase the natural finish of the backsplash.
12. Set sail with a nautical look.
 Chango Co
This bright open kitchen from Chango & Co. is giving us modern nautical vibes with its navy blue island and white vertical board and batten backsplash. It's a cheery space where we'd feel very happy about cooking a meal for friends.
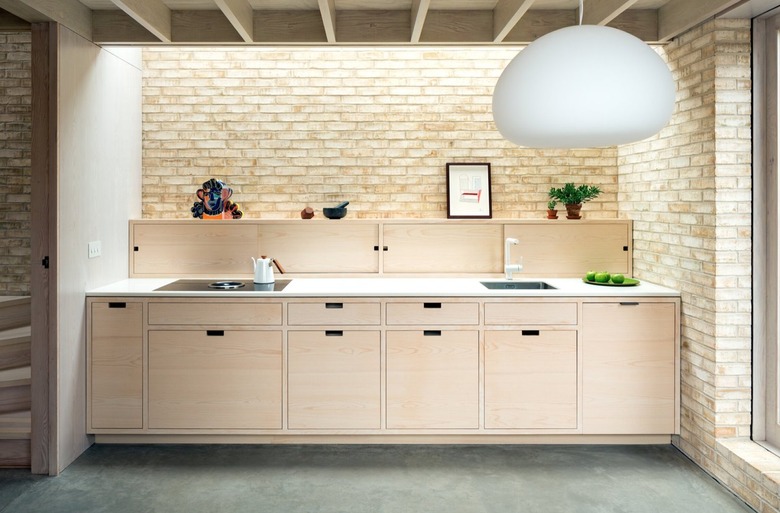
13. Go against the grain with some cork.
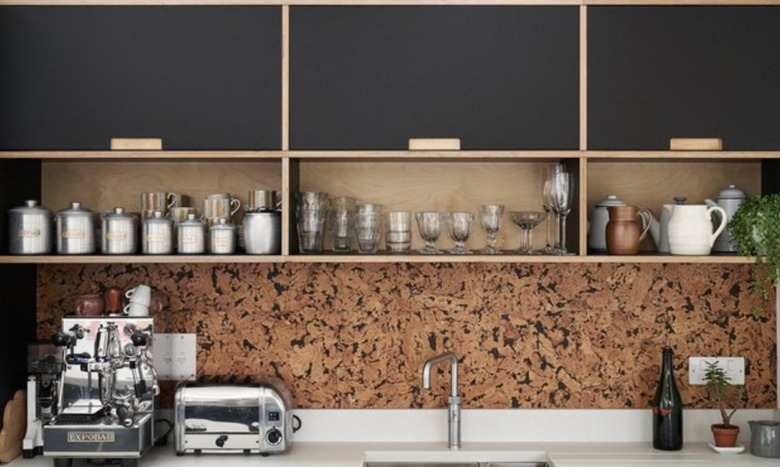 Plykea
With all this talk about wood backsplashes, we thought this cork option by Plykea was a lovely idea, too. Although cork is made from the bark of a cork tree and isn't considered technical wood per se, we still love how it adds texture and dimension to a modern cook space.
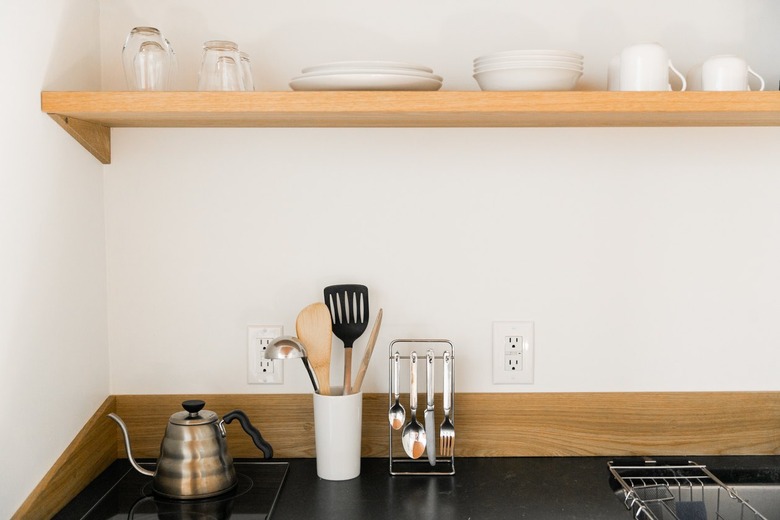
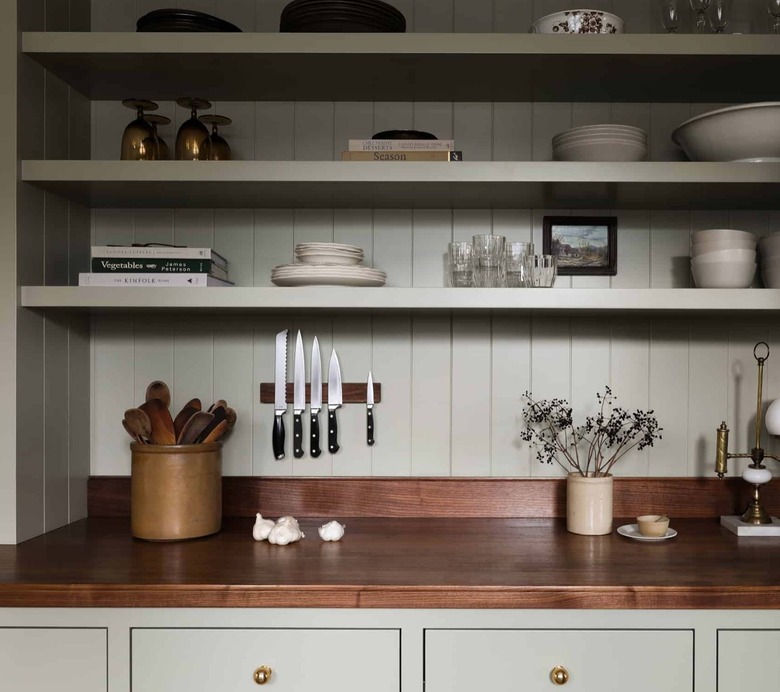
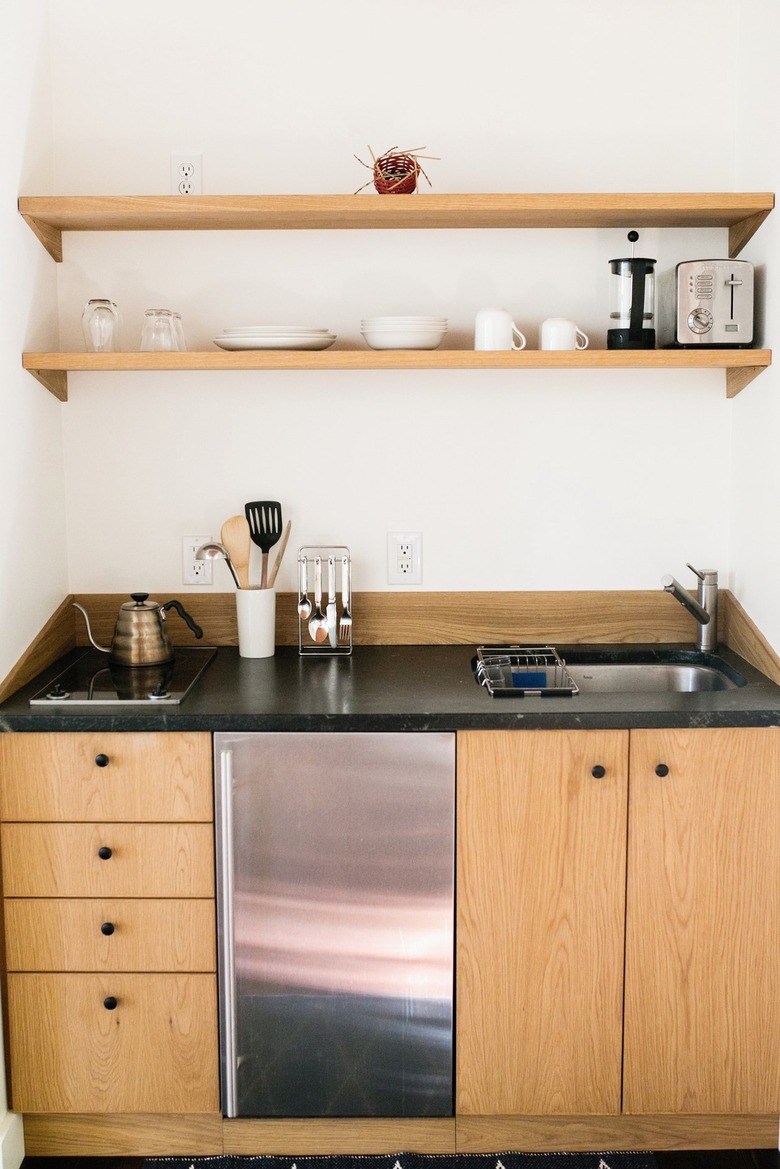
14. Use your backsplash as a shelf, too.
 Melanie Rieders for Hunker
A backsplash functions as a protective shield in many ways, but why not let it work as a shelf and storage, too? We're loving this wood ledge look that creates the perfect spot for spices and more.
15. Don't stop at the ceiling.
 Gem Cabinets
We've seen backsplashes that are pretty tall. But we recommend carrying your wood all the way onto the ceiling. This reclaimed look from Gem Cabinets strikes the perfect balance in a modern kitchen.
16. Bring in a bit of the outdoors.
 Paul Anderson for Hunker
Keep things really rustic in your kitchen by going with a creative backsplash that's made from simple wood panels hung vertically and left unpainted. Because, if you're really into the great outdoors, why not bring them inside?
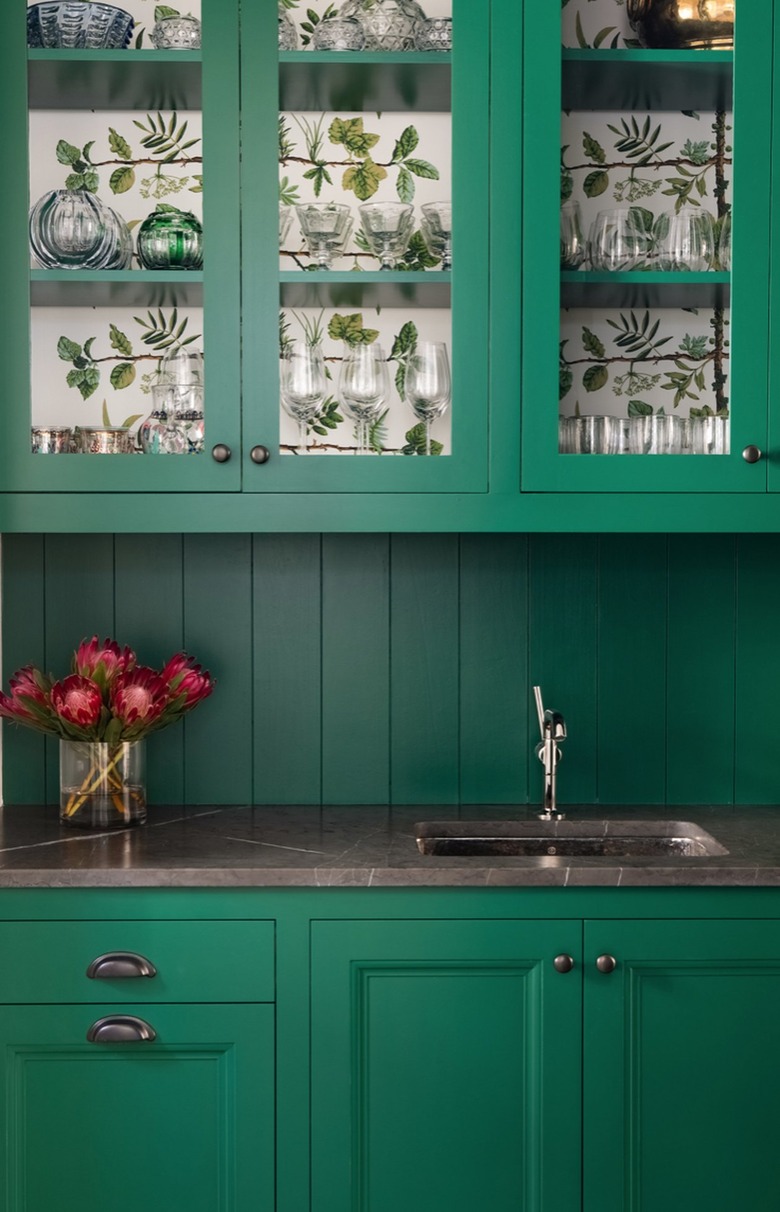
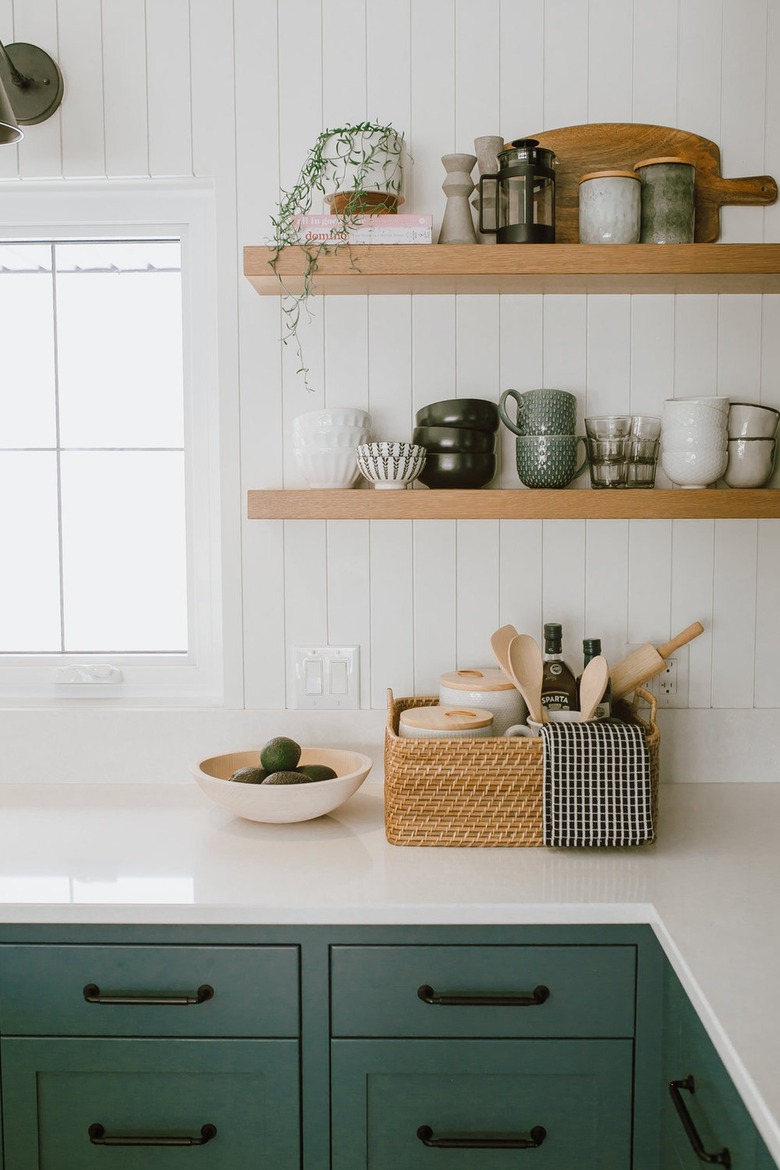
17. Make everyone green with envy over your backsplash.
Chango & Co.
We've seen many shades of green in kitchens, but we especially love the bold shade in this design from Chango & Co. The matching green backsplash and green patterned wallpaper inside the cabinets are a verdant dream.
18. Paint it black.
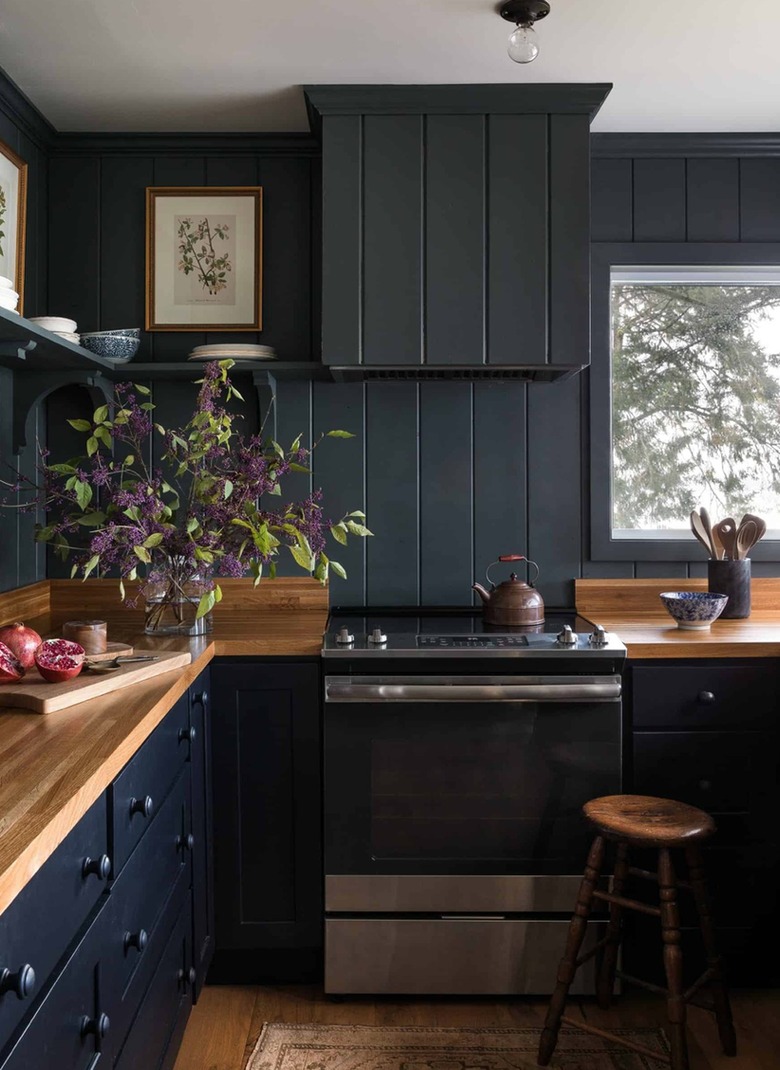 Heidi Caillier Design
Make your kitchen a whole mood like this design from Heidi Caillier. Black cabinets, a matching black wood backsplash, and light wood counters all work together to up the drama.
19. Match the counter.
 Paul Anderson for Hunker
This fresh kitchen features matching counters and a contained backsplash. The continuous effect works to make the space feel seamless.
20. Keep the wood rustic and raw.
 Will Reid
No need to overthink or overdo your wood backsplash. Just follow Will Reid's lead and install some rustic tongue-and-groove wood panels vertically for an old-world feel. Treat the planks with a clear stain so all you see is that beautiful grain.
21. Do something surprising with stick-on panels.
 Stikwood
Can't afford a real reclaimed wood backsplash, but love the look? One way to save is to use stick-on panels made from wood particles or even faux wood. Take this unique kitchen spotted on Stikwood: The gray-toned faux wood looks incredibly realistic and is renter-friendly.
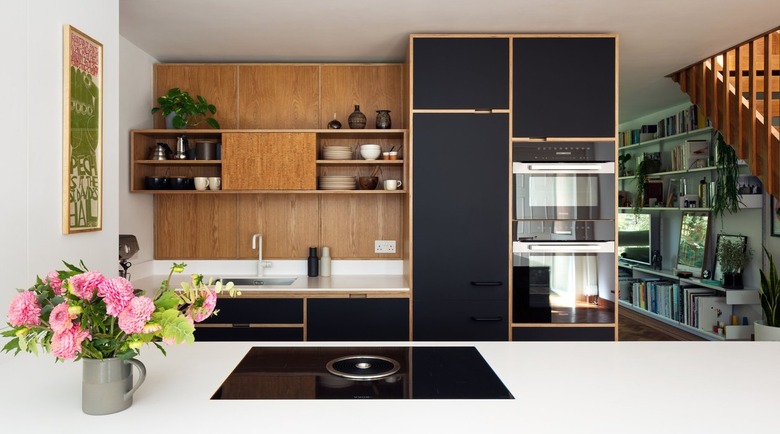
22. Make affordable materials feel fancy.
 Uncommon Projects
Plywood is considered a simple, lower-cost material, but it doesn't have to look cheap. Here, Uncommon Projects used this material for both the cabinets and the backsplash in a way that seems truly elegant.
23. Showcase your backsplash with open shelves.
 Chango & Co.
In this spectacular kitchen designed by Chango & Co., the white shiplap backsplash behind the stove becomes a centerpiece with open shelves that make it stand out even more.
24. Go for all white everywhere.
 Liz Marie Blog
It can be challenging to pick a color palette for your whole home design, let alone your backsplash. So we love this floor-to-ceiling shiplap look from Liz Marie. It's a non-boring, all-white kitchen that takes the guesswork out of choosing complementary hues and feels super fresh.
25. Try some narrow panels for a traditional touch.
 Jaclyn Peters Design
We love this pretty kitchen look from Jaclyn Peters for so many reasons, but the gorgeous white beadboard backsplash is especially good. How beautiful is it with those white counters and green cabinets?
26. Incorporate wood sparingly for a striking effect.
 Uncommon Projects
Adding a solid wood backsplash behind only the kitchen sink area is a chic design choice. Uncommon Projects nails a classic midcentury modern look with this inspired idea.
27. Use plywood to perfection.
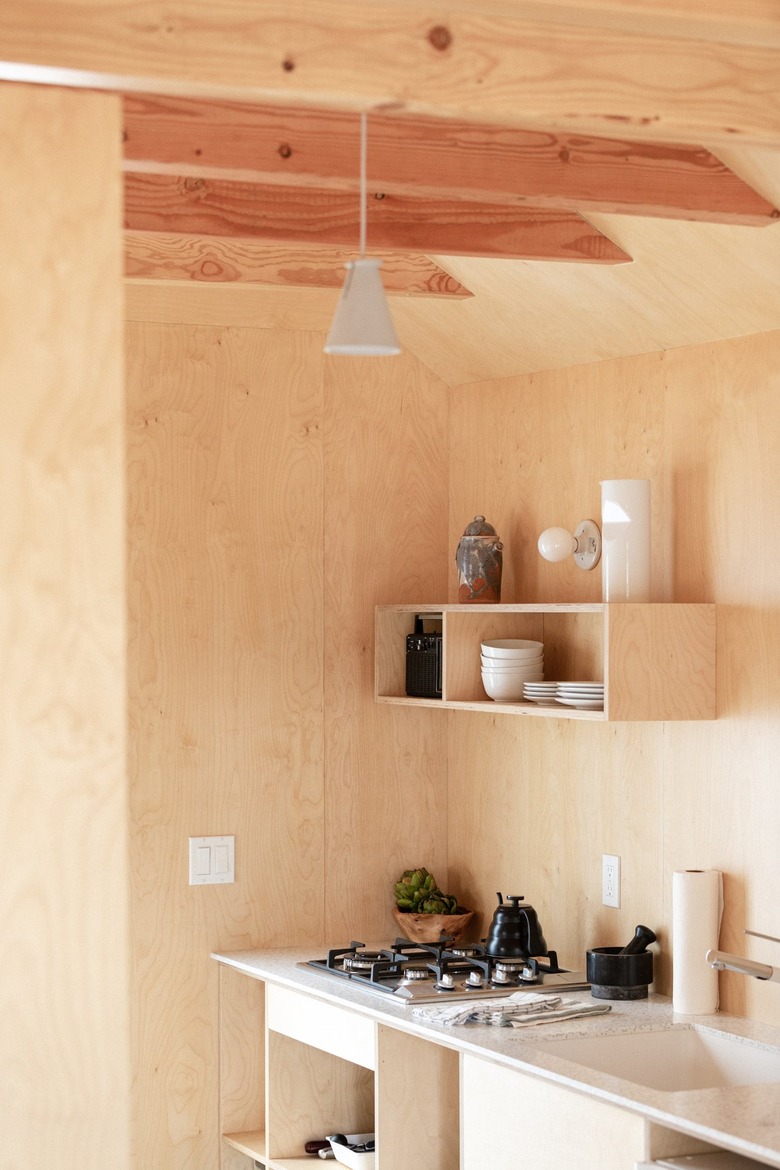 Stephen Paul for Hunker
For the ultimate in minimalist vibes, use plywood for your backsplash — and for everything else in your kitchen. If you use it in multiple places, the simple material will wow your guests every time.
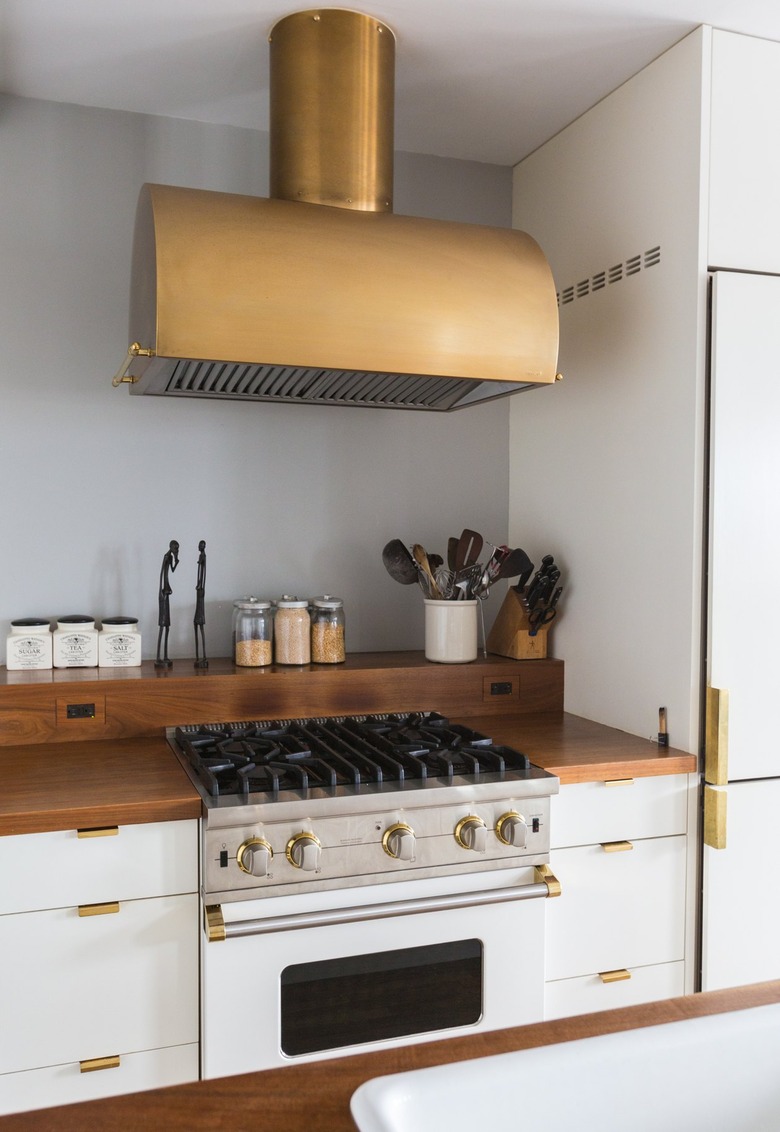
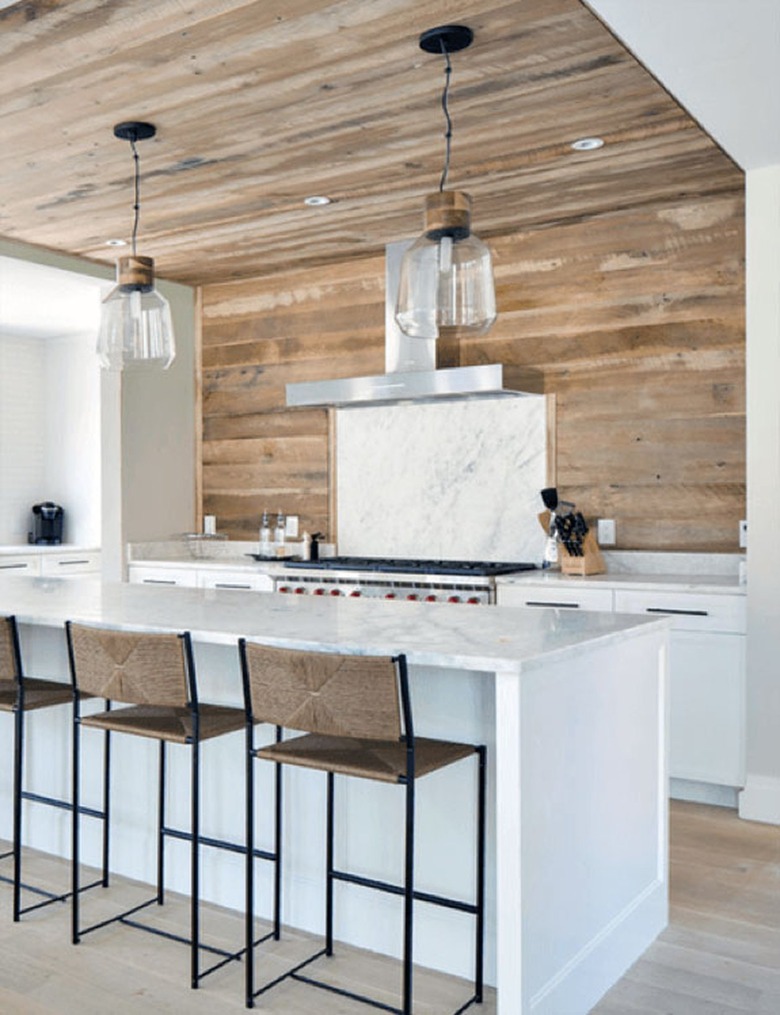
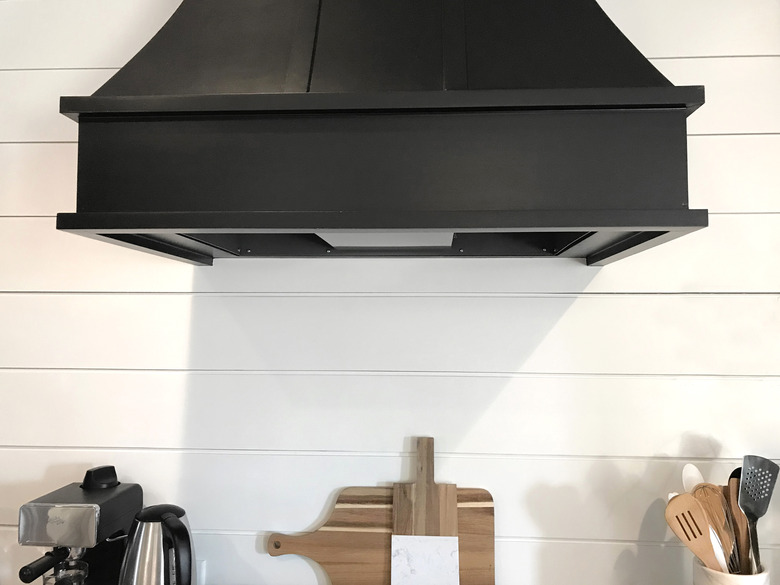
28. Install it around your range.
 TriggerPhoto/iStock/GettyImages
Some people are a little apprehensive about adding a wood backsplash around their stove. But if treated and installed correctly, a simple shiplap look like this one will work wonderfully (and safely) around a hood area.
The Kitchen Backsplash Explained
 Nicole Mason
A backsplash can be both the 4-inch riser on the back of a countertop or include the entire wall behind the countertop, extending all the way to the bottom of the cabinets or to the ceiling. The backsplash is technically there to provide an easy-to-clean barrier between the sink, stove, food prep areas, and the drywall. It's protective, but also doubles as a focal point and a great way to add something unexpected to your decor.
To fulfill its aesthetic function, the kitchen backsplash material should be easy to clean. It's there to provide a safe place for water, grease, oils and other liquids to collect, and while some of these subtances evaporate harmlessly, some can stain or leave a film. If you can't get the residue off easily, the backsplash isn't doing much good as an aesthetic feature.
Pros and Cons of a Wood Backsplash
Pros and Cons of a Wood Backsplash
Wood is a timeless material that can offset other common features in a contemporary kitchen, such as stone, metal or solid-surface countertops, shiny metal appliances, and monochromatic walls and cabinets. Whereas too much wood can make a room look busy and closed in, the limited amount of wood in a backsplash adds just enough to make a style statement.
For the DIY enthusiast, there's a lot to love about this feature. It's easier to install than tile or metal, and assuming you properly finish the planks — which is essential, especially if you use barn wood or reclaimed boards — a wood backsplash is also easy to keep clean. If stains do penetrate and discolor the finish, the damage is fixable with a hand sander.
One disadvantage of wood is that it's flammable. You shouldn't install it behind a gas cooktop unless you can guarantee a minimum distance of 18 inches between the backsplash and the back burners. Moreover, unlike tile, stone, and metal, wood can warp. To minimize that, seal both sides of the material before installing it, and glue the wood to the wall with construction adhesive.
Wood Backsplash Options and Costs
Wood Backsplash Options and Costs
Because installation of a wood backsplash is a fairly straightforward DIY project, you can minimize costs by doing the work yourself. Your costs will mostly go toward materials. You can also minimize these prices by using wood that is leftover from another project. Some options you might consider include:
- Beadboard — The price of beadboard paneling varies widely from $3 to $40 per square foot, depending on quality and style. Beadboard comes in traditional tongue-and-groove planks and in milled panels.
- Tongue-and-groove flooring — Virtually any style of flooring can work as a backsplash, but if you want to reduce your work and guarantee a cleanable surface, use prefinished flooring. Costs vary from $3 per square foot for oak and bamboo to $12 or more per square foot for exotic hardwoods. You can also use laminate flooring, which is thinner and easier to work with than real-wood flooring.
- Shiplap siding — Shiplap siding boards can look great in the kitchen. Expect to pay from $2.50 to $3.50 per square foot for hardwood, between $2.50 and $7 for cedar and between $2.75 and $3.75 for pine.
- Reclaimed wood — Reclaimed-wood flooring costs between $8 and $10 per square foot. It isn't the least-expensive option by far, but in many ways, it's the most stylish and interesting. It's a guaranteed conversation starter.
- Barn wood and pallet wood — Because they are rough and difficult to keep clean, barn wood and pallet wood aren't the best choices for a backsplash. If you have your heart set on barn wood, prices start at $3 per square foot and climb upward with increasing quality. Pallet wood is typically free, but the planks are irregular and difficult to fit together, so you have your work cut out for you if you choose this option.
Prepping for a Wood Backsplash
Prepping for a Wood Backsplash
The wall behind a wood backsplash doesn't require as much preparation as when you are installing tile. It needs to be flat, but small level variations are acceptable, and because construction adhesive adheres better than thinset tile adhesive, you don't have to put as much energy into deglossing and scuffing the wall. Because it's possible to attach shiplap, tongue-and-groove, and beadboard by nailing or screwing planks and sheets to the wall studs, you can make your home improvement project easier by installing the backsplash over damaged drywall without fixing it.
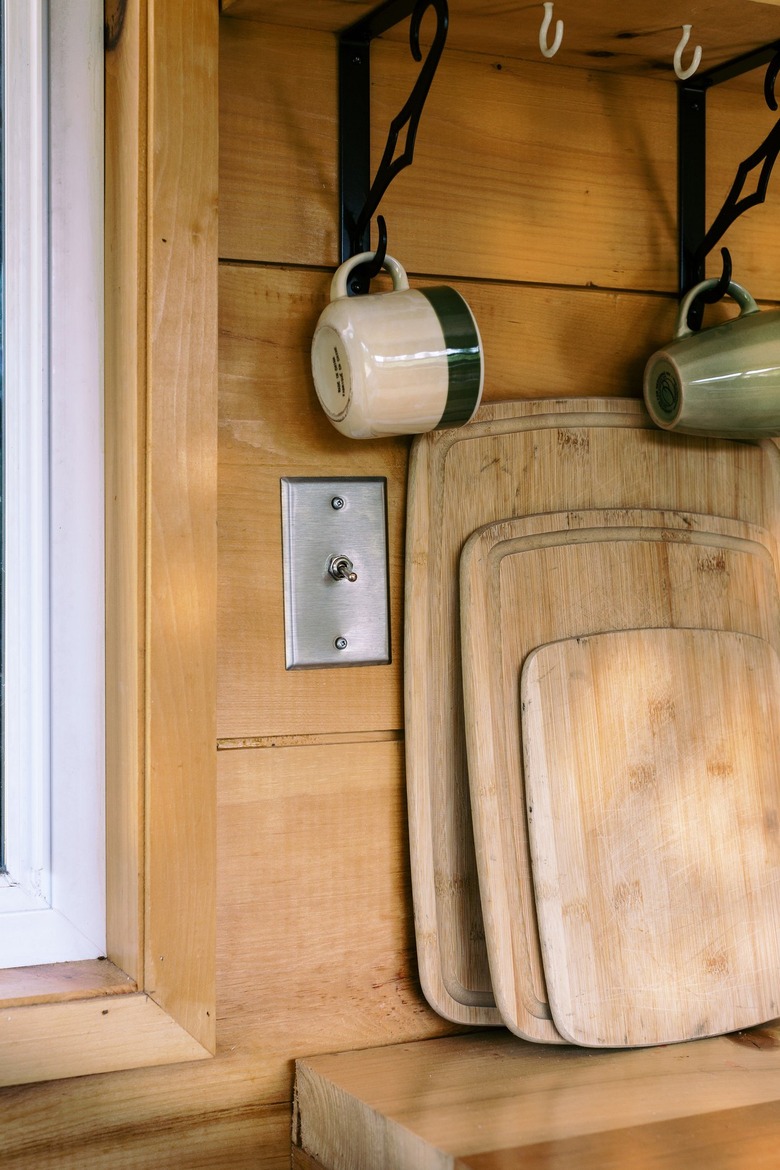
One issue you will have to address is how to extend the wall outlets and switches to make them flush with the new wall surface, which will be extended outward by as much as 3/4 inch. Electrical code requires all wiring to be enclosed in an approved electrical box, so you can't just cut holes in the backsplash, feed the outlets and switches through and screw them to the wood. The solution is to install a box extender — an inexpensive plastic ring that effectively extends the edges of the electrical box.
Seal the Wood Before You Install It
Seal the Wood Before You Install It
Sealing the wood is essential for two reasons. The first is that sealed wood, like sealed grout, is waterproof and easier to clean. The second, which is probably more important, is that sealed wood is less affected by changes in humidity and is less likely to warp or lift off the wall.
To prevent warping, you have to seal both sides of the wood, so it's something you need to do before installation. If you use a clear sealer such as varnish or a penetrating oil, apply at least one coat and let it dry before installation. Then, apply a finish coat to the exposed surface after installation is complete. If you plan to paint, apply the primer before installation and paint afterward.
A gloss finish is better than a matte one when it comes to backsplashes. Matte finishes tend to collect dust, and they are more difficult to clean. When varnishing or painting, choose a gloss or semigloss sheen. When applying penetrating oil, consider buffing the finished surface with beeswax or paraffin wax.
Installation Tips for a Wood Backsplash
Installation Tips for a Wood Backsplash
You don't always have to glue wood to the wall with construction adhesive, but it's a good idea because the substance helps prevent the wood from curling and warping, which is always a possibility when a natural material is involved. Use a caulk gun directly on the back of each plank as you install it and use nails to hold the planks in place until the glue sets, removing them afterward if you want.
A few other tips can help make installation easier and can prevent mistakes that could lead to a makeover of the entire project:
- Leave a 1/8-inch expansion gap between the backsplash and the countertops, cabinets, ceiling and any other transitions. Fill the gap with flexible caulk and, if warranted, cover it with trim but don't nail the trim to the backsplash with nails that penetrate to the surface underneath because that prevents the wood from moving and defeats the purpose of the gap. Glue the trim to the backsplash or the adjoining surface but not both, or you can nail it to the countertop or cabinets.
- Install tongue-and-groove flooring to the wall the same way you install it on the floor
—
by driving nails through the tongues into the wall studs and covering the nails with the next board.
- You can't avoid the use of fasteners when installing shiplap planks because they are wide and tend to curl if you don't fasten both sides. Drive ring-shank nails or trim screws through each overlapping joint into the wall studs. Fill the holes with wood filler and sand well before applying the final finish.
- Backsplash areas are loaded with electrical outlets, which means there might be a lot of wiring behind the drywall. Be careful when driving nails or screws and make sure all fasteners are not so long that they can contact wiring.
Keeping Your Wood Backsplash Clean
Keeping Your Wood Backsplash Clean
The best cleaning method for your wood backsplash depends on the finish you apply. Surfaces finished with polyurethane are generally the easiest to clean, requiring only occasional wiping down with a damp rag or a solution of dish soap and water. Remove grime and oils with a solution of one part vinegar to three parts water. This cleaning method also works well for surfaces finished with gloss or semigloss enamel paint.
If you finished your wood backsplash with penetrating oil and a buffed wax surface, keep it clean by dusting with a dry cloth. Use a damp one only when you need to wipe off stains. A buffed wax finish needs to be updated every year or so with new wax, and it needs occasional buffing with a soft cloth or lambswool buffer to keep its shine.
If your backsplash suffers damage such as a dent or burn, you can usually sand it out and touch up the finish when you're done. The only time this might be difficult is when you use prefinished flooring because the factory finish can be difficult to match with products you can apply at home. Your best bet is to get professional help.