Guess What? Now You Can Make A Handy Tabletop For Your Sofa Arm
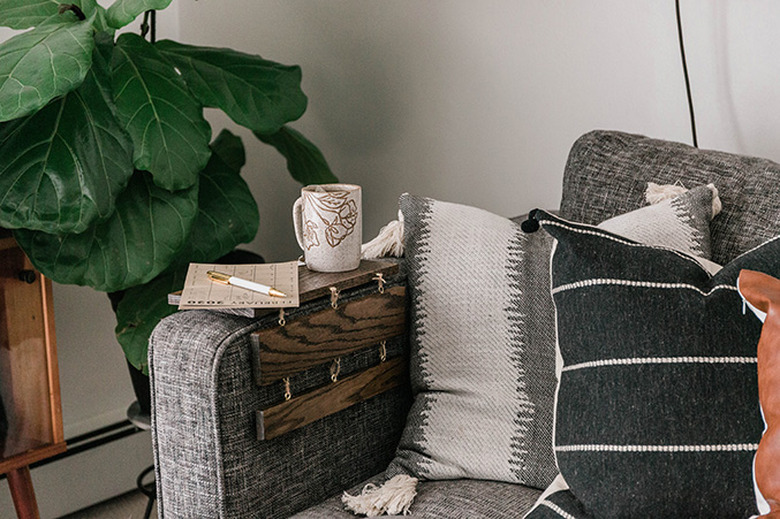
Bottom line: no more scrambling to find the perfect spot to rest your mug of tea or glass of wine. We've got a simple weekend project that will turn that sofa arm of yours into the perfect platform for a DIY tabletop.
This project is especially perfect for those small-space-dwellers out there who don't have room for a sofa side table. Check out the tutorial for our portable, drapeable tabletop below.
 Carrie Waller
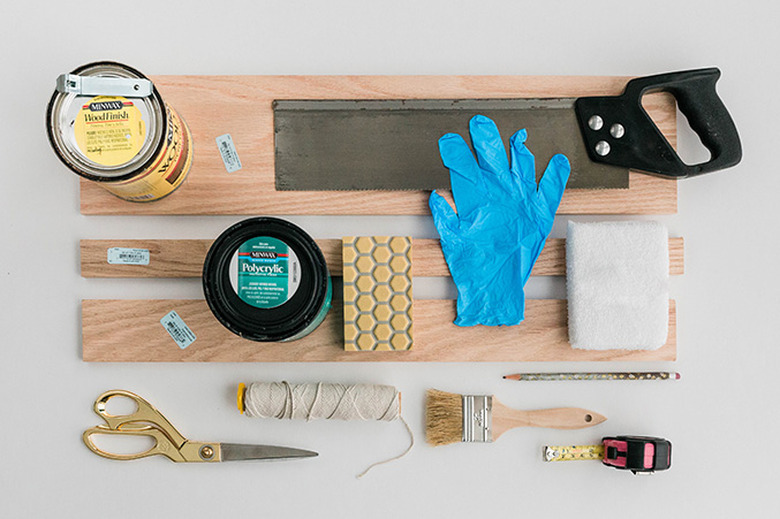
Things Needed
-
Pencil
-
1/2-inch-by-5 1/2-inch-by-24-inch wood board, (1)
-
1/2-inch-by-2 1/2-inch-by-24-inch wood board, (1)
-
1/2-inch-by-1 1/2-inch-by-24-inch wood board, (1)
 Carrie Waller
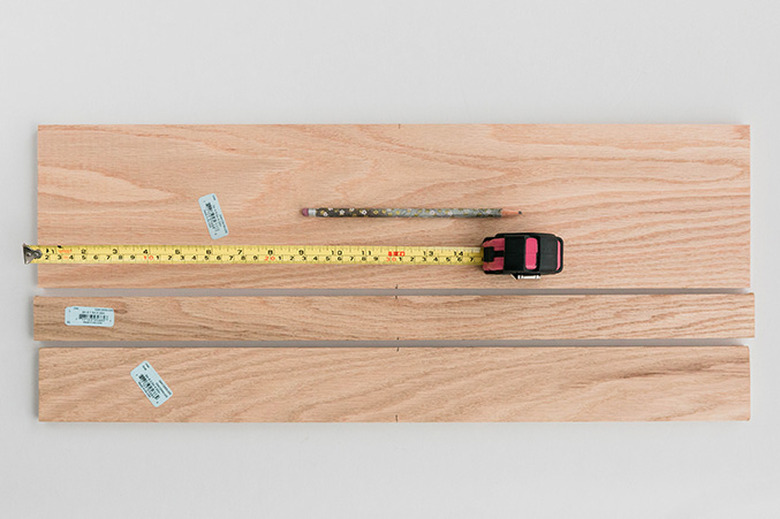
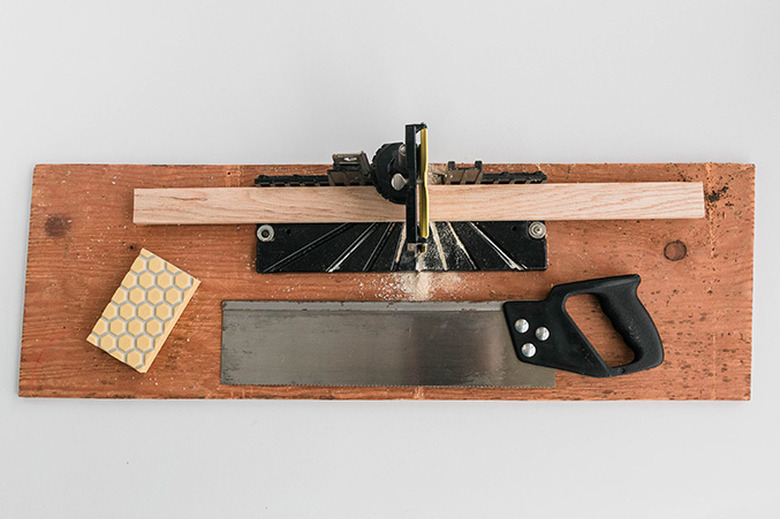
Step 1
You're going to want to cut your boards in half, so measure to find the center of each board using your measuring tape, and mark the spot with a pencil.
Note that the width of your largest board needs to be at least as wide as your particular sofa arm. Upsize or downsize as needed when shopping at the hardware store.
 Carrie Waller
Step 2
Use a miter box and saw to cut your boards in half right at the marks you made in Step 1. Sand the ends smooth, first, with a 120-grit sanding block, and then, lastly, with a 220-grit block.
 Carrie Waller
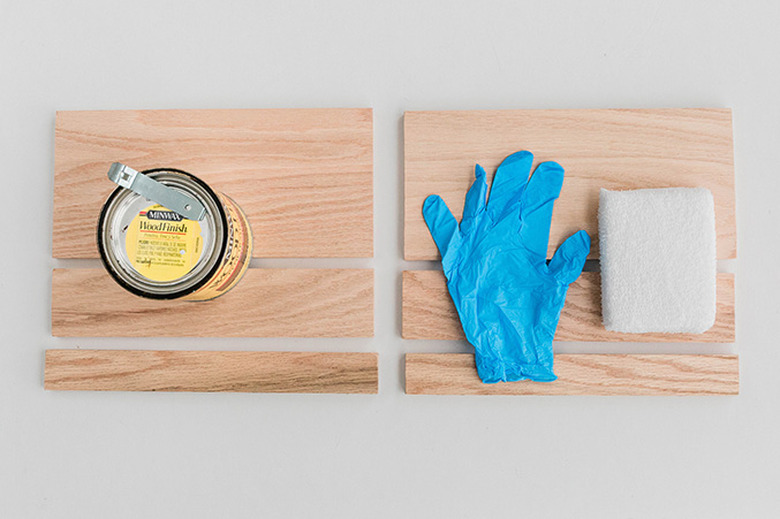
Step 3
Stain the top, bottom, and sides of the cut boards in your color of choice using a sanding pad and pair of gloves. For this demo, we used stain in a 'Dark Walnut' color. Stain the top and sides of the boards first, allow to dry completely, then flip and stain the bottom. Allow to dry overnight.
Note that we stained all six of our boards (the pair of large boards, the pair of medium boards, and the pair of small boards), but you only need to stain one of the large board halves for this project. We were just thinking ahead to the next DIY sofa arm tabletop we plan to make!
 Carrie Waller
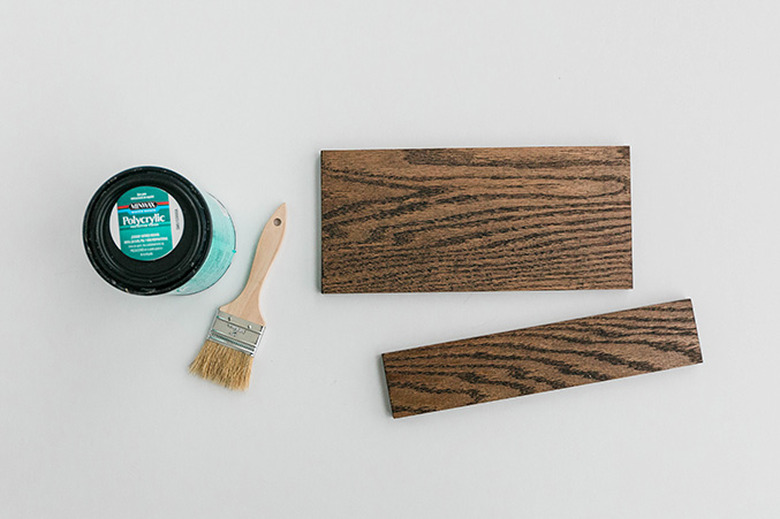
Step 4
Use a bristle brush and a pair of gloves to coat the top, bottom, and sides of the stained boards with a protective sealant. Follow the same finish order as described in Step 3 to coat all sides of your boards. Allow all sealed sides to dry completely, then sand lightly with a 220-grit sanding block. Coat the boards with a second layer of the sealant, and allow to dry overnight.
 Carrie Waller
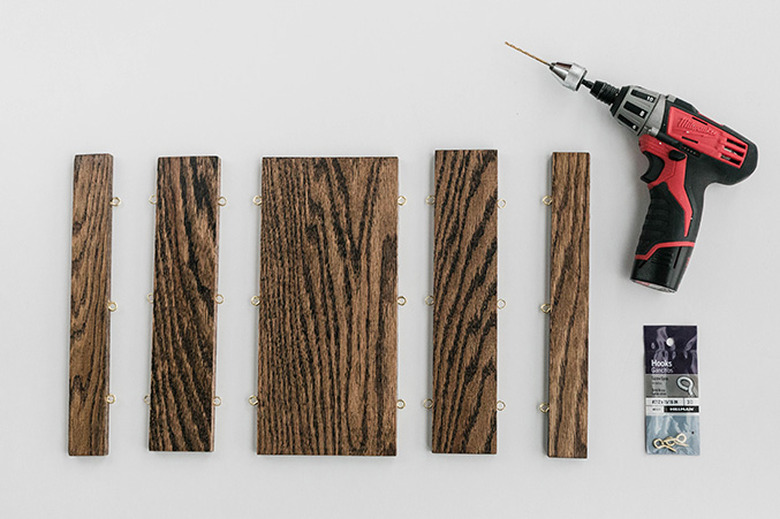
Step 5
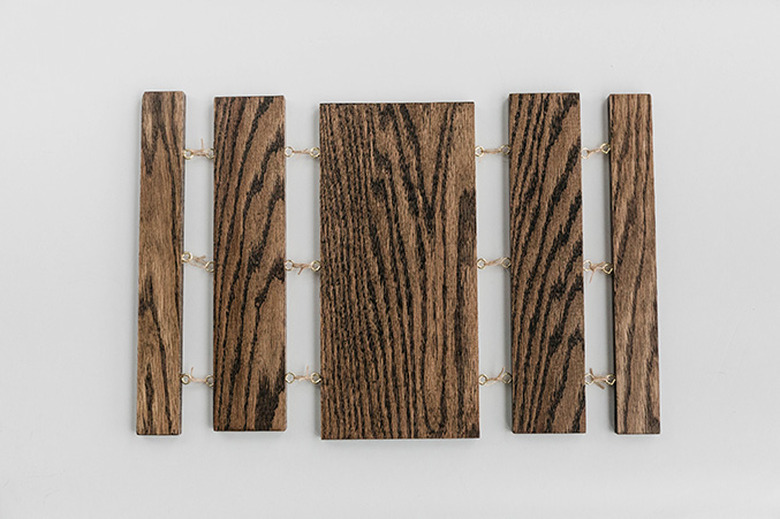
Make three marks on the long sides of each of your boards—two 1 inch in from each outside end, and one in the center of the boards.
You'll need to make the same sets of three marks on both long sides of the large and medium boards, but only on one side of the small boards. This is because you won't need to hang anything below the small board—it's the end of the overhang, as you'll see in the Step 6 demo photograph.
Pre-drill holes at the marks you made using a drill and 7/64 drill bit. Twist screw eyes into each of the holes you pre-drilled (needle nose pliers make this process easier).
 Carrie Waller
Step 6
Tie string between the screw eyes to connect the boards together. The single large board goes in the middle, with the two medium-sized boards attached on either side. Finish by tying the two small boards beside the medium boards. Pull the string through the screw eyes a couple of times each and triple knot for added strength.
 Carrie Waller
Step 7
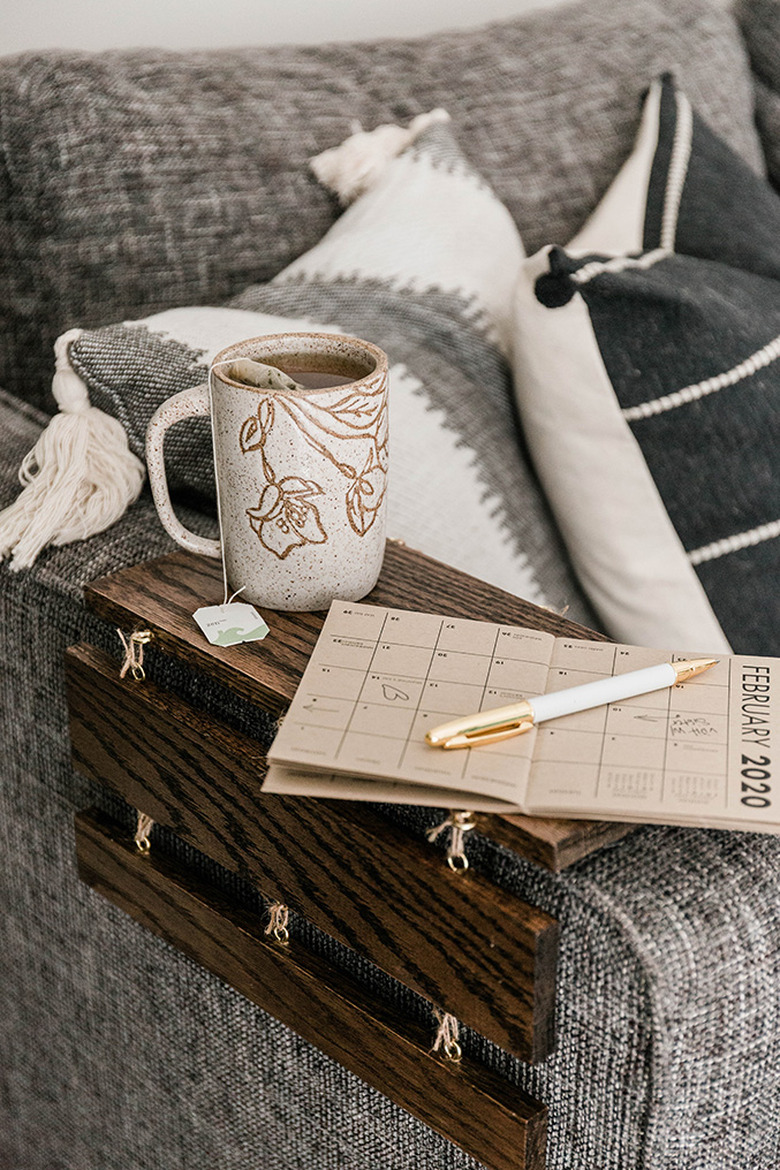
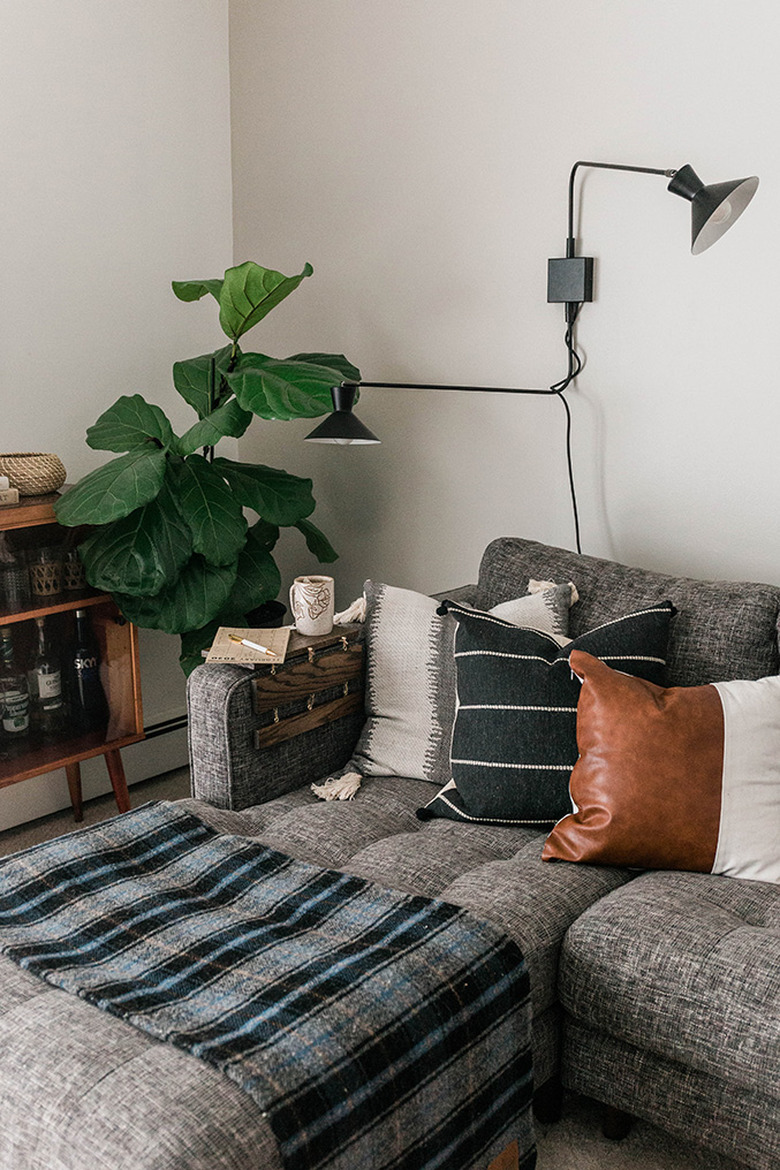
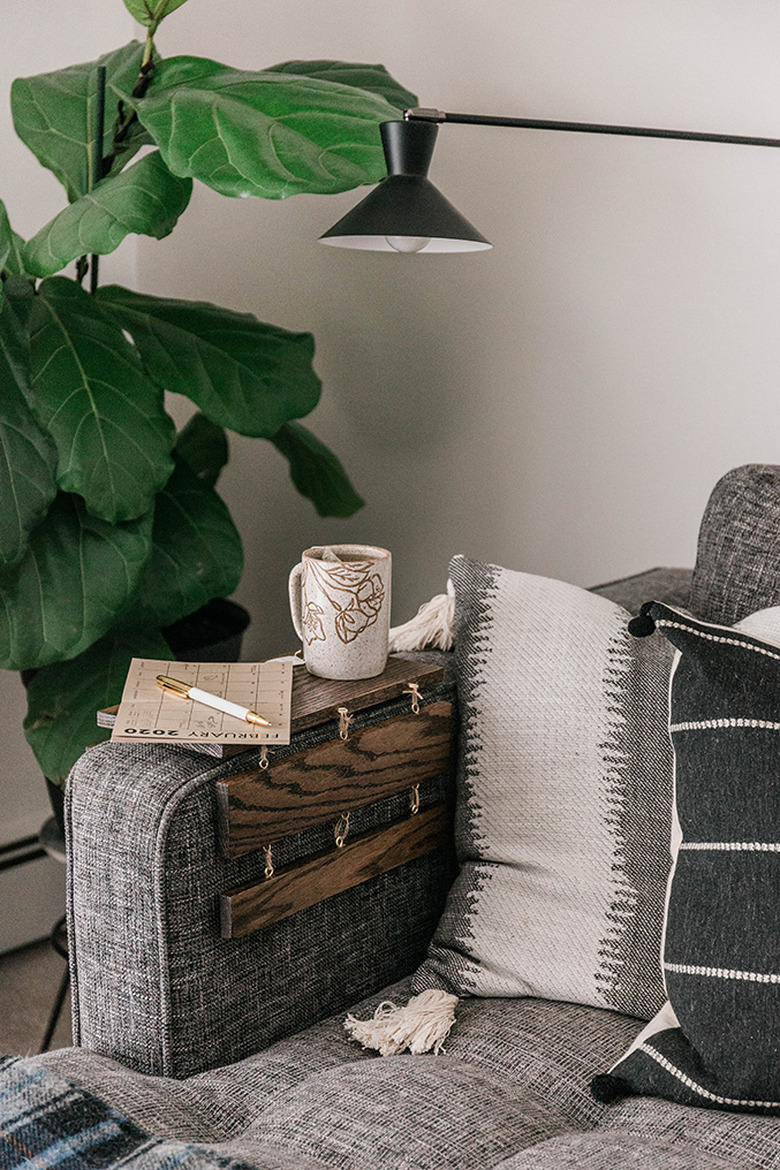
To use your DIY tabletop, just drape it right over the arm of your sofa. The overhung sequence of medium-to-small boards helps give the tabletop lots of stability. Although it's not necessary, you could consider cutting and gluing sections of anti-slip rug lock on the underside of the tabletop. That way, the wooden surface will stay in place even better over your sofa arm!
 Carrie Waller
 Carrie Waller