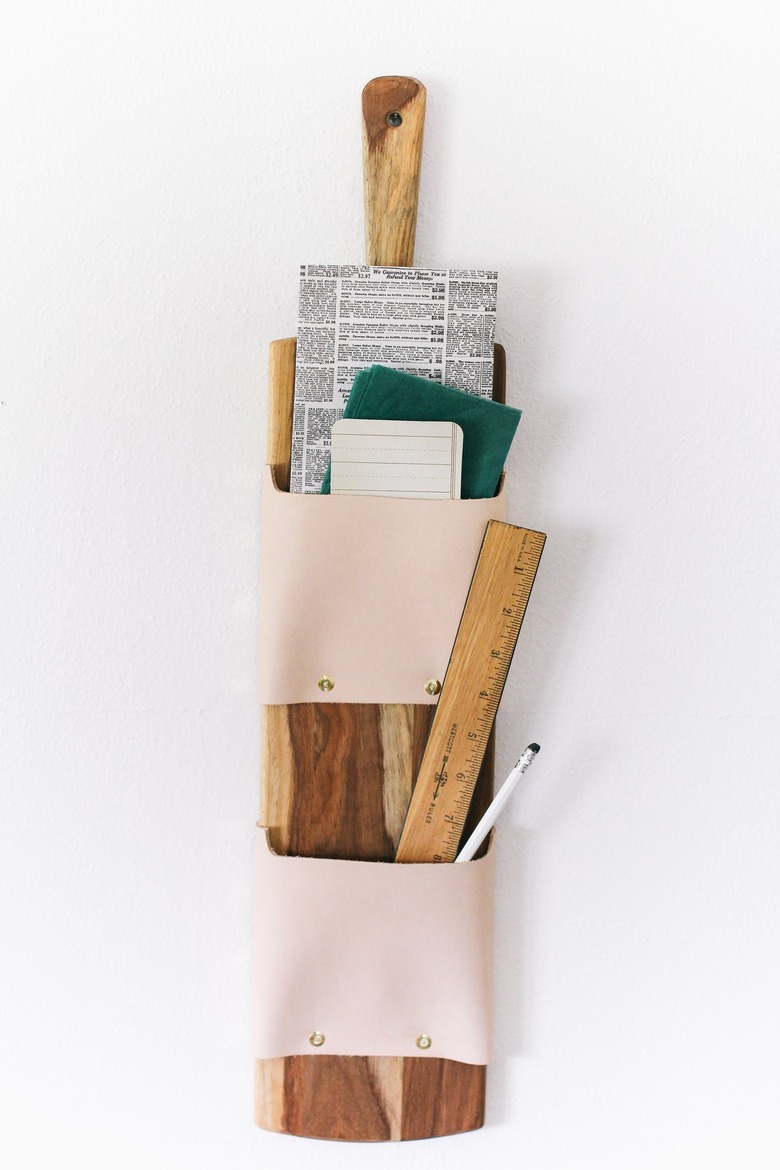
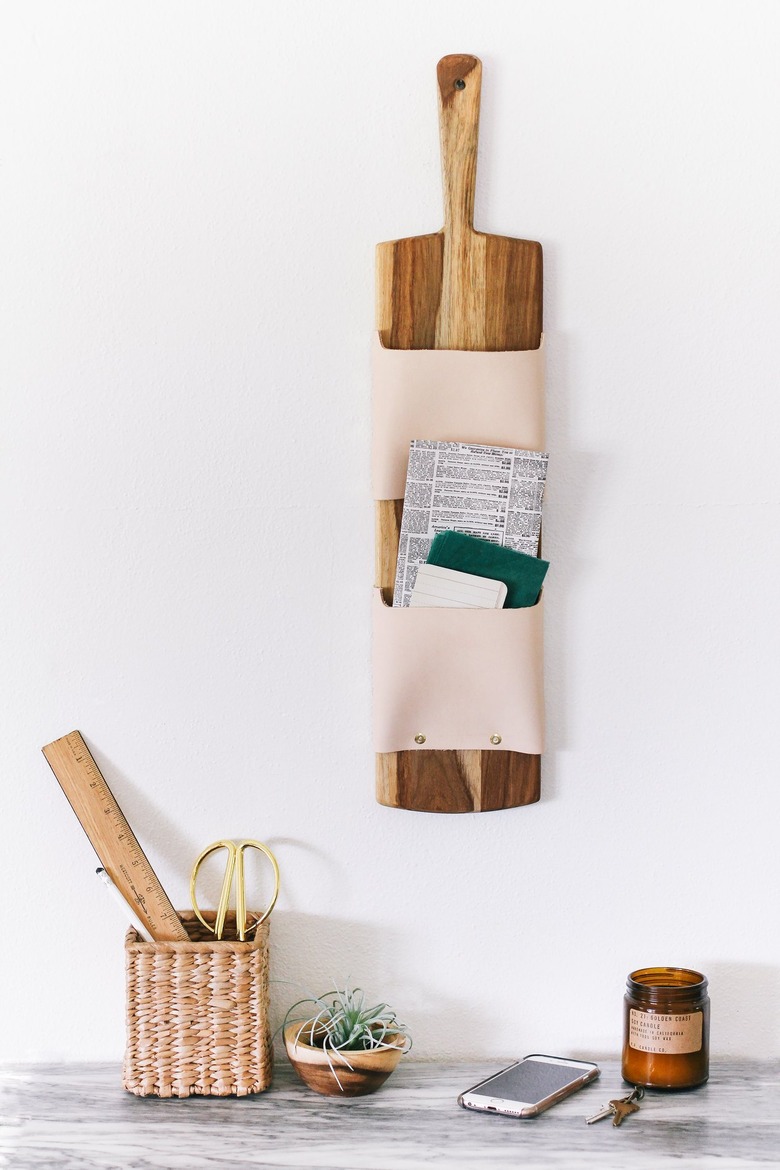
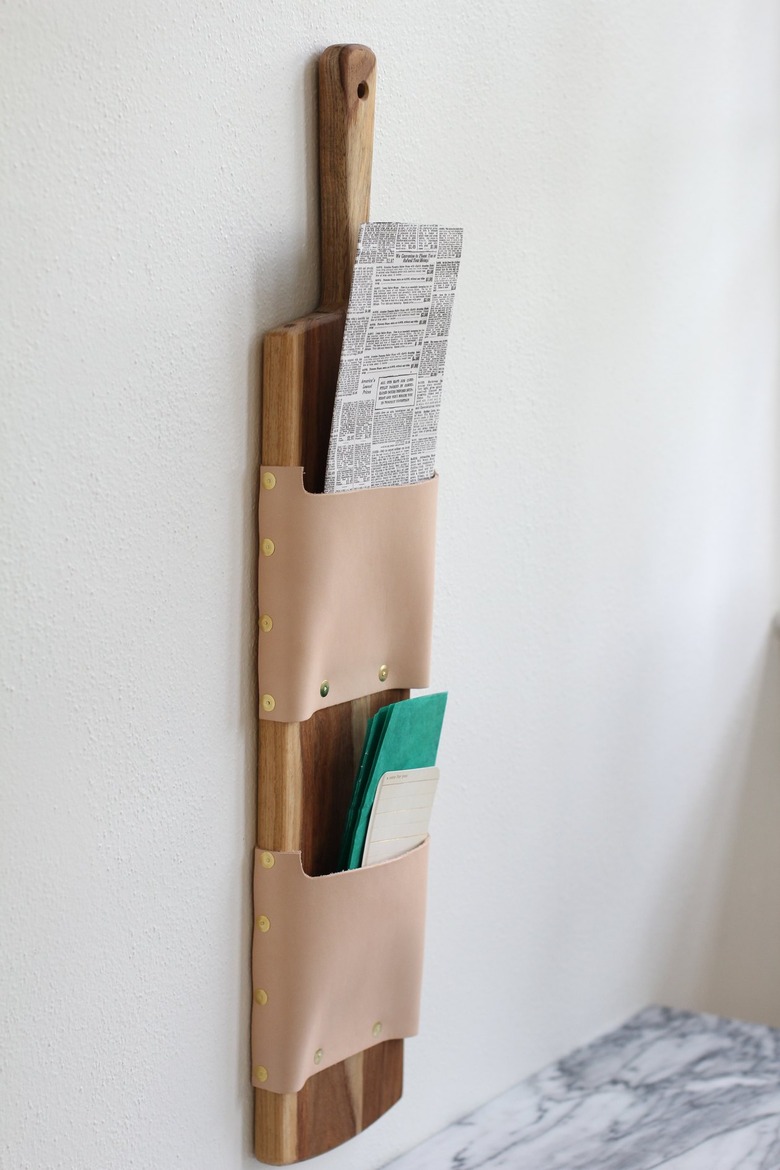
Easy-To-Make Wall Organizer Using A Cutting Board
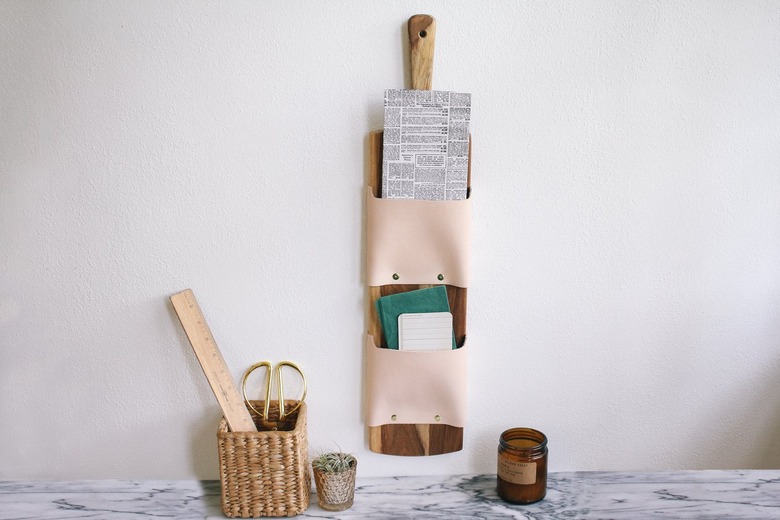
Bid adieu to the dreaded stack of mail precariously teetering on the edge of your counter or table. We've got a simple hack that'll corral your precious papers, pencils, and odds and ends into a tidy and totally stylish wall holder. All it takes to transform a cutting board into a chic organizational hub are some sturdy leather pouches. And since it already has a handle, hanging it up on the wall (may we suggest in the kitchen or in an entryway) is a total breeze.
 Trisha Sprouse for Hunker
TIP: If you're looking for a one stop shop, all these materials are easily found on Amazon!
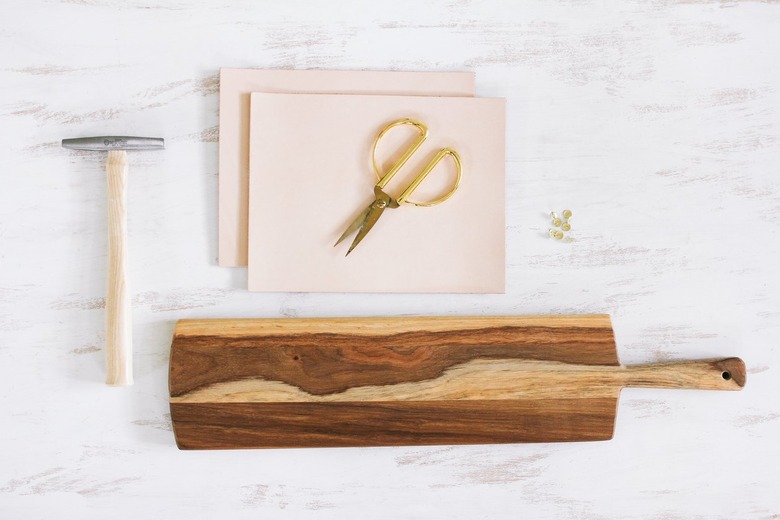
Things Needed
-
Tooling leather or faux leather
-
Ruler
-
Scissors or utility knife
-
Pencil
-
Hammer
-
Fabric glue (optional)
 Trisha Sprouse for Hunker
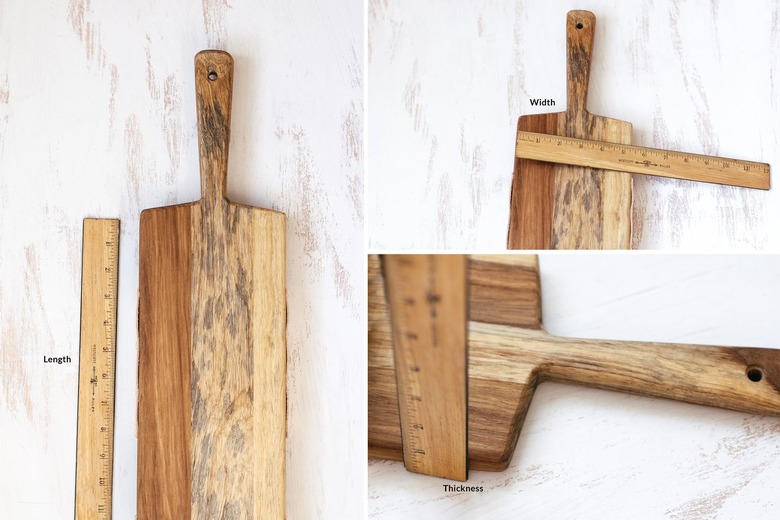
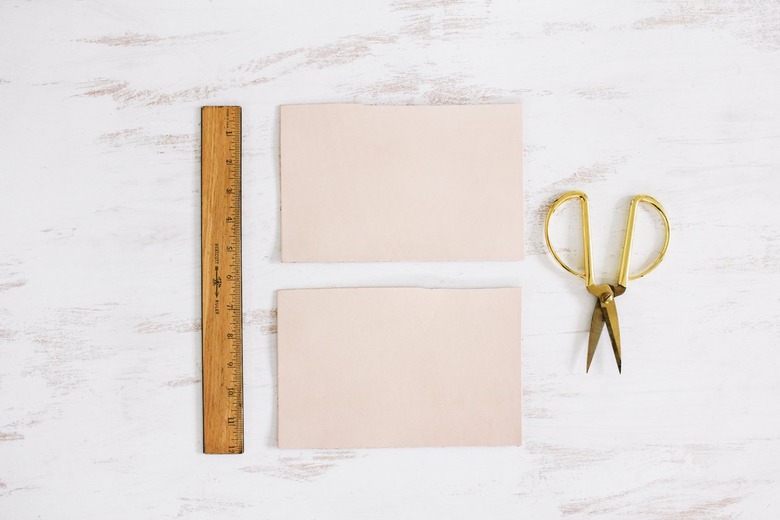
Step 1
Step 1
Measure the length, width, and thickness of your cutting board to determine what size you'll need to cut for your leather pouches. For the length, don't include the handle in your measurement — only measure the part of the board that will have the leather pouches attached. For reference, the board we use in this tutorial is 19 inches long by 5 ½ inches wide, and a ½ inch thick.
 Trisha Sprouse for Hunker
Step 2
Step 2
Using the measurements you took, cut two leather pouches that are wide enough to wrap around the front and sides of your cutting board and long enough to hold a letter size No.10 envelope. We cut our leather pouches to 7 ½ inches wide by 5 ½ inches long.
TIP: If you opt to use faux leather instead of real leather, you may want to cut out four pouches and glue them together in pairs to make thicker and sturdier pouches. Simply pipe fabric glue on the wrong sides of two faux leather pouch pieces, line up the corners, and press them together. Smooth out the fabric and wipe away any excess glue.
 Trisha Sprouse for Hunker
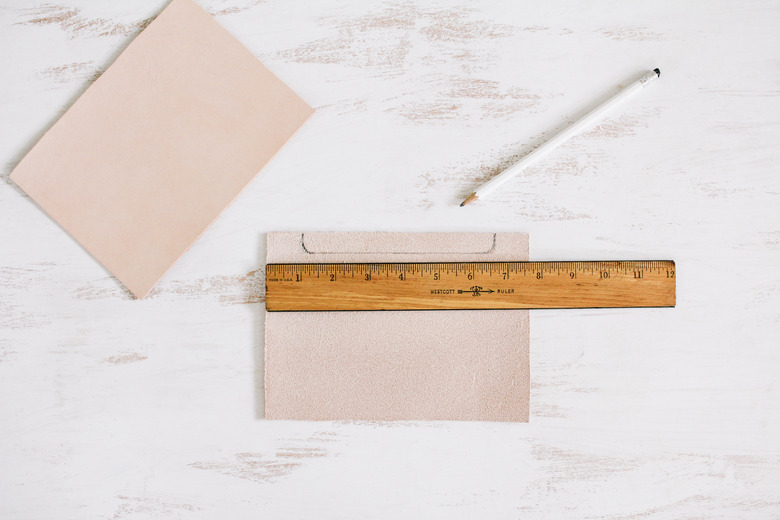
Step 3
Step 3
Turn the leather pouches over so the backsides are facing up. At the top of each pouch, use a ruler and pencil to draw a rectangle that extends ½ inch down from the top and has a 1-inch margin on each side. Freehand rounded corners at the bottom of the rectangle.
NOTE: You may need to increase the size of the margins if your board is a lot thicker than the one we used.
 Trisha Sprouse
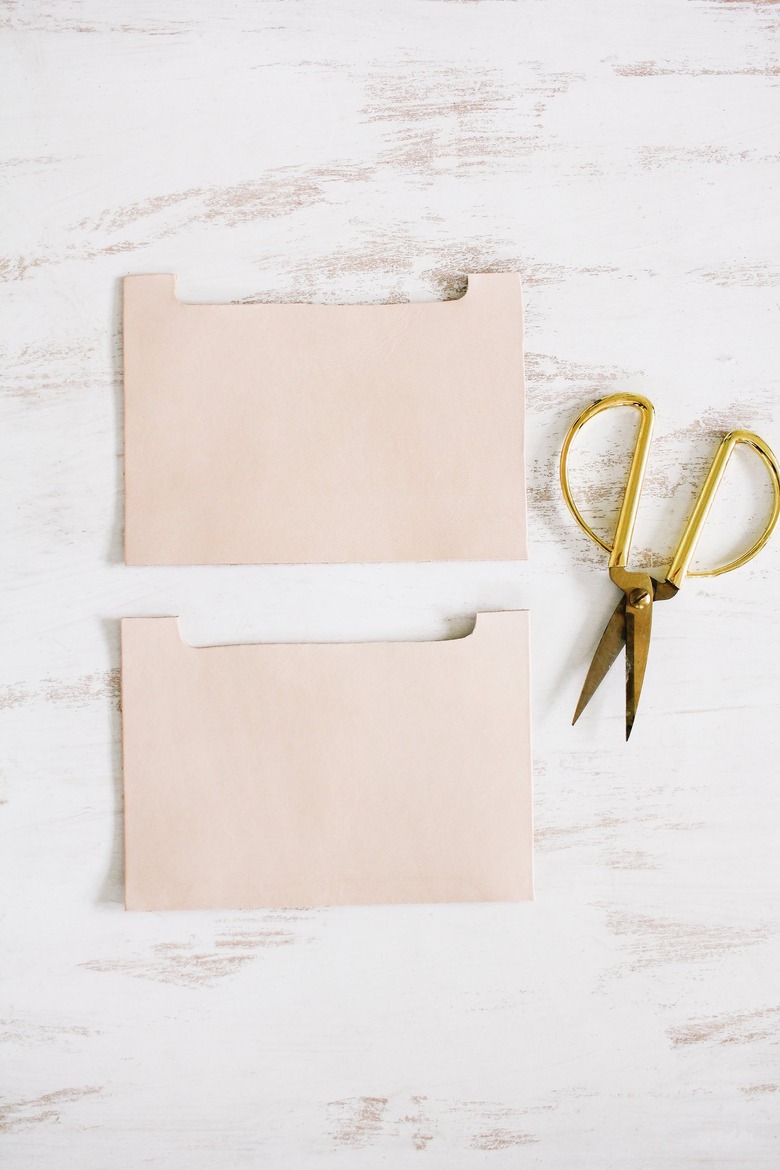
Step 4
Step 4
Cut out the rounded rectangle shapes you drew. You should end up with a "rounded lip" shape at the top of your leather pouches.
 Trisha Sprouse for Hunker
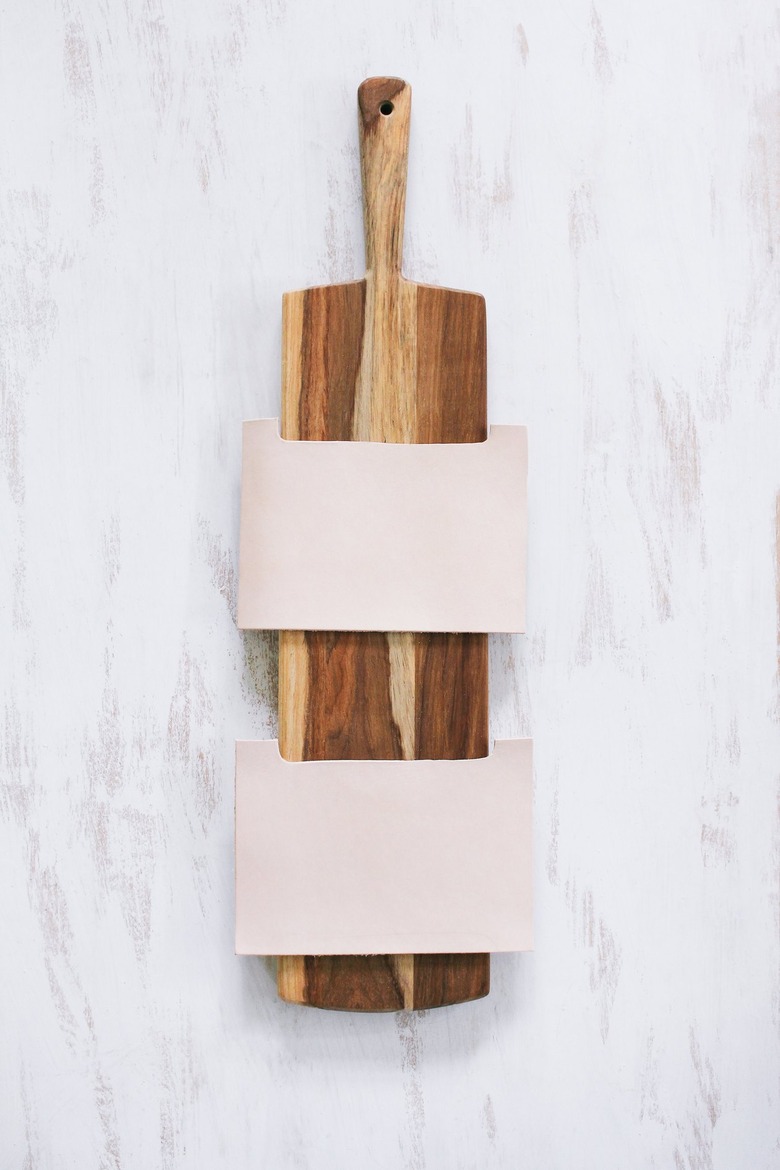
Step 5
Step 5
Place the leather pouches on the cutting board and play around with the arrangement until you have the exact spacing you want.
 Trisha Sprouse for Hunker
Then attach each side of the pouches to the board by hammering four evenly spaced tacks through the leather and into the wood. To ensure even spacing, it's easiest to nail in the top and bottom tacks first followed by the two middle tacks.
 Trisha Sprouse for Hunker
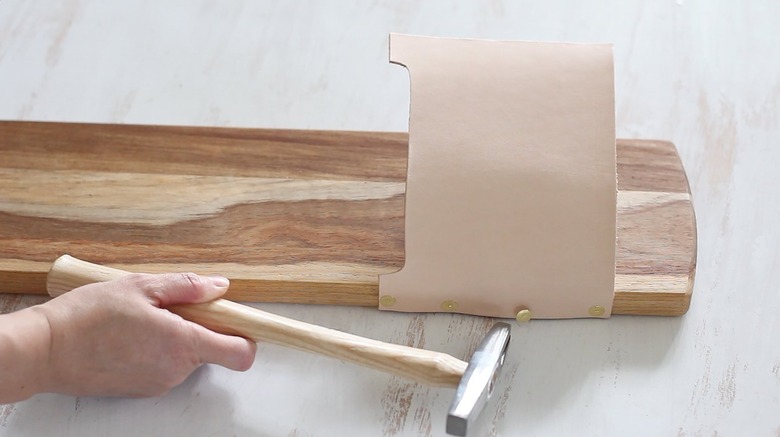
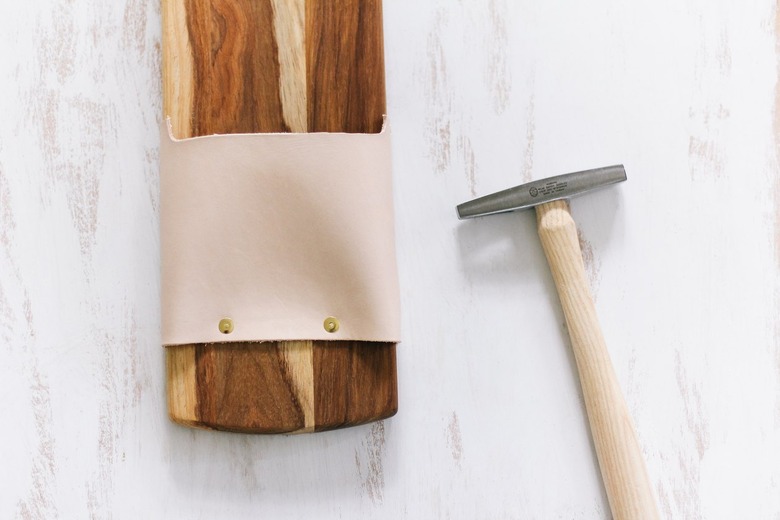
Step 6
Step 6
Attach the front of the pouches by hammering in two tacks that are centered along the bottom of each pouch.
 Trisha Sprouse for Hunker
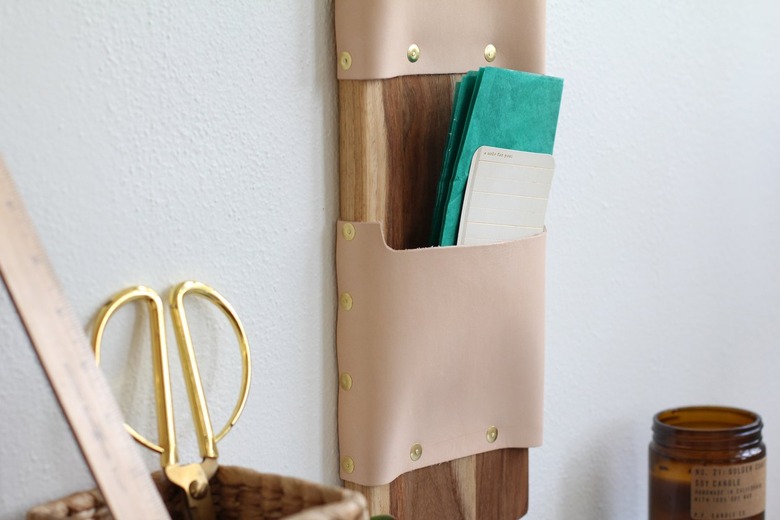
Your new wall holder is ready for hanging. Choose a place that keeps your letters, bills, and other important items within arm's reach. Now you can manage your mail like a boss in one convenient and completely clutter-free spot.
 Trisha Sprouse for Hunker
 Trisha Sprouse for Hunker
 Trisha Sprouse for Hunker