Unique Vintage Upholstered Ottoman DIY

We may receive a commission on purchases made from links.
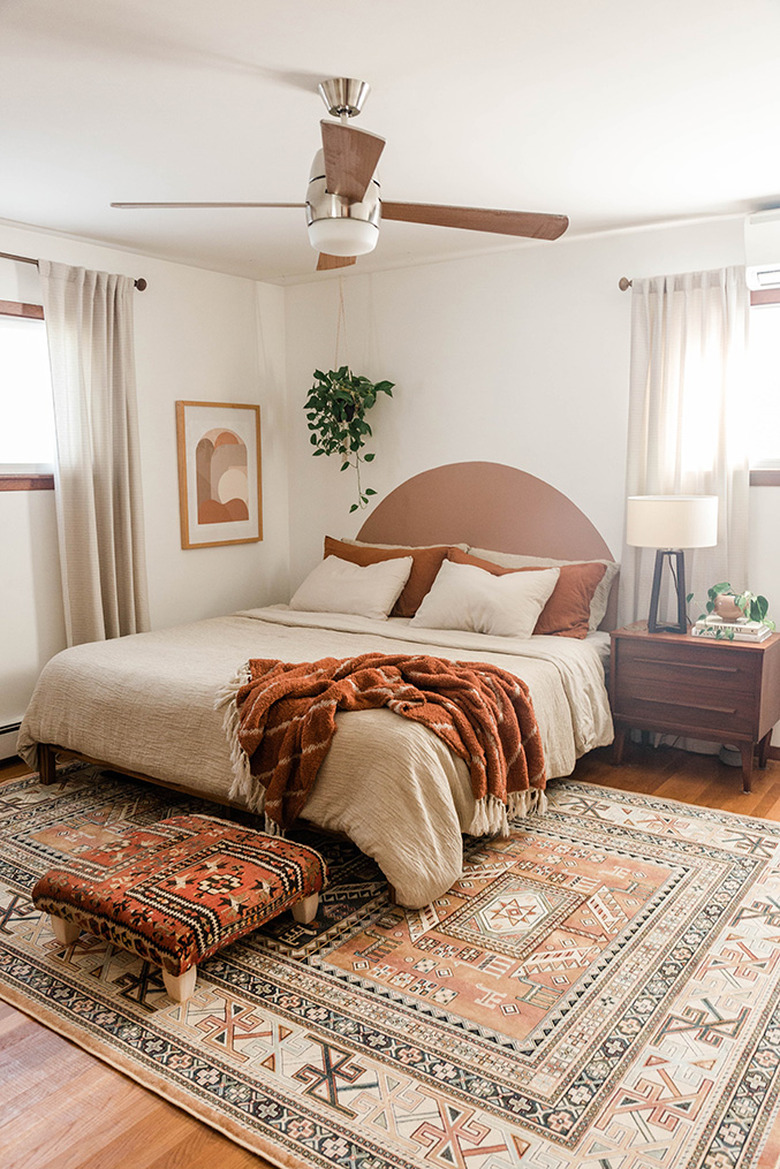
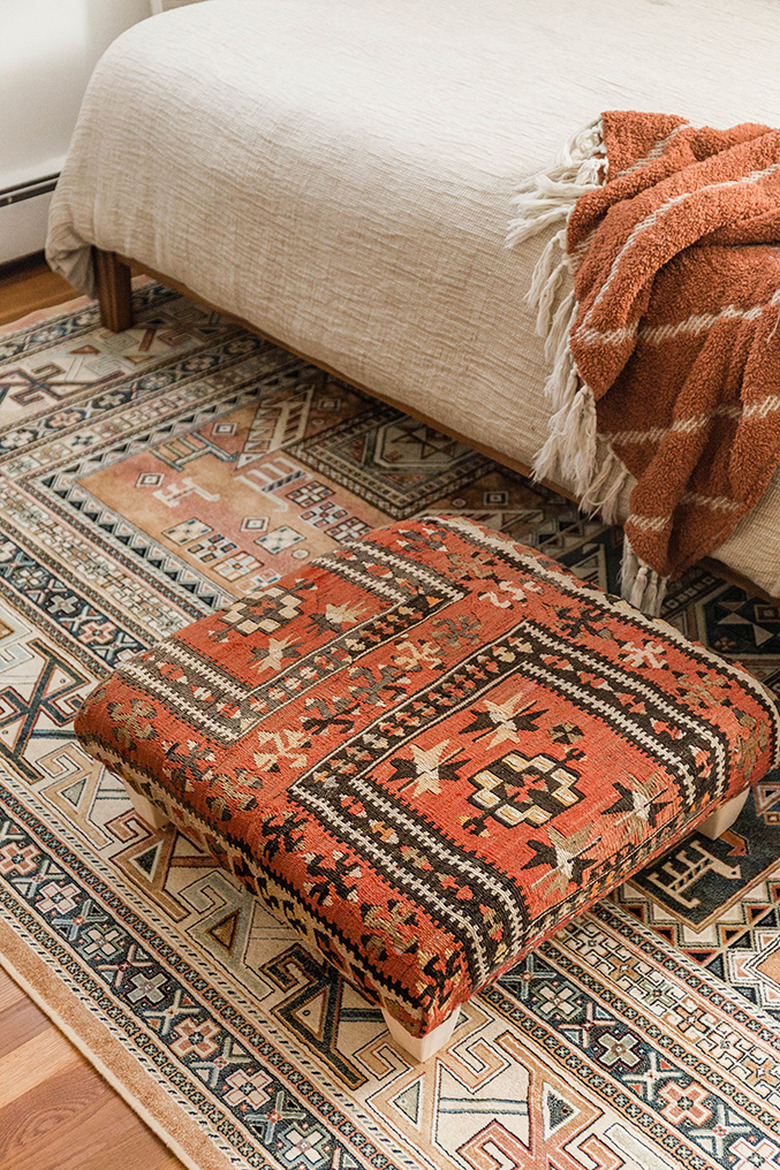
One thing we absolutely love about DIYs is that you can create, or recreate, any design you desire. Lately, upholstered ottomans have been on our mind, so naturally we decided to make our own. This way we can get exactly the style we want — and for this look, we decided to use a vintage rug for our fabric. It adds an authentic and gorgeous vibe to your home. Here's how you too can get the look using homemade techniques and a patterned Turkish rug scored off of Etsy.
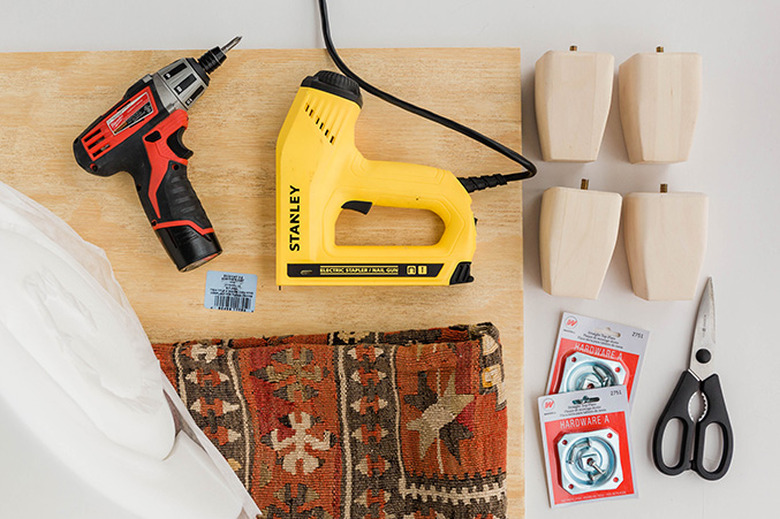
Things Needed
-
Pine plywood board in your preferred size/shape (ours measures 2-feet square)
-
Marker or pen
-
Vintage rug (ours came from this Etsy shop)
 Carrie Waller
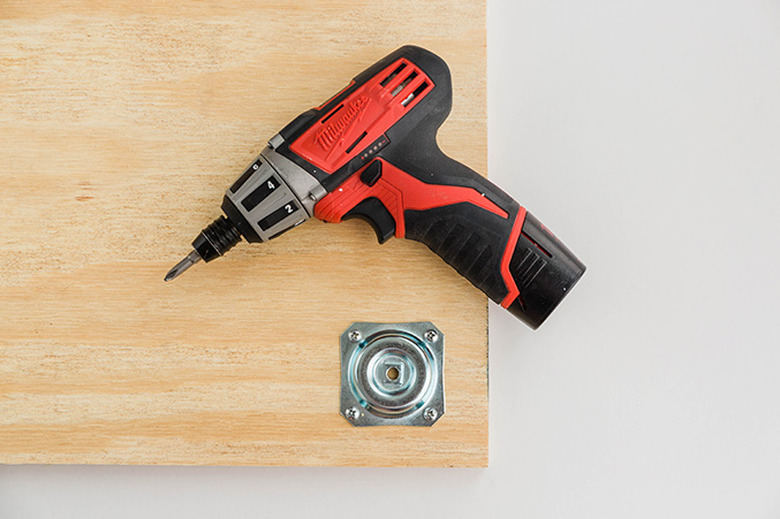
Step 1
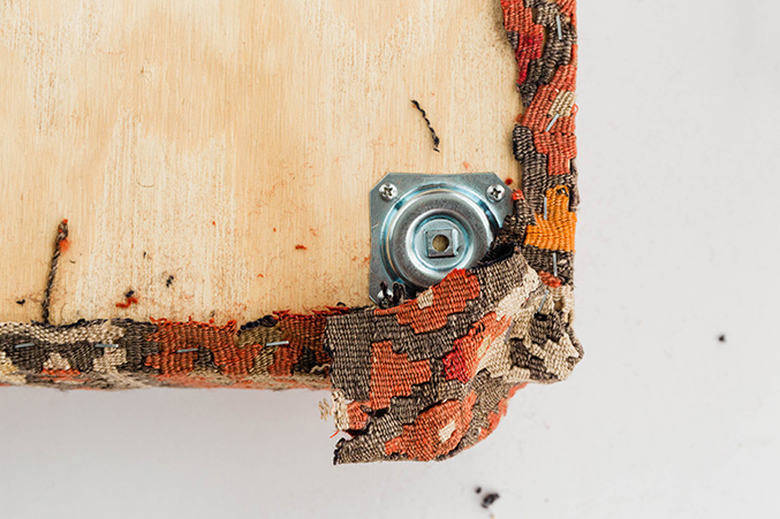
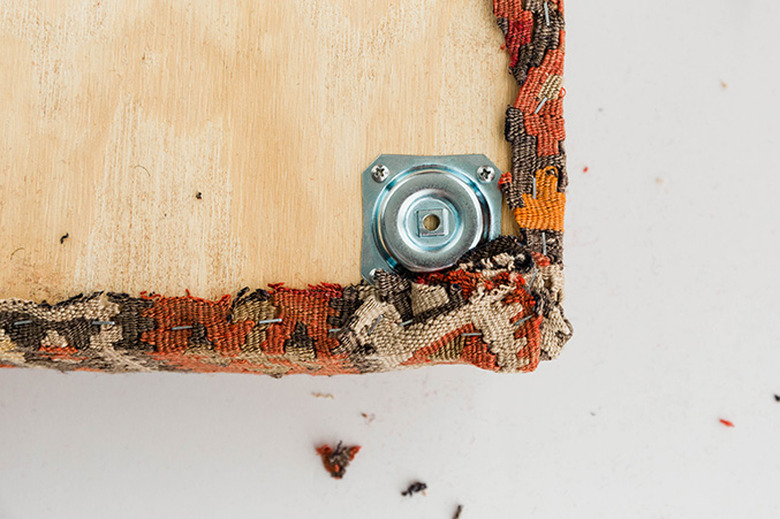
Attach the table leg plates to each corner of the underside of your pine plywood board using a drill and the screws that came with your plates. You can choose your own placement for the legs, but we installed ours about 1 1/2 inches in from each corner of the plywood board.
 Carrie Waller
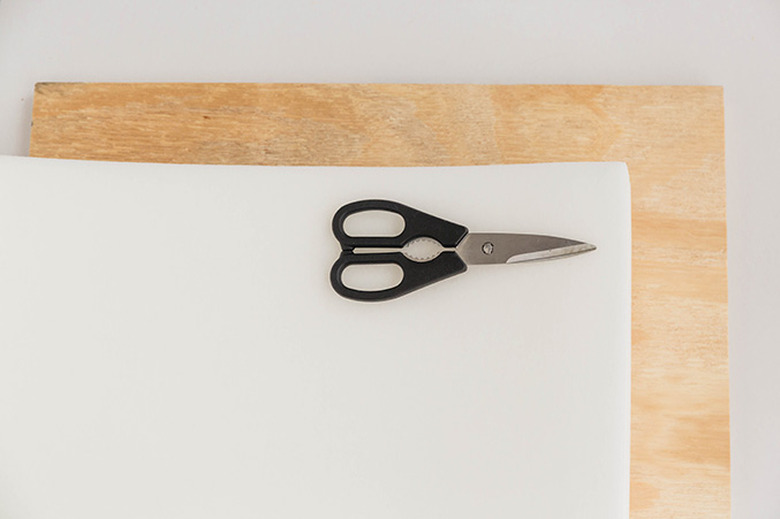
Step 2
Place the plywood board on top of your foam batting, and using a pen or marker, trace onto the batting where you'll need to cut. Then, cut the batting down to size using scissors or a utility knife.
 Carrie Waller
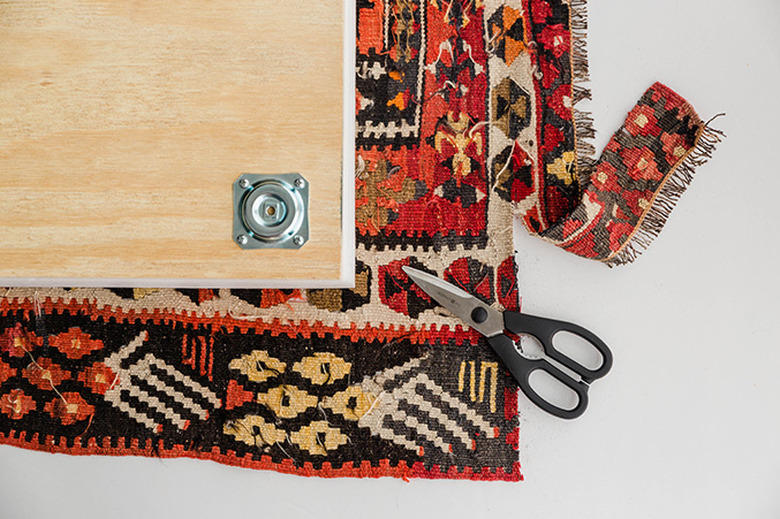
Step 3
Lay the vintage rug top-side-down on a flat surface, and then place the cut batting on top of that. Put the plywood board top-side-down (with the metal table leg plates showing) on top of the batting and rug. Use scissors to cut the rug down so that there's about six inches of overhang on each side.
 Carrie Waller
Step 4
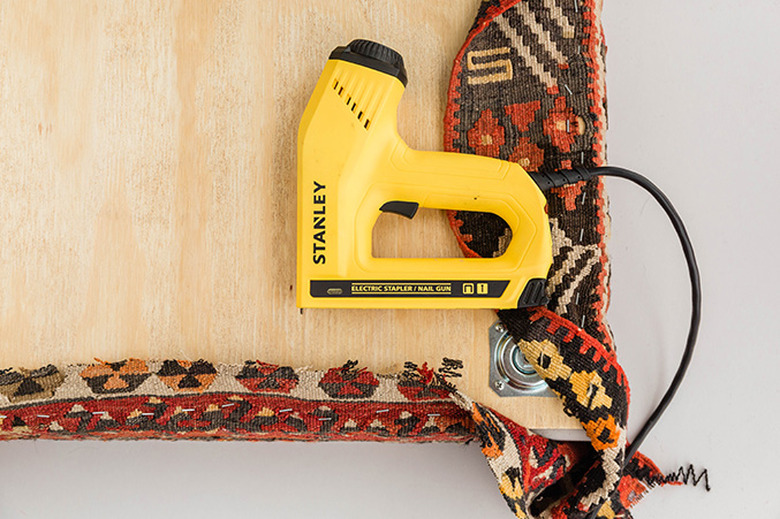
Begin wrapping the rug around the sides of the batting and plywood board, and staple to the underside of the board. Just focus on the sides for right now — not the corners.
TIP: Pull as tightly as you can for a nice, tailored look in the end. And don't staple one side all at once. Instead, add one staple to the center of one side, turn the plywood board, and staple the center of the next side. Continue turning the board and stapling one side at a time until all sides of the plywood board have been tightly stapled.
 Carrie Waller
Step 5
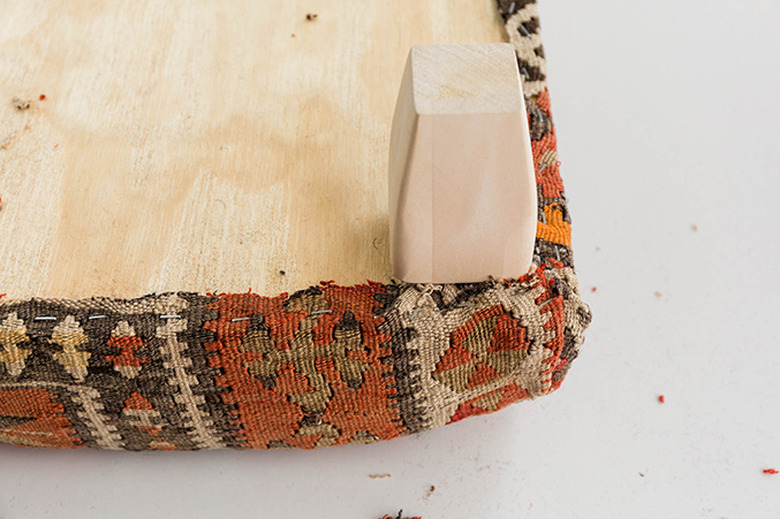
Use the idea of hospital corners to upholster each of the four corners of your ottoman. The best thing to do is to watch a video on how to do this since a live demonstration is extremely helpful. Essentially, though, you'll need to pull and staple the rug neatly around the corners of the plywood board by using overlapping 45-degree folds — sort of like wrapping a present!
 Carrie Waller
 Carrie Waller
Step 6
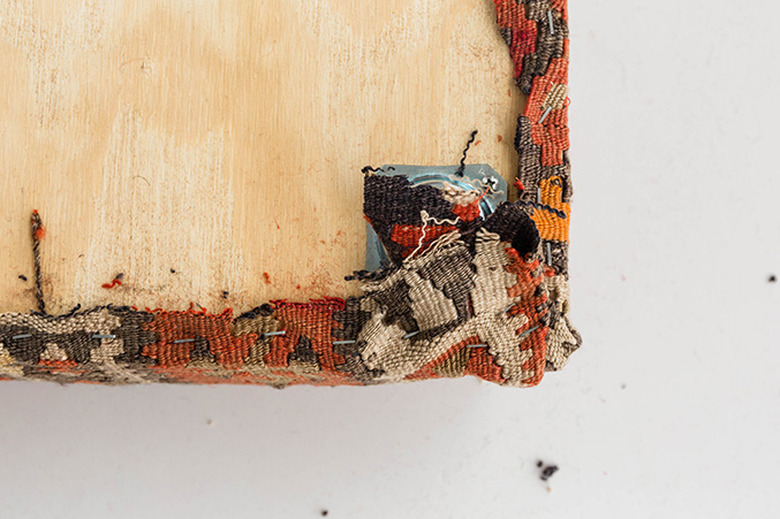
After you've tightly stapled your corners and added any extra staples needed around the edges of your ottoman, use scissors to trim all of the excess fabric away to neaten the edges. All of this will be hidden once the ottoman is turned upright, but trimming will help your ottoman look as professionally done as possible.
 Carrie Waller
Step 7
Screw the wooden legs into place through the metal table leg plates you installed in Step 1. Now you're ready to enjoy your beautiful new ottoman!
 Carrie Waller
 Carrie Waller
 Carrie Waller