Display Your Air Plants With This Cute DIY
We may receive a commission on purchases made from links.
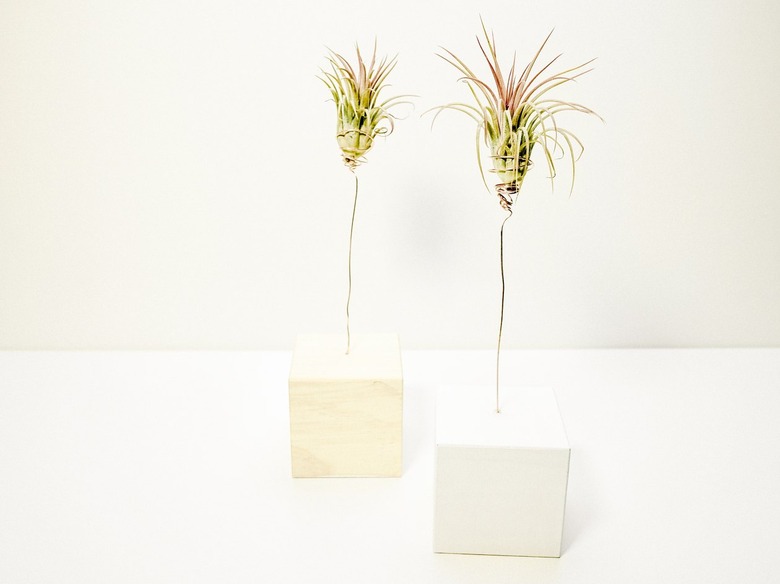
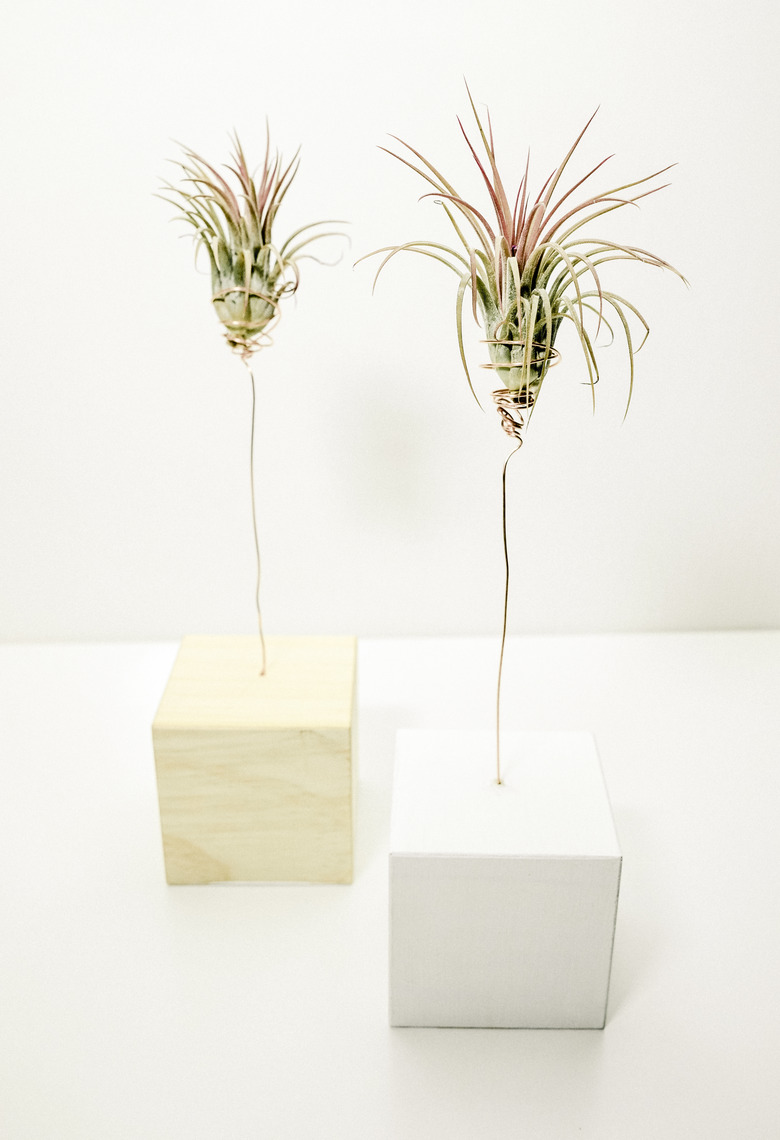
There's no such thing as too many houseplants, and luckily for those without green thumbs, low-maintenance air plants have recently become widely available at local nurseries and online. They're gorgeous, don't need soil, and unlike some plants, keeping them alive won't completely stress you out (we're looking at you, fiddle-leaf fig tree). And to go with your easy-to-care for air plant, here's an easy-to-make air plant holder you can whip up in a flash using just a wood block and some hobby wire. Plus, they look like small palm trees. Yup. Tiny. Little. Trees. Enough said — now onto the DIY!
Things Needed
-
Wood block, any size (we used this 3.5-inch cube)
-
Acrylic craft paint and brush (optional)
-
Acrylic finish (optional)
-
Small air plant (we used Tillasandia Ionatha)
-
Hobby or floral wire, at least 18 gauge thickness (we used copper, but any will do)
-
Measuring tool
-
Pencil
-
Cutting long nose pliers
-
Drill
-
Drill bit approximately the same circumference as your wire (we used a 1/16-inch bit with 18 gauge wire)
-
Industrial strength glue
 Maya Marin
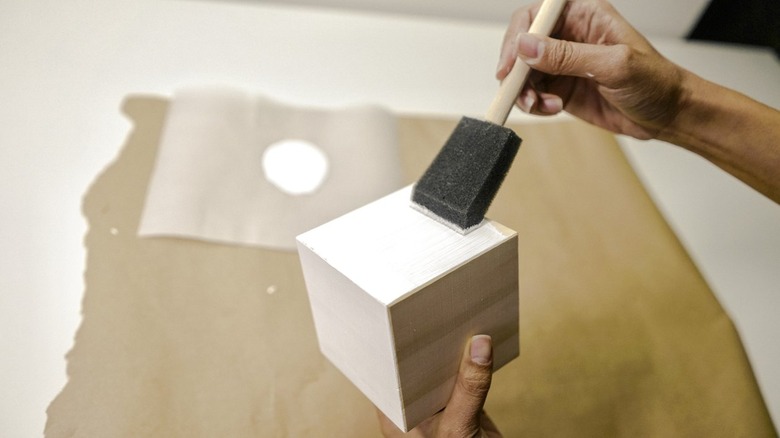
1. Paint Wood Block (Optional)
Though we love the look of natural wood, we thought that white would look great paired with our copper wire. Painting, though, is totally up to you. If leaving the wood natural, we suggest using an acrylic finish to seal the wood and to bring out its natural grain.
 Maya Marin
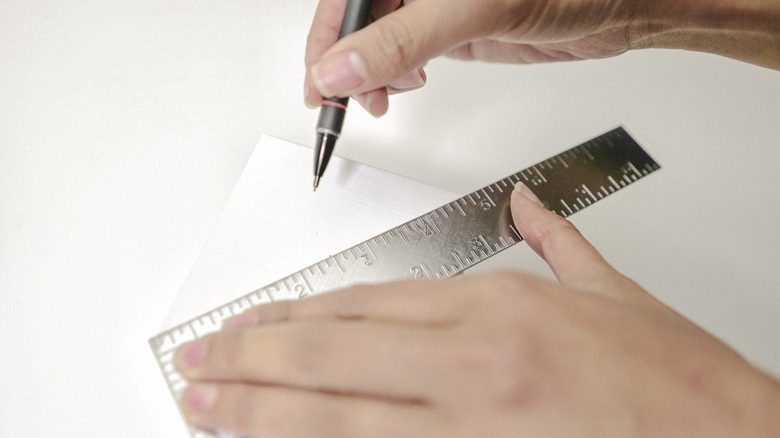
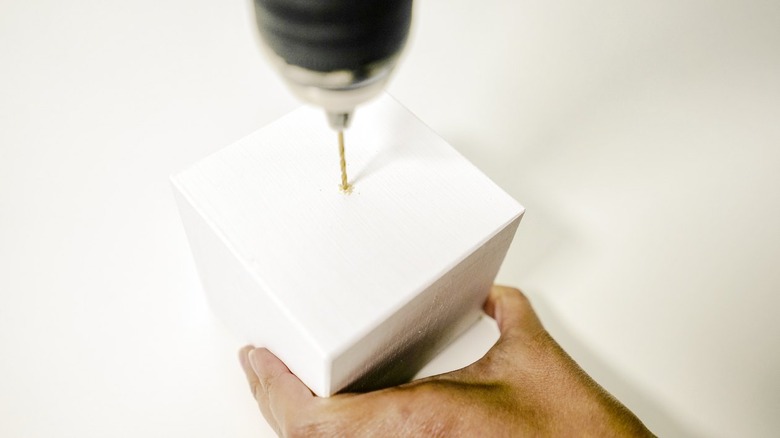
2. Drill Hole Into Wood Block
We used a cube wood block, so it didn't matter which way was up. However, if you're using a rectangular block, figure out which side you'd like to face upwards. For greater stability, of course, it's best to have the base wider than the height. Use your measuring tool to find the center point of the top side of the wood block, and mark with a pencil.
 Maya Marin
Drill a hole at the mark approximately 1-inch deep. The hole should be large enough to fit the wire you're using, but small enough so that it's fairly snug. We used 18 gauge wire and 1/16-inch drill bit.
 Maya Marin
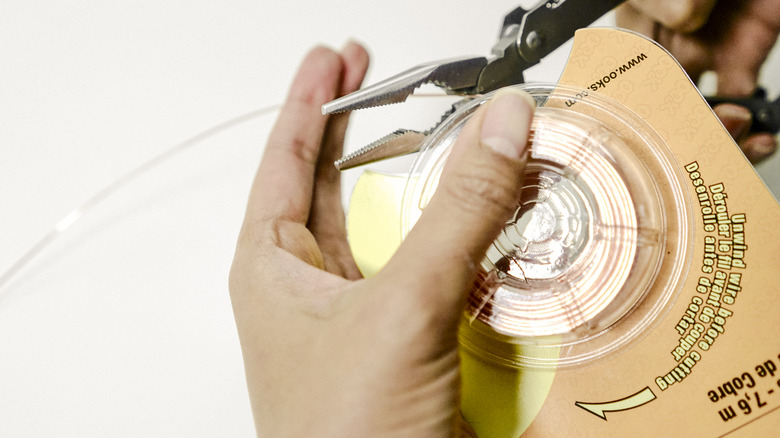
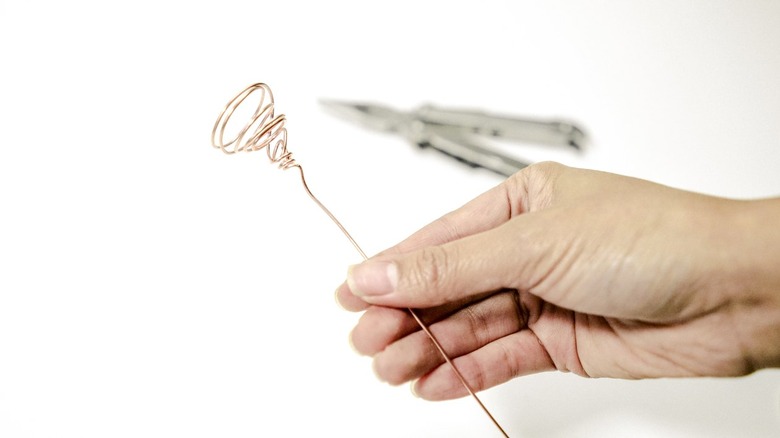
3. Cut and Shape Wire
Using your pliers, cut approximately 18 inches of wire. This will give you plenty of wire to ensure there is enough length to create a coil as well a support the weight of the plant.
 Maya Marin
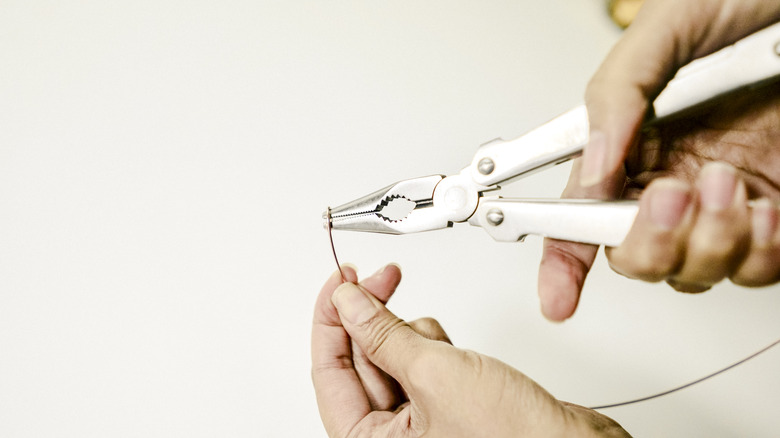
Also using your pliers, form a coil at one end. To do so, grab the tip of the wire with the pliers (as shown below) and rotate the pliers while your other hand holds the wire in place.
 Maya Marin
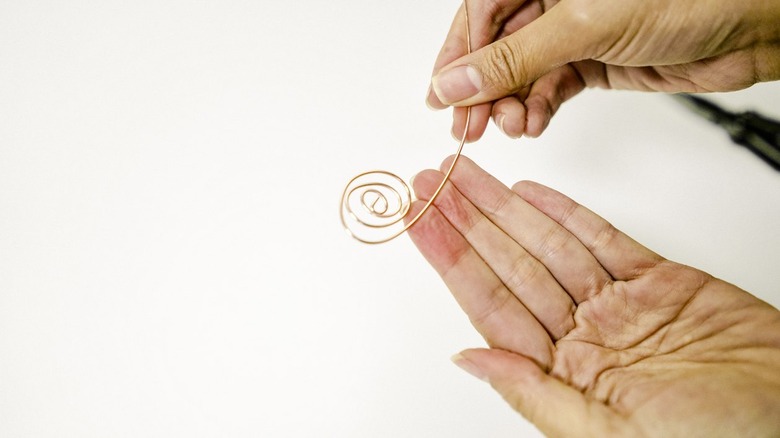
Bend the tail at the very base of the coil and hook it inside the center as shown below.
 Maya Marin
 Maya Marin
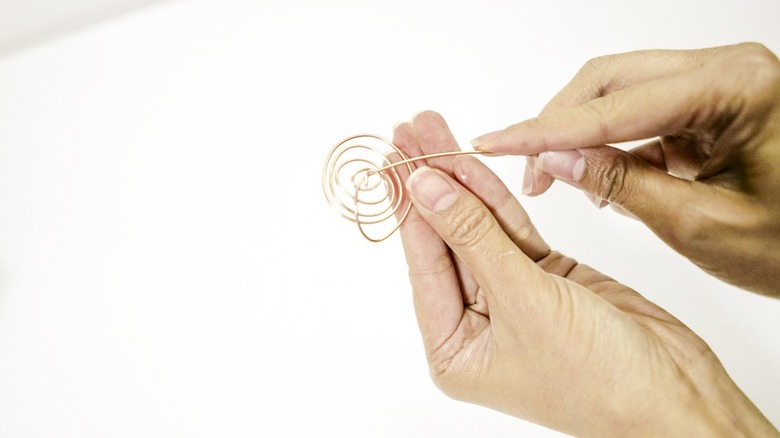
To finish shaping your wire, pull the tail and center of the coil downward to form a cone. As you do so, shape it so that it's wide enough to securely hold the base of your air plant.
 Maya Marin
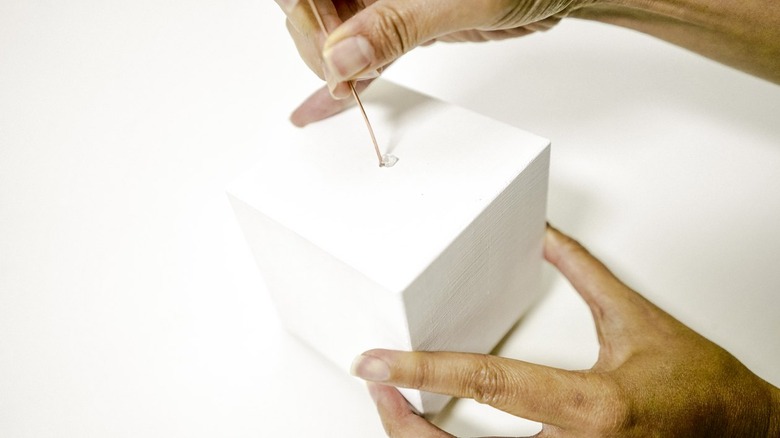
4. Glue Wire to Wood Block
Before attaching your wire to the wood block, figure out the right height of your air plant "tree." This will depend upon a few factors: your desired height, the weight of the air plant, and the material and gauge of your wire. The taller the tree, the stronger your wire needs to be in order to support the weight of the plant so that it remains upright.
The best way to figure this out is to place the air plant in the wire cone and then testing out heights by holding the wire in your hand in varying lengths to see what height the wire will support. Once you've figured out the right height, use your pliers to cut the wire approximately one inch below your desired tree height.
Coat the base of the wire with glue and insert it into your drilled hole.
 Maya Marin
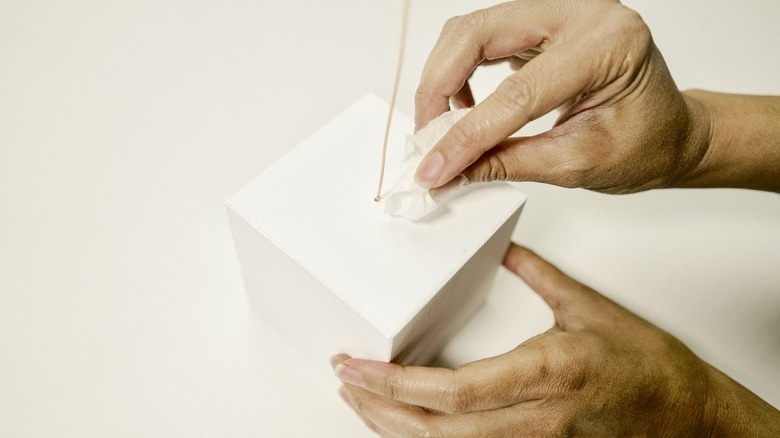
Wipe away any excess glue, though you may want to leave a bit on the surface of the wood block around the the base of the wire for added stability. Hold the wire upright while the glue cures.
 Maya Marin
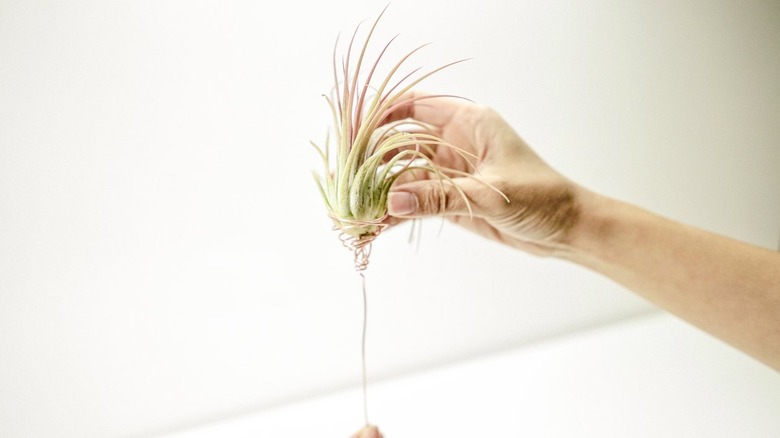
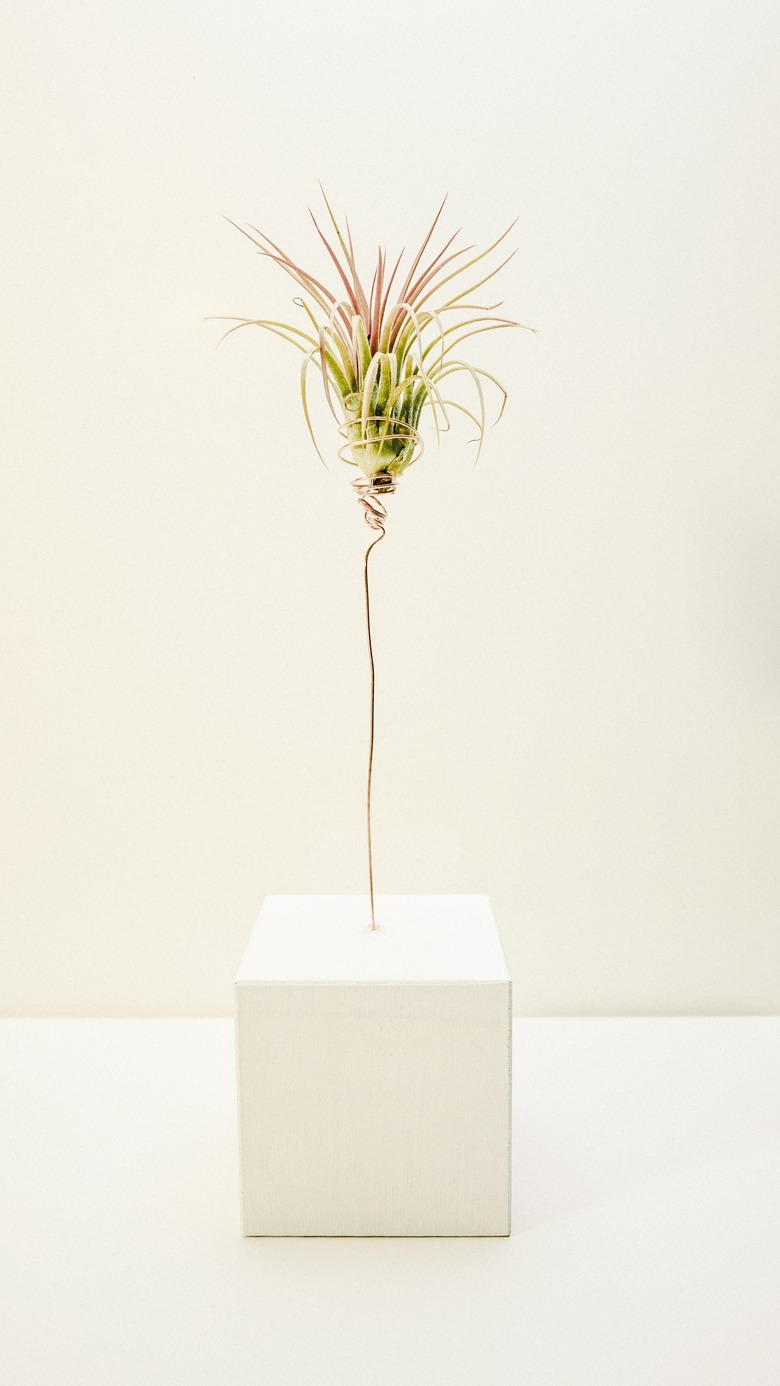
5. Add Air Plant
Finally, insert your air plant into the wire holder and your mini air plant "tree" is ready to take center stage on your coffee table, mantle, or shelf.
 Maya Marin
 Maya Marin
But of course you'll have to make more than one because, come on, how cute are these little guys?
 Maya Marin