Air Plant Care 101
Interest in air plants is sky-high right now. After all, who can resist their velvet-ribbon foliage? Their delicate neon blooms? Or the astounding fact that they don't need soil to grow — and can be placed in clever little nooks like living sculptures?
Truth is though, air plants (also known as tillies, or tillandsias, after their genus name) can be tricky to keep alive. Well-intentioned lovers of these plants might mistake "no soil" for "no water," which isn't the case. "Air plant" does not mean "breatharian of the plant world."
 The Horticult
As epiphytes, tillandsias grow innocuously on larger structures like trees, and pull hydration and nutrients from the air, rain and debris. Tillandsias absorb their essentials through their foliage (not through their roots, which are there instead for leverage), so they need to be watered regularly. They also have specific needs when it comes to circulation, light, and maintenance. Read on for these tips on keeping your tillies in tip-top shape...
 The Horticult
Before You Buy, Find Good Light and Circulation for Your Air Plants
Before You Buy, Find Good Light and Circulation for Your Air Plants
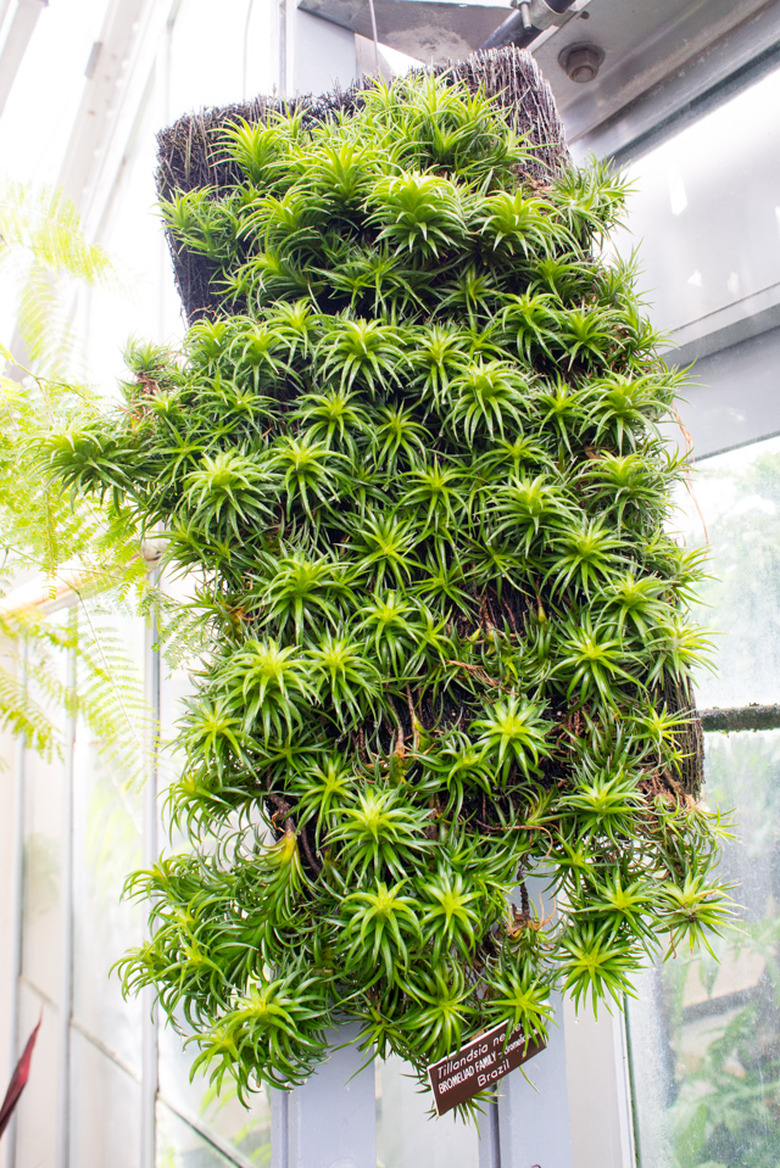
You know those glass orbs often sold alongside tillandsias? They're hip, but not necessarily healthy. Tillies need airflow and bright light to thrive. So find a spot — whether indoors or outdoors — that gets circulation, as well as bright but indirect light.
When we grow them inside, we always place them near a window. (When entertaining, sometimes we move them temporarily to a more stylish spot.) We've had the best luck when we grow them outdoors, under a tree or eave so that they do not get direct midday sunlight and receive excellent air circulation.
TIP: Air plants survive very well resting or tied loosely to trees with small canopies providing bright filtered light. Avoid trees with dense leaves and any spot with midday direct sun. Early morning and late afternoon direct sun are okay.
 The Horticult
WARNING: Air plants are not hardy to frost, so if there is any risk, bring them indoors.
Get Your Tillandsias
Get Your Tillandsias
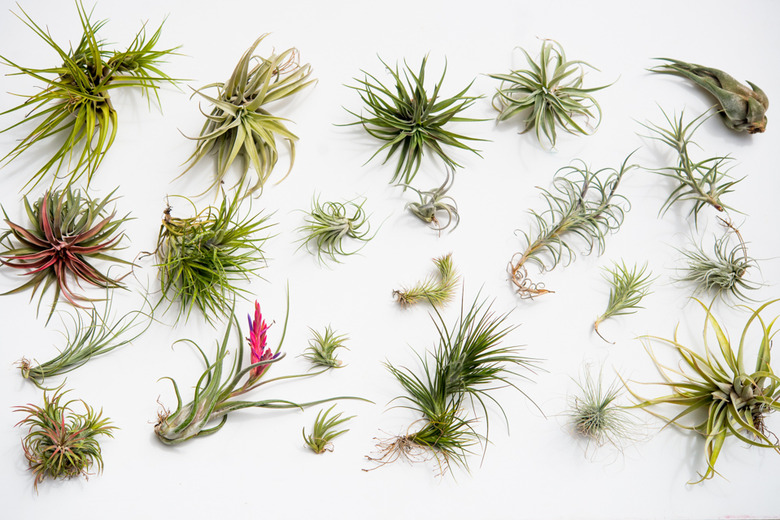
Acquire your air plants from a trusted source. That could be a local nursery, home furnishings store (where the plants are stored near a light source), or online. We've had great luck with highly rated online sources that sell directly from their greenhouses, at discount/wholesale prices. Get a variety! Try different types, and see what you like and what you can keep alive in your space and your lifestyle.
 The Horticult
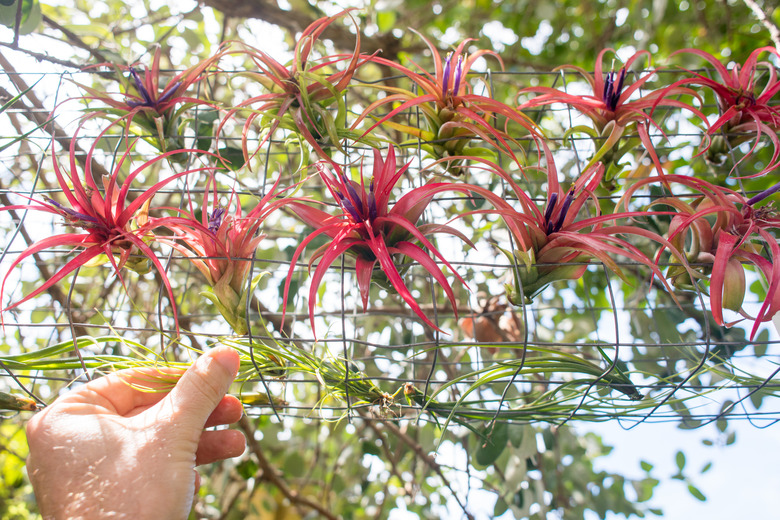
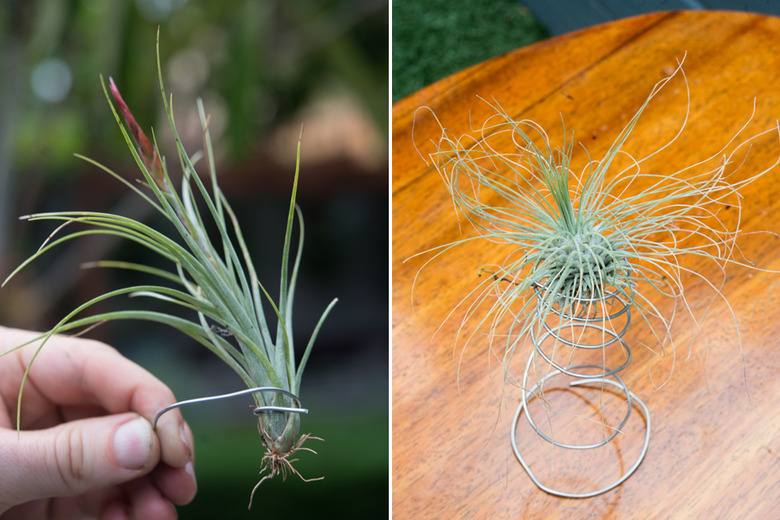
Choose Your “Planter”
Choose Your "Planter"
This can be the nook of a tree, a shelf, or a planter designed specifically for tillandsias. You can even make your own air plant stands or frames out of aluminum wire or with a metal grid from your local hardware store. Place your air plant habitat in the kind of spot as discussed above.
 The Horticult
 The Horticult
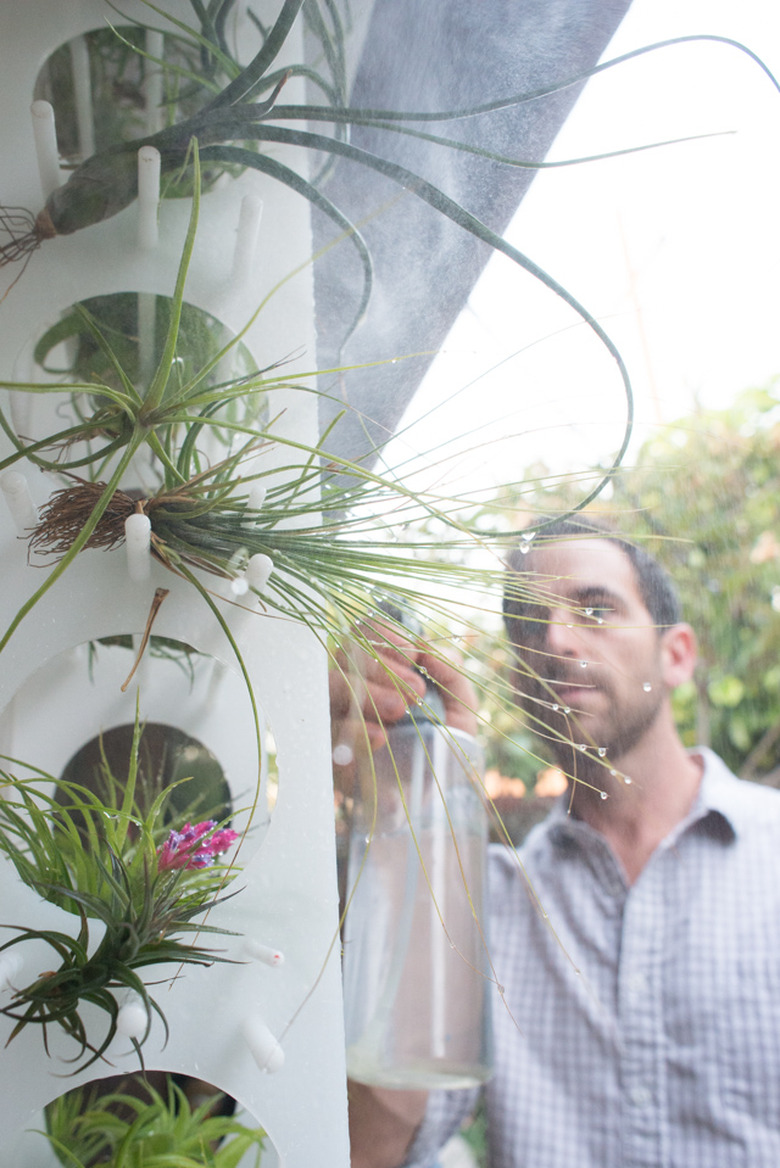
Water Your Air Plants
Water Your Air Plants
The Technique
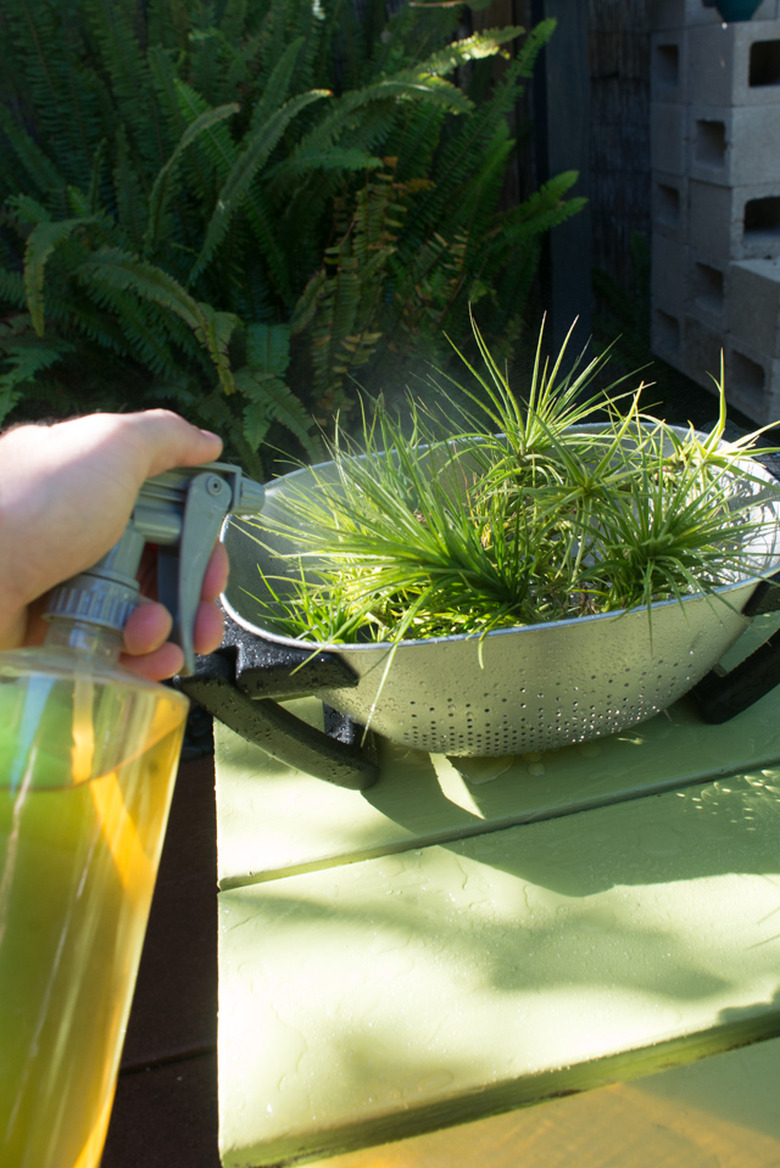
Misting is a good, quick way to hydrate your plants between soaking or drenching. Mist your plants as little as once a week in humid climates or as often as every day in dry climates. Use a spray bottle with a wide spray pattern to thoroughly wet the leaves.
 The Horticult
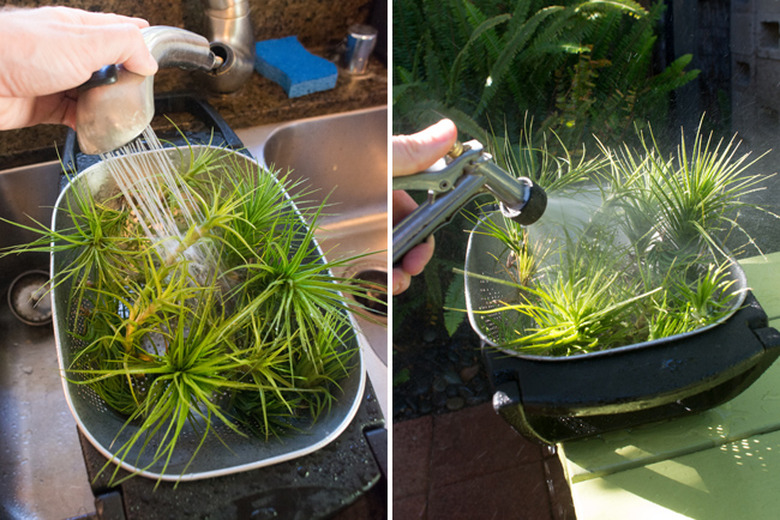
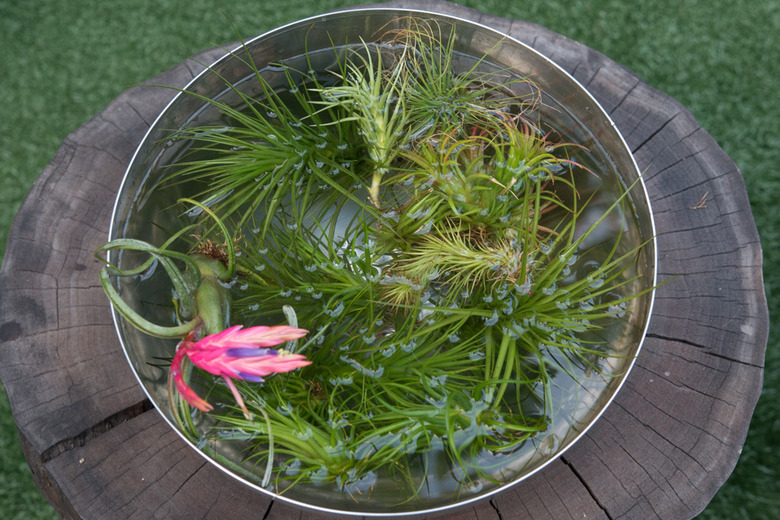
Drench weekly by running under a stream of water or immersing for a minute or two in a bowl of water. For many species of air plants, this will be enough in humid climates with good air circulation.
 The Horticult
If plants appear to be drying out even with weekly drenchings, apply a weekly or bi-weekly soaking regimen. If you miss weekly drenching for more than two weeks, soak thirsty plants for up to five hours. Always keep blooms above water level.
Tip: You can tell a thirsty air plant by browning and increased hardness of the leaves. Meanwhile, white fuzz on the leaves is a healthy sign! The hairs are trichomes, which act as receptors of moisture and nutrients, and are naturally more visible on certain species that are native to arid regions. General rule: the fuzzier the air plant, the less water it needs.
 The Horticult
After soaking, shake off excess water and place them in a location with good circulation so they can dry completely within four hours. Lingering moisture or puddling water can lead to rot.
 The Horticult
What kind of water?
Reverse osmosis or rainwater is ideal. Tap water can be used to drench or soak your plants, but high chlorine content could cause damage. Distilled water is not advised, as it can actually leach nutrients from your plant.
TIP: You can let your tap water sit out for a day in a pitcher so the chlorine can off-gas before soaking or putting into your mister bottle.
Mind Your Pups
Mind Your Pups
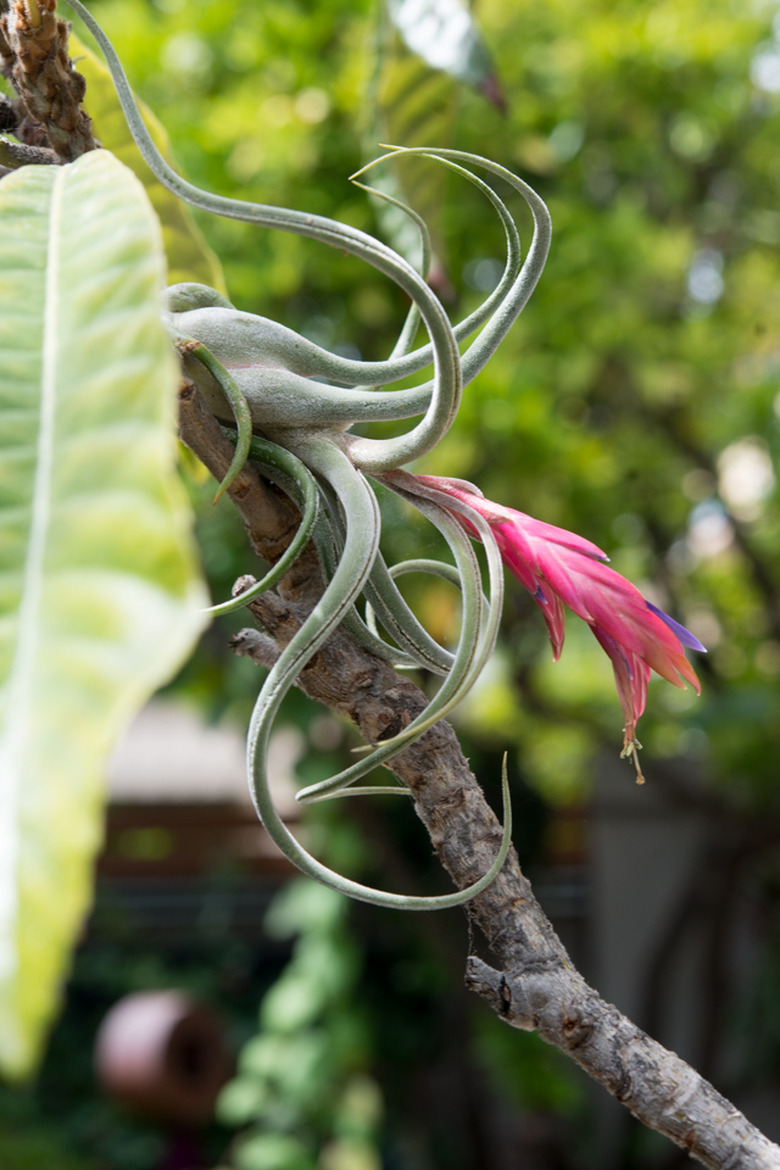
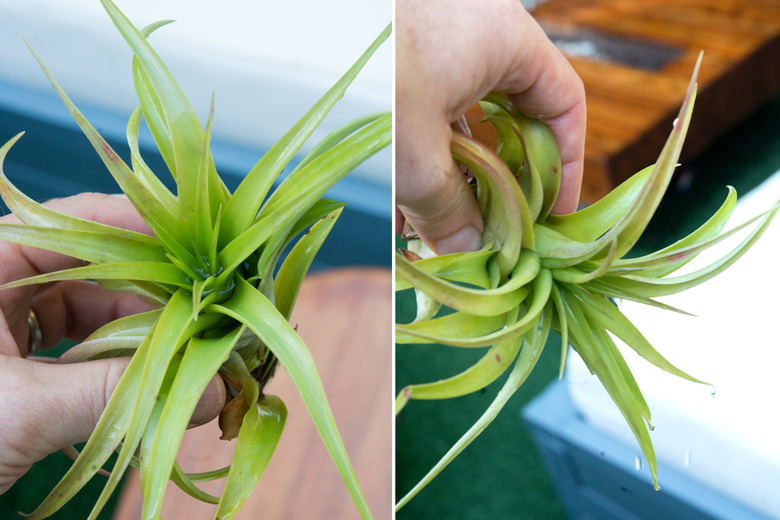
An air plant flowers once in its lifetime, and during that time will often begin to develop a pup, or offset, at its base. That's the offspring! As the pup grows, the parent will slowly fade. When the pup has gotten at least one-third the size of its parents, often you can separate the two by gently pulling them apart with a slight twist — but this is completely optional. If they do not separate easily, the pup may not be ready to survive on its own. If you do separate them, take care to keep the pup's structure in tact.
 The Horticult
TIP: If the parent is still alive, keep it! It could produce additional pups.
Consider Pruning and Feeding
Consider Pruning and Feeding
You will likely find dried brown leaves at the base of your plant, which is totally normal. Feel free to trim them with a pair of shears, but make sure there are no small pups within the dried foliage. Some pups can be as small as an eraser tip and can hide in the dried leaves.
You don't necessarily need to fertilize, but for more robust flowers and pups, fertilize once a month (in spring, summer and early fall) with a water-soluble bromeliad or orchid fertilizer added to your mister and diluted to one-quarter strength.
 The Horticult