Create Cane And Leather Trees To Complement Your Holiday Decor
We may receive a commission on purchases made from links.
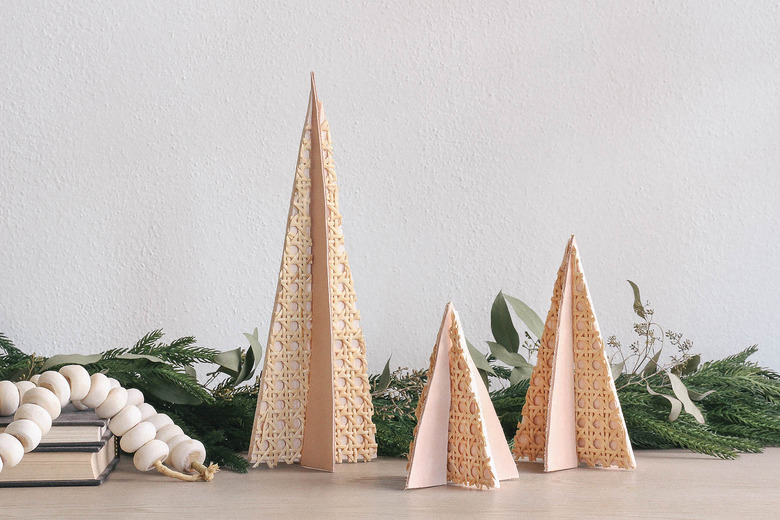
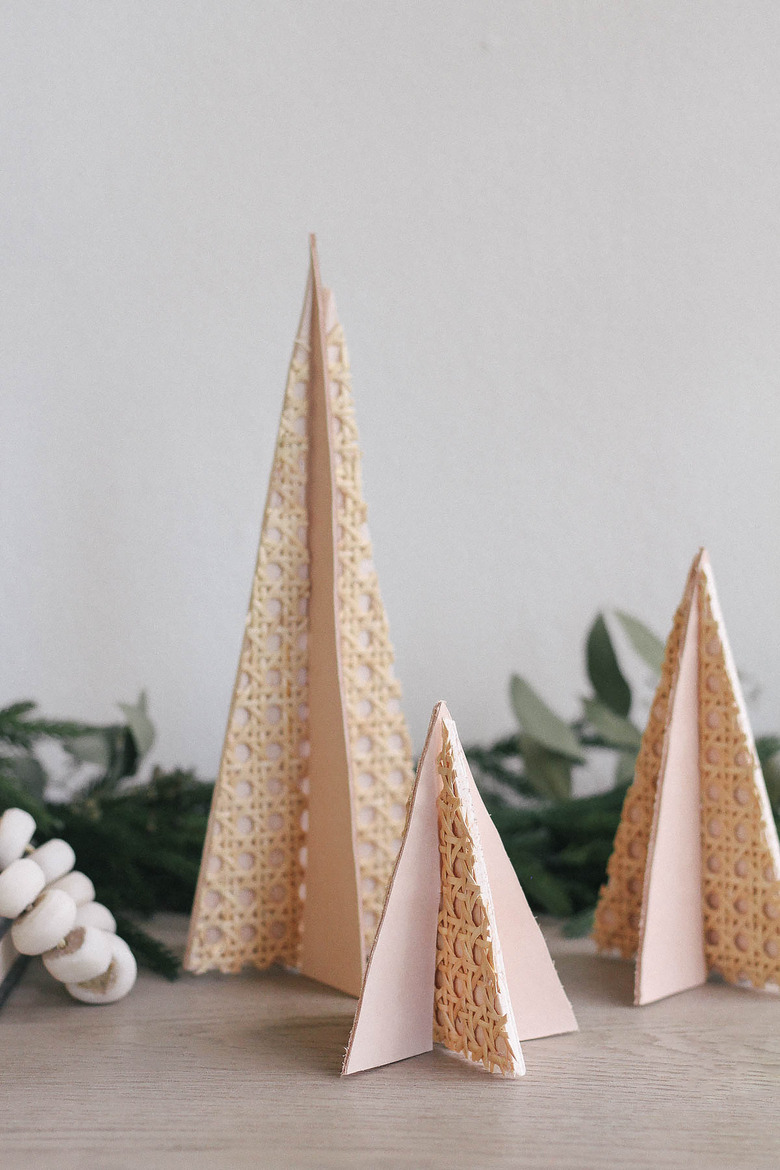
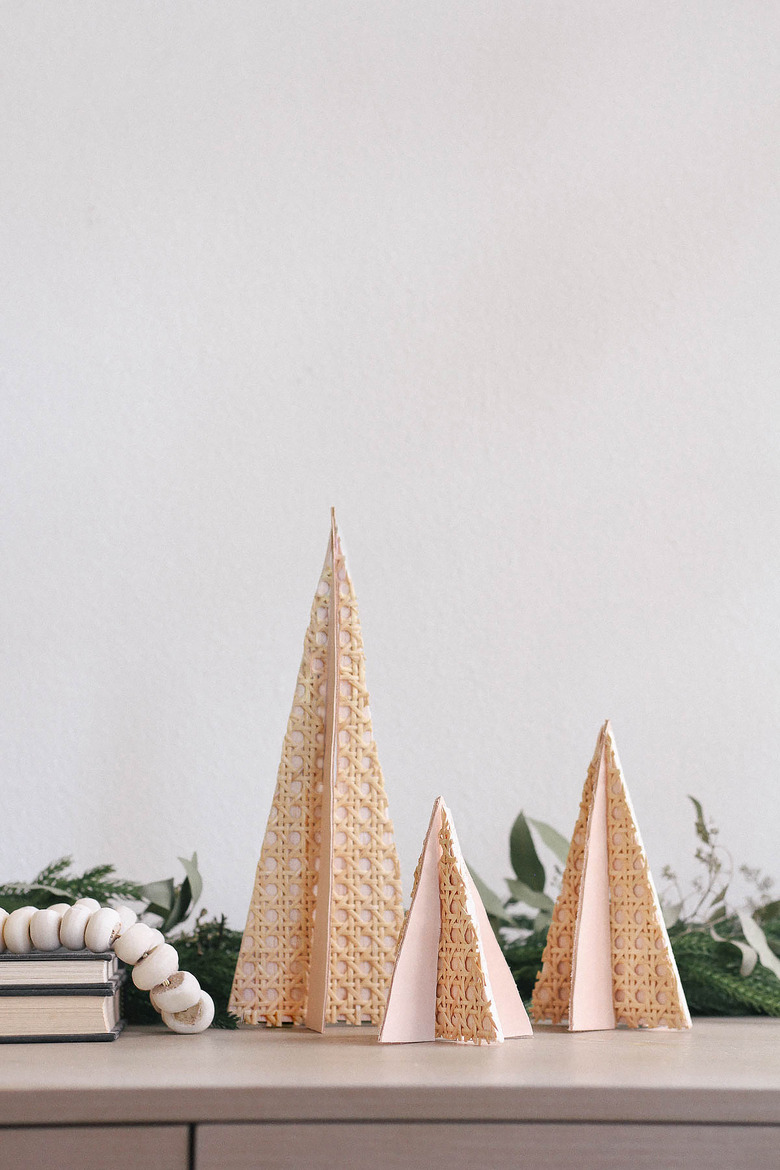
Bring the festive and familiar shape of evergreen trees to your holiday decor with a modern twist. Made from cane webbing and leather, they offer a great woven texture and neutral palette that will complement any decor style. Cluster several trees together on a mantel, table, or shelf, and this little holiday forest is sure to bring the enchanting charm of a winter wonderland to your space.
Things Needed
 Trisha Sprouse
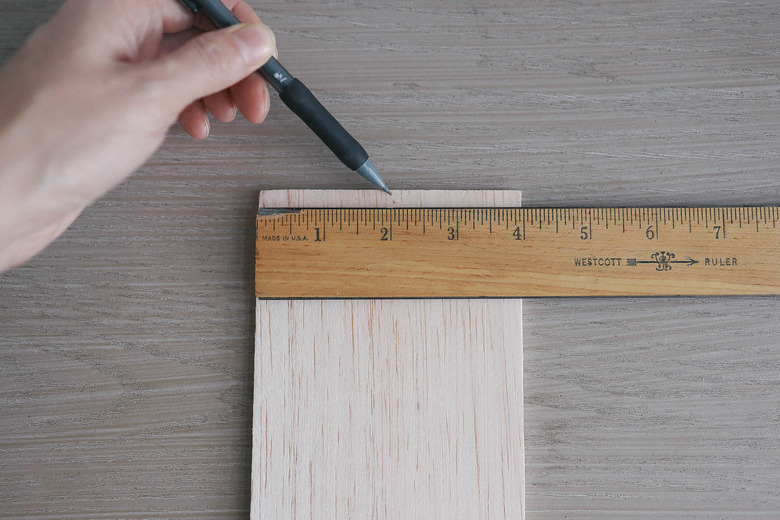
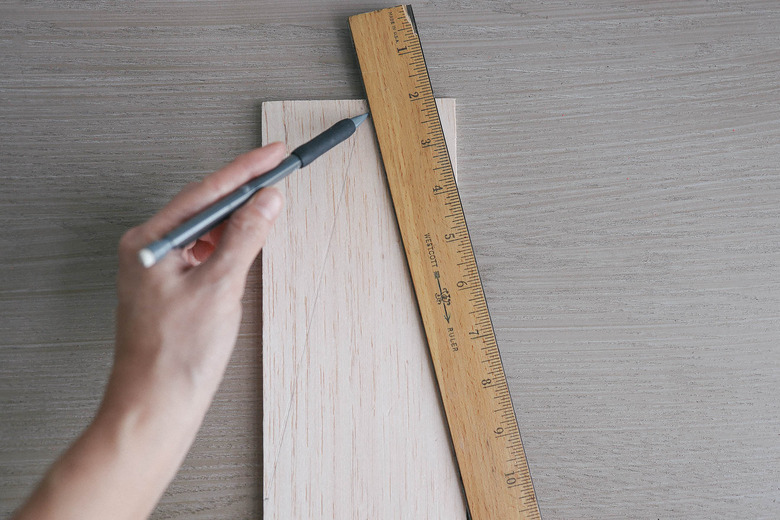
1. Draw triangles on the balsa wood.
First, mark the middle of your piece of your balsa wood (our mid-point was at the two-inch mark).
 Trisha Sprouse
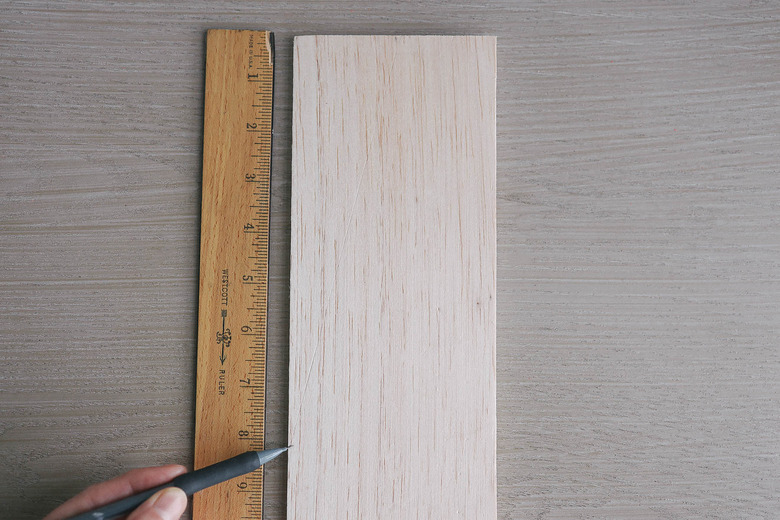
Decide how tall you want your tree to be, and make a mark on each side of the balsa wood at that height. We decided on an 8-inch height for our medium tree (shown here), 12 inches for our large tree, and 6 inches for our small tree.
 Trisha Sprouse
Connect the midpoint at the top to the two side points with a pencil to form a triangle.
 Trisha Sprouse
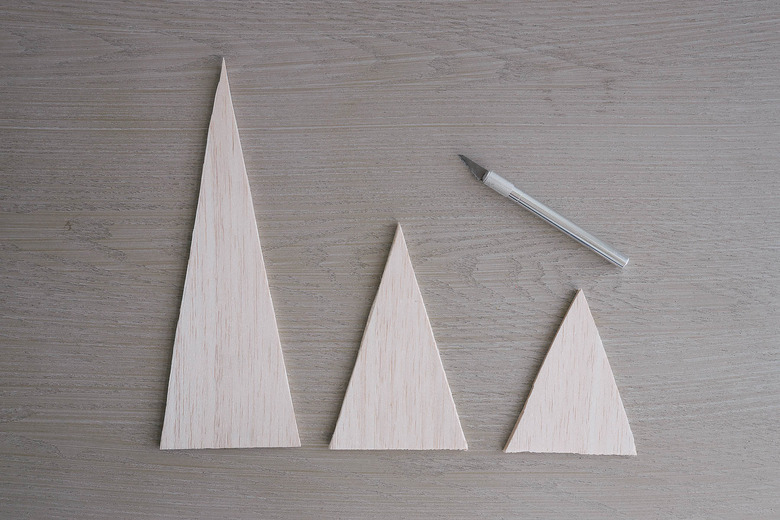
2. Cut out the wooden triangles.
Use a craft knife to cut out the triangle shapes from the balsa wood.
 Trisha Sprouse
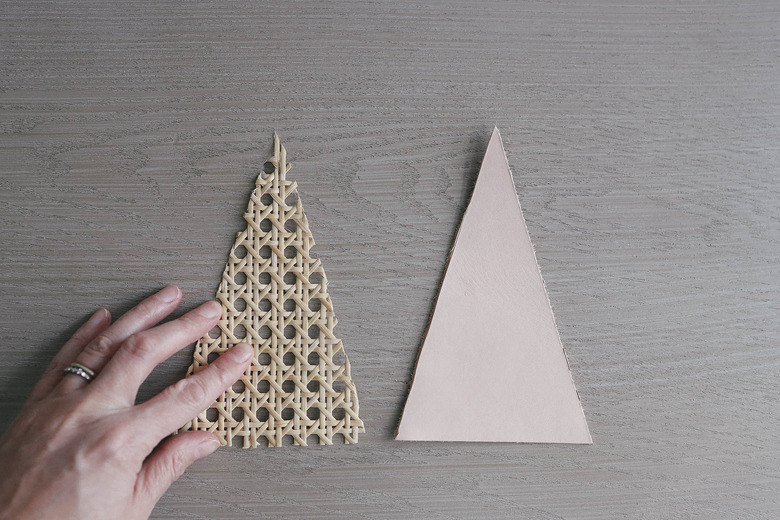
3. Cut out the cane and leather triangles.
Trace each wooden triangle onto the cane webbing and leather. Use scissors to cut out the cane webbing triangle, and a craft knife to cut out the leather one.
 Trisha Sprouse
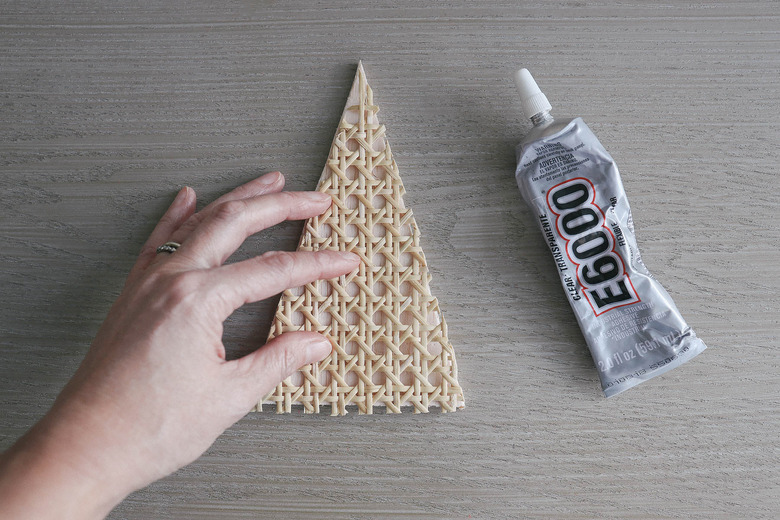
4. Glue the cane triangles to the wood triangles
Pipe a generous amount of glue on the back of the cane webbing triangle, and glue it onto the corresponding balsa wood triangle. Place a piece of wax paper on top, and weigh it down with a heavy book (the wax paper protects the book). Let it dry for a few hours.
 Trisha Sprouse
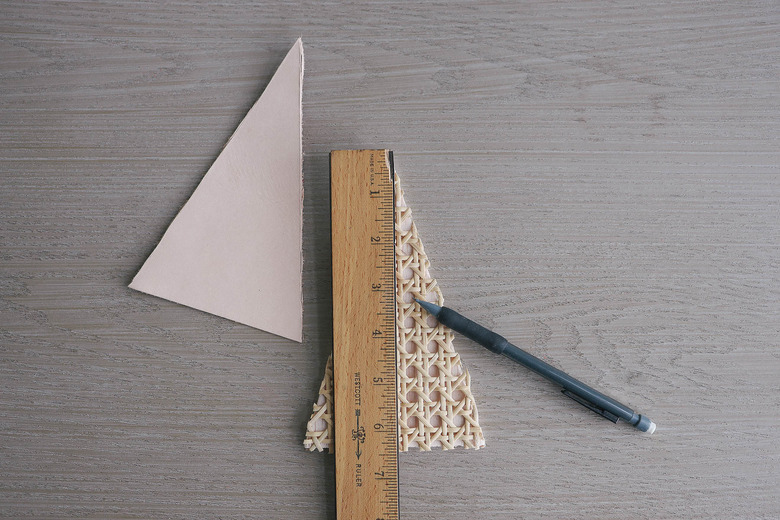
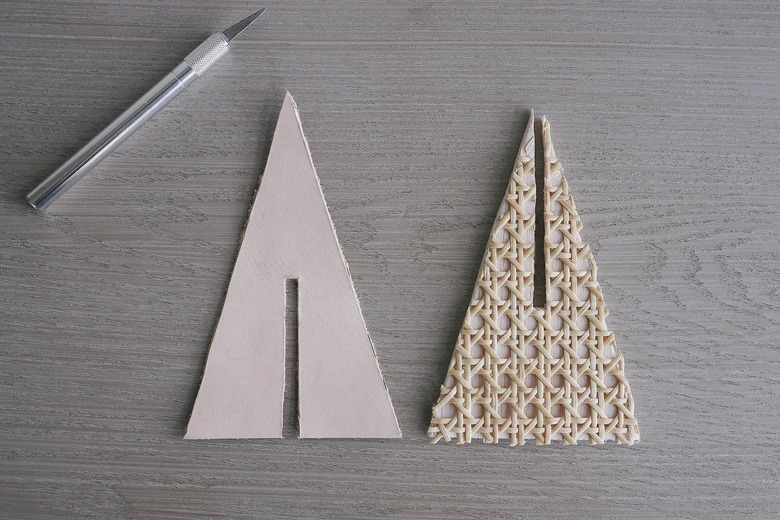
5. Cut slits in the triangles.
Once the glue is dry, remove the book and wax paper. On the cane webbing triangle, use a ruler to draw a line from the top of the triangle down to the middle. On the leather triangle, draw a line from the bottom center of the triangle up to the middle.
 Trisha Sprouse
Use a craft knife to cut out slits along the center lines you drew. You'll need to the make the slits as wide as the thickness of your balsa wood (in our case, 1/8-inch thick).
 Trisha Sprouse
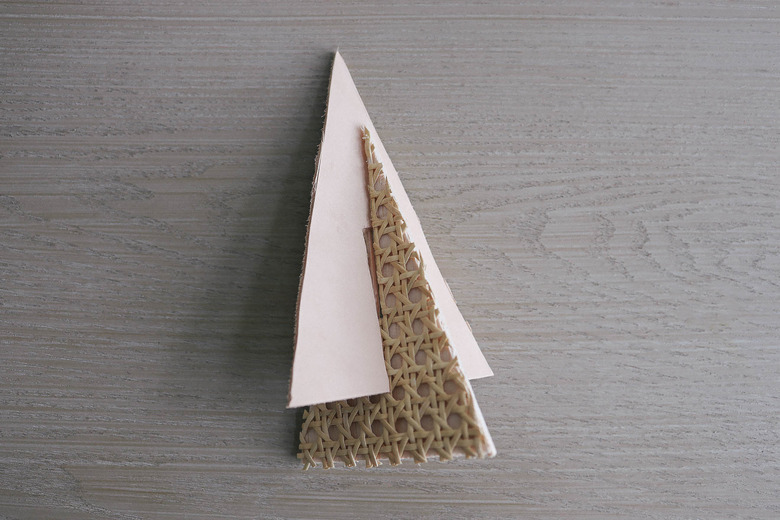
6. Assemble the trees.
Slide the slit on the leather triangle over the slit on the cane triangle, and stand the tree upright.
 Trisha Sprouse
Your trees are all ready to deck the halls!
 Trisha Sprouse