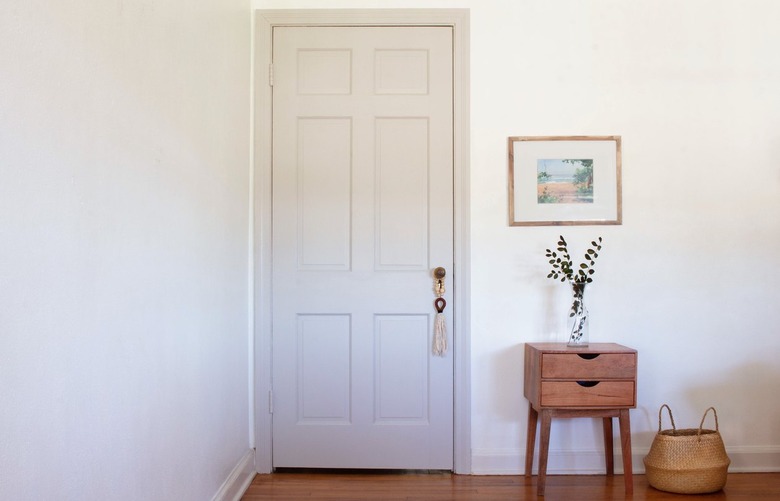
How To Replace An Interior Prehung Door
We may receive a commission on purchases made from links.
The quickest and easiest way to replace an interior door is with a prehung door. Unlike slab doors, which consist of a blank door and nothing else, prehung doors come already installed on a jamb, which makes up a part of the door frame and supports the door. Although you will have to remove the old jamb from your doorway before you can install it, you don't have to measure for and cut hinge mortises — a job that's notoriously easy to mess up.
Whether the door you're replacing is prehung or not, you'll have to unhang it (take it off the hinges) before you can remove the old door jamb. The same is true for French doors (yes, you can get those prehung), bifold doors, and other types of closet doors.
Tip
Don't forget to take an accurate measurement of the old door before you buy a new one. You don't want to find out after the fact that you bought a 30-inch door when you needed a 32-inch one.
Project Overview

Project Overview
The idea behind a prehung door is that you can just slip the entire door assembly into a rough opening of the correct size, fasten the jamb to the studs, and bingo — you're finished. Of course, DIY home improvement projects are seldom that simple, and what complicates this project is the need to get the jamb plumb, or level. Some installers like to leave the door attached to the jamb throughout the entire installation, but the jamb is easier to manipulate and straighten if you first remove the door by pulling the hinge pins. Because the hinges are already placed correctly, you'll just have to set the door back on the hinges and replace the pins after you've installed the jamb.
After you remove the existing door and jamb, it's important to check the rough opening for square before beginning installation of the new one. If the door was sticking or swinging open when left ajar, the house may have settled, and the door opening may be skewed. Take width measurements at the top middle and bottom and height measurements at the left middle and right. If your measurements differ by more than 1/2 inch, consider adding furring strips to fill gaps between the new jamb and the framing.
It's also a good idea to check the level of the header and floor because if either slopes, you'll need to cut one jamb longer than the other. You want the jambs to extend to within 1/2 inch of the finished floor (closer is better but leave yourself some wiggle room). If you plan to install new flooring after installing the door, go ahead and extend the jambs all the way to the subfloor. You can undercut them later with a handsaw and get them the exact length you need.
How to Replace an Interior Prehung Door
How to Replace an Interior Prehung Door
1. Remove the Old Door
Using a screwdriver, unscrew the lockset from the old door and remove it. Then, remove the barrel bolt from the side of the door. You can reuse these on the new door or simply discard them.
Now, close the door and tap out the hinge pins using a screwdriver and hammer. When all the pins have been removed, pull the door by gripping the hole where the lockset was and it will fall into your hands. The door may or may not be heavy, so you might need an extra pair of hands to help support and carry it.
2. Remove the Old Door Casing
Cut the caulk around the inside and outside of the door casing, the molding trim that lines the perimeter of both sides of the door, with a sharp utility knife. This will prevent you from pulling off paint when you remove the casing. To pry it off, start at the bottom of one side of the doorway. Tap a chisel behind the casing and pry the bottom out. Work your way to the top, prying as you go. Do this carefully if you want to reuse the casing. Remove the casing from the sides and top of the doorway on both sides in the same way.
Tip
When you remove the casing, it's a good idea to tap out all the nails before you set the casing aside. Not only does this prepare it for reuse but it prevents accidents.
3. Remove the Door Jamb
Starting on one side of the door at the bottom, work a chisel or pry bar behind the door jamb and pry out the bottom just far enough to see whether it's held by screws or nails. If the jamb is held by nails, you should be able to pry it off in the same way you pried off the casing. If it's held by screws, it's easier to slip the blade of a reciprocating saw behind the jamb and cut the screws one by one. Cut as close to the studs as possible to avoid having the cut screws interfere with installation of the new jamb. If using a reciprocating saw, make sure to wear protective eyewear.
4. Separate the New Door From the Jamb
Lay the new door flat on a table or stand it against a wall. Remove the plug that the factory installed to keep the door closed during shipping and then pull the hinge pins, using a hammer and screwdriver to tap them out if necessary. Lift the door out of the jamb and set it aside.
5. Cut the Jamb to the Proper Height
Measure the height of the door opening from the header to the floor. Subtract 3/4 inch from this measurement to account for the thickness of the top jamb and subtract another 1/4 to 1/2 inch to allow for a small gap at the bottom of the jamb. Altogether, you're subtracting 1 to 1 1/4 inches.
Measure that distance from the jamb header to the bottom of the side jamb that goes on that side of the doorway, scribe a perpendicular line across the jamb with a speed square, and cut along the line with a circular saw. If the floor and header are level, you can cut the other jamb to the same height, but if one or the other isn't level, take a separate measurement for the opposite jamb.
6. Tack the Jamb Into the Doorway
Move the jamb into the doorway, making sure the hinge and strike jambs are on the proper sides. Lift one of the side jambs to the top of the doorway, align the sides flush with the walls on either side of the doorway, and partially drive a 2-inch finish nail about 6 inches from the top to temporarily hold it in place. Repeat on the other side.
7. Level the Top Jamb
Put a 2-foot level against the top jamb and check the bubble. It should be centered, and if so, you're good to go. If it isn't, remove the nail from the side jamb on the higher side, move that jamb down to center the bubble, and re-drive the nail.
8. Plumb the Side Jambs
Plumb the hinge-side jamb first. Set a level against it and move the bottom as needed to center the bubble. Set shims behind the jamb a few inches below the bottom hinge and partially drive a nail to hold the shims in place. Recheck the level and set shims a few inches below the top hinge and hold them in place with a nail. Move over to the strike-side jamb and plumb it the same way, putting one set of shims about 6 inches above the floor, another set behind the strike mortise, and a third set about 6 inches below the top jamb.
When you're finished, hang the door on the hinges, replace the hinge pins, and open and close the door to make sure it doesn't stick and the gaps between the sides and top of the door are even. Make adjustments as needed. At this point, you can leave the door hanging, but since you need to paint the jamb and door casing, it's probably better to take the door down so you can paint that separately.
9. Secure the Jambs
Drive pairs of 2 1/2-inch finish nails or trim screws at roughly 18-inch intervals along both side jambs. You'll have to space them a little closer along the top jamb because it's shorter. Set the fasteners about an inch from the edges of the jambs and use your speed square to align them in a straight line. If you're using nails, sink the heads below the surface using a nail set. When all the fasteners are set, score the parts of the shims extending beyond the jambs using a utility knife and break them off.
10. Install the Door Trim
Nail the door casing around both sides of the door frame using pairs of 1 1/2-inch finish nails arranged side by side at 18-inch intervals. If you don't do this with a nail gun, set the heads with a nail set.
11. Fill the Nail and Screw Holes, Sand and Paint
Fill all the nail and screw holes with wood filler, wait for it to dry, and then sand the jamb and casing. Apply the interior wood enamel of your choice with a paintbrush. If the door is hanging, you can paint it at the same time, or you can paint it separately on a pair of sawhorses.
12. Install the Door Hardware
Reuse the doorknob or lockset you removed from the old door or install new hardware as desired. If this is a privacy door and you want to install a latch or deadbolt, you can also do this at this time.