Look Closely: That's Yarn We're Using On This IKEA Stool (A Unique Piece!)

We may receive a commission on purchases made from links.
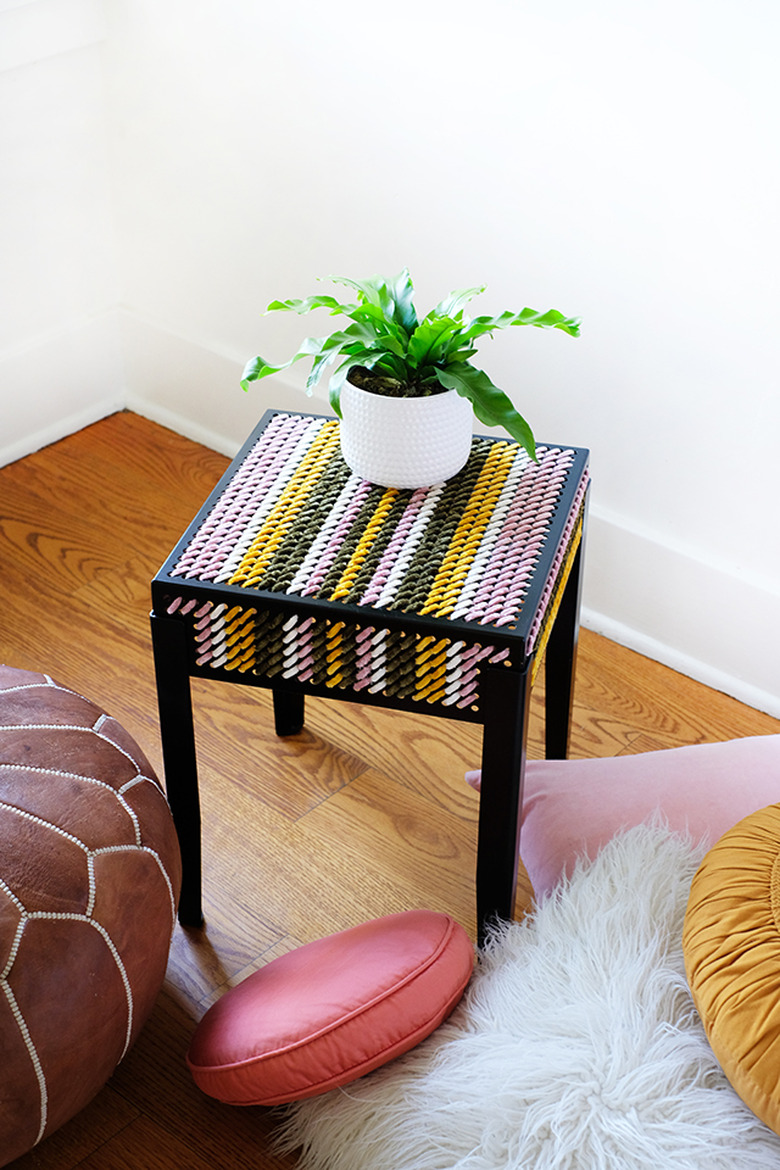
Purchasing furniture for your home from a big-box store doesn't always mean you end up with a generic piece that is seen in everyone else's home. Giving inexpensive furniture a little DIY love can result in a one-of-a-kind piece and not break the bank at the same time. This stool from IKEA is the perfect piece that you can easily add your own flare to. And this little makeover will cost less than $10.
 Jeran McConnel
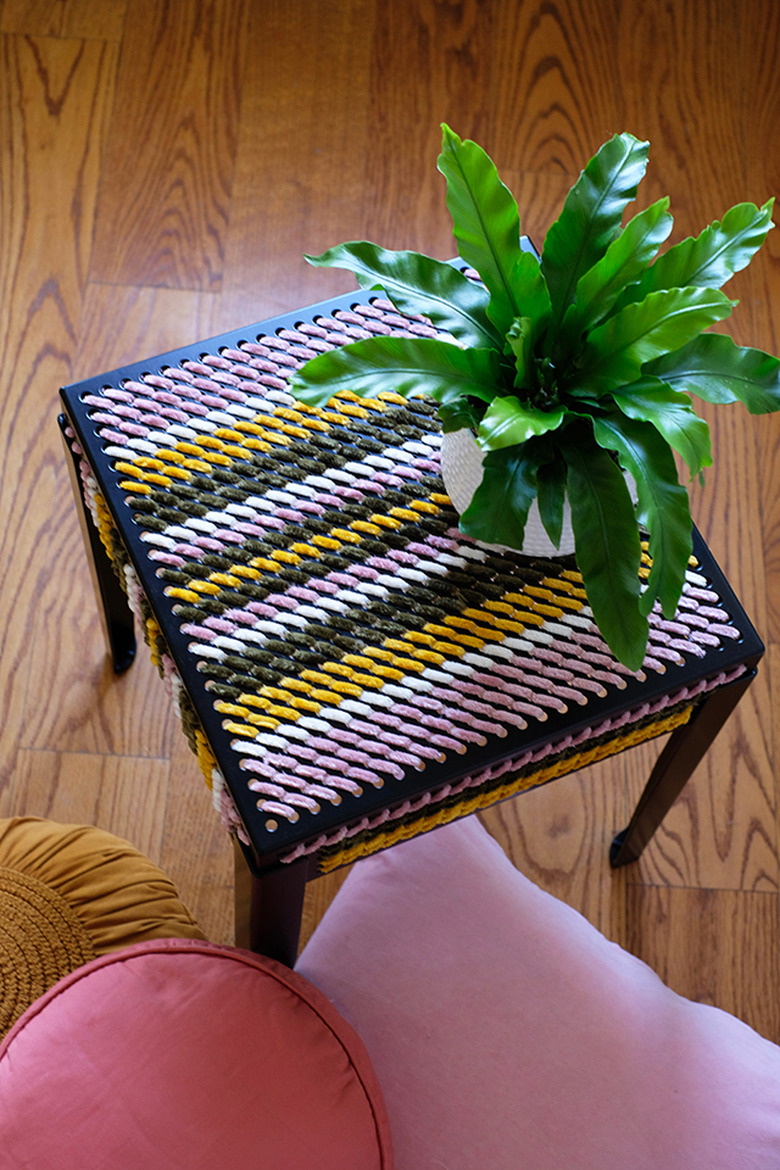
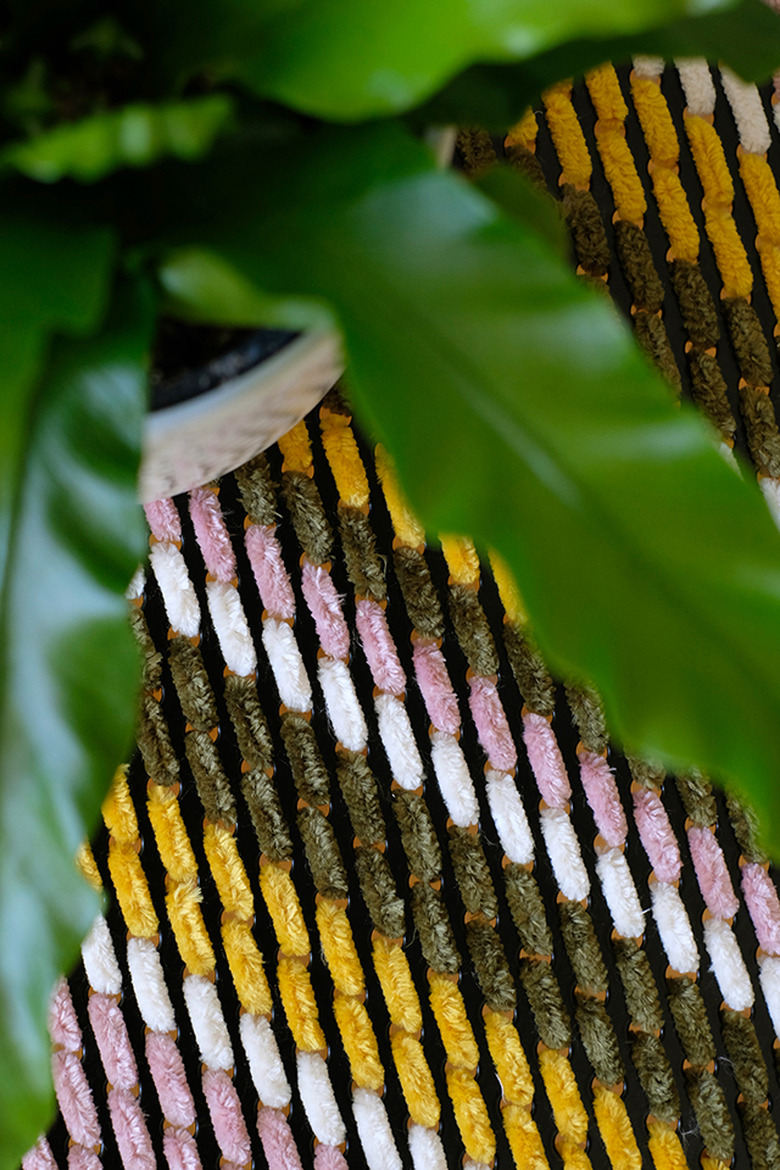
While walking the winding paths of IKEA, I came across this simple, metal stool/side table; it had DIY written all over it. With its grid pattern of holes, I knew it needed some sort of weaving or stitching. I originally thought that a cross-stitch pattern would work really well with these holes. But, after playing around a bit with different weights of yarn and string, I landed on a simple running stitch in a stripe pattern for a clean look. I also found some heavy velvet-like yarn that worked well with the size of the holes. I wanted to play with a fun '70s/'80s vibe, so the stripes were perfect.
 Jeran McConnel
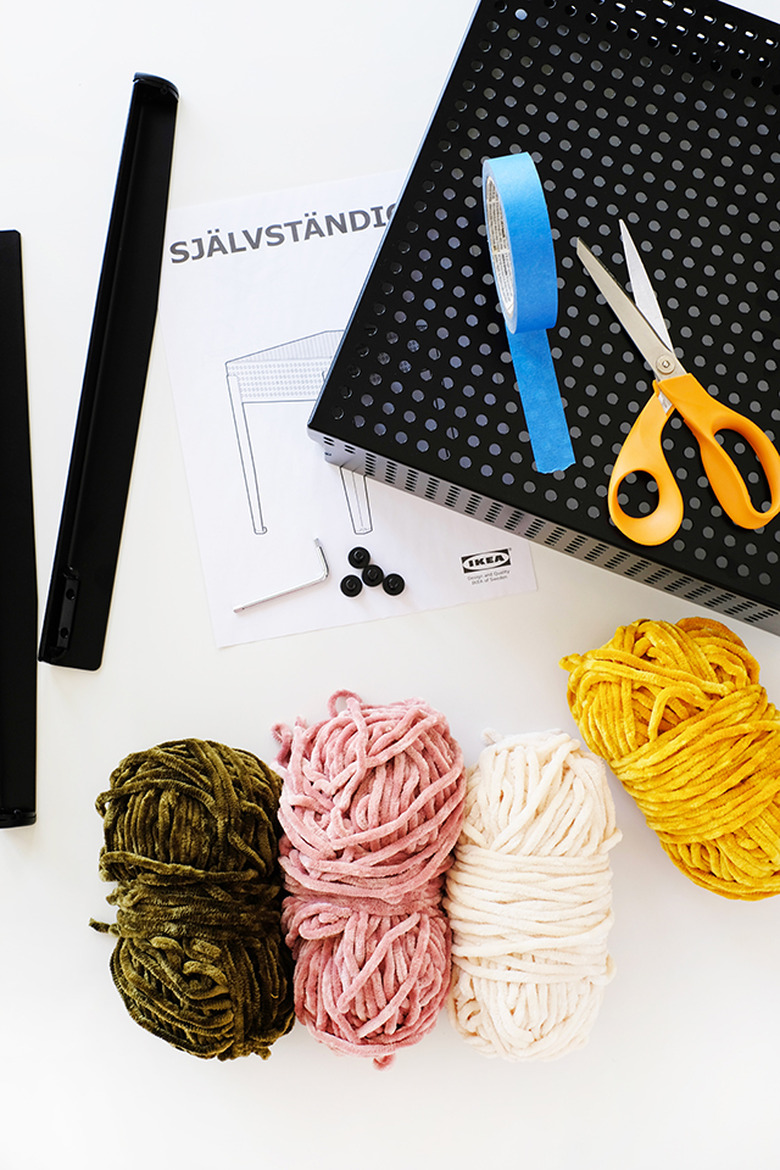
Things Needed
-
IKEA Sjalvstandig stool (found in stores only; see note below for alternate options)
-
Heavy yarn in a few colors
-
Blue painter's tape or masking tape
-
Scissors
 Jeran McConnel
NOTE: If you can't get to an IKEA store, or simply prefer to do all your shopping online, you can find similar perforated metal pieces that will work just as well as the IKEA stool, such as this, this, and this — or you can try pieces that have a grid pattern that could still be used for weaving, such as this and this.
Step 1
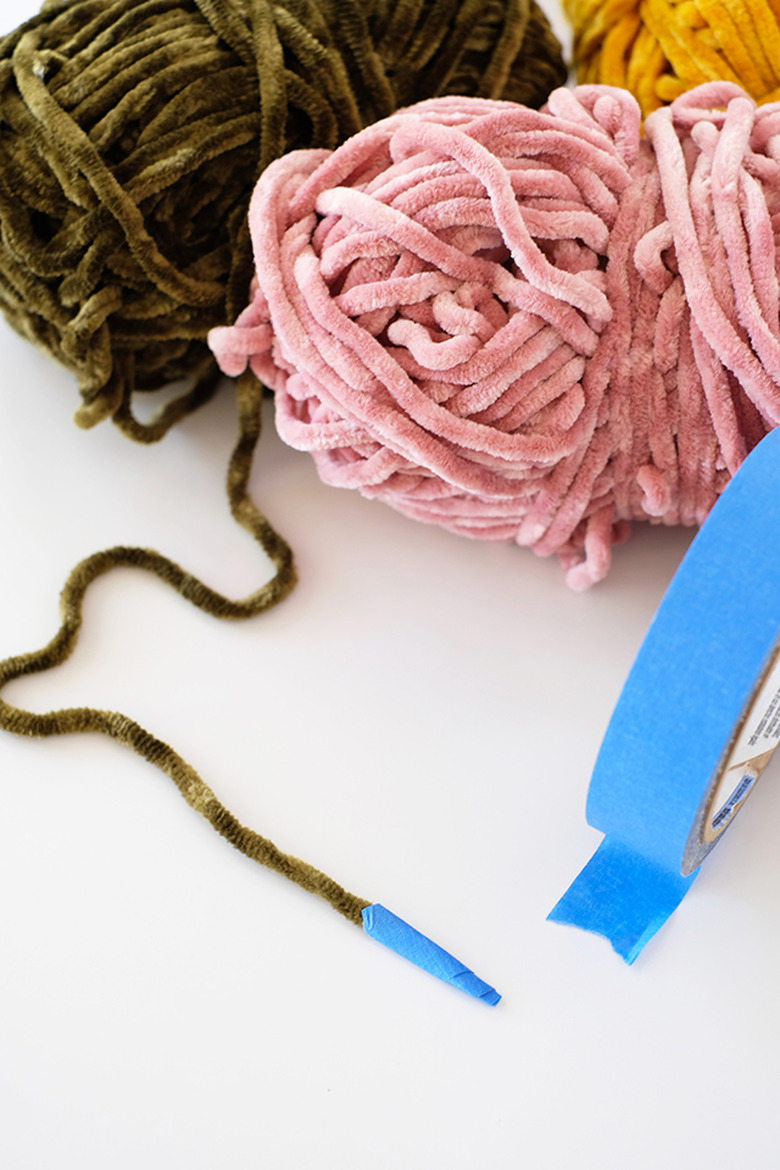
Start by selecting a couple colors of yarn. I felt like heavier yarn looked better woven through the holes, but that was just my preference.
I found it easier to weave the top of the stool without the legs attached. So, don't assemble the IKEA stool until all the weaving is finished.
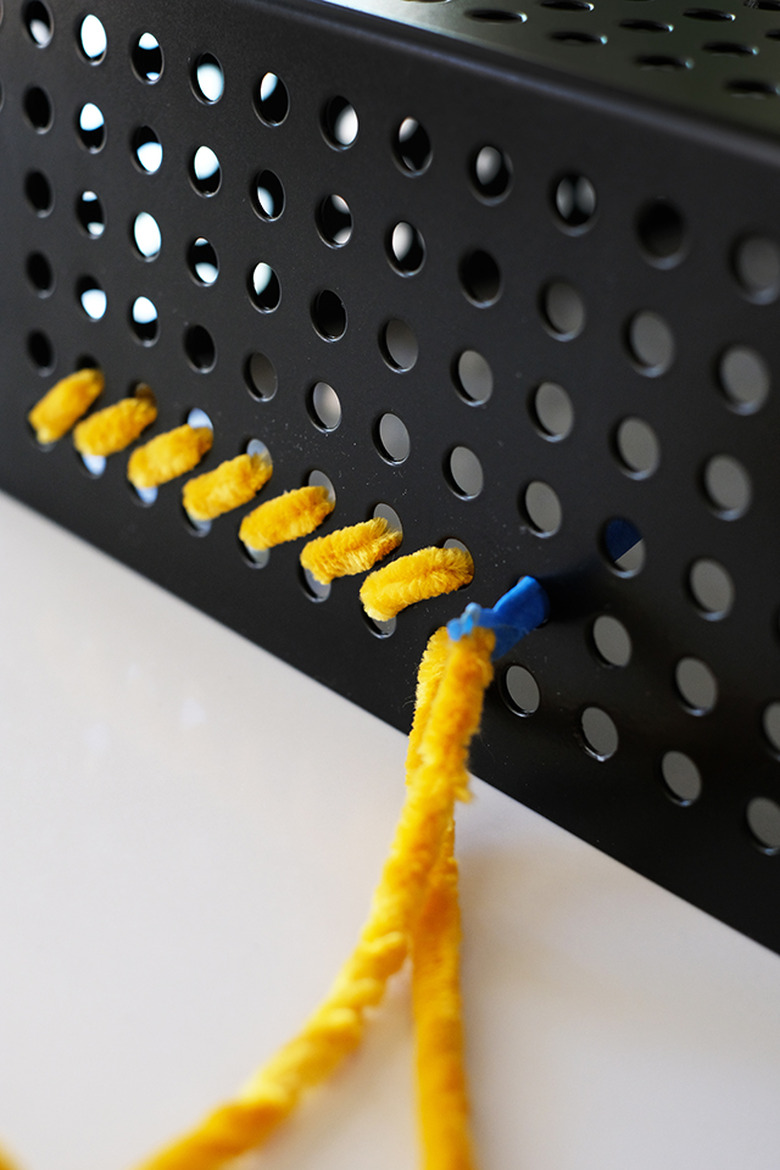
And, instead of messing with a needle, I simply used some blue painter's tape on the end of the yarn to help feed the yarn in and out of the holes.
 Jeran McConnel
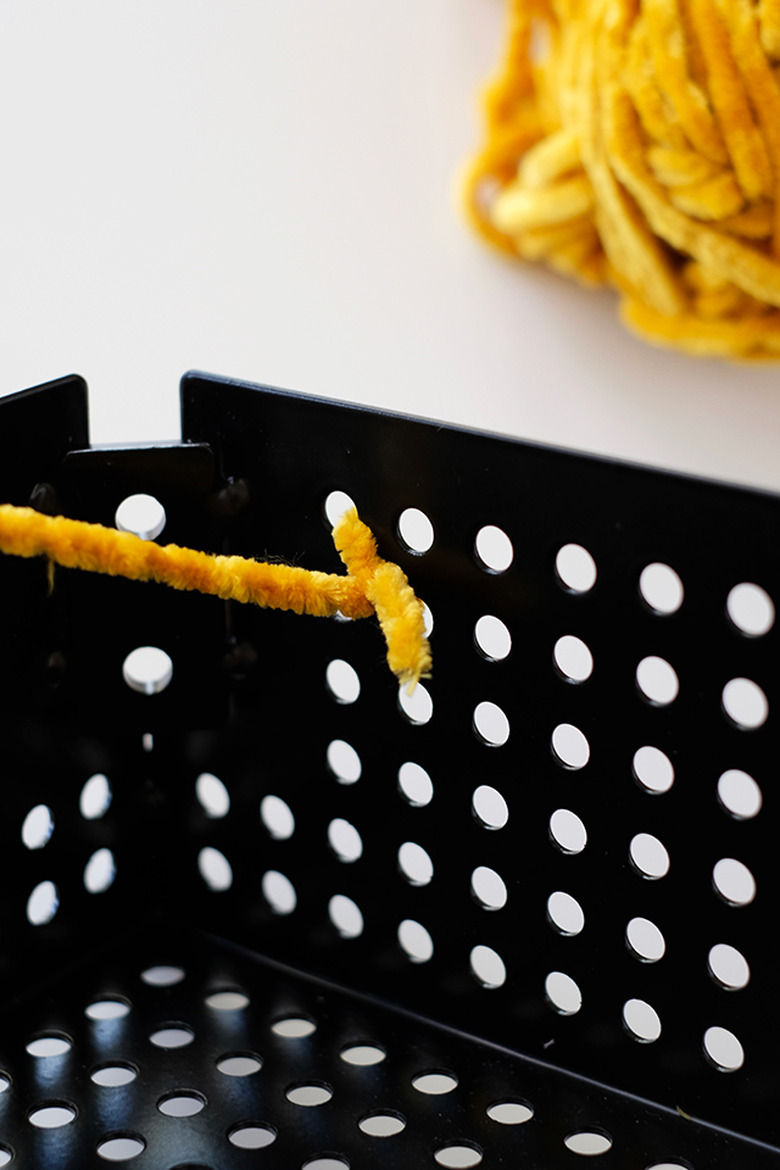
Step 2
To start, tie off the yarn on the inside of the stool. I double and triple knotted this yarn to make sure it was secure, and then I trimmed off the loose end.
 Jeran McConnel
Step 3
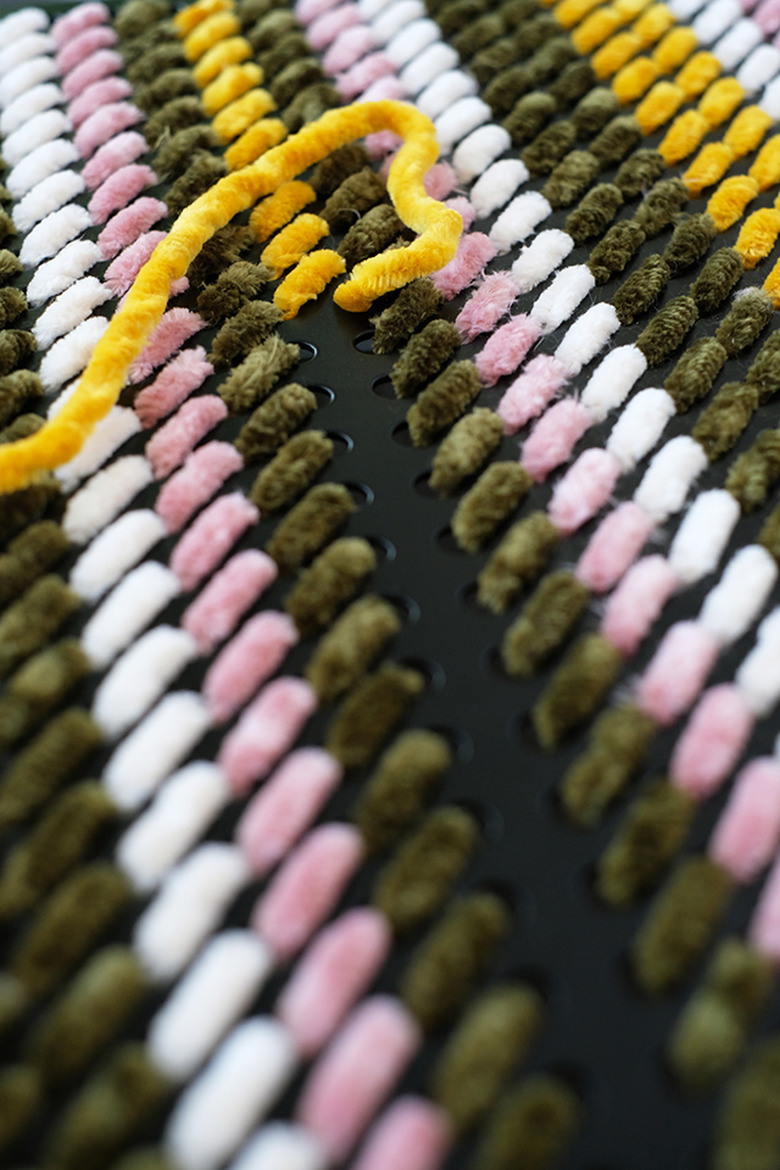
Begin on the sides of the stool, weaving in and out in a diagonal pattern. When you are finished with a color, tie off the ends and then tie on the new color. I chose to keep my pattern in simple rows.
 Jeran McConnel
Step 4
Work toward the middle of the stool. I mirrored the pattern on each side of the stool so that the stripes would be symmetrical.
 Jeran McConnel
Step 5
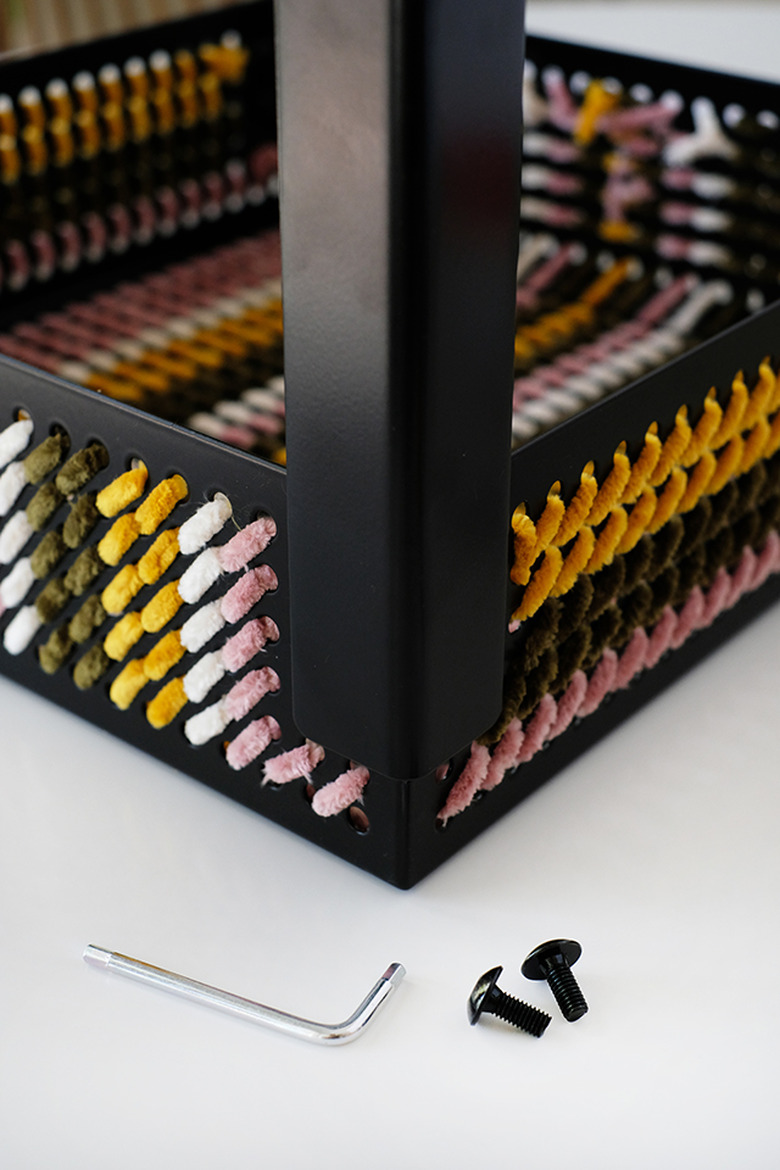
Finish by knotting off the last strand of yarn and then trim any longer, loose pieces on the underside. Then, finally, screw the legs onto the stool.
 Jeran McConnel
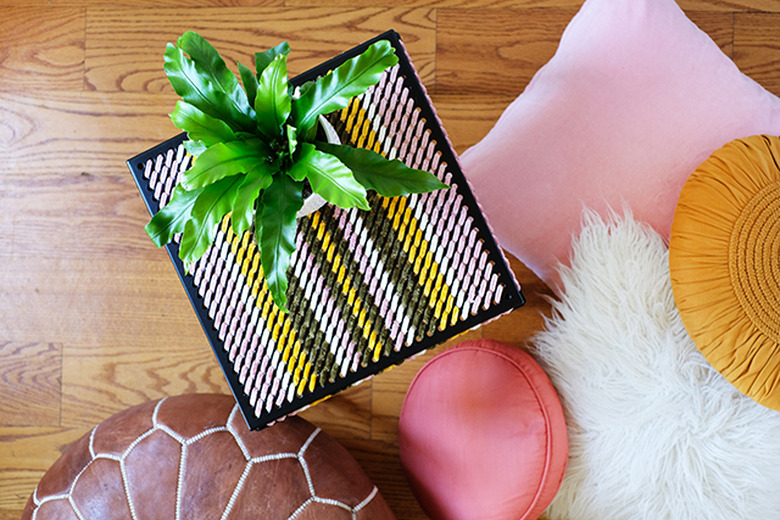
This metal stool was really meant for outdoor use, but with this little makeover, it's now a unique piece for inside as well. It's the perfect size for a little side table or a fabulous plant stand.
 Jeran McConnel
 Jeran McConnel
 Jeran McConnel