From IKEA Console Table To Cane Sideboard, You Need To Try This DIY
We may receive a commission on purchases made from links.
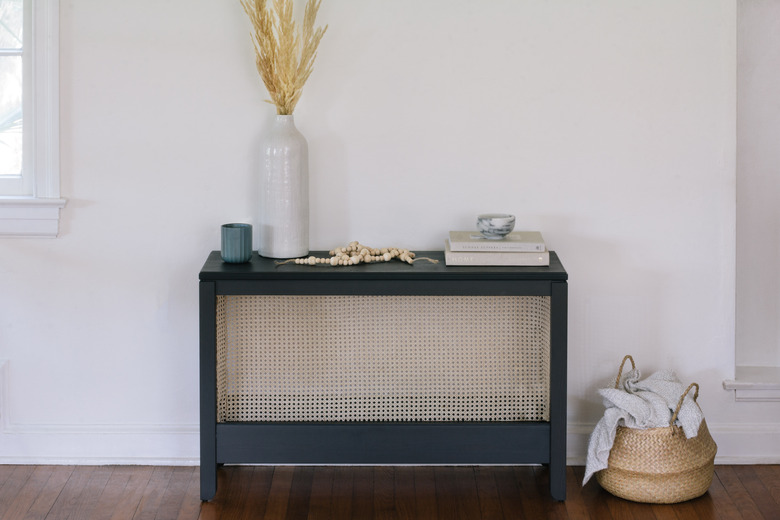
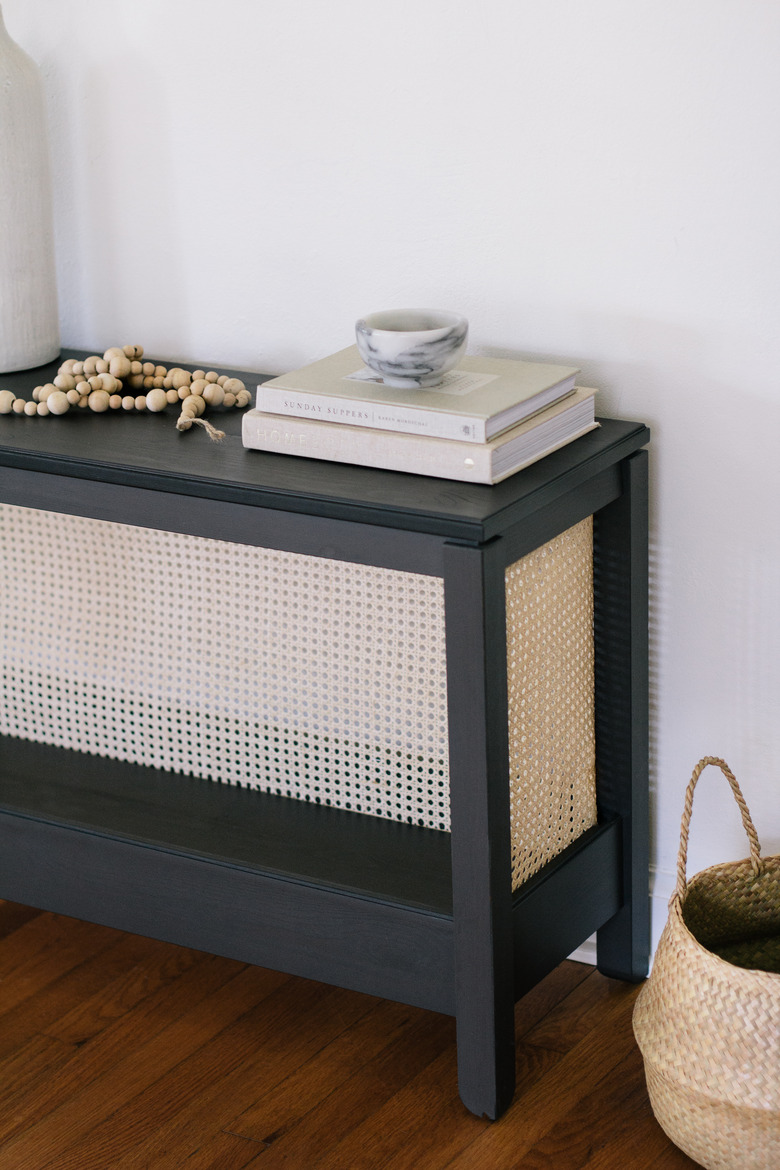
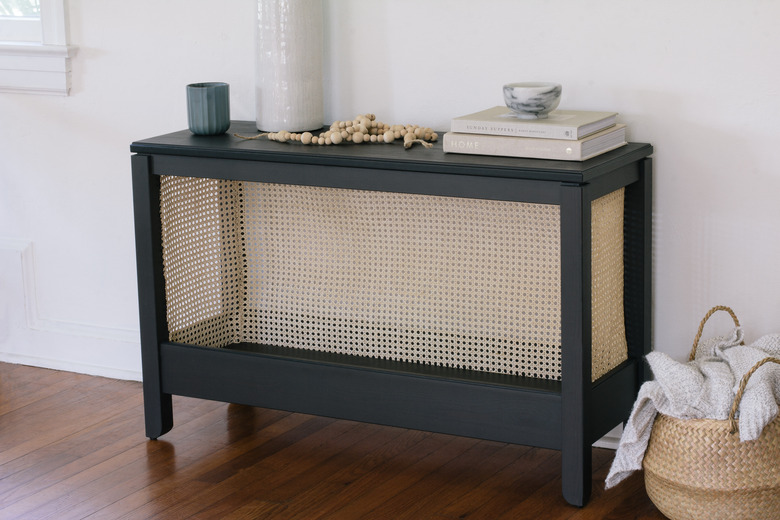
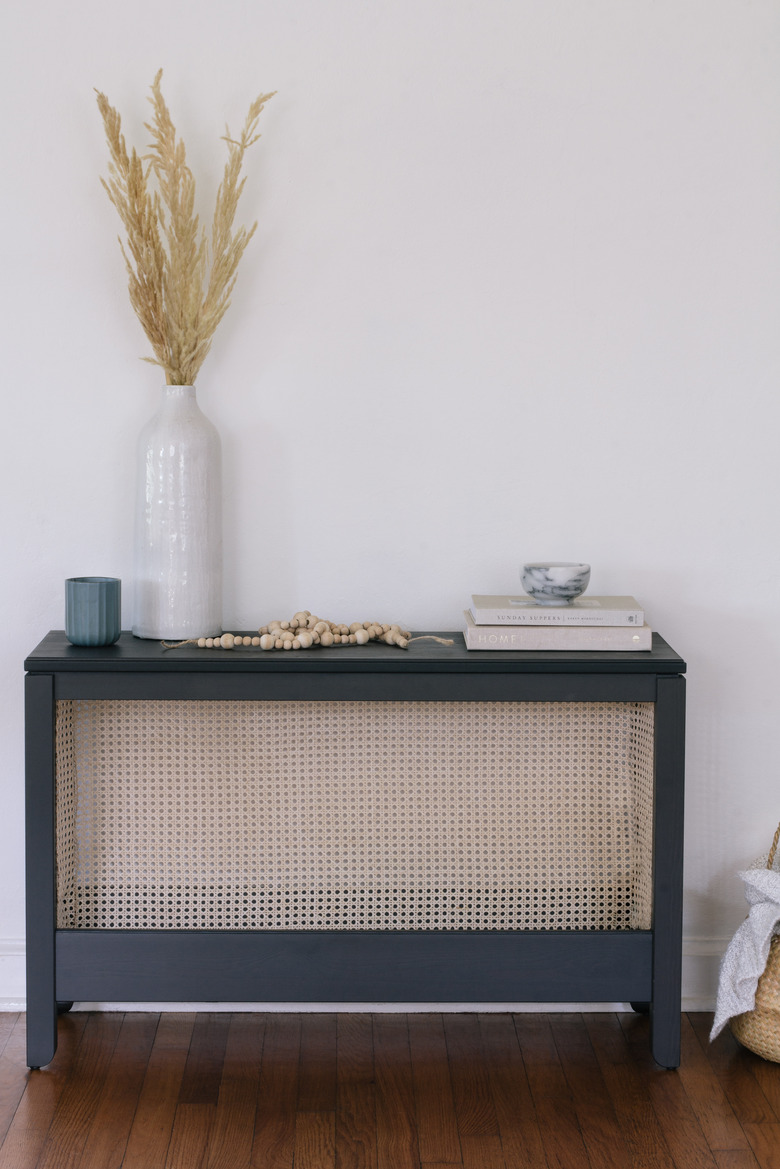
What can we say? We simply can't get enough of cane furniture around here (like this side table, headboard, and cabinet). So we're back at it with this simple IKEA hack that elevates an already gorgeous console table into a swoon-worthy sideboard, using, you guessed it, cane webbing. The textural contrast created by juxtaposing espresso-toned wood with bleach-blonde cane gives us all the design feels. It strikes the exact right balance between organic airiness and modern luxe, no? But pssst, this table only costs $149.
Things Needed
-
Cane webbing (24 inches by 72 inches)
-
Tape measure
-
Scissors
-
Drop cloth or scrap board
 Trisha Sprouse
Step 1
You'll need to cut three pieces of cane webbing — one for each opening on the sides of the table, and one for the back. For the two side pieces, we cut them to 18 1/2 inches long by 12 1/2 inches wide. For the back piece, we cut it to 18 1/2 inches long by 38 inches wide. The key is to leave at least an extra inch of cane webbing on the length and width to ensure you have enough to pull the cane taut.
Alternatively, you could cut one long piece of cane webbing (approximately 18 1/2 inches long by 63 inches wide) to wrap around both sides and back.
TIP: If the cane webbing is too stiff or difficult to work with, soak it in warm water for about 30 minutes prior to cutting.
 Trisha Sprouse
Step 2
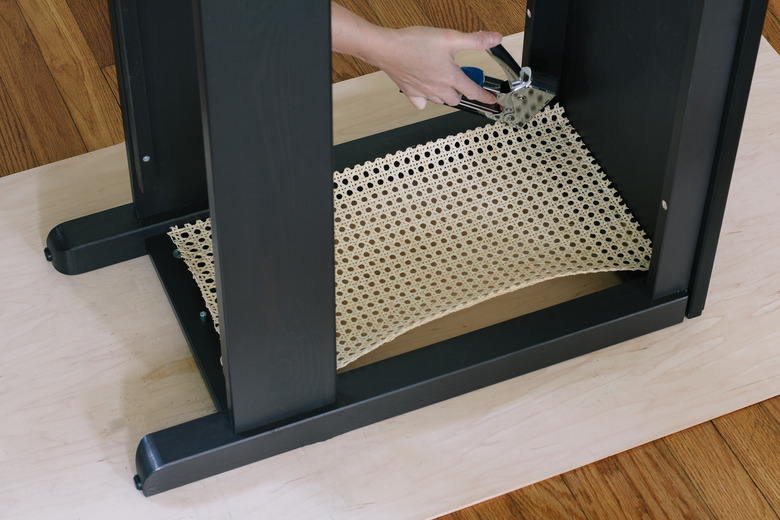
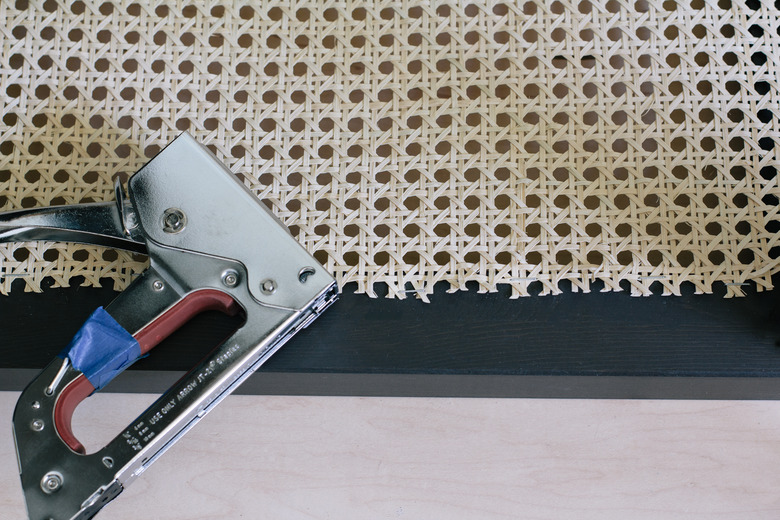
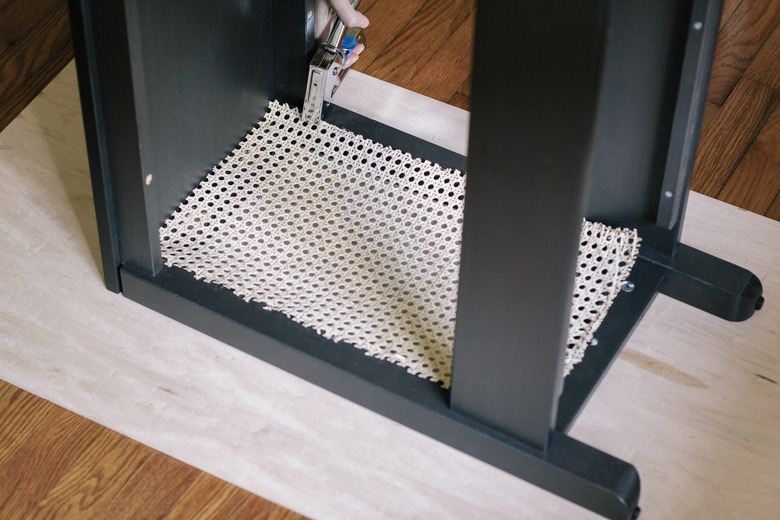
Assemble the HAVSTA console table according to the package's directions, but don't insert the lower shelf just yet. Flip the table on its side (placing a drop cloth or scrap board underneath to protect the floors). Place one of the side pieces of cane webbing face down into the opening on the side of the table, and staple it along the inside perimeter.
 Trisha Sprouse
We found it was easiest to start by stapling the cane webbing along the top, then down the sides, and finally along the bottom. Space your staples about an inch apart, and be sure to pull the cane webbing taut as you staple.
 Trisha Sprouse
Step 3
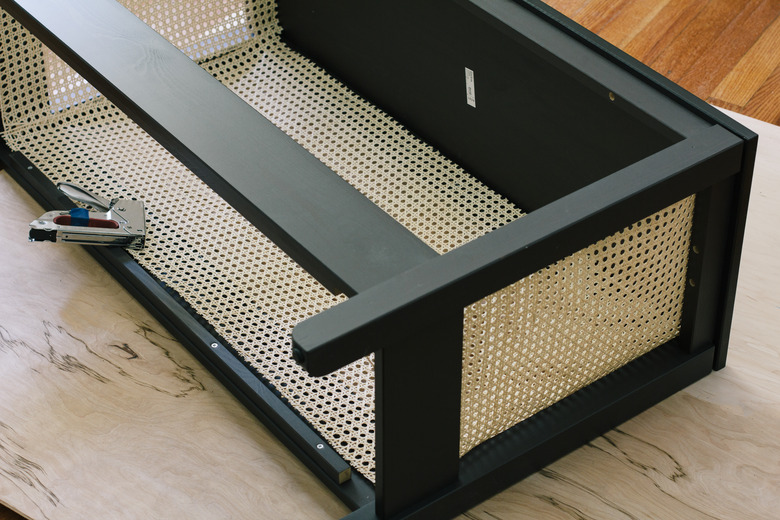
Now flip the table over onto the other side, and staple the other side piece of cane webbing into place. Again, be sure to pull the cane webbing taut as you staple.
 Trisha Sprouse
Step 4
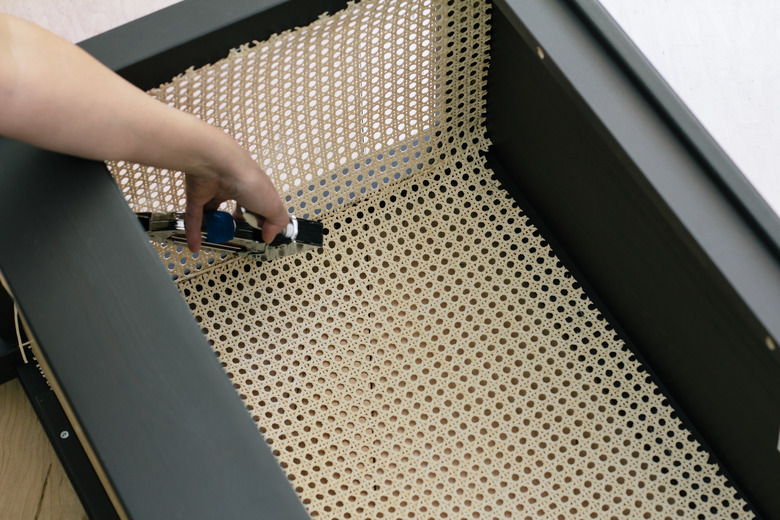
Now flip the table onto its back and staple the back piece of cane webbing into place. Try to line up the holes of the back piece with the holes of the side pieces so the pattern stays consistent.
 Trisha Sprouse
When you get to the sides, there will likely be some overlap between the back piece and the side pieces. Again, line up the holes so the pattern stays consistent, and staple the back piece on top of the side pieces.
 Trisha Sprouse
Step 5
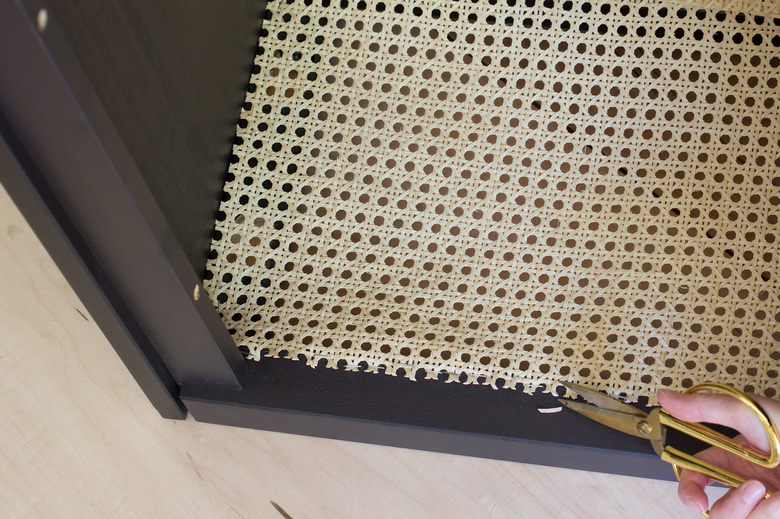
Trim off any stray pieces of cane webbing along the sides.
 Trisha Sprouse
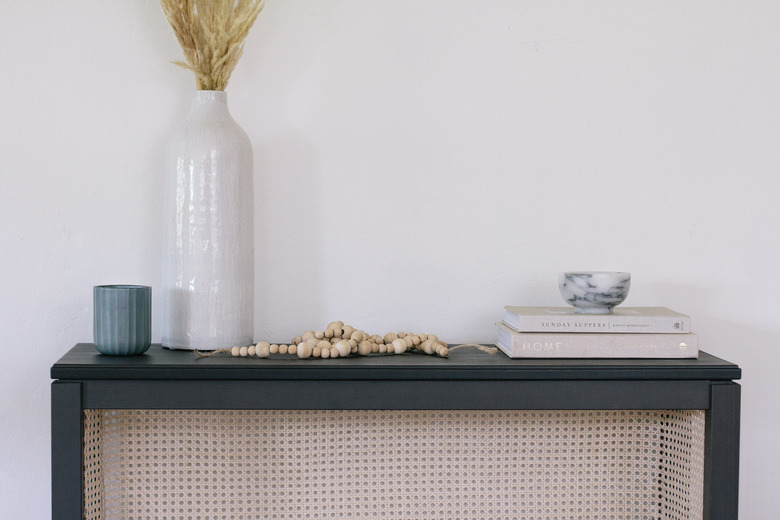
Now insert the bottom shelf into the table — and then have fun accessorizing your beautiful new cane sideboard.
 Trisha Sprouse
 Trisha Sprouse
 Trisha Sprouse