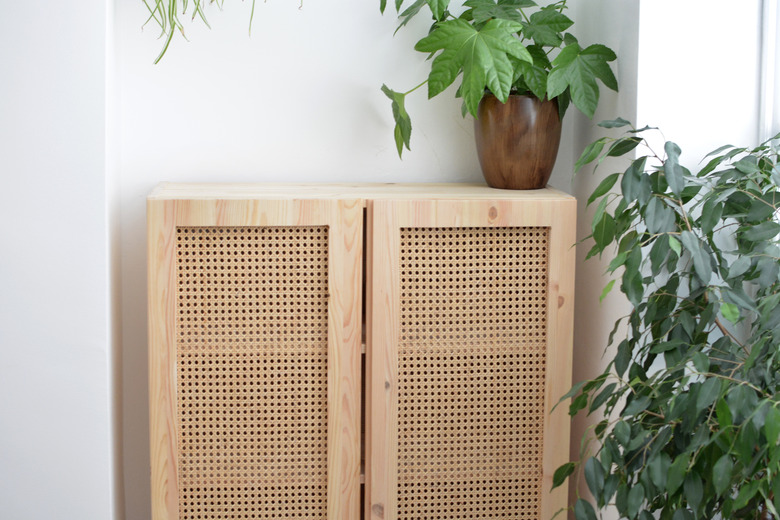
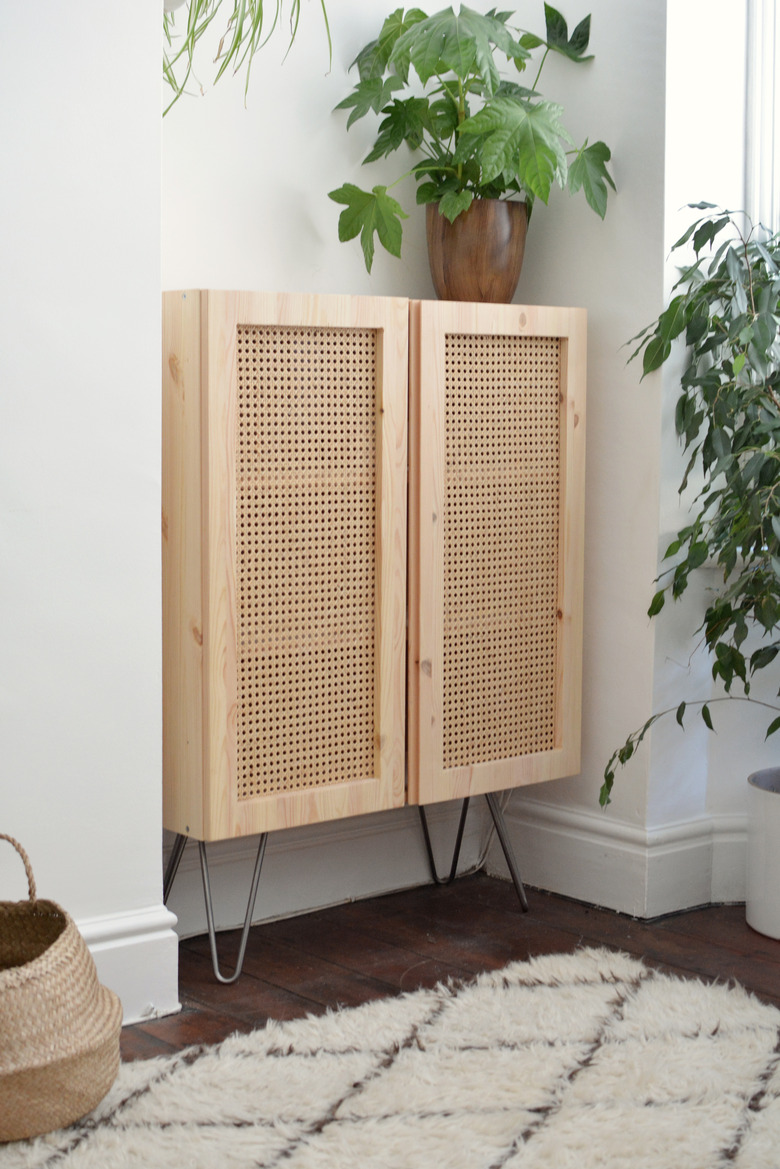
This IKEA Hack Uses Cane To Turn A Plain Cabinet Into A Design Beauty
We may receive a commission on purchases made from links.
Do we love cane furniture? Hell yes. The usual price tag though? Mmmm, not so much. If you're looking for a statement piece on a budget, this clever IKEA hack might be the solution. The IKEA Ivar cabinet is so basic it's pretty much the perfect candidate for a makeover. Throw in some cane and you've got yourself a v cool piece of furniture that you don't need to break the bank to own.
 Caroline Burke
NOTE: This DIY involves saws, drills, and other tools. If you don't own them, we suggest that you talk to your local hardware store to see if they can cut your cabinets for you.
Things Needed
Step 1
Open up the flat pack box and remove the two cabinet doors. The doors come with wooden batons fixed across the back that we don't want — remove them with a screwdriver.
 Caroline Burke
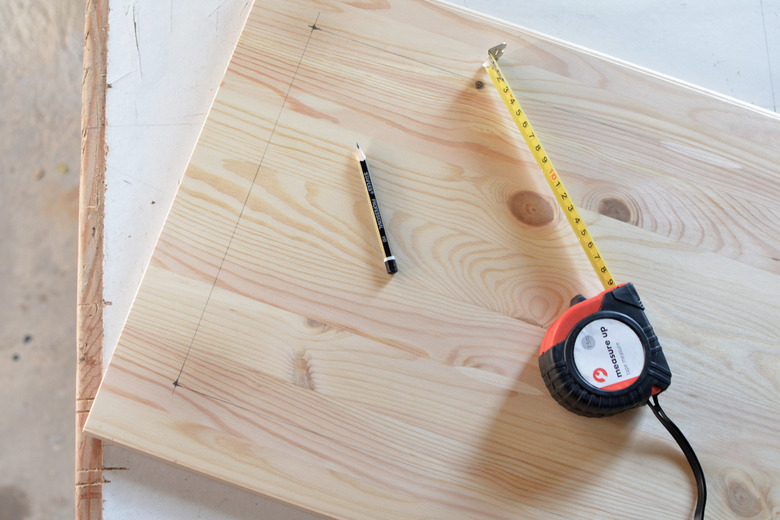
Step 2
Take the doors and mark out a rectangular panel in the center. To draw the smaller rectangle, take a measuring tape and mark a line 2 inches in from the edge on the back of the door. Do this all the way around the sides of the door to create your inner rectangle.
 Caroline Burke
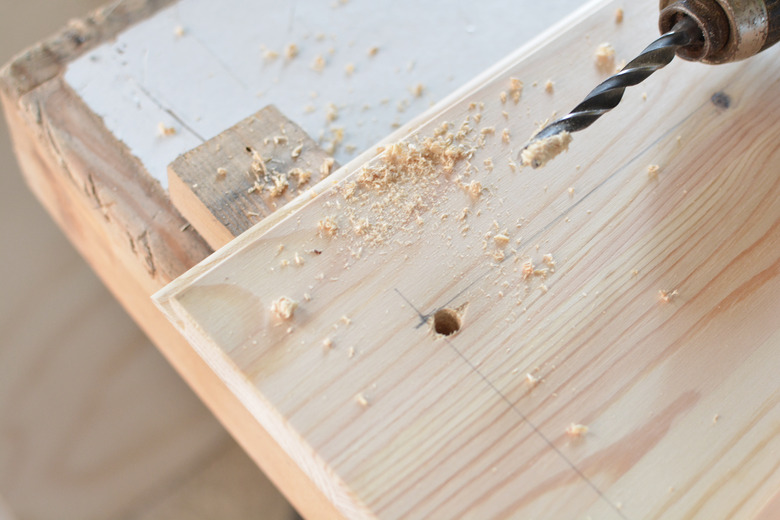
Step 3
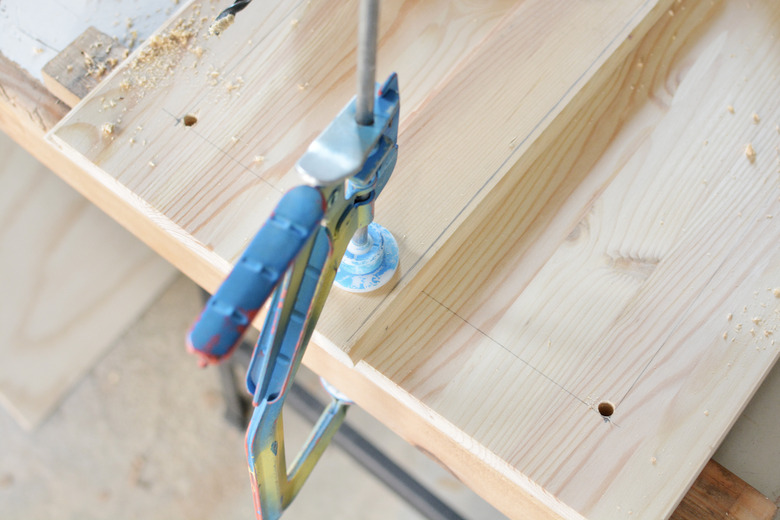
Next, we want to remove this section using a jigsaw. To do this we need to make some holes for the blade. Using a power drill, drill at each corner of the rectangle you've marked. (Don't forget to check that your drill bit is wide enough to accommodate your jigsaw blade.)
 Caroline Burke
We find it easier to do this with the door secured to a workbench using a hand clamp. Drill four corner holes in total, making sure each one is located inside the lines of the smaller rectangle.
 Caroline Burke
Step 4
Place the jigsaw blade through a corner hole to begin cutting. Cut along the pencil line until you reach the next corner. You want a clean, straight edge, so take your time.
 Caroline Burke
Again we recommend securing the door with a hand clamp, rotating the door each time you cut.
Step 5
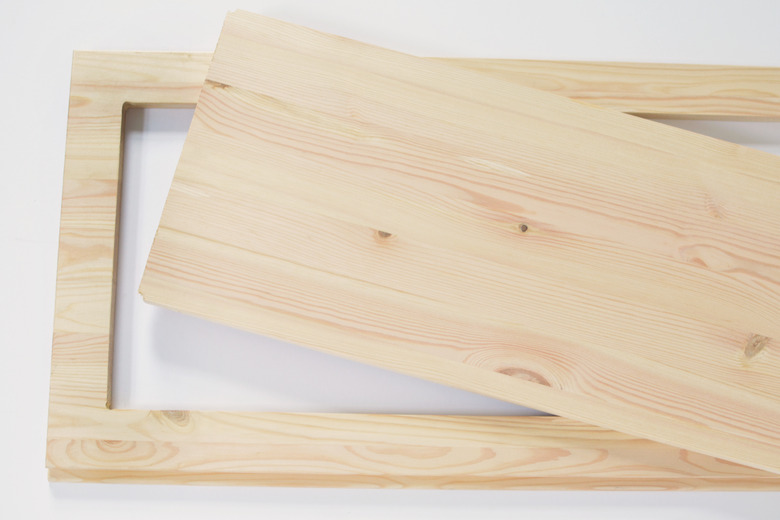
Once you've cut along each pencil line, the rectangular panel will come out and you can discard it. Sand the edges and pay attention to smoothing the corners as they'll be slightly rounded from the drill holes.
 Caroline Burke
Step 6
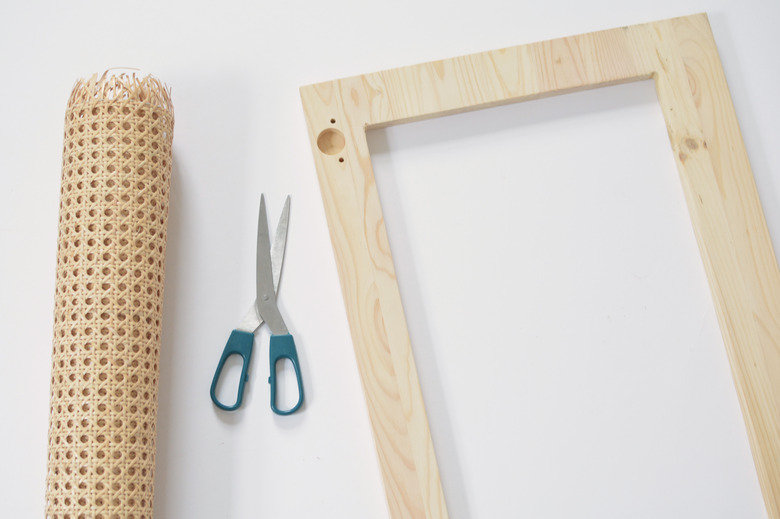
Grab your cane webbing and some scissors — you'll need to trim the cane to fit the door panel.
 Caroline Burke
Roll the cane over the back of the door and trim it to size; you'll want at least an inch of excess webbing all around. (We cut ours to measure 13 inches by 30 inches.)
TIP: If your cane is hard to work with, soak it in warm water for 15 minutes.
 Caroline Burke
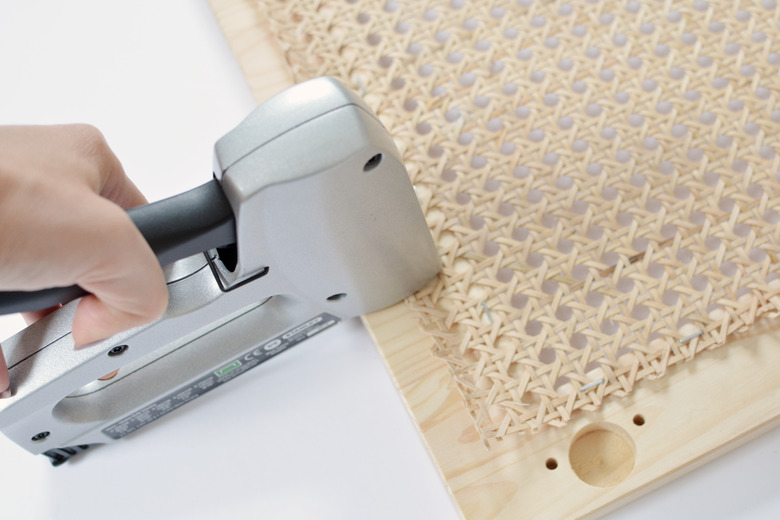
Step 7
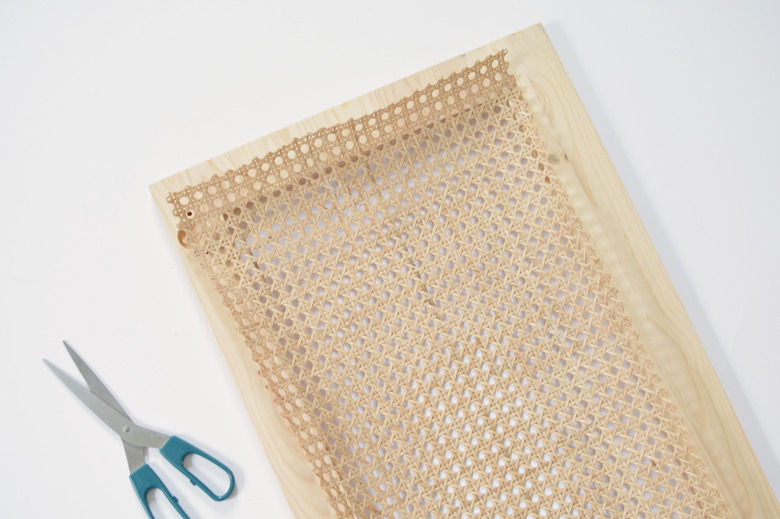
Staple the cane all the way around the back of each door. To keep the cane taut, it helps to put one staple in the middle of each side to start. You can then work toward the corners, pulling the cane tight as you staple. (Don't cover the predrilled holes for the hinges, as you'll still be using the hardware supplied to hang the doors on the cabinet frame.)
 Caroline Burke
Step 8
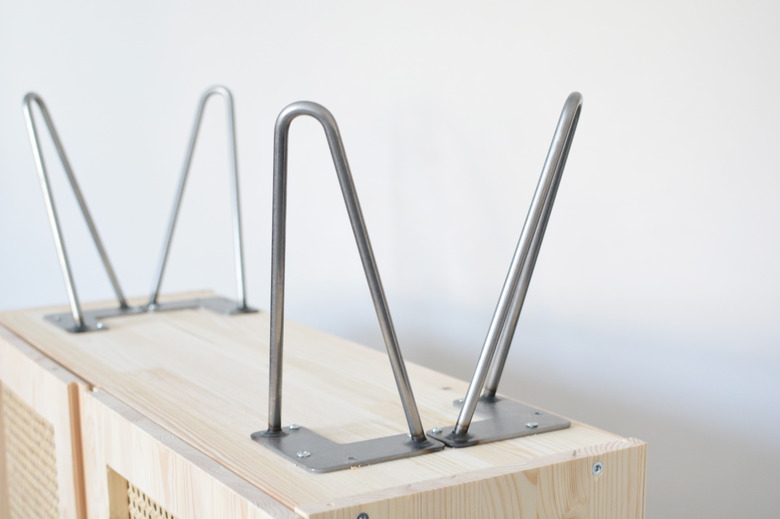
Assemble the rest of the Ivar cabinet frame as per the instructions and hang the cane doors using the hinges supplied.
While you can mount the cabinet straight onto the wall, we decided to add some hairpin legs. (You just need to screw them onto the bottom.) This is an optional step.
 Caroline Burke
 Caroline Burke
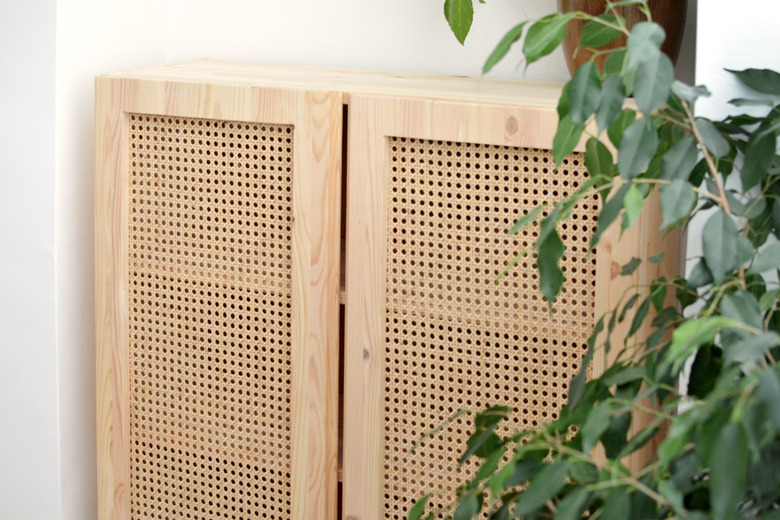
Allow us to introduce you to your new cane cabinet.