10 Genius Paint Roller Tips For The Perfect DIY Job
We may receive a commission on purchases made from links.
The best part of a DIY paint job is when all the prep work and cutting in are done and it's time to bust out the paint roller. This part of the paint job moves quickly, and it's when you really start to see how the finished project will come together. Rolling paint isn't hard, and most DIY painters can do the job and get good results. With a few smart roller painting tips, however, you can get a professional-looking job quickly and with a little less sweat equity.
1. Start With Good Tools
1. Start With Good Tools
The point of a DIY paint job is to save a few bucks, so you're probably not looking to spend more than necessary on this project. However, when it comes to buying painting supplies, you can be frugal but not cheap. You'll make your life a lot easier if you buy a quality paint roller handle with a comfortable foam or rubber grip.
You will also want to buy a high-quality roller cover. Covers made from a wool-blend material are some of the best. They hold paint better and roll out a more consistent layer of paint. Because they cover better and more consistently, they also allow you to roll the room more quickly than disposable roller covers.
2. Always Remove Lint
2. Always Remove Lint
Even the highest-quality paint roller will leave behind lint when it's new. You can pick it off the walls as you go, but doing so will slow you down. If you leave any lint after the paint is dry, you'll have to sand the wall and repaint. Fortunately, you can avoid this problem like a pro using one of several techniques.
- If you like, you can wrap the paint roller in painter's tape and then remove the tape. The lint will come off with the tape, but it might take a few wraps before you get it all.
- An alternative is to stretch a piece of tape adhesive side up between two helpers and roll the paint roller over the tape to trap the fuzz.
- Yet another option is to simply wash the paint roller in warm water before you use it.
3. Choose the Right Nap
3. Choose the Right Nap
A nap may sound like a good idea after starting a painting project, but in this case, nap refers to the density of the material on the paint roller cover. A 3/8-inch nap will work for most paint jobs but use a 1/4-inch nap if you're going for a high-gloss finish. If you're painting a textured wall or ceiling, a 3/4-inch nap is best.
If you use too thin a roller on a textured surface, you'll find yourself having to push too hard on the roller to try to fill all the little divots. This is hard on you and the roller. It will also slow you down considerably and make your arms and shoulders sore.
4. Make the Roller Tight
4. Make the Roller Tight
It can actually be a good thing if it's a tight fit when sliding the roller cover over your roller handle. If the cover doesn't fit snugly on the roller, you'll end up fighting with it throughout your entire paint job. You should stop and fix this problem now before you put a drop of paint on your roller. Here's how:
- If your roller has metal tines, use a pair of pliers to gently pull them outward a bit.
- When you have a roller with plastic tines or if you can't adjust the metal tines far enough, wrap them in a thin plastic until they become thick enough to hold the paint roller securely. A corner of a plastic drop cloth is perfect for this job.
5. Prime the Paint Roller
5. Prime the Paint Roller
When you first dip your roller in paint, you'll notice that it takes a moment to completely wet it entirely. The paint will almost seem to hesitate, and parts of the paint roller may stay paint-free until you really get going. Priming your roller allows you to avoid this delay and jump right in when you're ready to roll.
To do so, simply run some water over the roller cover to get it good and wet. Then, shake off the roller and pat it with some paper towels to get rid of the excess moisture, leaving the roller damp but not saturated. That's it. Now, when you dip your roller into the paint, it will soak it up immediately with no delay.
6. Consider the Bucket
6. Consider the Bucket
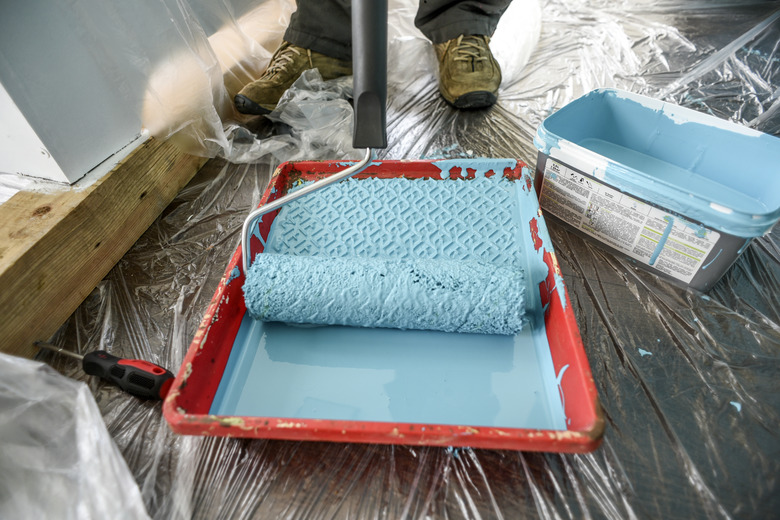
Professional painters like to pour their paint into a 5-gallon bucket and use a bucket screen to load their roller. The screen hangs down inside the bucket and works like the ramp portion of a paint tray, distributing the paint and removing excess from the roller. A bucket and screen generally work better than a paint tray when it comes to getting just the right amount of paint on your roller, and they save you from constantly refilling a smaller paint tray so you can roll your walls faster. If you're buying paint by the gallon, you can add more than one gallon to the bucket (which pros like to do for color consistency).
Tip
Large paint buckets are super heavy. If you go with the bucket, plan on walking to the bucket rather than bringing the bucket along with you as you work your way around the room. You'll have to wait for that until you've used enough paint to lighten the load a bit.
7. Avoid Deep Dips
7. Avoid Deep Dips
When refilling your paint roller, try to make sure only the nap goes into the paint and not any part of the roller handle. If you dip the roller too deeply, the paint can get inside the roller cover. This tends to leave a nasty paint line with each roller stroke. It can also seep out as you work and create an uneven coat as you smooth the paint over the wall. Although it's possible to avoid dipping the roller too deeply into the paint when using a paint tray, you will likely find it easier to control your roller refilling depth when using a bucket and screen.
8. Start in the Middle
8. Start in the Middle
Always make sure you start rolling somewhere in the middle of your wall or ceiling. The proper roller technique involves putting the paint on the wall and then using long, even strokes to smooth it out. If you start too close to the edge of the wall, you won't have the room you need to smooth out the paint properly, resulting in an uneven coat. You'll also be forced to leave the paint thicker in that area, which is never the goal. Several thin coats of paint are always better than one heavy coat. Make sure you always start rolling at least 6 inches away from the edges of the wall and corners.
9. Stop the Splatter
9. Stop the Splatter
If you find your arms, drop cloths, and everything else nearby speckled with tiny paint drops after using a roller, you're not alone. There are several possible reasons for this, and you can avoid them all. The first thing you want to do is slow down. Good equipment, quality paint, and proper technique all make faster work of rolling walls and ceilings on their own and eliminate the need to rush. Rolling too quickly results in excess paint splatter.
Overloading your paint roller can also cause splatter and is yet another issue often solved by switching to a bucket and paint screen rather than using a paint tray. Thin paint drips and splatters more readily than thicker paint, so don't spend too much time spreading out your paint. Roll it onto the wall, smooth it out, and move on. If you keep smoothing the paint over the same area, you will make it too thin and cause it to splatter.
10. Don't Leave Roller Marks
10. Don't Leave Roller Marks
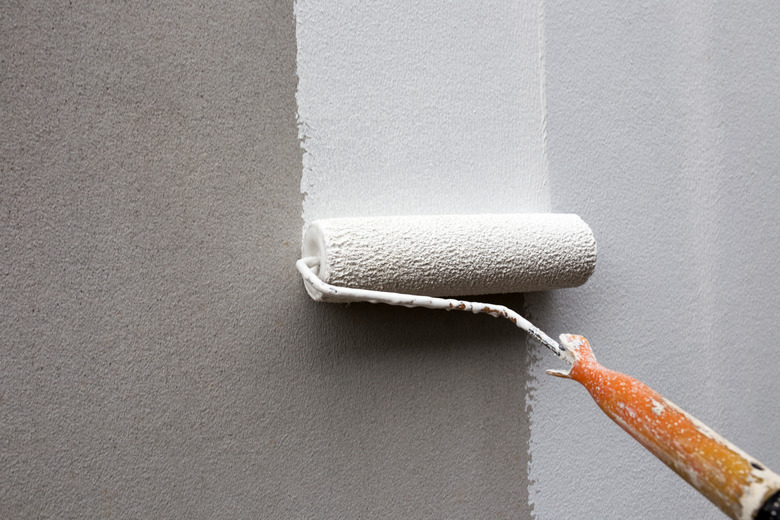
The surest sign of an amateur paint job is seeing roller marks on the ceiling or walls, but you can easily avoid this problem and paint like a pro with a few tips. One simple trick is to always cut in (or paint the edges of the wall or surface first with a paintbrush) before you roll. This lets you get closer to the edge with your roller and helps to cover the brush strokes for a consistent finish.
If your paint is thick, you can thin it as needed so it goes on more smoothly. Thin it a little at a time and try rolling it on a piece of cardboard until you get the thickness and spread you like. As you work, it's imperative that you always try to keep a wet edge and start rolling from it. Setting your roller in wet paint and rolling it outward is far less likely to create roller marks than starting in a dry area and rolling into the wet paint.
Equally important is making sure you are using the proper technique and letting the roller do the work. You should press the roller only as firmly as you must to keep it against the wall or ceiling rather than pushing on it too firmly or applying uneven pressure. It takes more time and effort, but it's often best to use a ladder when painting ceilings and high walls. A pole makes the job easier but makes it more difficult to apply even pressure to the paint roller.