Install Picture Frame Molding In Any Room With Our Easy DIY
We may receive a commission on purchases made from links.
Give plain walls some personality with picture frame molding. Also referred to as millwork, the addition of decorative wall moldings lends a more sophisticated look to your space, especially if you have a basic builder-grade home. Think of it as architectural eye candy that gives your house a more custom feel — the kind of character you would expect to find in historical homes like a Colonial-era residence or a Parisian pied-à-terre. It's easy to install yourself, doesn't require any power tools, and is even renter-friendly.
 Trisha Sprouse
Things Needed
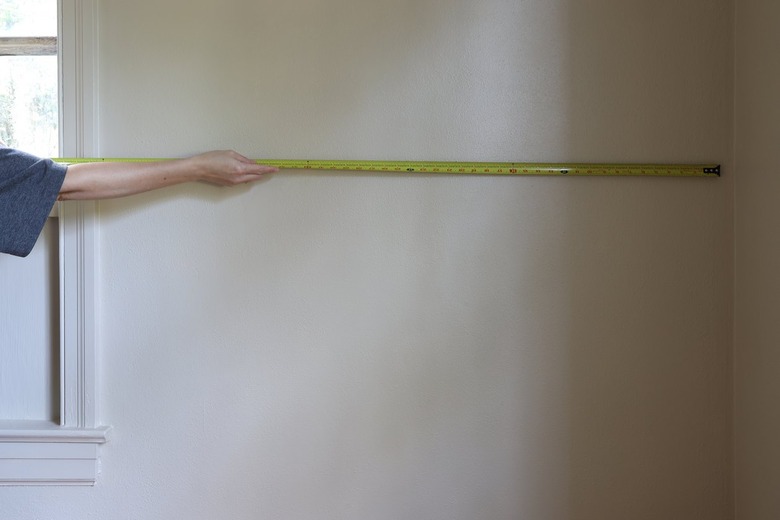
1. Measure the Wall
Measure the height and width of the wall, and record the dimensions on paper. If your wall has a window or door, measure from each side of the window/door to the adjacent wall. If you have crown molding, measure from the bottom of the crown molding to the top of the baseboard.
 Trisha Sprouse
Tip
If you plan to also paint your walls, it's easier to paint them before adding the molding, so you can easily roll the paint onto the walls with a paint roller, and then brush the paint onto the molding.
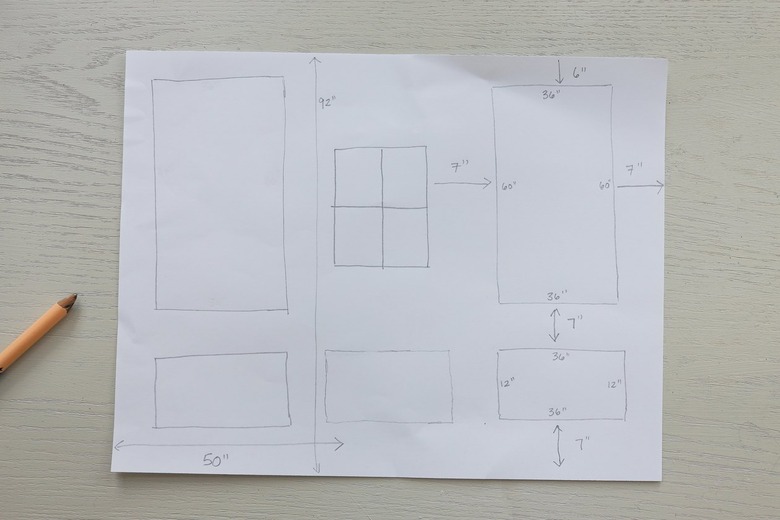
2. Plan Your Design
Using the dimensions of your wall, figure out the desired pattern and spacing for the molding. You'll need to determine how many boxes you want on each wall, how far from the ceiling and floor you want your boxes, how far in from the adjacent wall, and how far apart each box will be from each other. Anywhere from three- to seven-inch spacing is fairly typical. It also helps to keep the spacing symmetrical on each wall for a balanced look. You may also consider adding a chair rail molding that runs horizontally along the wall.
When considering how many boxes to add, we suggest sticking to the rule of thirds, which states that objects grouped in odd numbers (one, three, five, or seven) tend to be more aesthetically pleasing. For example, two boxes on one wall would compete visually with each other, but three boxes would balance each other out.
For reference, our wall in this tutorial had a window in the center, so we decided to do a large box on each side (the window acts visually as a third box) with three smaller boxes underneath. We opted for 7-inch spacing all around to keep things looking even, with the exception of 6-inch spacing from the ceiling. It helps to make a drawing with all of the dimensions, and to check — and double check — your math before cutting the molding. This will also help determine how much molding you need to buy.
 Trisha Sprouse
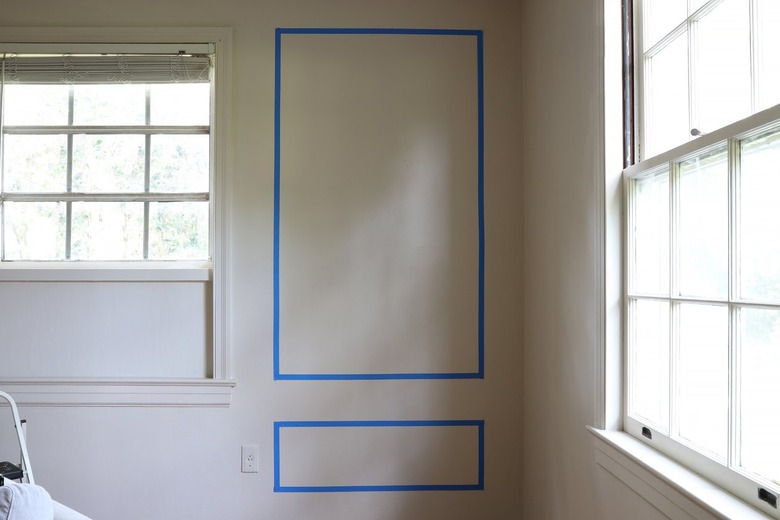
If you're more of a visual person who needs to actually see the layout before committing to a design, you could also use painter's tape to create the design on the wall, and then make a note of the dimensions.
 Trisha Sprouse
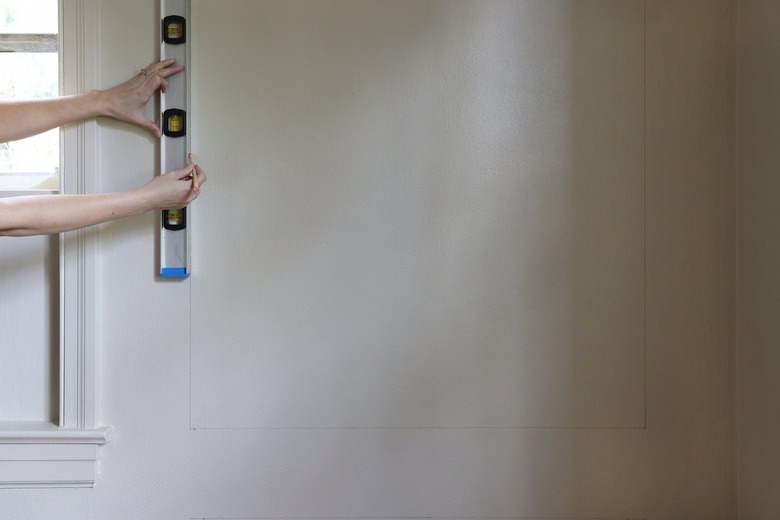
3. Mark the Placement on the Wall
Once your design is finalized, use a tape measure to mark the dimensions on the wall. Then use a level and a pencil to draw the boxes on the wall. This will help make the process of attaching the molding go faster since you just have to line it up with the pencil lines.
 Trisha Sprouse
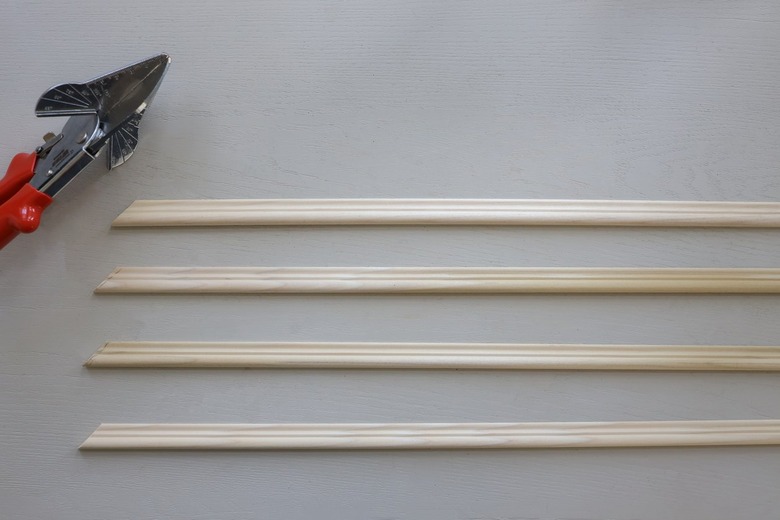
4. Cut the Molding
Mark the dimensions on the molding pieces and cut them to size. To create corners with 45-degree angles you'll need to use either miter shears, a miter box, or a miter saw. Always remember the thicker side of the molding should be the longer side of the angled cut, and the thinner side should be the shorter side of the cut.
 Trisha Sprouse
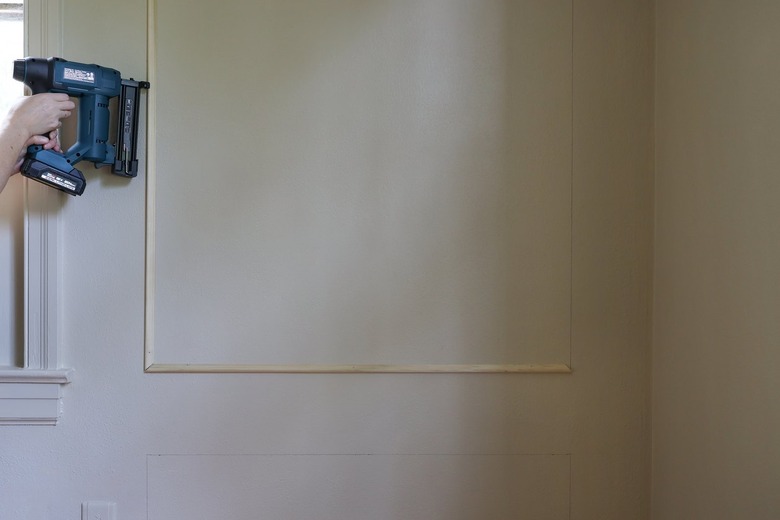
5. Nail the Molding to the Wall
Start by lining up one of the molding pieces with its corresponding pencil line. Check with a level to make sure it's straight, and then nail it to the wall with either a brad nailer or a hammer and nails. We found it was easiest to put one nail in first, then straighten the molding with a level, before adding a few more nails along the length. Line up the angled corner of the next molding piece, and continue attaching each piece in the same manner.
 Trisha Sprouse
Tip
To make this renter-friendly, you can attach the molding to the wall with double-sided mounting tape instead of nailing them. It's also worth noting that even if you do nail the moldings to the wall, it's easy to remove them, and the nail holes are easy to fill and touch up with paint with a wood filler.
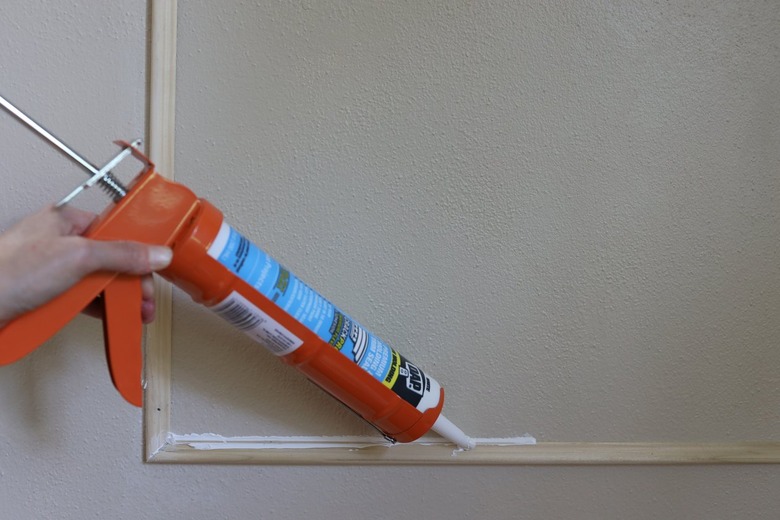
6. Caulk the Molding
Using the caulk gun, caulk the spaces between the corners and along both the inner and outer edges of the molding. Use your finger or a damp paper towel to smooth it out and remove any excess caulk. If desired, you could also fill the nail holes with a bit of caulking or wood putty. Allow the caulking to dry about 30 minutes.
 Trisha Sprouse
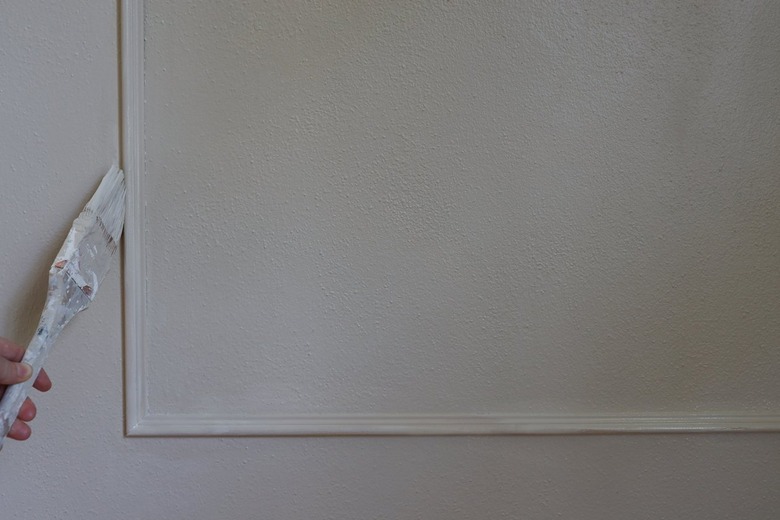
7. Prime and Paint
Now it's time to paint! You could opt to choose a different sheen for the molding than the wall to make it stand out a bit more, or you could use a different paint color entirely. It's best to either prime first or use a paint with a built-in stain blocking primer, especially if you're using unfinished wood molding. This will block any wood knots from bleeding through the paint. Use an angled paintbrush to apply the paint/primer, allow it to dry, and then apply a second coat.
 Trisha Sprouse
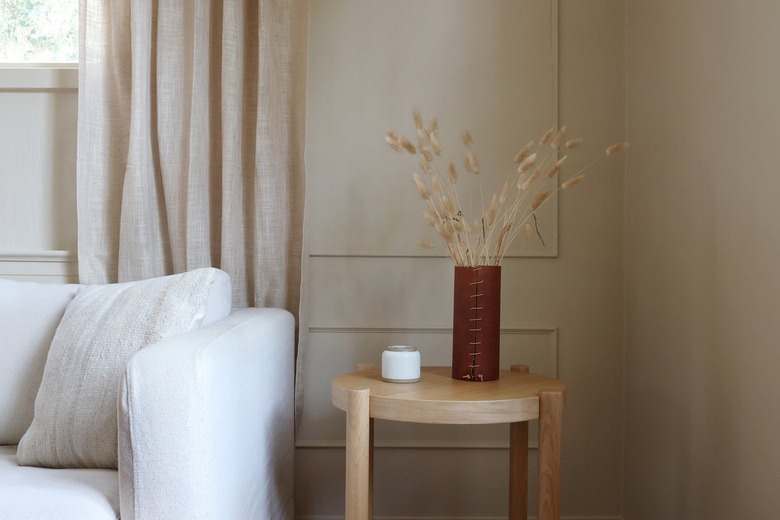
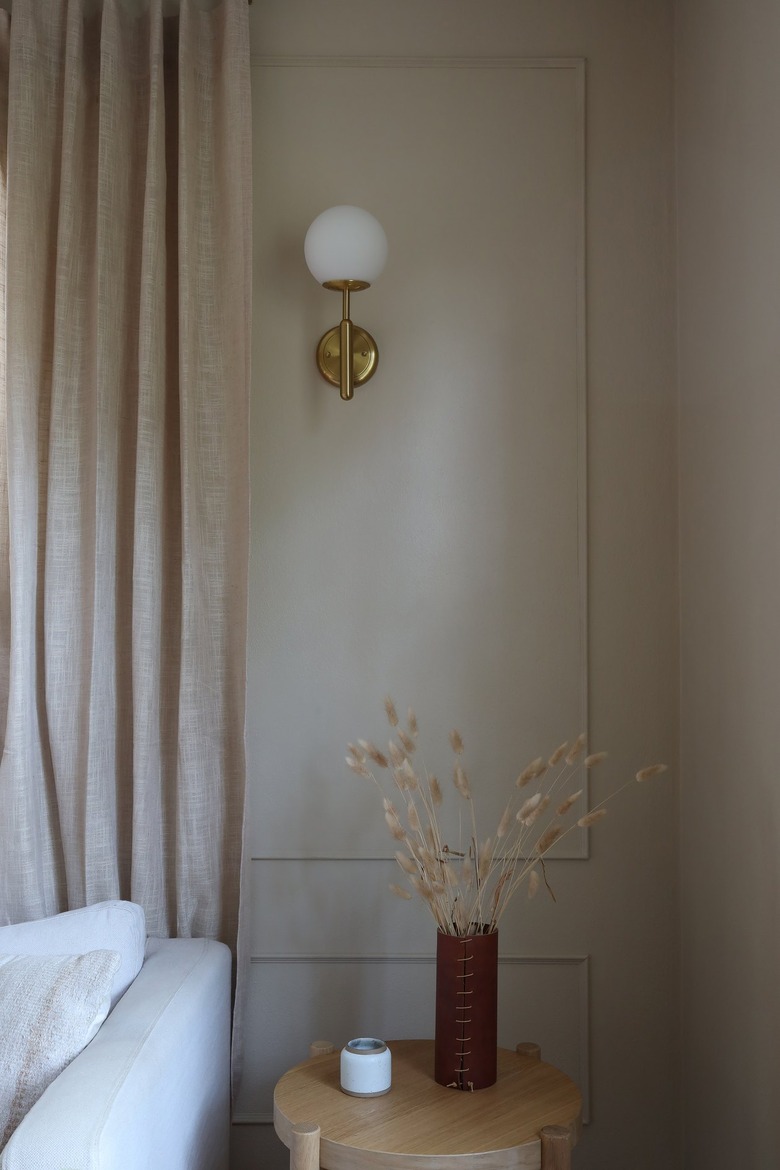
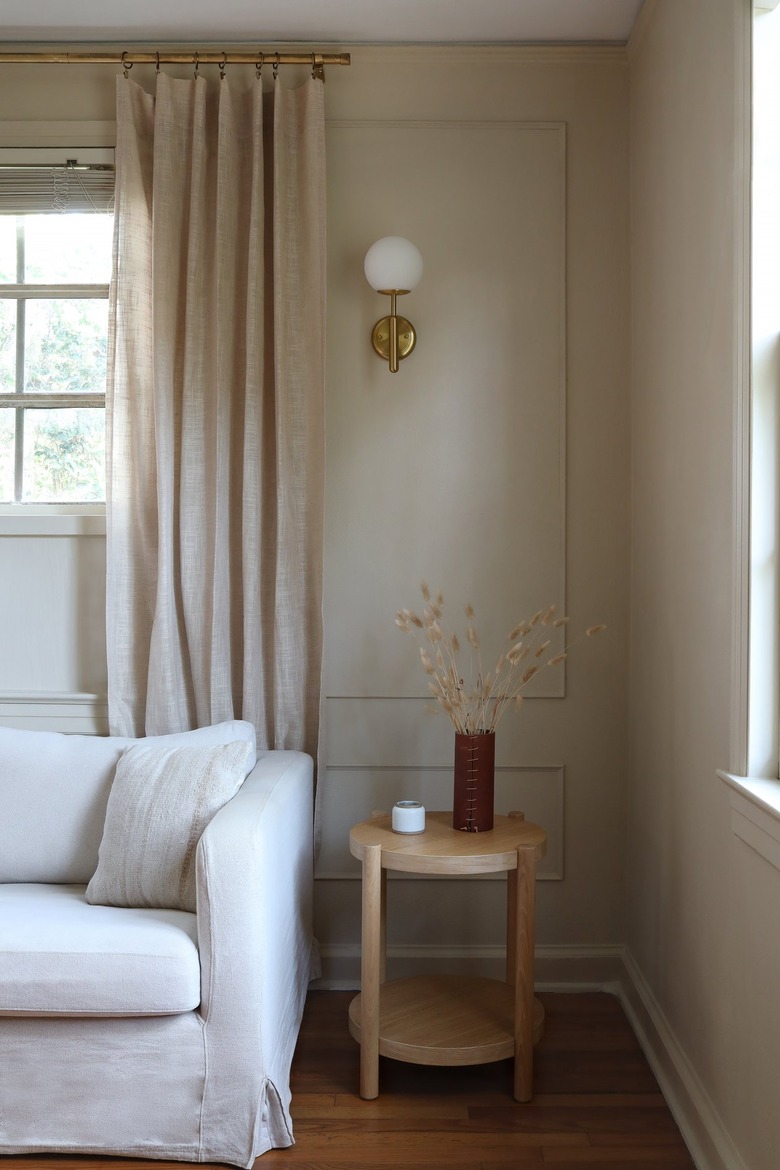
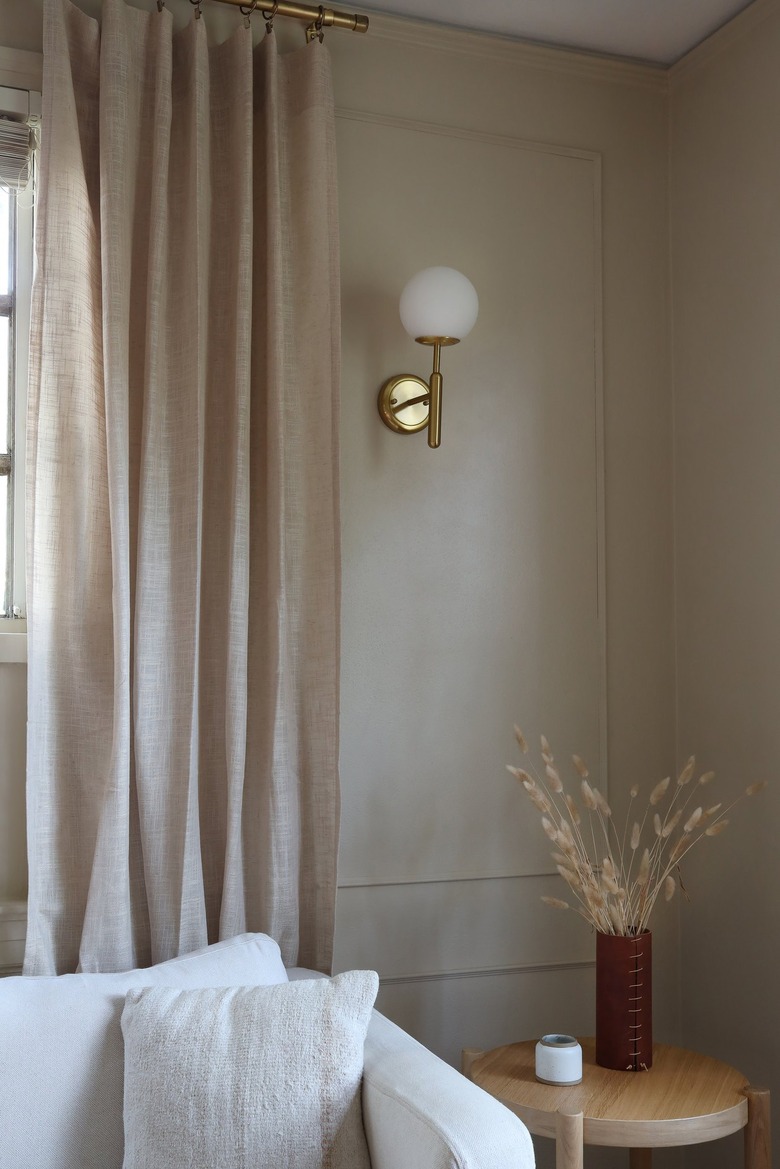
Once the paint is dry, you can move your furnishings back in place, and admire the fancy new look of your walls!
 Trisha Sprouse
This easy DIY is such a clever home improvement trick for giving a lovely makeover a living room, dining room, or entryway.
 Trisha Sprouse
More DIY Projects and Tutorials
More DIY Projects and Tutorials
- Top 5 DIY Tools for Home Decor
- How to Paint Wood Paneling
- Make New Wood Look Antique
- Fireplace Cover Tutorial
- How to Install Wood Wainscoting in the Bathroom
- Listen to Trisha on the Being Home With Hunker Podcast
- This Board and Batten Tutorial is the Wall Treatment You're Looking For
- Popular Benjamin Moore Paint Colors for Your Home Improvement DIYs