This Technique Makes New Wood Furniture Look Antique
We may receive a commission on purchases made from links.
Nothing beats the worn and weathered surface of old wood furniture to add a bit of grit to a modern space. Even if you're a lover of contemporary design, the addition of antique wood breaks up the sleek lines of new pieces and creates a more layered-over-time look. But antique wood furniture is not exactly budget-friendly — the older it is, the more expensive it tends to be. Fortunately, it's fairly easy to get the look by distressing new wood furniture. Follow along as we turn this new wood table (that we scored for under $230 on Amazon) into an antique-looking gem that appears to be centuries old.
Things Needed
-
Power drill with wire brush attachment (or wire brush)
-
Wood stain (we used Minwax "Golden Oak")
-
Clear topcoat sealant (optional)
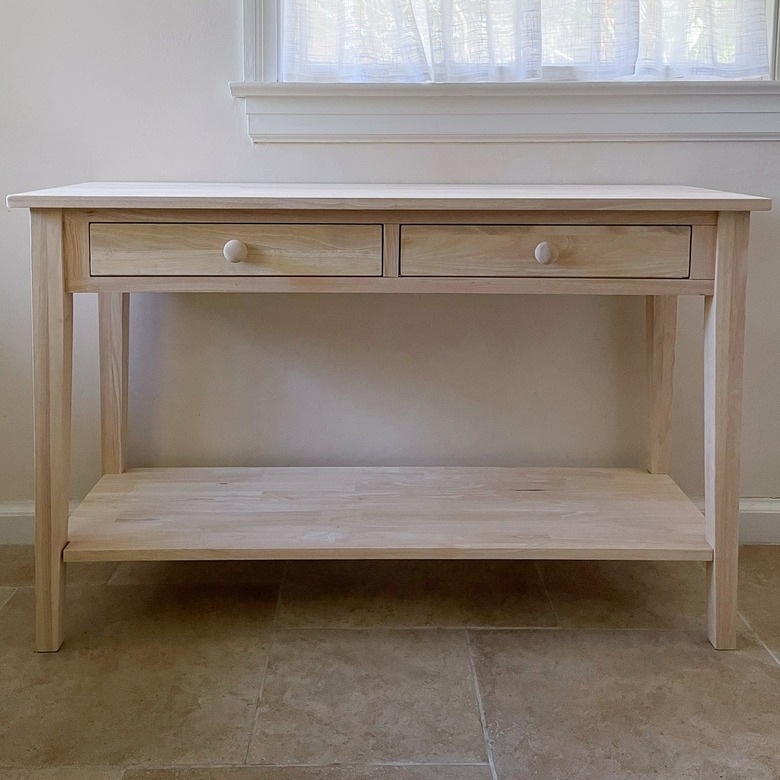
Here's a "before" look at the table in its new unfinished state.
 Trisha Sprouse
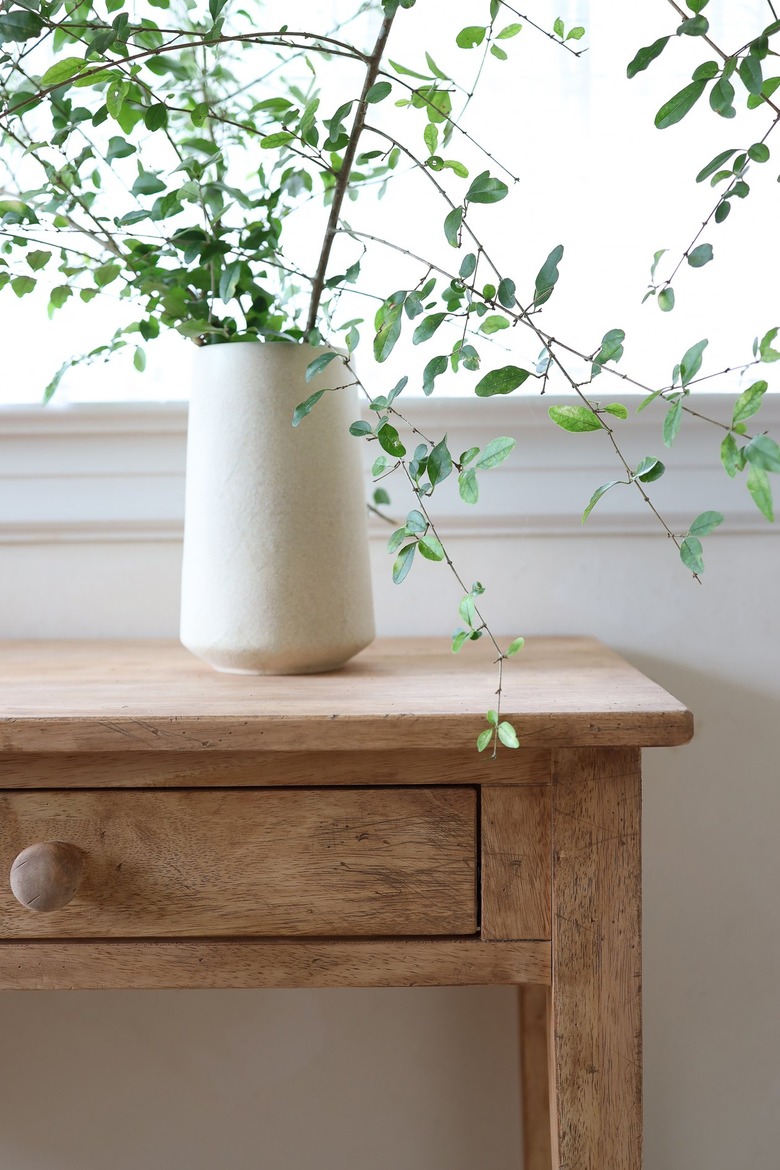
And here's a detailed "after" view once we gave it the antique treatment.
 Trisha Sprouse
Soften the Edges
Soften the Edges
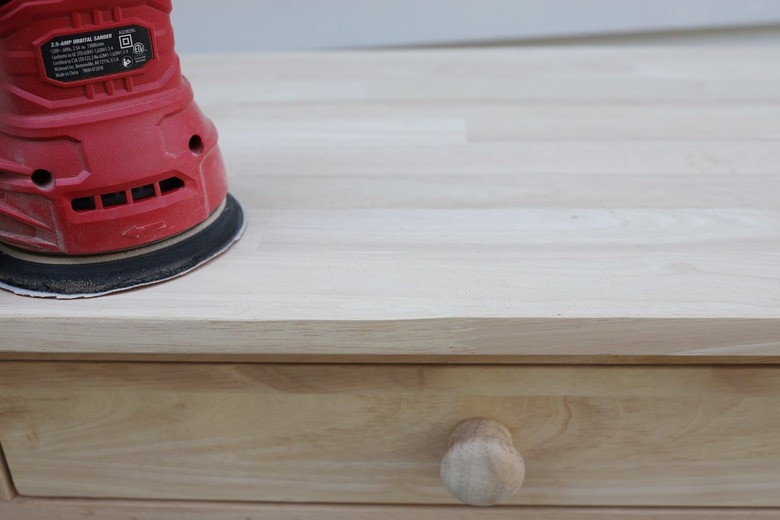
One of the telltale signs of new wood are precise corners and razor straight edges. Rounded edges will give the wood more of a worn and weathered look. Soften all the edges and corners with an orbital sander and coarse-grit sandpaper. Be sure not to forget the edges around the furniture legs.
 Trisha Sprouse
You can see in this photo below where the edge has been softened and rounded on the left side while the right side is still straight and crisp.
 Trisha Sprouse
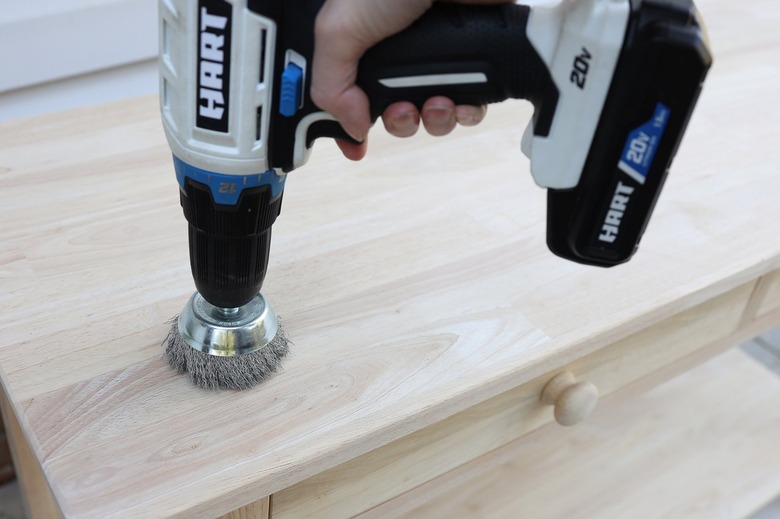
Raise the Grain
Raise the Grain
Raising the wood grain will create grooves where the wood stain can settle darker in some spots than in others. This mottling effect will make the wood look like it's been exposed to the elements versus a uniform stain color that's typical of new wood furniture. Place a wire brush attachment on your power drill and run the brush back and forth over the entire surface, making sure to follow the wood grain. This will scuff up the wood and create a prominent raised texture.
 Trisha Sprouse
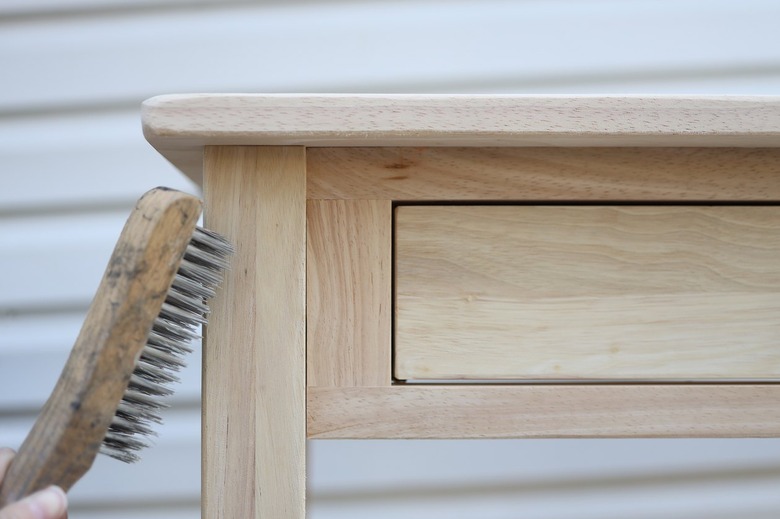
If you don't have a wire brush attachment for your power drill, you can use a regular wire brush. Simply brush it back in forth in the direction of the wood grain.
 Trisha Sprouse
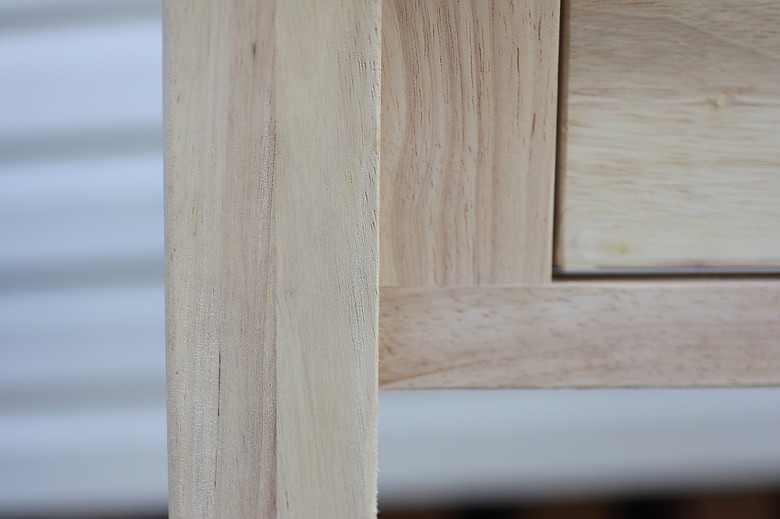
Here's a close-up view of the texture that wire brushing creates — it's subtle here, but it will become more prominent once we apply the wood stain and antique wax.
 Trisha Sprouse
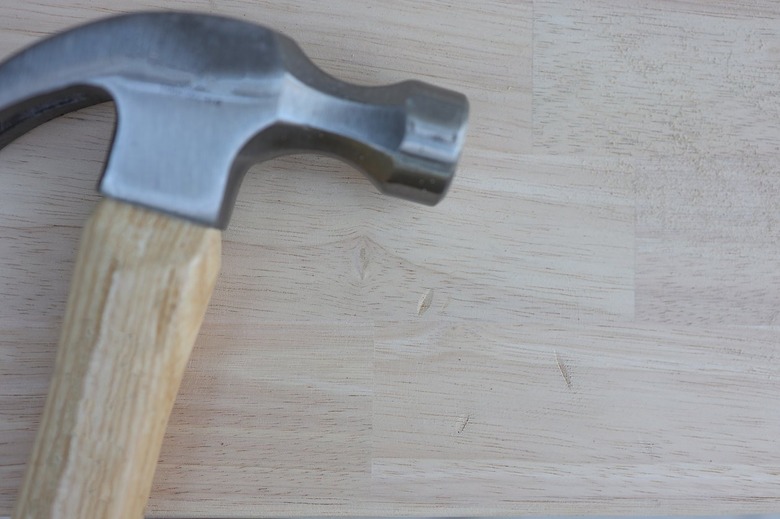
Distress the Surface
Distress the Surface
Bang the wood in random spots with the front and back end of a hammer. Try to steer clear of creating any kind of pattern. You want it to look as naturally "banged-up" as possible. The front end of the hammer will create softer dings while the back end of the hammer will gauge the wood deeper. Don't hold back here — this part is a great stress outlet!
 Trisha Sprouse
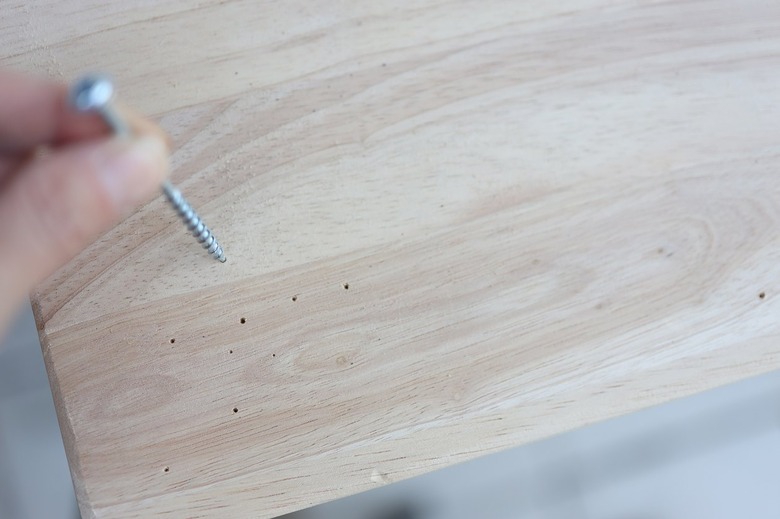
Use either a screw or a drill bit to create the look of "worm holes" by digging the tip into the wood. We found that hitting the top of the screw with a hammer created deeper and more prominent holes while manually twisting the screw made smaller, shallower holes. It's best to cluster several holes together for a more authentic look, but again steer clear of creating anything with a pattern. Just pick random spots on the top, sides, and legs.
 Trisha Sprouse
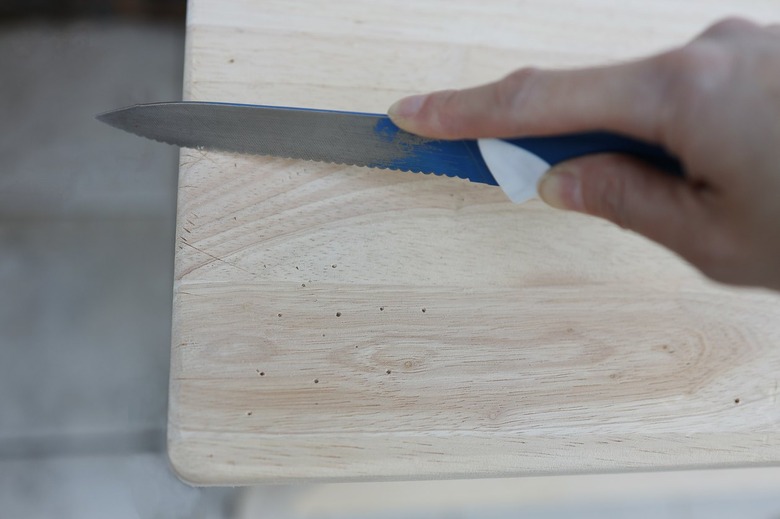
A serrated knife will create authentic scratches across the wood surface, or you could also use a jigsaw for deeper cuts. Simply slice and scratch the wood with the knife, making sure to pay particular attention to the corners and edges. You can also stab the knife into the surface to create cut marks.
 Trisha Sprouse
Stain the Wood
Stain the Wood
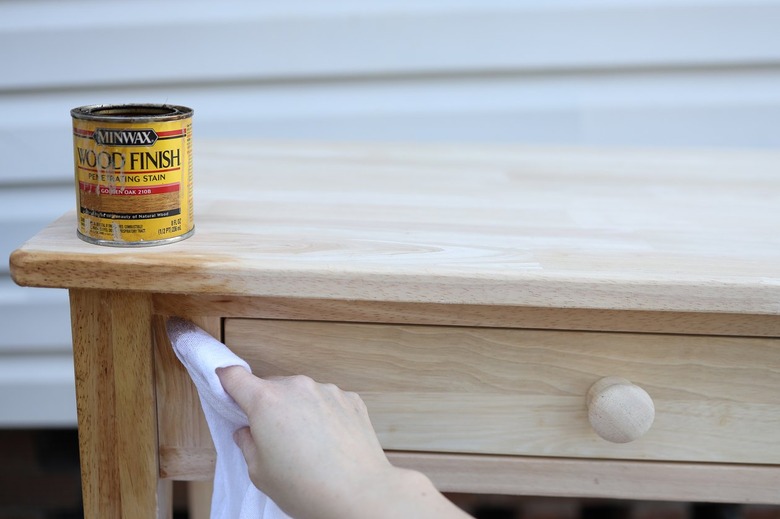
Once you're happy with the level of distressing you've given your wood furniture, wipe away any dust or debris, and apply a coat of wood stain. Be advised that light and medium stain colors will show more of the distressed areas (darker stains tend to hide them). We used the color "Golden Oak" by Minwax and applied one light coat with a soft cloth, immediately wiping off any excess.
 Trisha Sprouse
Tip
If you want to dilute the absorption of the stain color, you can brush a coat of water over the wood first.
Add Grit and Grunge
Add Grit and Grunge
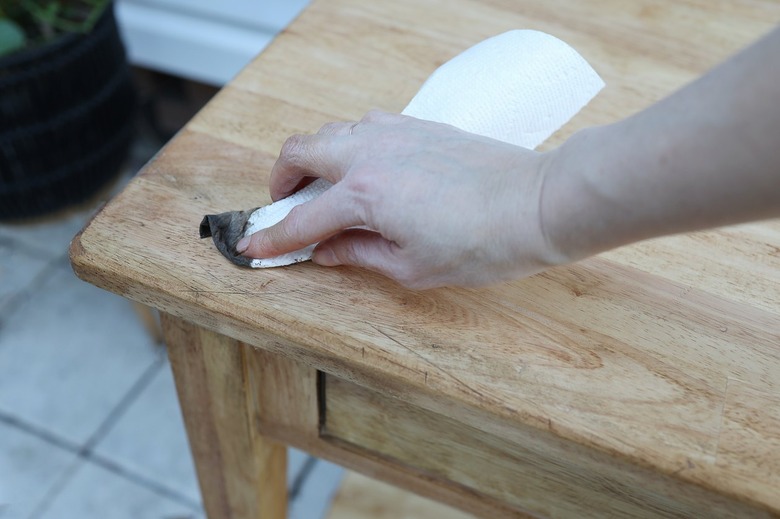
You'll notice after applying the wood stain that some of the stain color will settle into the nooks and crannies to create a weathered effect. To further highlight all of those wonderful dings, divots, and scratches, use a soft cloth to apply a layer of dark antiquing wax. This will also give the table a grungier appearance, like real antique wood. Start with a light application and build up to the desired level of grunginess. We focused the application of antiquing wax mostly around the corners and along the edges.
 Trisha Sprouse
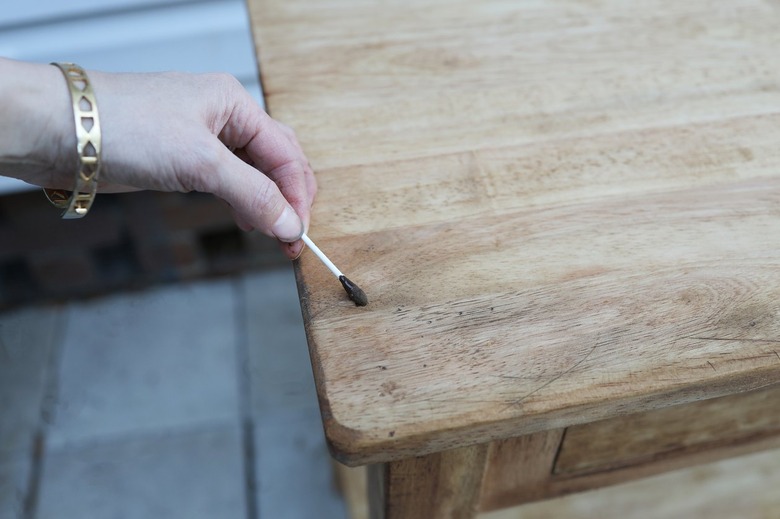
We also used a cotton swab to push wax into the little worm holes and deeper dents. Wipe away any excess wax, and then let dry an hour.
 Trisha Sprouse
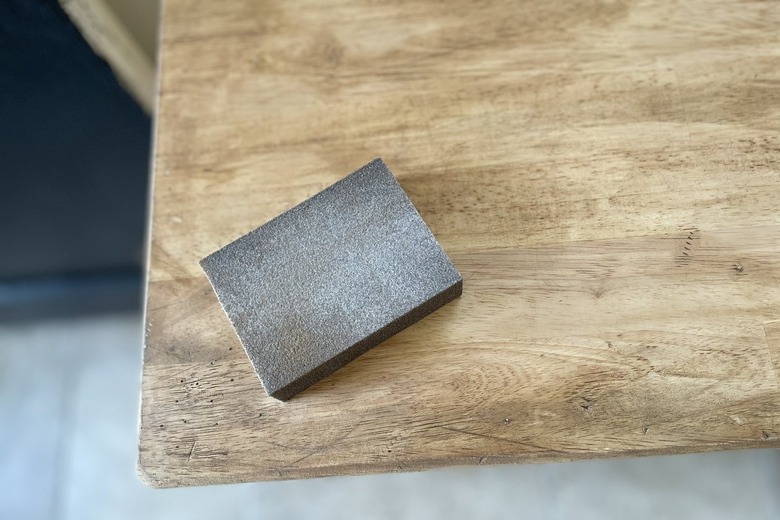
Sand to Smooth
Sand to Smooth
Once the wax has dried, sand the wood with 120-grit sandpaper to remove any splinters that may have occurred during the distressing process. This will also help the stain and wax blend together. You can also sand any areas where you'd like to remove some of the wood stain. This unevenness only enhances the antique vibes.
 Trisha Sprouse
Protect the Surface (Optional)
Protect the Surface (Optional)
Finish your furniture by sealing it with a clear topcoat if desired, or leave it unsealed to allow the wood to become further distressed and aged over time. We chose to leave our table unsealed.
 Trisha Sprouse
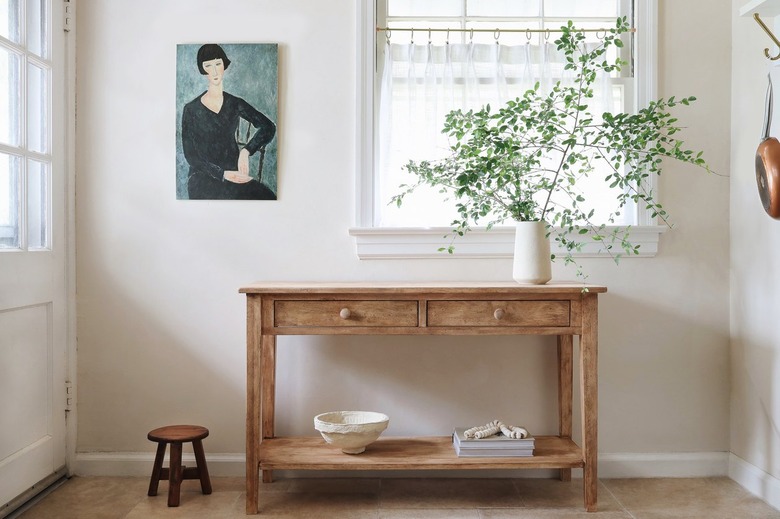
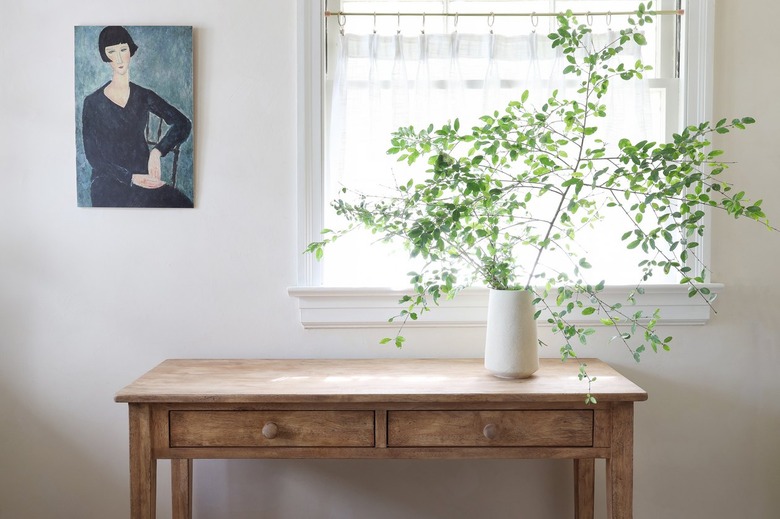
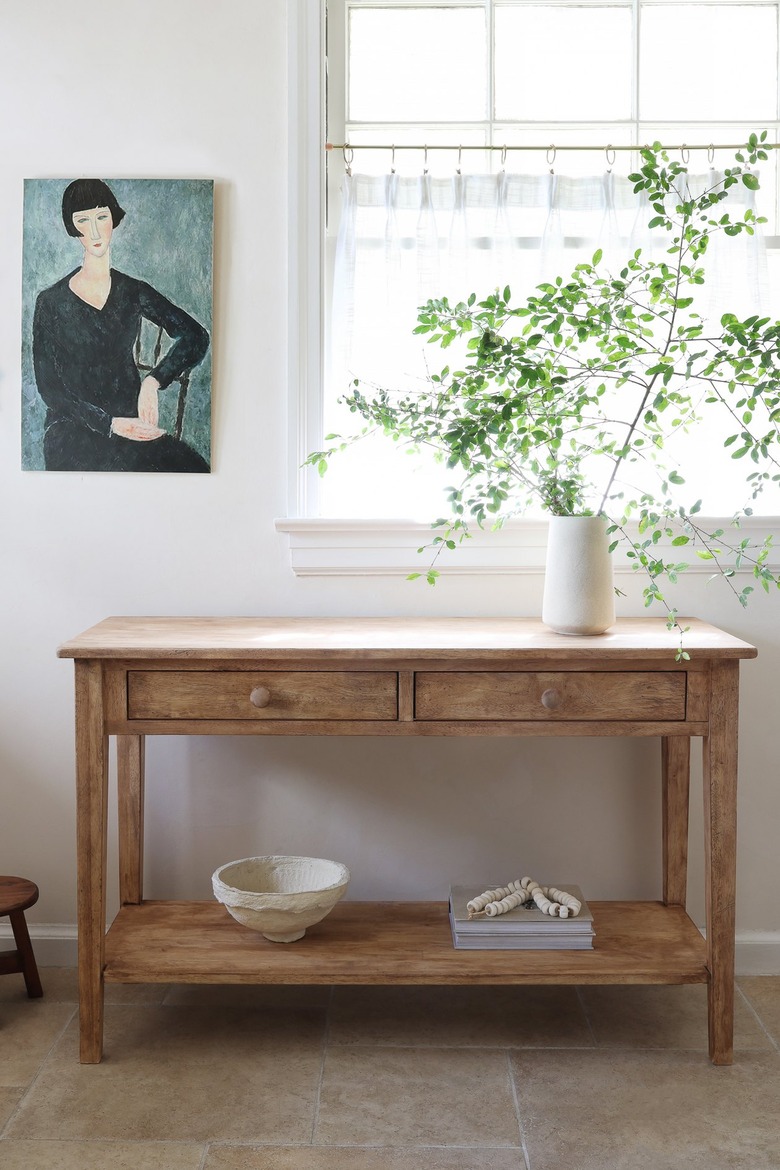
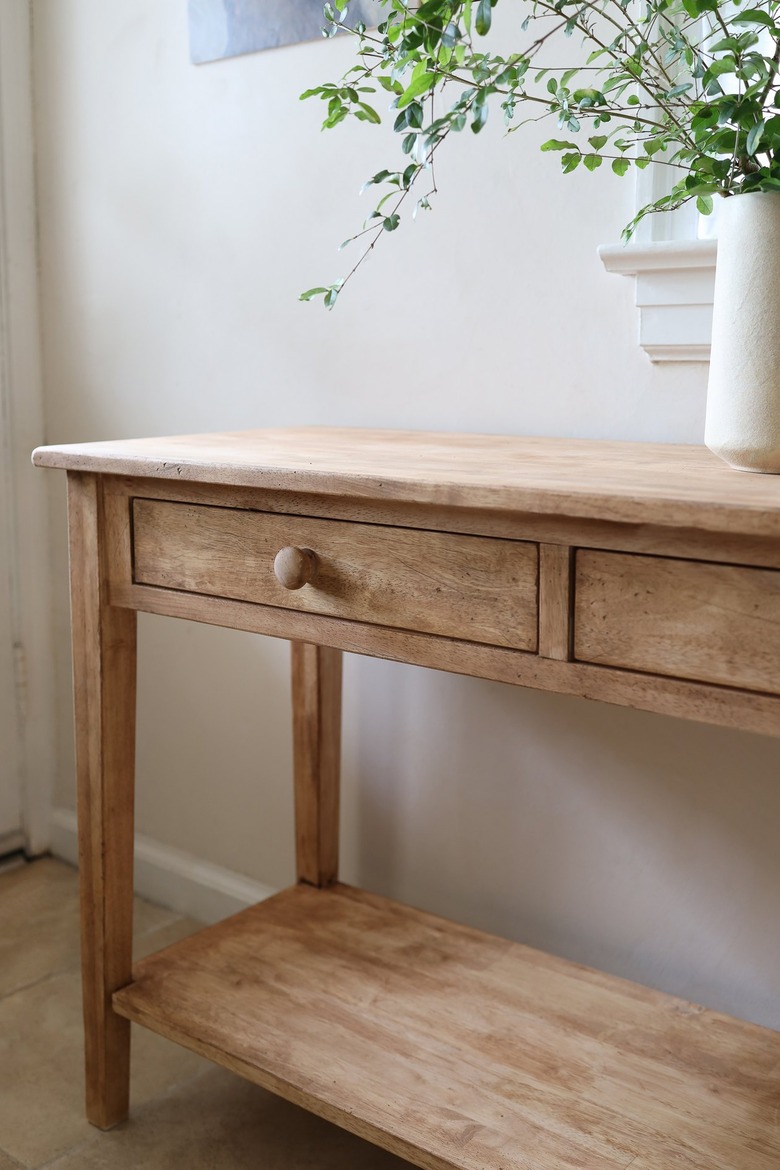
Now style up your new "antique" furniture with some fun accessories, and enjoy the look of something old that's actually something new.
 Trisha Sprouse
 Trisha Sprouse