This Board And Batten Tutorial Will Transform Any Room
We may receive a commission on purchases made from links.
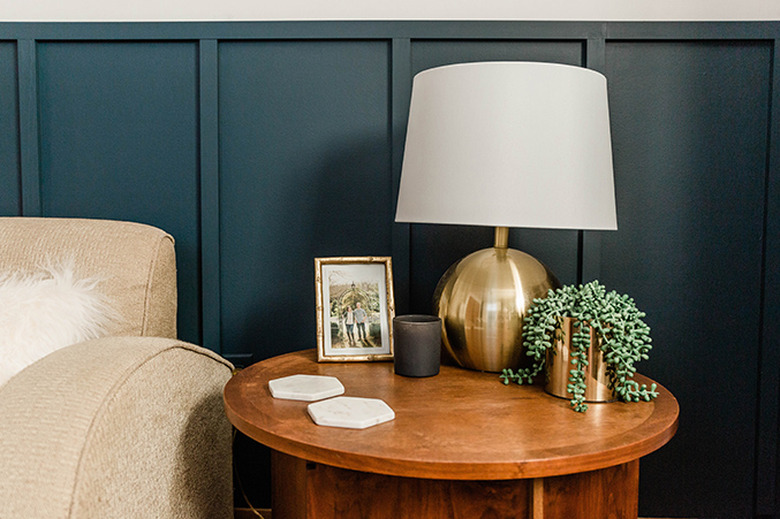
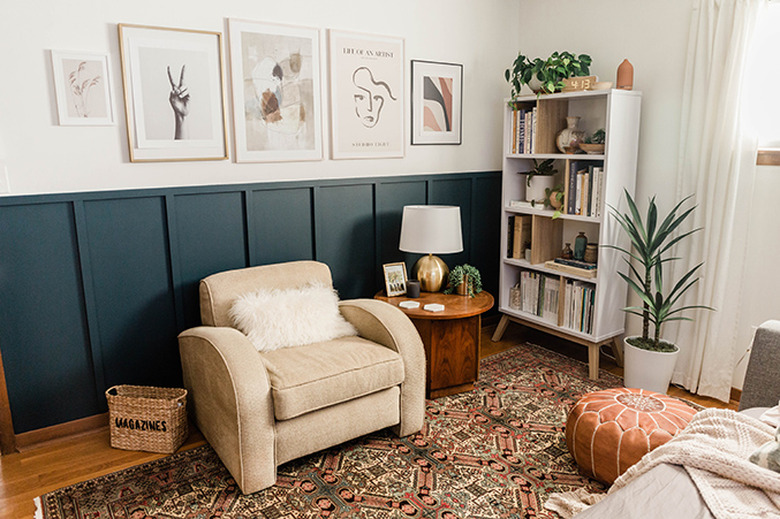
Have you fallen in love with the look of board and batten the way we have here at Hunker? It's a design-worthy way to turn a blank wall into a key player in home decor, whether in a living room, dining room, bedroom, or entryway. In this home improvement tutorial, you'll learn how to DIY a batten wall using a classic painted board and batten treatment. Tackle it using hand tools, or go all out and save yourself tons of time with power tools — you choose! You'll absolutely love this makeover.
 Carrie Waller
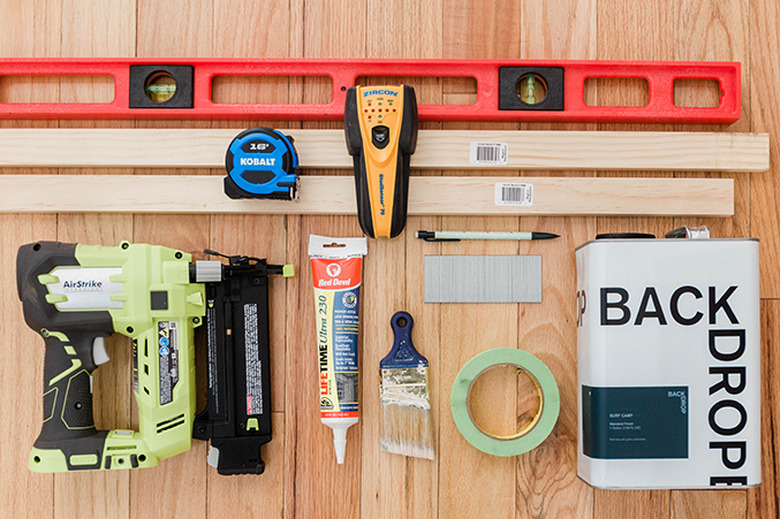
Things Needed
-
1-inch-by-2-inch-by-6-foot select pine boards (enough to fill the span of your wall)
-
Pencil
-
Battery-powered brad nailer and 2-inch-by-18-gauge brad nails (or, a hammer with standard 2-inch drywall nails)
-
1-inch-by-2-inch-by-4-foot select pine boards (enough to fill the span of your wall vertically every 16 inches)
-
Water cup
-
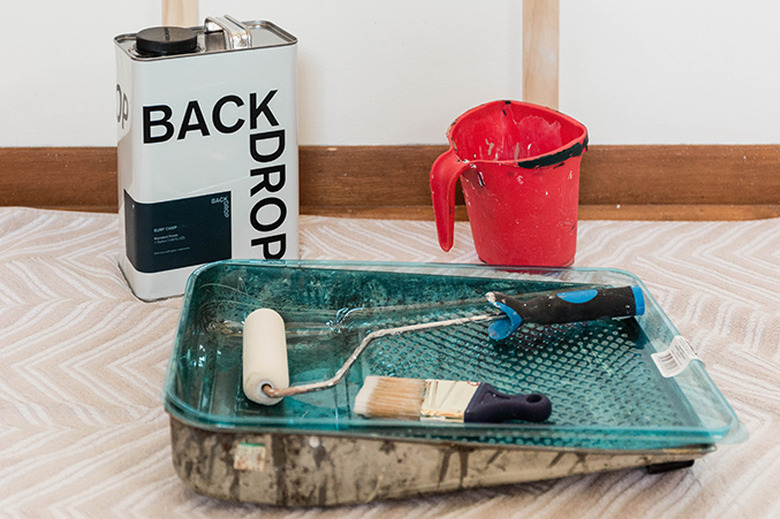
Paint (we used "Surf Camp" from Backdrop)
 Carrie Waller
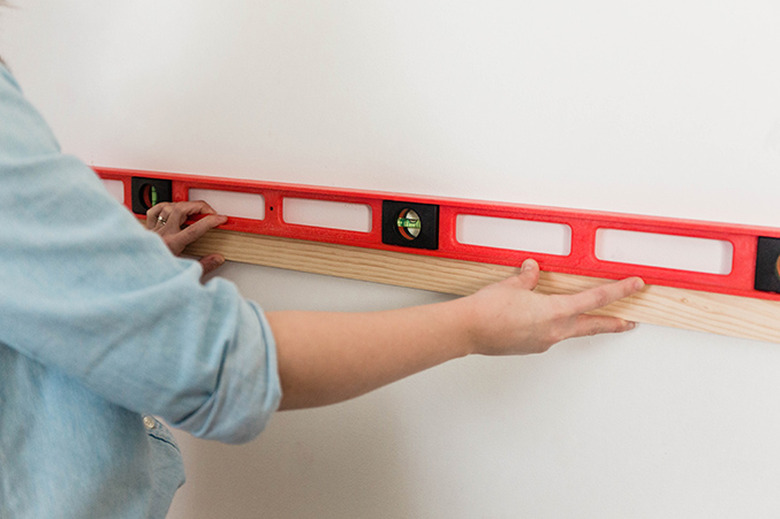
Step 1
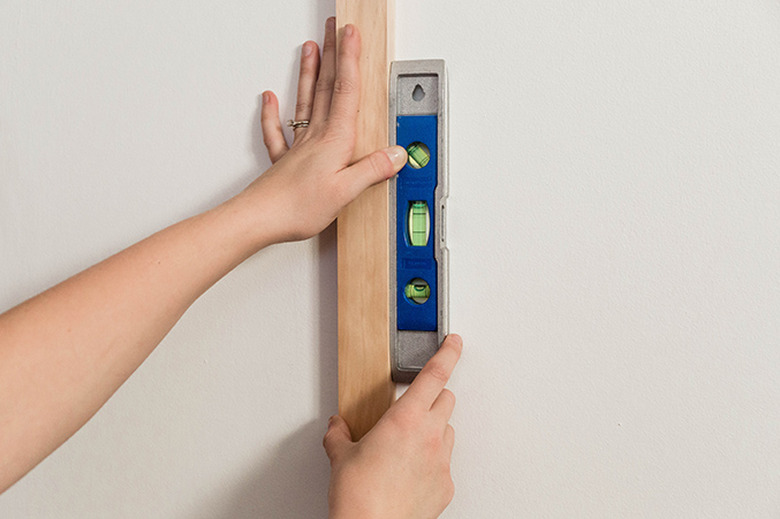
Hold the long 1-inch-by-2-inch-by-6-foot select pine boards (however many you need to span the length of your wall) up against the wall at whatever height you choose — just make sure it's no more than four feet high so that your 1-inch-by-2-inch-by-4-foot select pine boards work as vertical slats. This will be your top board. We planned it so our horizontal slat would sit just under a light switch so we didn't have to cut around that. Make sure the horizontal slat is perfectly level.
 Carrie Waller
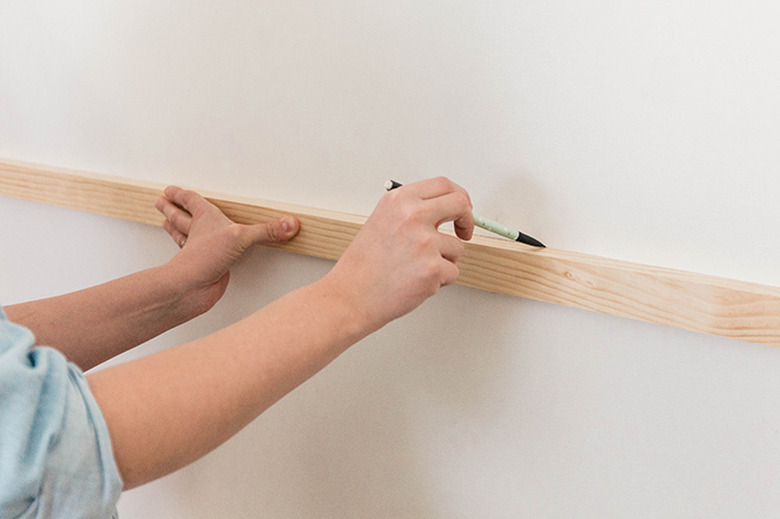
Step 2
Carefully set the level aside without moving the horizontal slat, and make a pencil mark along the length of the top edge of the slat. Set the slat aside, and repeat steps 1 and 2 until you have a line that spans the entire length of your wall. For example, we needed two 6-foot boards to span the length of the wall. We measured and cut the second 6-foot board to fit our particular wall perfectly.
 Carrie Waller
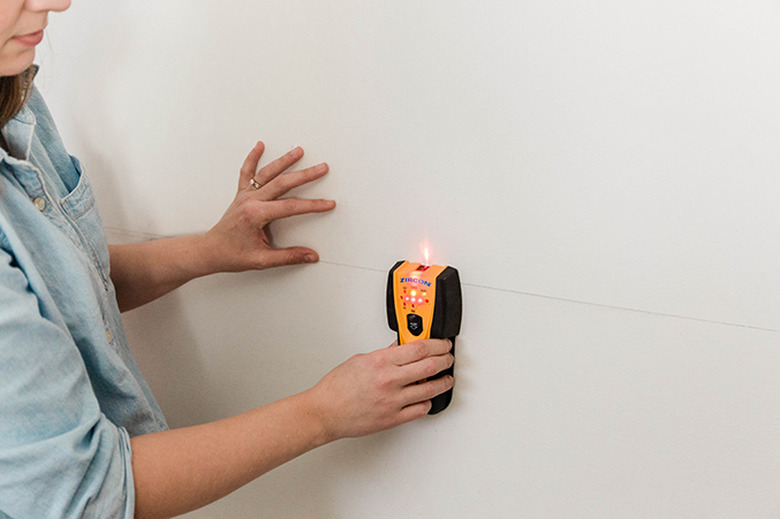
Step 3
Find and mark all of the studs across the length of your feature wall using a stud finder. The spacing should be about every 16 inches.
 Carrie Waller
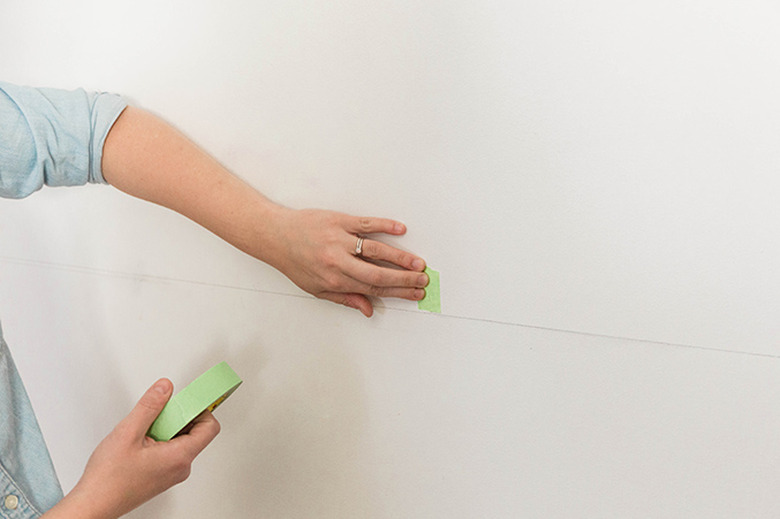
Step 4
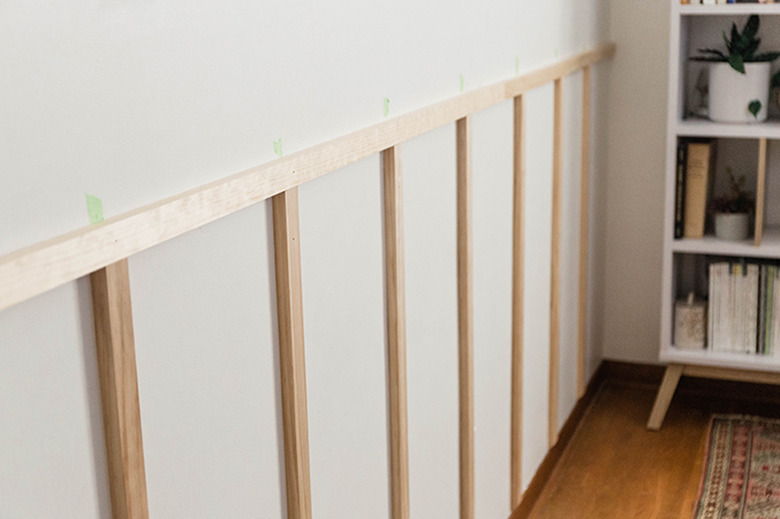
Add painter's tape over each pencil mark to clearly denote where each stud is. Make a V-shaped mark in pencil on top of the painter's tape to mark the stud center so that you can be extra precise in later steps.
 Carrie Waller
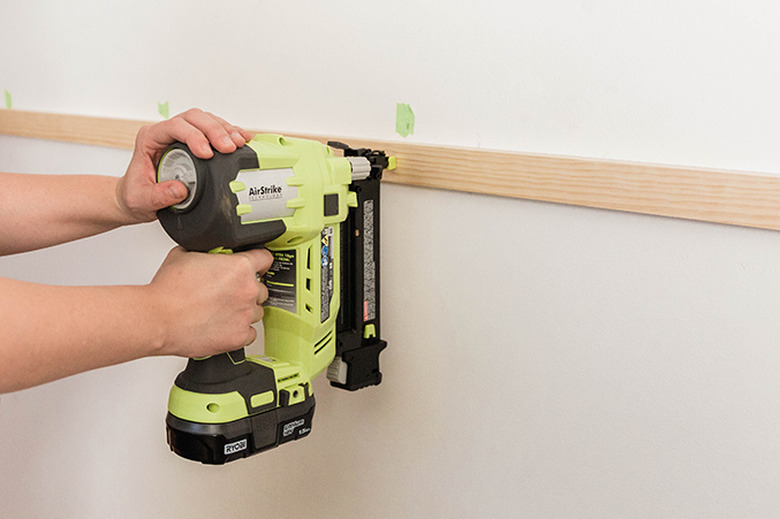
Step 5
Now, put the horizontal pieces back on the wall just below the level line you marked earlier, and nail them in place where you marked the studs in Step 4. If you need to use multiple horizontal slats to span your wall, like we did, butt them right up against each other on the ends to get a seamless look.
TIP: For the nailing, we used a battery-powered brad nail gun and 2-inch-by-18-gauge brad nails to make this process go quickly (as in, in under a minute for the whole wall), but you can use regular nails and a hammer. Just make sure you pre-drill pilot holes first so you don't split the wood.
 Carrie Waller
Step 6
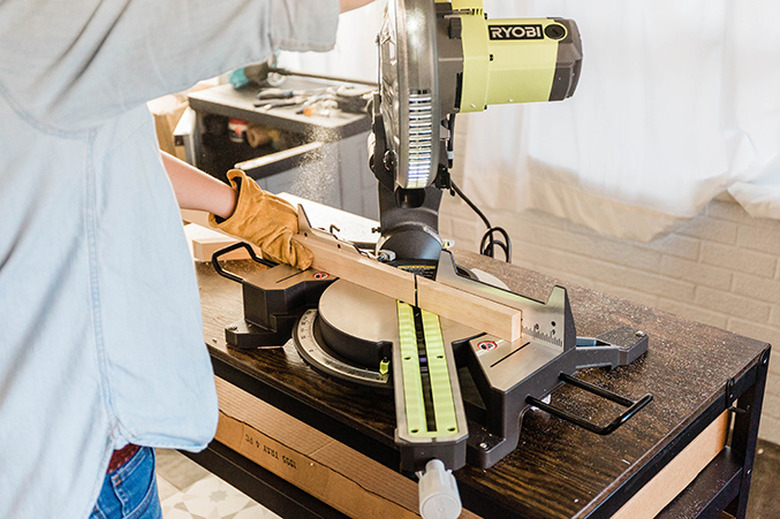
Measure the height below the bottom edge of the horizontal slats and the top edge of the baseboard at ground level. Mark that height on your 1-inch-by-2-inch-by-4-foot select pine boards, and cut them to size using a compound miter saw or miter box and back saw. Note that if your home is older and the walls are a bit uneven, you may need to take individual measurements and number the slats and their corresponding locations on the wall to ensure that the vertical slat spans all the way from the bottom of the horizontal slat to the top of the baseboard.
TIP: To make the transition from slat to the baseboard look more seamless without having to remove your existing baseboard, just cut the bottom edge of your vertical slat at a 45-degree angle. This design feature will make that transition feel more intentional and will save you from having to do a lot of custom trim work at the baseboard level.
 Carrie Waller
Step 7
Hold each vertical batten slat up on the wall over the area where you marked the stud, make sure it's level, then nail in place — we drove in one nail toward the top of the slat, one toward the bottom, and one in the middle.
 Carrie Waller
 Carrie Waller
Step 8
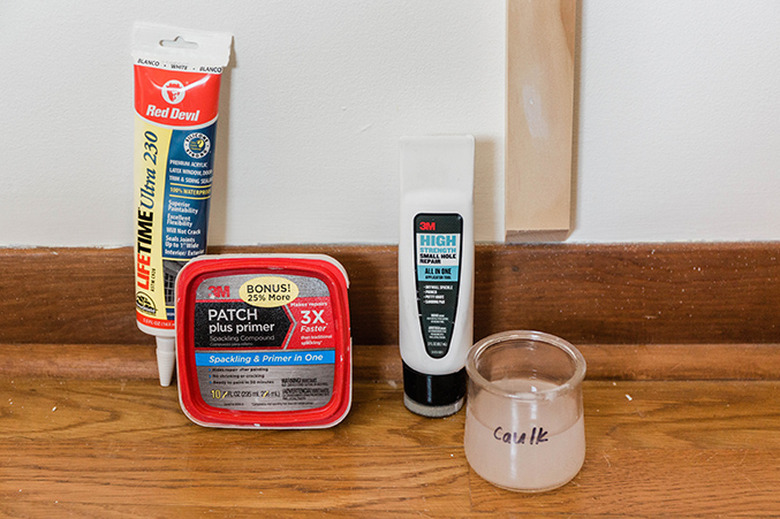
Remove the painter's tape guides you put in place earlier, and discard them. You'll need a wood filler for a smooth look: Fill the nail holes with patch plus primer, and caulk along the edges of the trim. This 4-in-1 spackle tool is handy to use for detail nail-hole-filling work since it comes with the spackle, primer, putty knife, and sanding pad in one product.
TIP: Smooth caulking lines by dipping your finger in water first. We keep a small glass water jar marked "Caulk" in our tool box specifically for this purpose!
 Carrie Waller
Step 9
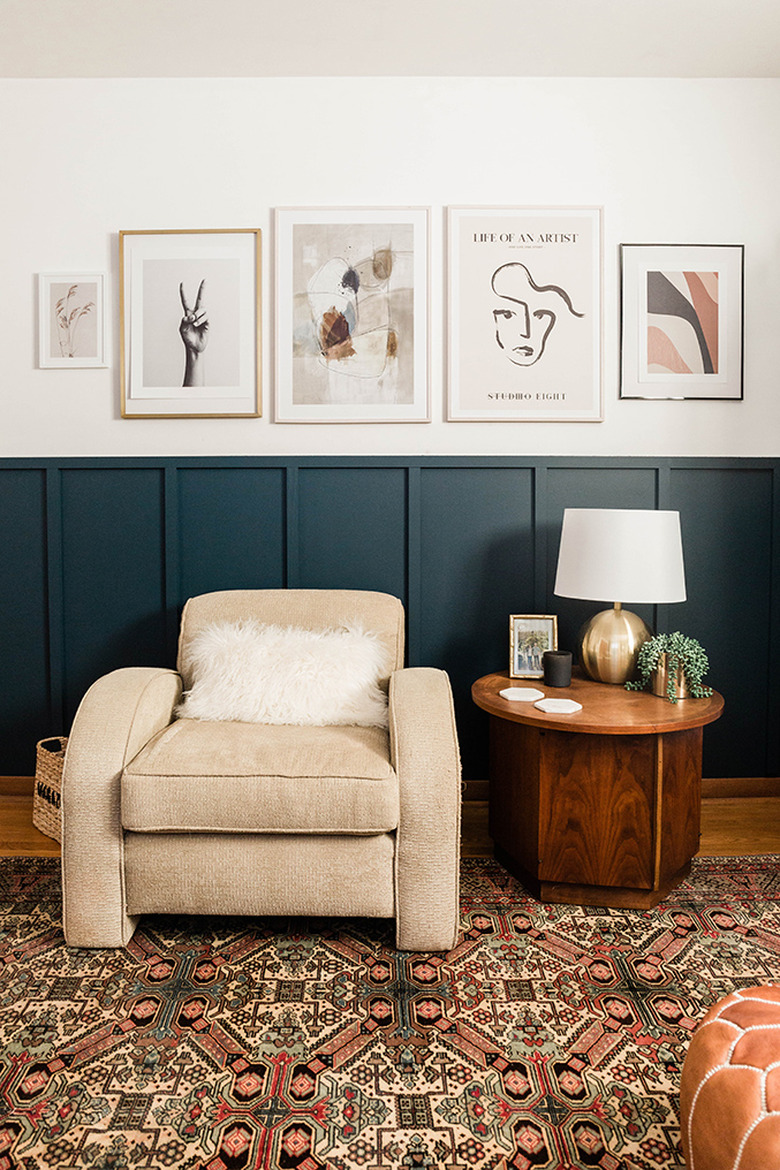
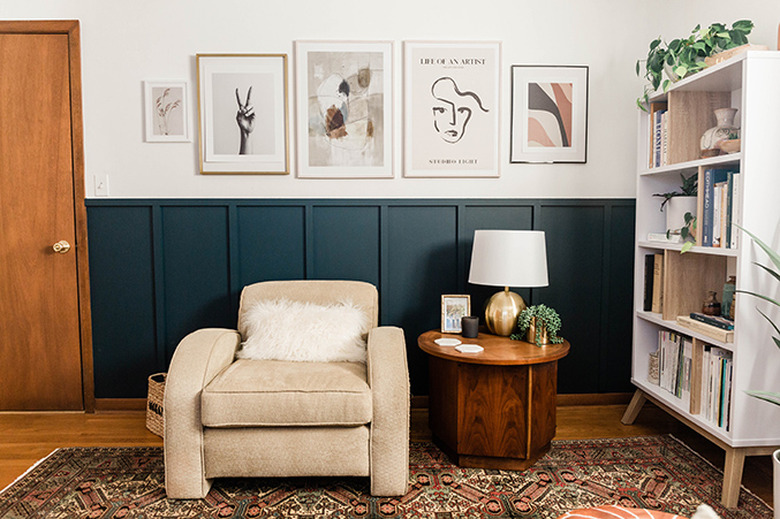
Paint your new accent wall and trim using a foam paint roller (this type of roller gives an ultra smooth finish), angled brush, and paint tray. We used a paint color called "Surf Camp" from Backdrop. Paint as many coats as you need to cover the wall and wooden trim completely, allow it to dry overnight. Now you have your own customized batten board wall, giving any space a whole fresh look!
 Carrie Waller
 Carrie Waller
 Carrie Waller