How To Install A Drip Irrigation System
We may receive a commission on purchases made from links.
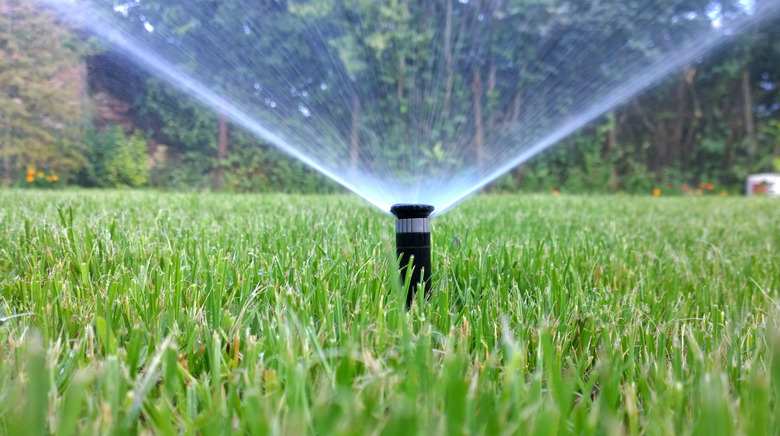
Whether or not you're new to gardening, you probably already know about the benefits of a drip irrigation system, but you might not be up to speed on the details of installing one. It can look a little complicated, especially when you're browsing through catalogs of drip components, but installation is actually fairly straightforward, and compared to installing a sprinkler system, it's a veritable snap. Because drip tubing and emitters are designed to remain above ground, very little digging is involved, so you can forget about having to disrupt your landscaping with a system of trenches.
Installation usually proceeds in two stages. In the first stage, you establish a mainline that is connected to the water source, which can be a standard 3/4-inch outdoor hose bib or an antisiphon valve normally used to supply a sprinkler system. If you already have a sprinkler system and one of the zone valves is unused, it makes a great water source for a drip irrigation system. You aren't at any disadvantage, however, if the spigot on the side of your house is all that's available because drip components are tailor-made for such a situation.
In the second stage of installation, you connect branch lines and emitters to the mainline to supply water to the plants. If there's anything complicated about installing a drip system, it's probably choosing emitters that supply enough water without overwatering and delivering the water in such a way that roots are nourished. To do this, you have to know the water pressure and flow rate of the water source to avoid overloading the system. Installing a drip irrigation system is extremely DIY-friendly, and once it's in, it requires little maintenance, but emitters do clog, so you can't ignore upkeep altogether.
Check Water Pressure and Flow Rate
Check Water Pressure and Flow Rate
After you've chosen the water source for your drip system, whether it's an outdoor faucet or an antisiphon sprinkler valve, you need to check the water pressure and flow rate. Drip systems usually operate at lower pressures than normal house pressure, but they need a minimum of 20 to 25 psi. To measure your water pressure, screw a pressure gauge onto the spigot or sprinkler valve, turn the water on all the way and note the reading. If the pressure is less than 25 psi — which could be because of corroded pipes or the building's plumbing configuration — choose another water source.
The flow rate from the water source is an important parameter that determines how many emitters can be operating at one time. To measure flow rate, turn the water on all the way and time how many seconds it takes to fill a 1-gallon bucket. Divide by 60 to get the flow rate in gallons per second. Emitter flow rates are measured in gallons per hour (gph), so to convert your reading to gph, multiply by 3,600. The total output of all the emitters operating at the same time — in gph — cannot exceed this number, or the system won't work.
Planning a Drip Irrigation System
Planning a Drip Irrigation System
A drip system often incorporates more than one zone even if the total output of all the emitters doesn't exceed the flow rate of the source, and the reason is because different plants have different watering needs. You can provide a single water source with multiple outlets by using a garden hose splitter or a multiport timer, and once you've done that, you can figure out which components you need for each zone. Installing a splitter also allows you to hook up a garden hose to the same faucet that supplies the drip system, so you won't have to disconnect one to use the other.
When measuring the length of tubing you need for the mainline, keep in mind that the closer emitters are to the mainline, the better they work. Instead of passing a single length of mainline tubing through your garden, you'll want to snake it back and forth to limit the lengths of the 1/4-inch branch lines that feed the emitters. You also want to build in as much flexibility as possible because plants' water needs change as they grow and mature, so the more mainline drip tubing you use, the better. Whenever you need to change the position of a branch line or a single emitter, you can always plug the hole with an inexpensive goof plug.
You lose 1 pound of pressure for every 2.3-foot rise in elevation from the water source to the emitter, and you gain 1 pound for each equivalent drop. That means plants at higher elevations can be underwatered, and those at lower elevations can be overwatered, but problems can usually be averted by using pressure-compensating emitters. Most conventional emitters are pressure-compensating, but not all, so it's important to check.
Things Needed
-
Clamps (optional)
-
Clamp pinching tool (optional)
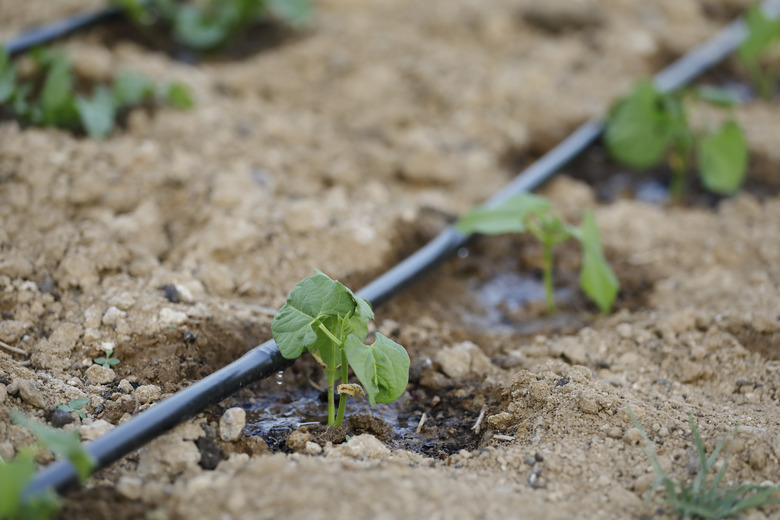 temmuzcan/iStock/GettyImages
How to Install a Drip Irrigation System
1. Prepare the Water Source
The transition from a 3/4-inch spigot to drip tubing requires four components. Screw on a backflow preventer first, followed by a pressure regulator, filter and tubing adapter in that order. The backflow preventer prevents contamination of the water supply, and it's required in most communities, but you can omit it if you're connecting to an antisiphon sprinkler valve since the antisiphon mechanism does the same job. Virtually all sprinkler valves include an antisiphon mechanism. It's the pancake-shaped valve with the outlet for the sprinkler supply attached to the main shut-off valve.
Tubing adapters are available for 1/2-, 5/8- and 3/4-inch pipe, so be sure to use the right size for the tubing you plan to use. Generally, the longer the drip mainline, the larger-diameter pipe you should use to maintain constant water pressure.
A timer is optional but is highly recommended since it automates the whole watering process. If you use a sprinkler valve, it may already be connected to a control panel, but if you're using a faucet, you can install a battery-powered timer. It goes on first, before the backflow preventer.
2. Install the Main Drip Line
Measure the length of polyethylene drip line you need to reach the side of the area to be watered farthest from the water source. Cut that length from a roll of tubing using a utility knife. If you want to change the direction of the line, you can do that using an elbow fitting, and if you want to create a branching network, you can use a tee fitting. If you need to add more tubing to continue in a straight line, use a coupling. Avoid extending the drip line across a lawn, where it can get in the way of the lawn mower, or across a walkway or driveway by routing it along the sides of walkways, retaining walls and buildings.
Fittings are often color-coded depending on the tubing diameter: black (3/4 inch), blue (5/8 inch) and green (1/2 inch), and you connect the tubing by pushing it at least 1 inch into the fitting opening. Fittings with barbed ends that go inside the tubing are also common, and these come with clamps that you tighten with a special pinching tool. They are not color-coded.
Terminate your main drip line with end caps that have push-on compression openings or barbed connectors. You can also use end-closure rings that hold the end of the kinked tubing closed.
3. Secure the Main Drip Line
Hold the drip line to the ground by pounding in stakes at intervals of several feet using a mini sledgehammer. Secure the drip line to wooden surfaces, such as walls, fencing or siding, using tubing clamps.
4. Install Emitters and Connectors for Branch Lines
Use a hole-punching tool to make a hole in the main drip line wherever you want to install an emitter or a length of 1/4-inch tubing (to get to a plant too far away for an emitter to reach from the mainline). Insert one end of an emitter or a barbed 1/4-inch coupler, elbow or tee and push until the fitting snaps into place. This can be difficult to do when the tubing is cold, so if you can't wait for the sun to warm it up, you might want to use a lighter to soften the tubing.
5. Create Branch Lines
Connect a length of 1/4-inch tubing to each connector you've installed in the mainline and extend it to the plant you want to water. Install an emitter by pushing the barbed end into the end of the tubing. Again, a little warmth helps make this easier. Using tees and elbows, you can create a network of 1/4-inch tubing to water several plants that are close together or to water a large plant with more than one emitter. After one day in the sun, the tubing will settle flat on the ground, but until that happens, you may want to use a few stakes to hold it in place.
Choosing the Right Emitters
Choosing the Right Emitters
Drip emitters commonly come in three different flow rates of 1/2, 1 and 2 gph, and they are color-coded so you know the flow rate at a glance. The emitter you use for a particular plant depends on the plant's watering needs as well as the soil condition. You generally need a higher flow rate for sandy soil since it doesn't hold water very well. On the other hand, it's not a good idea to mix flow rates in a single zone, so if one plant needs more water than the one next to it, add another emitter rather than using one with a higher flow rate. You can also help loose, sandy soil retain moisture by spreading mulch.
Some plants and trees need more water than one or two drip emitters can deliver, and for these, you can use bubblers, which have flow rates as high as 13 gph. Microsprayers are also an option for watering ground cover and low-growing shrubs and vegetables.
 fcafotodigital/iStock/GettyImages
Useful Alternatives to Emitters
Useful Alternatives to Emitters
Installing a drip irrigation system is not a particularly challenging endeavor given how easy it is to fit drip components together, but it does take time, and if you're in a hurry to get your vegetable garden watered, you might consider using soaker hoses with 3/4-inch hose thread fittings that screw directly onto a standard hose bib. You can even connect them to timers, and because they deliver a greater water flow, the timer needs to be on for a fraction of the time that it does with a drip system.
Along the same lines, if you have already deployed a main poly drip line, you can connect 1/4-inch soaker hose with a barbed connector, which is a better option for container gardening than 3/4-inch soaker hose. Even better, consider deploying drip tape with precisely spaced apertures instead of standard poly tubing to water rows of vegetables or flowers.
One last option you might consider is 1/4-inch laser tubing with built-in emitters that delivers water at a preset rate (for example, 0.9 gph). Connect one end to a main drip line with a barbed connector, cap the other end with a goof plug and you have a ready-made series of precisely spaced drip emitters that you can snake throughout your garden bed. When using any of these options, it's important to monitor total flow rate to make sure you don't overextend your water supply.
References
- Southern Nevada Water Authority: Installing Drip Irrigation
- YouTube: Ask This Old House – How to Install a Drip-Irrigation System
- My Farm Life: 5 Tips For Planning A Drip Irrigation System
- Irrigation Tutorials: How to Select the Best Drip Emitters or "Drippers"
- Family Handyman: How to Install a Drip Irrigation System in Your Yard
- Dripdepot: All About Emitters/Drippers