Installing An Above-Ground Sprinkler System: A DIY Guide
We may receive a commission on purchases made from links.
While the elegance of an underground sprinkler system can't be denied, digging all those trenches is a daunting proposition, and if you're unable to DIY that and you're cash-strapped, you may have to wait a few years before you can install one. On the other hand, maybe you don't need one because an above-ground sprinkler system can do everything an underground one can do, and installing and maintaining one is a fairly easy DIY project. You don't need to dig any trenches or install valve stations. Best of all, you actually have a wider choice of sprinkler heads, and there's more flexibility when your irrigation system is above ground and accessible.
One potential drawback is the exposed garden hoses snaking across your landscape, which are an eyesore and complicate yard maintenance tasks like raking leaves and mowing the lawn. Depending on your watering needs, you can always roll them up and put them away when you aren't using them, but if you want the convenience of not having to do that, you'll probably want to put the extra effort into installing semipermanent, above-ground water supply lines. High-density polyethylene (HDPE or poly) tubing was made for applications like this.
Garden Hoses and Poly Tubing
Garden Hoses and Poly Tubing
The simplest version of an above-ground sprinkler system is a standard 3/4-inch garden hose running from an outdoor spigot to a sprinkler head, and a slightly more complex one is a daisy chain of sprinkler heads connected to one another and the water supply by hoses. These days, it's easy to find kink-proof hoses, which eliminate one of the most common problems with this watering strategy, and you can also use easy-to-manage expandable hoses, which shrink to a fraction of their length when not in use. No garden hose puts itself away when the watering is finished, though, so if you really want to keep maintenance to a minimum, you might want to think outside the garden hose box.
Poly tubing is familiar to anyone who has seen a drip irrigation system in operation, and it's also commonly used for underground sprinkler systems. Made from a completely recyclable material, poly tubing is flexible, and because it's non-UV-degradable (unlike PVC pipe), it's actually recommended for above-ground piping systems. Lengths of tubing are joined with leak-proof, push-together compression fittings instead of glue, so constructing a pipe network with poly tubing is ridiculously easy, and you can connect the system to a hose-thread spigot with a compression adapter.
If you construct your water delivery system with poly tubing. you can keep it out of sight by running it along the sides of buildings and walkways and even underground in places where it needs to cross a walkway or driveway. Because the bulk of the network is above ground, you can move it when the changing needs of your landscape call for a different watering pattern, but until that happens, tubing staples keep it firmly in place.
Supplying an Above-Ground Sprinkler System
Supplying an Above-Ground Sprinkler System
As with any lawn sprinkler system, the design for an above-ground watering system starts with determining the water pressure and flow capacity available to supply the sprinkler heads. To determine water pressure in pounds per square inch (PSI), simply screw a water pressure test gauge onto the spigot you plan to use, turn it on all the way (after making sure every other faucet in the house is off) and note the reading. To check flow rate in gallons per minute, time how many minutes it takes for the spigot to fill a 5-gallon bucket and divide by 5.
Once you know the water pressure and flow rate, you can determine how many sprinklers you can run at once based on the pressure requirements and flow rates of the sprinkler heads, which vary with the product and are usually listed on the labels. If you have a large area to water, you'll probably have to create separate watering zones to avoid overtaxing your watering system, and that's easy to DIY. You simply screw a hose manifold onto the spigot, which is a fitting that has a single inlet and multiple outlets (usually four). Connect a garden hose or poly tubing network to each of the outlets.
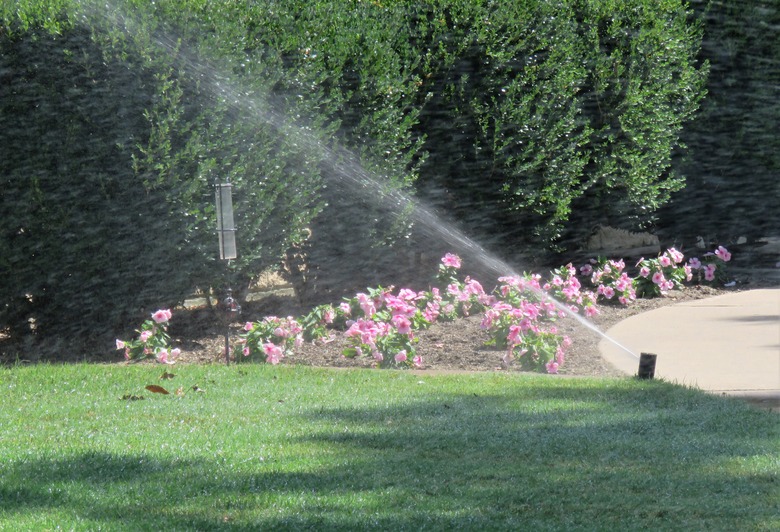
At the business end of the irrigation system, you want the sprinklers to reach all parts of the lawn and garden without overwatering any part and with as little waste as possible, and here is where the benefits of a DIY above-ground system are most evident. Any type of sprinkler head that normally goes underground can be adapted for above-ground use, and the types of sprinklers that can't be used with underground systems are also at your disposal. Once you've set up a watering zone, you can automate it by screwing a battery-powered timer onto its outlet at the manifold.
 schulzie/iStock/GettyImages
Sprinkler Heads You Can Use
Sprinkler Heads You Can Use
If you're used to watering your lawn with a garden hose, you're probably familiar with the common above-ground sprinklers. Stationary sprinklers, which are great for watering flower beds and small patches of lawn, send out streams of water in all directions, while oscillating sprinklers cover larger areas by rocking back and forth while they spray. You can connect one of these to your faucet manifold with a garden hose, or you can incorporate either into a system of poly pipe by installing a male hose adapter and screwing the garden hose to that fitting.
Impact sprinklers, introduced by Rain Bird but now sold under a number of brand names, are the best choice for watering large lawns. Each one uses a lot of water, so you can only use one or two per watering zone, and to ensure they have enough water pressure to do the job, you shouldn't combine them with other types of sprinklers. You can daisy chain these with garden hoses or tie them into a network of poly tubing with an adapter.
Any type of underground sprinkler head can also be used with a poly tubing network or a garden hose by connecting it to sprinkler spike. Underground sprinklers have a 1/2-inch female connector into which you screw a plastic riser, which then screws into the spike. This means you can use pop-up spray and rotary heads as well as MP rotators to water parts of the lawn and garden with shapes too irregular to be efficiently watered with conventional above-ground sprinkler heads.
Connecting Sprinkler Heads With Garden Hoses
Connecting Sprinkler Heads With Garden Hoses
Common garden sprinklers as well as spikes used to adapt underground sprinklers for above-ground use typically have a female 3/4-inch hose inlet and a 3/4-inch male hose outlet, which is usually capped. This suggests you can install the sprinklers in a daisy-chain setup much like power outlets in an electrical circuit, which you can, and you can use this feature to create a sprinkler zone that waters efficiently with minimal wastage.
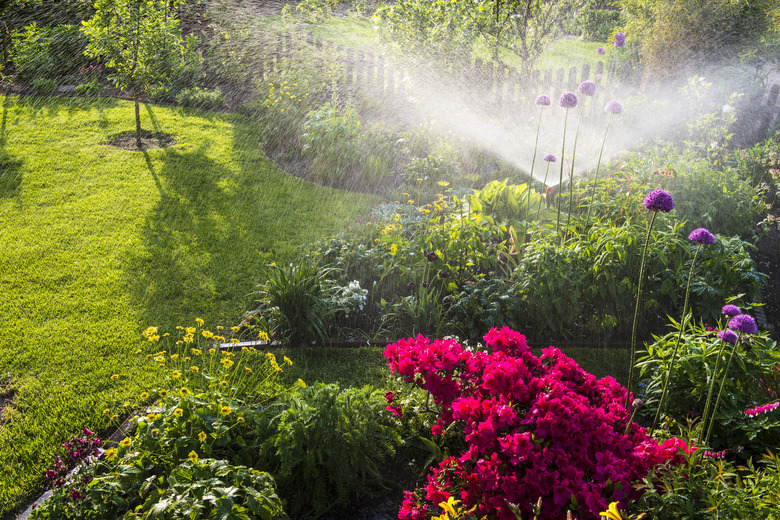
The key is to keep sprinklers optimally spaced to avoid dry areas between them while at the same time keeping overlap to a minimum. The spacing depends on the output of the sprinklers and the water pressure. At an average pressure of 40 PSI, the optimal spacing between MP rotators is anywhere from 8 to 35 feet depending on the model, while for impact sprinklers, it can be as much as 50 feet or more. Once you've daisy chained a system of sprinklers together with garden hoses and found the optimal spacing by trial and error, you can use a simple trick to maintain the spacing when you move the sprinkler system to another part of the yard.
Simply cut the garden hoses connecting the sprinklers to the proper length with a utility knife and install male and female hose connectors onto the cut ends as needed. Reconnect the hoses to the sprinklers and when you deploy the sprinkler system, just be sure to avoid slack in the hoses when you position the heads. You don't need to cut the hose connecting the system to the water supply because you need that length to be variable so you can move the sprinklers around the yard.
 Fahkamram/iStock/GettyImages
How to DIY an Above-Ground Sprinkler System
How to DIY an Above-Ground Sprinkler System
Assuming you want a quick and easy system that you can move around the yard, you'll probably want to connect it with garden hoses. Constructing a network with poly tubing takes a fair bit more effort and planning.
1. Choose Your Spigot
Locate the spigot on the side of the house or in the garden that's most suitable for your sprinkler system. Check the water pressure and flow rate to make sure the spigot has what it takes to supply an irrigation system.
2. Install a Multiport Outlet (Optional)
If you plan to have zones that operate independently of one another, screw a multiport outlet, or manifold, onto the spigot.
3. Install Timers (Optional)
If you want to automate any of the zones in your irrigation system, install a timer onto the outlet for that zone at the manifold.
4. Connect the First Sprinkler
Run a length of garden hose or poly pipe to the first sprinkler in your network. If it's the only sprinkler you're going to use and it has an outlet for downstream sprinklers, make sure that the outlet is capped.
5. Adjust the Sprinkler
Depending on the type of sprinkler you use, you can set such parameters as throw distance, arc length and direction. Oscillating sprinklers have a single knob that lets you regulate the arc from 180 degrees to 90 degrees or even shorter, and fixed sprinklers usually have a simple adjustment that determines throw distance.
To set the arc length of an impact sprinkler, you usually have to move a wire clamp on the base of the sprinkler head. You'll need a flathead screwdriver to adjust pop-up sprinkler heads, and you'll also need to read the manufacturer's instructions because adjustment methods vary from brand to brand.
6. Connect Another Sprinkler
Screw a garden hose or a length of poly tubing with a female hose adapter to the outlet of the first sprinkler and connect the other end to another sprinkler. It doesn't have to be the same type of sprinkler as long as it can operate at full capacity with the available water pressure. Set this in a place that isn't being watered by the first sprinkler and adjust it so the spray patterns of the two sprinklers overlap by a small amount.
7. Add More Sprinklers if Necessary
Continue building the sprinkler network by adding more sprinklers until the entire zone is watered. If you exceed the number of sprinklers the water system can support, consider using sprinklers with lower flow rates and spacing them more closely or adding another watering zone.
8. Set the Timers
Battery-powered timers typically allow you to set the system start time as well as watering duration and frequency. The best time of day for watering in many areas is between 6 and 10 a.m., and the second-best time is from 4 to 6 p.m., but this can vary by location and climate (check with your water utility for recommended watering times). Watering duration depends on several factors, but in most cases, you can determine it by leaving the sprinklers on until the soil is moistened to a depth of 6 inches and timing how long that takes. Set that as the watering time.
Most grass types don't need daily watering, so if you're watering your lawn, set the timer frequency to 48 or 72 hours depending on the weather and the grass type. If you have flowers or vegetables that need more frequent watering, put them on a separate zone with its own timer.
References
- Charter Plastics: Advantages of Polyethylene Pipe
- Backyard Boss: Best Above Ground Sprinkler Reviews
- DIY Lawn Expert: The Ultimate DIY Irrigation System
- Cnet: How to Make a Cheap, Simple Lawn Sprinkler System
- YouTube: Ryan Knorr Lawn Care – DIY Above Ground Sprinkler System (2020 Update!)
- Scotts: Lawn Watering Tips – When Is the Best Time to Water Your Lawn?