A Beginner's Guide To Sprinkler Irrigation Systems
We may receive a commission on purchases made from links.
A farmer needs a large-scale irrigation system to keep the crops watered, and a homeowner similarly needs a watering system — albeit a much smaller one — to keep the lawn and garden healthy. Among the reasons to install a programmable sprinkler system is that it saves water, time and labor, but perhaps the most important reason is that it works to protect your landscape investment even when you're not around. Up-front installation costs are not insignificant, but because most systems are constructed with easy-to-assemble PVC piping, you can save money by taking on some of the installation work yourself as a DIY project.
It's possible to run an irrigation system using a nearby lake or stream as a water source, but most systems draw water from the home's municipal water supply. The sprinkler system itself is basically a network of pipes with each pipe run terminating at a water-delivery device, such as a lawn sprinkler, a shrub sprayer or a drip emitter. The network is usually divided into zones, and each zone is controlled by a low-voltage solenoid valve connected to a programmable control panel, or timer, which is what makes automatic sprinkler systems automatic.
Installation of a sprinkler system involves digging, so ideally, this happens before the landscape is planted, although you can install one at any time. When designing the watering system and the landscape, it's important to include plants with more or less the same watering requirements in each watering zone. The sprinkler system often outlasts the landscaping, so it usually becomes necessary to modify output in a zone to avoid overwatering or underwatering some of the plants in a given zone. This is readily done by adjusting or changing sprinkler heads or employing drip technology, which is easy to connect to an existing sprinkler system.
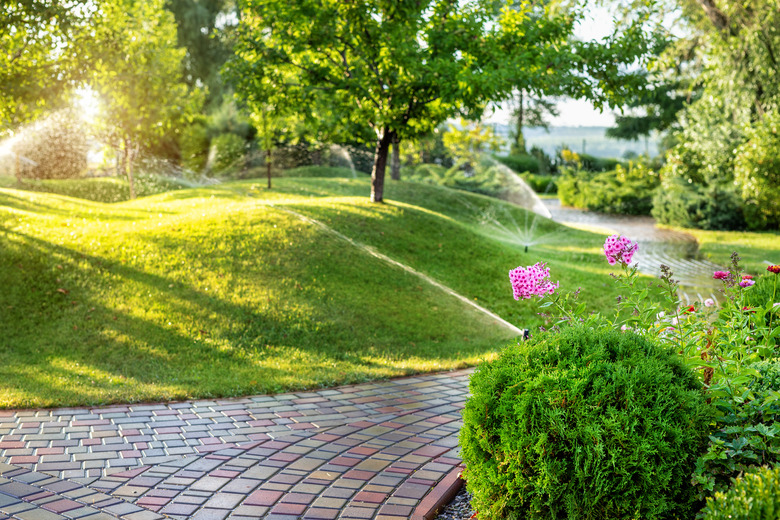
Typical Watering System Components
Typical Watering System Components
The irrigation system begins at the point where it connects to the building's water supply, where a 3/4-inch shutoff valve (preferably a ball valve) is installed. A backflow preventer is also required in most communities, but if these are built into the valve for each zone, which they often are, you may not need a separate one depending on local health codes. The valves are typically located outdoors above or below the ground. They are most commonly installed in an underground valve box with a removable lid into which the main 3/4-inch PVC water supply pipe is split into 3/4-inch branch lines by a manifold, which is a fitting with one inlet port and several outlet ports. You can construct one yourself by gluing sections of PVC pipe to PVC tees. Each branch line is routed underground to a separate watering zone in the yard.
Automatic control valves are powered by 24-volt electricity, which is supplied by a transformer plugged into a nearby exterior receptacle. The transformer feeds an electronic control panel with separate controls for each watering zone, and each valve is wired to one of the zones. The control panel lets you set the watering duration and frequency for each zone separately, and some controllers are Wi-Fi enabled so you can make changes from your mobile device.
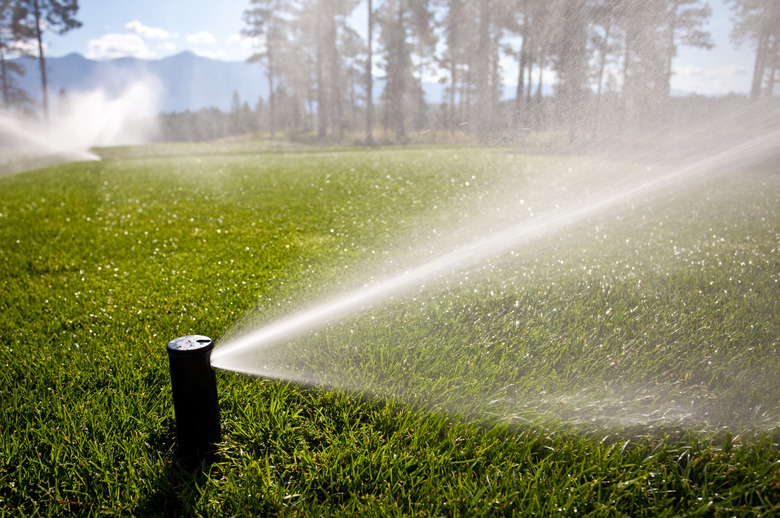
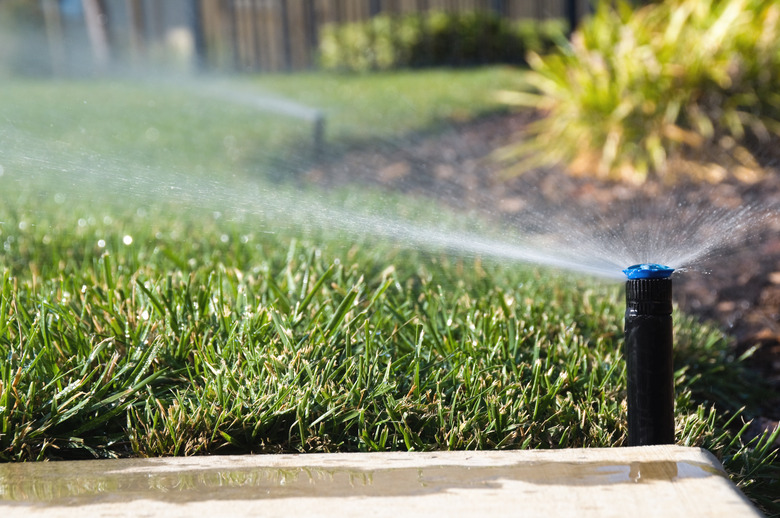
The business end of the underground irrigation system is the sprinkler head, of which there are many different types. Each zone typically has several sprinkler heads spaced in such a way to provide uniform watering for the zone. None of the sprinkler outputs should overlap, but that's an ideal that can be difficult to achieve considering the variability of wind speed and direction.
 ImagineGolf/iStock/GettyImages
Different Types of Sprinkler Heads
Different Types of Sprinkler Heads
In general, sprinkler heads are divided into two groups: spray heads, which deliver a fixed spray pattern, and rotary nozzles, which rotate as they spray a single stream of water. Rotary nozzles can spray water much farther than spray heads, and they can also be adjusted to spray long, narrow areas, but they generally require more pressure to operate. If you mix rotary nozzles and spray heads in a single zone, it's often a good idea to split the zone into two branches and install a pressure regulator or a flow control valve on the branch that serves the spray heads because if the pressure is too high, water will mist from the spray heads and get dispersed by the wind.
Most but not all sprinkler heads are pop-up style, which means they are installed underground and only rise above ground when the water comes on. The shrub-style sprinkler is an exception and so is the bubbler. They are both designed primarily for garden use, so they don't need to retract into the ground to avoid being clipped by the lawn mower. Another exception is the above-ground rotary sprinkler, which you often see irrigating crops because of its exceptionally long reach.
Good pop-up sprinkler heads come with three important features. The first is a spring that retracts the head because sprinklers that depend on gravity tend to get stuck as they age. The second is a rubber seal around the riser that keeps out dirt when the sprinkler is off, and the third is a minimum height of 3 inches when the sprinkler is operating. The range of the sprinkler stream is too limited with anything less than that.
Sprinkler System Design and Installation
Sprinkler System Design and Installation
The two main factors to consider when designing a lawn sprinkler system are the shapes and sizes of the areas you need to water and the available water pressure. Rotary sprinklers can water very large and very narrow areas, but they need a minimum pressure of 40 PSI. The actual pressure in the pipes decreases by several PSI when several sprinklers are running, so rotary sprinklers usually need to be on a dedicated branch. If you can, design the system without rotary sprinklers, using only spray heads and bubblers to irrigate gardens and shrubs and rotary nozzles for the lawn.
Installing an underground sprinkler system involves a fair amount of digging since all the pipes have to be about 6 to 12 inches deep, so if you don't hire a landscaper to do the work, you'll definitely want to rent a trencher. Regardless of who does the digging, always call a locate service first to mark any underground utility cables or pipes with flags or marking paint on the ground above the buried lines. Even though utility lines typically are 18" to 24" below ground, and sprinkler pipes are only 6" to 12" deep, some utility lines may become closer to the surface over time, particularly in areas where the soil has eroded.
If you locate the manifold and control valves centrally in the yard, you'll reduce the amount of digging and pipe installation you have to do, but you may also opt to put the entire control center in the garage or another outbuilding to make it easier to service. That's your call, but if you opt for a central location in the yard to reduce the amount of pipe you have to lay, remember that the valves and control panel have to be close to a power receptacle.
Maintaining Sprinkler Heads and Valves
Maintaining Sprinkler Heads and Valves
When a sprinkler head malfunctions, adjusting or replacing it is usually a fairly simple DIY task. The procedure for adjusting the arc length and spray radius depends on the brand of the sprinkler head, but you can usually do it with tools no more complex than a flathead screwdriver. Replacing a sprinkler head is as easy as unscrewing the old one from the underground fitting and screwing on a new one. You might have to do some digging to expose the fitting.
Valves are similarly easy to replace, although the exact procedure depends on whether the valve is glued to the water pipes or connected with threaded fittings. Even though the valves are electrified, the voltage is only 24 volts, so if you forget to unplug the control panel before disconnecting a valve, you won't get much of a shock if any.
Winterizing Your Sprinkler System
Winterizing Your Sprinkler System
When designing your sprinkler system, it may make sense to incorporate drain plugs or drain valves that allow you to drain the system before the freezing winter temperatures arrive. Plugs must be at the low point in individual lines so the water can drain with the force of gravity. In most cases, however, sprinkler systems must be blown out with compressed air to clear the system of all residual water. This is a job you might want to hire a pro to do sometime in October or November, before freezing temperatures arrive
To shut down the timer for the off season, some control panels have a "rain" setting that disables the valves while leaving the timer powered so the settings are retained. Otherwise, you can simply unplug the control panel for the winter and reset the watering schedule when you start up the system in spring.
To start up the system, open the system's main shutoff valve (do this slowly to prevent damage to the system parts) and then run through all of the zones with a "manual" setting on the timer. Inspect each zone for any heads that need adjustment and look for any other problems. When all looks good, set the timer for the regular automatic watering schedule.
The Above-Ground Sprinkler System Option
The Above-Ground Sprinkler System Option
You may not want to go through all the trouble of installing an underground sprinkler system for many reasons, not the least of which being that you don't want to dig up your landscape. That doesn't put automatic watering out of reach because you can install an above-ground sprinkler system instead. The heart of this system is a multiport timer that attaches directly to an outdoor spigot and functions like a multizone irrigation system controller.
Among the sprinkler options for an above-ground watering system are stationary sprinklers, oscillating sprinklers and rotary sprinklers, all of which work efficiently at pressures between 30 and 50 PSI. You can also deliver water with soaker hoses, which are spongy hoses the size of standard garden hoses that sweat water along their entire length and are great for irrigating flower beds, vegetable gardens and patches of ground cover.
Multiport timers are battery powered, so you don't have to worry about plugging in anything, and you can program each zone independently just as you can with an automatic sprinkler system. An above-ground sprinkler system gives you the added benefit of being able to move sprinklers around to direct water where it most needs to go. Of course, you'll have to roll up the hoses when it's time to mow the lawn, which is something you don't have to do if you have an underground system.
 toddarbini/E+/GettyImages
Setting Up a Drip Irrigation System
Setting Up a Drip Irrigation System
Drip irrigation is a specialized type of above-ground irrigation that uses bubblers and microsprayers to target water delivery precisely and to deep-water roots. Developed in Israel, it's the ultimate in water-saving irrigation, and it's easy to incorporate in a multiport timer. The main polyethylene supply hose, which is available in 1/2- and 3/4-inch diameters, connects to the timer with an adapter and runs above ground throughout the area to be irrigated.
Bubblers and microsprayers can be inserted directly into the main water hose, or a length of 1/4-inch tubing can be inserted, run to wherever it's needed and terminated with an emitter. Drip systems need lower water pressure than sprinkler systems, so they require a pressure regulator. The regulator usually screws into the spigot or multitimer, and an adapter for the drip hose screws onto an outlet port of the regulator.
References
- Building Moxie: Irrigation 101: A Guide to the Basics of a Residential Irrigation System
- Rain Bird: All About Automatic Sprinkler Systems
- Irrigation Tutorials: How to Pick the Best Sprinkler Head or Bubbler for Your Irrigation System
- Hunter: Spring Start-Up Checklist
- Plumbers Stock: How to Replace a Sprinkler Valve
- Rain Bird: How Do I "Winterize" My Irrigation System