A Beginner's Guide To Drip Irrigation Systems
We may receive a commission on purchases made from links.
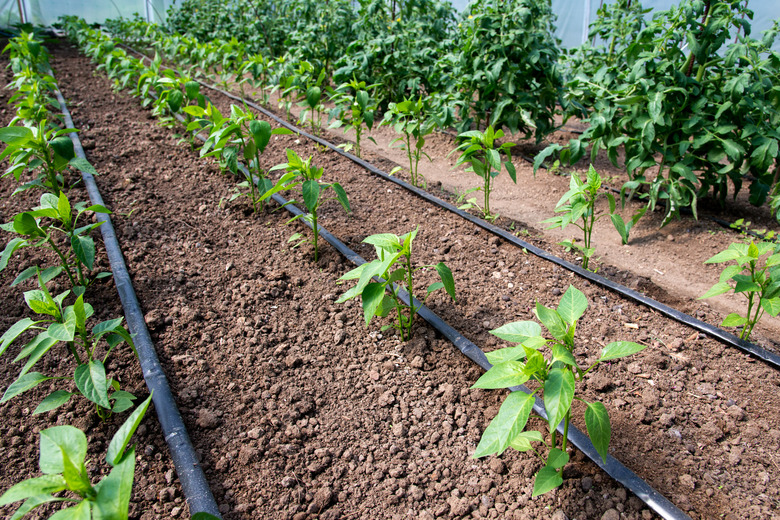
If you have a large lawn to water, you need a system of sprinklers that can broadcast water far and wide, but if you're watering plants in your garden or in containers on your porch, a drip irrigation system will better serve you. Paradoxically, drip technology uses less water while at the same time watering plants more deeply and efficiently than a sprinkler system ever could, and all this is possible with an expenditure of a fraction of the time and money it takes to install sprinklers.
Drip technology is tailor-made for arid climates because that's where it was developed. The first rudimentary drip system, using clay pots to distribute water, dates back to pre-Christian-era China, and this type of system was deployed in Afghanistan in 1866, but drip technology really came into its own in Israel in the 1950s, when Simcha Blass and his son Yeshayahu developed the first practical drip emitters. Partnering with Kibbutz Hatzerim, Blass founded Netafim in 1964, the first company to manufacture drip emitters and distribute them worldwide. Today, drip components are manufactured by a host of companies and are available at every home supply center that sells garden hoses.
In the grand scheme of things, drip technology isn't all that old and is constantly evolving, and modern gardeners have more and better options than their 20th-century forebears. Several different types of emitters are available as well as bubblers, microsprayers, drip tape, laser tubing and soaker lines. Systems can be designed to work with vegetable, flower, container and xeriscape gardens, and DIY setup is a snap. If you're looking to create a rain forest in your backyard, you probably need more water than a drip system can supply, but in most other circumstances, it's an irrigation option you should definitely consider.
Benefits of a Drip Irrigation System
Benefits of a Drip Irrigation System
As an example of how useful a drip system can be, consider the gardeners who had to evacuate their homes for a three-week period during the CZU Lightning Complex fires that struck the central California coast in the summer of 2020. Many who had set up their drip systems on timers came back to their homes to find their gardens flourishing amidst the devastation around them. Because they use water so efficiently, the drip systems were able to make the limited water supply last for the entire time the displaced homeowners had been unable to tend their gardens.
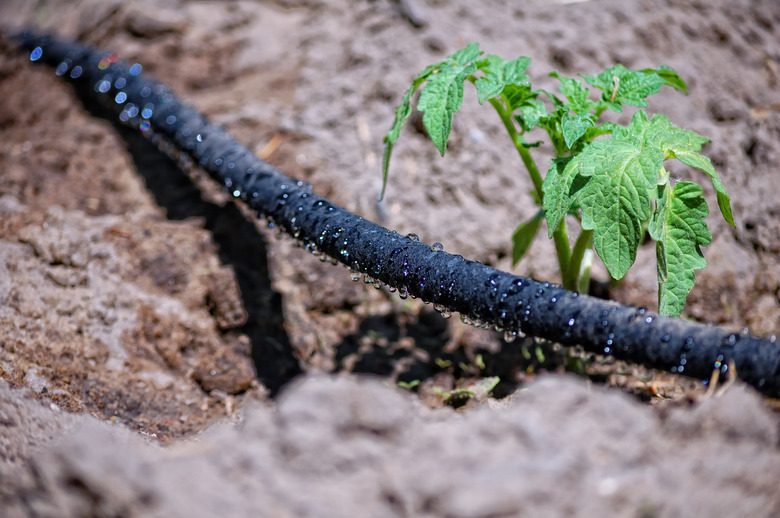
The ability to water automatically is just one of the benefits of a drip irrigation system. Emitters deliver water directly to a plant's root zone, so virtually none of it is lost to evaporation, which is increasingly important as droughts become more severe and long-lasting in parts of the country. Drip emitters regulate water flow, allowing you to give each plant the right amount of water without overwatering others in the same garden.
One of the best things about setting up a drip system is that it's so easy. The vast array of components available may be a little confusing, but the basic principle is straightforward: You have a UV-resistant polyethylene (poly) mainline (which doesn't have to be buried) punctuated by strategically placed 1/4-inch poly branch lines that terminate with drip components wherever water is needed. Unlike rigid PVC pipe, poly tubing is flexible and bendable, but you can purchase elbow fittings to navigate sharp corners. All connectors, such as tees, elbows and couplers, are compression fittings that you simply push together; no glue is necessary.
 kasim1/iStock/GettyImages
Components of the Mainline of a Drip System
Components of the Mainline of a Drip System
Depending on the type of garden, you can often find a kit that supplies everything you need to set up a drip irrigation system for it using a standard outdoor spigot as a water source. It's often just as easy, though, to purchase the components separately and construct your own system, and the DIY approach allows more flexibility. The components are designed to fit together like LEGO pieces, allowing you to build exactly what you need. You will typically need the following to construct a mainline, starting with the connection to the main water supply spigot:
- Backflow preventer: Unless you're connecting the system to a sprinkler antisiphon valve, you need a backflow preventer. This prevents water from being drawn backward by negative pressure and contaminating the water supply. This is the first component, and it screws onto the standard 3/4-inch hose-thread spigot on the side of your house.
- Pressure regulator: Drip components are designed to operate at a lower pressure than that of the water supply, so it's the job of the pressure regulator — which goes on next — to reduce the pressure to 25 psi.
- Filter: Small particles in the water can clog the emitters, which have tiny apertures. The filter, which screws onto the pressure regulator, removes these particles from the water and prevents clogging. Filters should be cleaned regularly.
- Tubing adapter: The last component to be screwed onto the system is a tubing adapter, which converts the 3/4-inch hose thread to a barbed connector. From here on, all components are compression fittings that you simply push together.
- Main drip line: Drip tubing for the mainline comes in diameters of 3/4, 5/8 and 1/2 inch, and for larger systems, 1-inch tubing is also available. Fittings for the various tubing diameters are sometimes color-coded: black for 3/4 inch, blue for 5/8 inch and green for 1/2 inch. To terminate the mainlines, you use screw-on end cap fittings or double-ring end closures to secure the kinked ends.
It's easy to automate your drip system with a battery-powered timer. Batteries easily last a full season but should be changed in the spring before watering begins. If you choose to add this component, it gets screwed to the spigot before the backflow preventer. You'll also want some tubing stakes to secure the tubing to the ground. These are available in plastic or galvanized steel, and plastic ones resist corrosion and are better for long-term use.
A Variety of Drip Emitters
A Variety of Drip Emitters
Technically, the emitter is the component that emits water, which it can do in a slow drip, a steady stream or a spray, but in drip technology parlance, a drip emitter is distinct from a bubbler, which releases water in a steady stream, or a microsprayer. All three have barbed connectors that fit tightly into 1/4-inch poly tubing, and they can also be inserted directly into the mainline after you punch a hole using either a hole-punch tool (such as an awl) or another sharp implement, such as a spade-style drill bit. It's important not to oversize the hole, though, or the tubing will leak, so it's best to use a tool designed specifically for the purpose.
- Drip emitters typically have a pancake or cylindrical shape, containing the internal network that slows the flow of water to a drip. Each emitter has a rated flow rate, which can be 1/2, 1 or 2 gallons per hour (gph). This is what you use if you want to water the roots of an individual plant.
- Bubblers are also for watering individual plants, but the water flow is much greater; they have an adjustment knob and can emit in a range from 0 to 13 gph. They are useful for water-loving plants or plants in loose, sandy soil that drains quickly.
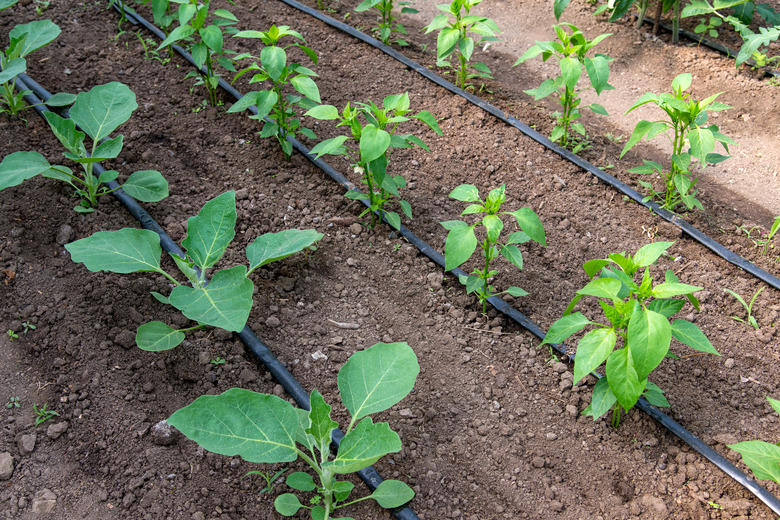
- Microsprayers are exactly what they sound like: tiny sprayers designed exclusively for drip systems. They are great for watering clusters of low-growing vegetation, such as strawberries, or rows of vegetables in a vegetable garden because they broadcast water over a larger area than a drip emitter or a bubbler.
- Drip tape, laser tubing and soaker hose are lengths of pre-perforated hose that are useful for watering row crops or flowers and vegetables planted close together. You can often water an entire garden using only drip tape.
While it's possible to insert an emitter directly into a mainline, it's more common to use 1/4-inch drip tubing. Barbed connectors, including straight couplers, tees and elbows, are available that allow you to create a network of emitters all supplied from a single hole in the mainline. You terminate these branch lines with goof plugs, which are also useful for plugging holes in the mainline that you made by mistake or no longer need. Goof plugs work because their heads are slightly wider than 1/4 inch. When you force it into a 1/4-inch hole, the flexible plastic tubing constricts around the neck to form a water seal.
It can be difficult to force barbed connectors and goof plugs into 1/4-inch tubing or into holes punched in mainlines, especially in cold weather. The job is easier if you warm the tubing with a lighter or lay it in the sun for a few minutes to make the plastic more pliable.
 DiyanaDimitrova/iStock/GettyImages
Planning a Drip System
Planning a Drip System
Most home water systems can easily supply a small to medium-sized drip system, but if you're planning a large system to water one or more gardens, you should determine the flow rate of your water source by timing how many seconds it takes to fill a 1-gallon bucket. Divide 1 (gallon) by the time it takes to fill and then multiply by 3,600 to get the rate in gallons per hour. For example, if it takes 10 seconds to fill the bucket, then 1 divided by 10 equals 0.10; 0.10 times 3,600 equals about 360 gph.
If the rate is lower than that of the total number of emitters you plan to install (also measured in gph), you need to divide the system into zones. Dividing the system into zones is also a good idea if you are irrigating plants with vastly different water requirements.
It's easy to create zones; you can purchase a multiport outlet or multiport timer that screws onto your hose bib. Remember that each zone operates independently, so you'll need a backflow preventer, pressure regulator and filter for each zone. If you're using a timer, be sure to program each zone to come on at a different time to avoid drawing too much water. The number of times per day the zone turns on and the length of time it stays on are programmable according to the needs of the plants.
Because you don't bury the mainline for a drip system, it can get in the way of the lawn mower, so if the water supply is far from the area to be watered, purchase extra tubing so you can run it next to buildings and walkways instead of straight across the lawn. As a rule of thumb, it isn't a good idea to mix emitters with different flow rates on a single branch line, so if you have a plant that needs more water, supply it with more than one emitter rather than using an emitter with a higher flow rate. Each bubbler and microsprayer you use should be on a dedicated 1/4-inch branch line rather than a line shared with other drip components.
Tip
If a self-watering garden is your goal with drip irrigation, consider supplementing the drip equipment with olla pots. You can make them easily and cheaply using basic terracotta planting pots.
References
- Blue Jay Irrigation: A Brief History of Drip Irrigation
- Dripdepot: 5 Drip Irrigation Mistakes to Avoid
- University of California Master Gardener Program of Sonoma County: Drip Irrigation Basics
- Little Tudor on the Prairie: The Beginner's Guide to Using Drip Irrigation in your Container Garden. It's EASY!