How To Make Your Own Olla Pot
We may receive a commission on purchases made from links.
Long before the advent of drip irrigation in the 1960s, there were olla pots. The olla watering pot has a lineage that stretches back to prehistory, and, like the wheel, it's an invention that's just as useful today as it was when it was first employed. In fact, olla irrigation pots are experiencing a resurgence in popularity as DIY gardeners come to appreciate their many benefits.
Benita Middleton owns and runs a gardening service in Dorset, England and is a huge fan of olla pots. "Overall," she says, "olla pots offer an efficient and eco-friendly method of irrigation, providing plants with consistent moisture while conserving water." Olla pots not only save water, they also save you time on plant care, and they can water your plants while you're away. They even help to control weeds.
While specially made olla pots can be pricey, you can easily make your own DIY 0lla pots using ordinary terracotta planting pots. Here's what you need to know to make your own self-watering garden or containers with olla pots.
How Do Olla Pots Work?
How Do Olla Pots Work?
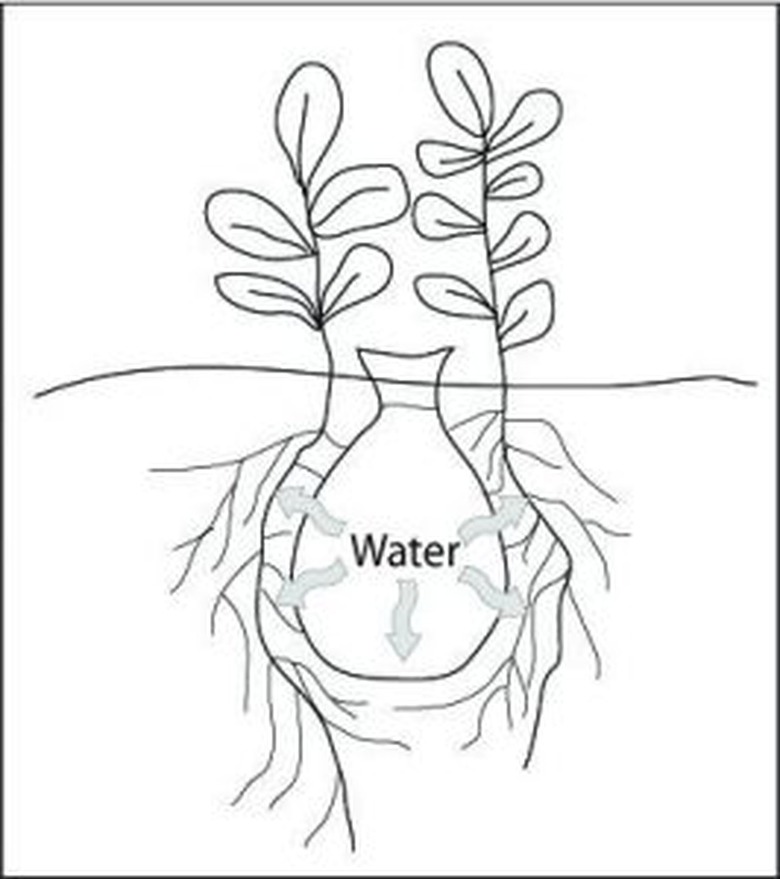
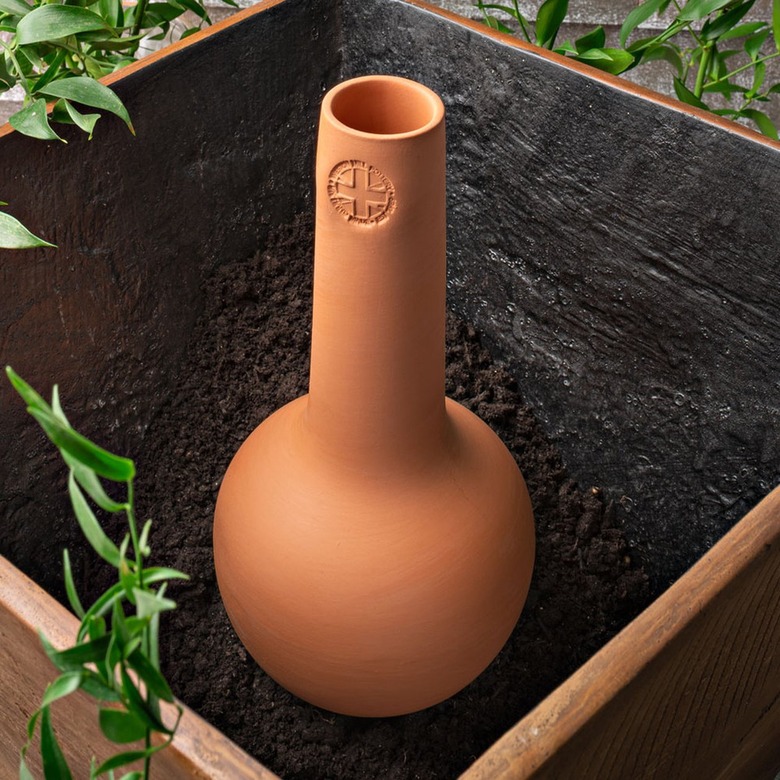
An olla watering pot is an unglazed terracotta or ceramic pot with a wide body and a narrow neck. You bury it in the ground near plants so that only the open top of the pot extends above the soil. Then you fill the pot with water and cover it. From there, the process is automatic. The water gradually seeps through the porous clay of the pot and into the plants' root zones to efficiently nourish the plants. Because of the pot's placement, water flows directly into the soil around the roots and even directly to the roots (as they grow up against the pot), so very little is lost to evaporation.
To get the most from olla irrigation pots, it's important to choose the right size. "Select olla pots that are appropriate for the plant's water needs and the size of the planting area. Larger pots hold more water and are suitable for plants with higher water requirements," says Middleton. Commercial olla pots often come in three sizes: large (10 x 13 inches), medium (7 x 10 inches), and small (5 x 7 inches).
History of the Olla Watering Pot
History of the Olla Watering Pot
Although it's possible to place the invention of the wheel within a certain epoch of human history, nobody can pinpoint it to a particular time or person. In the same way, no one knows who first used olla irrigation pots.
The word "olla" is pronounced "oh-ya," which suggests Spanish or Mesoamerican origins, but actually, the word has its roots in ancient Rome, where it simply referred to a rounded pot or jar. People used these types of jars for cooking and storing food as well as for ceremonial purposes.
The use of terracotta self-watering pots in the garden is first mentioned in the Fan Sheng-chih Shu, the first known agricultural extension book published in China some 2,000 years ago. There's no reason to suspect people weren't using them long before that. According to Middleton, "Olla pots originated from North Africa and China more than 4,000 years ago." Spanish settlers in North America as well as Native American tribes had their own versions of olla watering systems.
Things Needed
-
One or two unglazed terracotta planting pot(s)
-
Sheet metal, rubber stopper, cork, or coin
-
Plant drip tray or other cover
-
Stone or other heavy object (optional)
How to Make a DIY Olla Pot
How to Make a DIY Olla Pot
There are two easy ways to make your own olla watering pot, and both versions use standard, inexpensive terracotta (clay) planting pots:
- The open-pot version uses a single pot that you simply bury right-side-up and cover with a tight-fitting lid.
- The enclosed-pot version uses two pots that you glue together — one right-side-up, the other upside down — to create an enclosed vessel similar to a commercial olla pot.
The enclosed pot holds more water and can go longer without needing to be refilled but is twice as tall as the open pot.
Note: Be sure to use unglazed terracotta (natural clay) pots, as glazed pots do not let the water seep out. If you're making an enclosed olla, use two two identical pots of the same size and shape.
1. Seal the Drainage Hole
Whether you're using one or two pots, you have to seal the drainage hole at the bottom so the vessel holds water and releases it only through the clay sides and bottom of the pot(s). You can use a flat piece of sheet metal, a rubber stopper or plug, a wine cork, or even a coin to cover the hole. Seal the object over (or inside) the hole with silicone caulk, and let the caulk cure for 24 hours.
Note: If you're creating an open-pot olla, skip ahead to step 3.
2. Join the Pots (for Enclosed Pot Only)
Set the pot with the stopper upright on your work surface. Apply a thick, continuous bead of silicone caulk around the rim of the pot, then carefully set the second pot upside down onto the lower pot so their edges are aligned. Run your finger along the joint to smooth out the excess caulk. Let the caulk cure for 24 hours.
3. Bury the Olla Pot
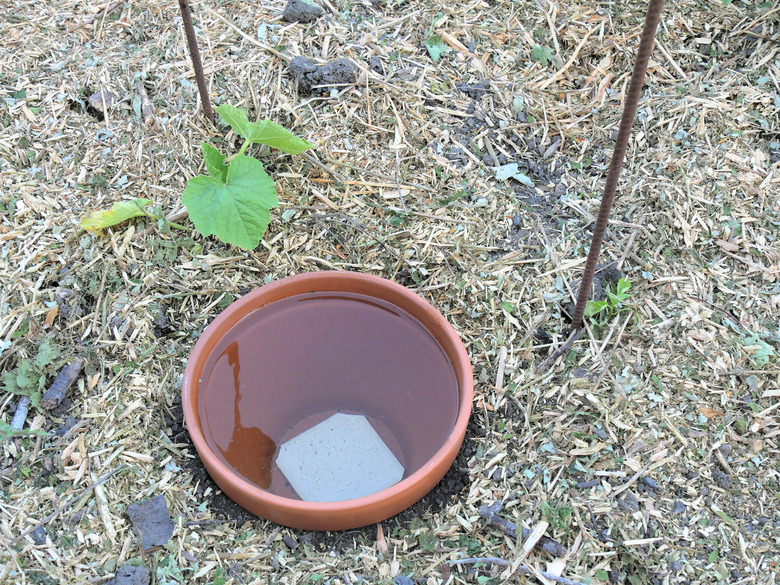
Dig a hole near the plant(s) you want to water, making it deep enough to bury the pot up to about 1 to 2 inches below its top. Set the pot into the hole so the stopper end is at the bottom and the exposed top is level. Fill in with soil around the pot, firming the soil with your hands as you go. To top of the pot should extend about 1 to 2 inches above the soil.
4. Fill the Pot with Water
 Igor Paszkiewicz/iStock/GettyImages
Fill the pot with fresh water up to the top. With an open pot, you can easily add water from a watering can or a hose. To fill an enclosed pot, you pour water through the drainage hole in the upper pot, so it helps to use a watering can or a container that delivers a narrow stream of water.
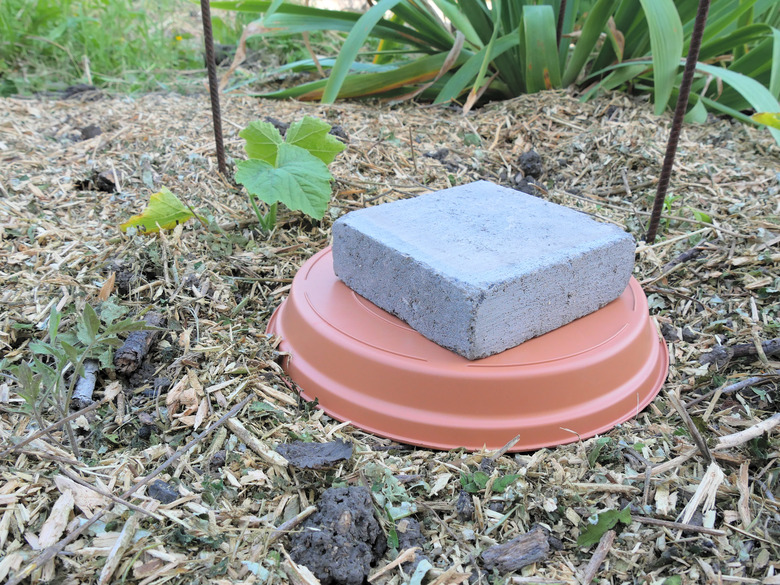
5. Cover the Olla Pot
 Igor Paszkiewicz/iStock/GettyImages
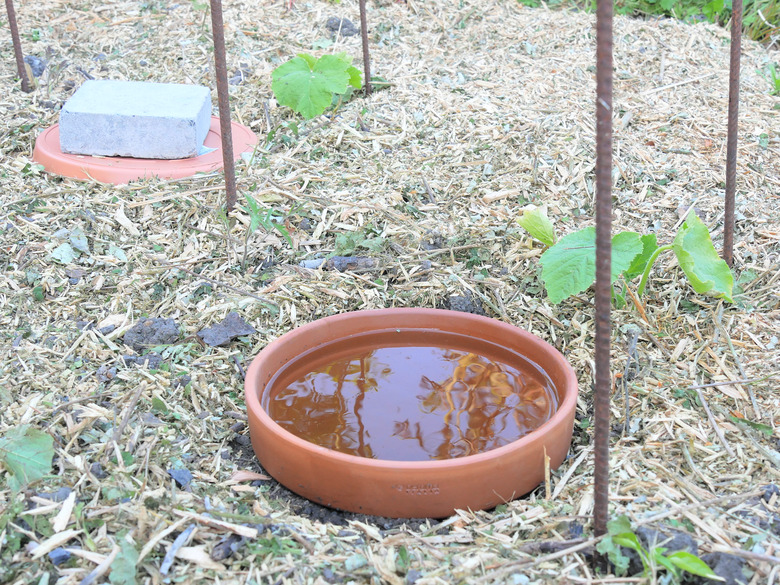
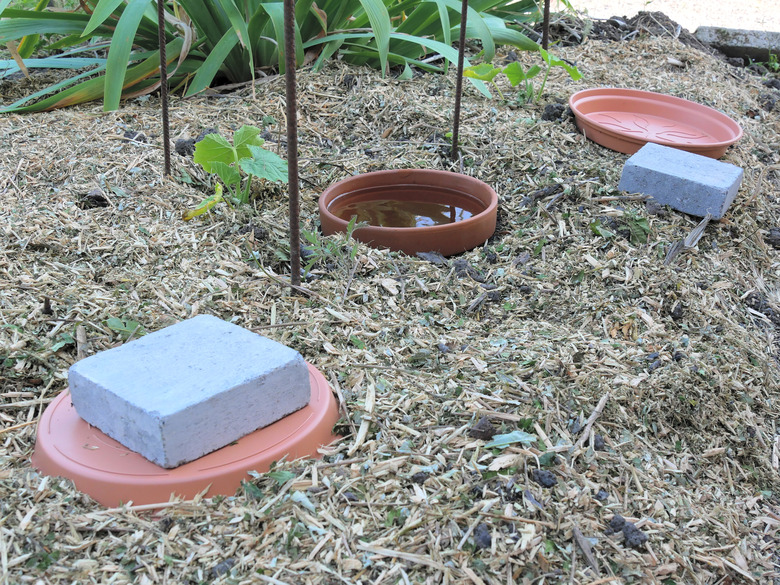
Cover an open-pot olla with an upside-down drip tray or similar item that completely covers the open top of the pot and seals fairly well to prevent evaporation. With an enclosed pot, you want to cover or seal the exposed drainage hole for the same reason; you can use a tray or a rubber stopper or similar item. If desired, you can secure the cover with a heavy object like a rock or paver brick, but this is optional.
Benefits of Terracotta Self-Watering Pots
Benefits of Terracotta Self-Watering Pots
According to Middleton, an olla watering pot benefits the garden in four ways:
- Watering efficiency: Olla pots minimize water loss from evaporation and runoff.
- Water conservation: Olla pots reduce the need for frequent watering. By delivering water directly to the root zone, they help to minimize water usage compared to traditional irrigation methods, like sprinklers or hoses.
- Plant health and growth: Olla pots prevent underwatering and overwatering. This helps to maintain optimal soil moisture for plant growth, reduces stress on plants, and encourages deep root penetration.
- Weed control: Ollas deliver water directly to the plant's root zone, limiting water availability to weed seeds and reducing weed growth in the surrounding area.
Olla Pots FAQs
Do olla pots work for container gardens?
Olla pots work really well in containers, sort of like a self-watering planter. The soil in containers tends to be loose and well-drained, and those conditions are perfect for terracotta self-watering pots. Use ollas in container just like you would in the garden. You can place a single olla pot in the center of the container and plant around it, or use multiple smaller ollas placed near individuals or pairs of plants.
What are the disadvantages of ollas?
Two issues to be aware of with ollas is that their clay material can become clogged with minerals from water, and they can be damaged by freezing temperatures. Natural minerals in water clog the pores in the clay, leading to uneven water distribution into the soil. It's easy to prevent this, says Middleton: "Soak the pots in vinegar or a mild solution to dissolve any deposits," You should do this yearly — at the beginning of the growing season — before the pots go into the ground.
Because terracotta clay absorbs and holds water, when the ground freezes, water in the clay freezes, causing the clay to flake or crack. When using olla pots in climates with subzero temperatures, Middleton advises, "To prevent the clay from breaking, the pots would require lifting and storing in a frost-free place."
How many ollas per square foot?
In DIY home gardens, olla pots are used primarily to water individual plants or small groupings of plants rather than providing irrigation for large areas of mass planting. Therefore, it's best to size each olla based on the plants it will be watering.
According to Middleton, "Olla pots are most effective for plants with similar watering needs. Grouping plants with similar water requirements around each olla pot ensures efficient irrigation." As a rule of thumb, a medium-size (8-inch-diameter) single-pot olla can water two tomato plants placed 2 feet apart. Plants that need more growing space, such as squash, melons, and pumpkins, should each have their own olla.
What can I use instead of ollas?
Sometimes you simply do not have enough space for burying ollas in your garden or container. Alternatives include drip irrigation and watering stakes.
A drip irrigation system is highly versatile and can be customized to suit almost any gardening space and any type of plant using various sprayers and nozzles, called emitters. Drip system emitters can be fit into very small spaces, and the use of timers can make a system conveniently automatic.
A watering stake is a long, hollow spike made of terrcotta or plastic. On end is pointed, and the other end is open to accept a glass or plastic bottle (such as a wine, soda, or water bottle) filled with water. You drive the pointed end into the soil next to the plant, then fit the bottle upside down into the open end of the stake. The water fills the inside of the spike and gradually seeps into the soil, just like with an olla pot.
You can also make self-watering plant spikes by punching a small hole in the cap of a plastic soda or water bottle and making another small hole in the bottom. Fill the bottle with water and put on the cap, then insert the bottle — cap end down — into the soil.