How To Build An Easy DIY Fire Pit For The Backyard
We may receive a commission on purchases made from links.
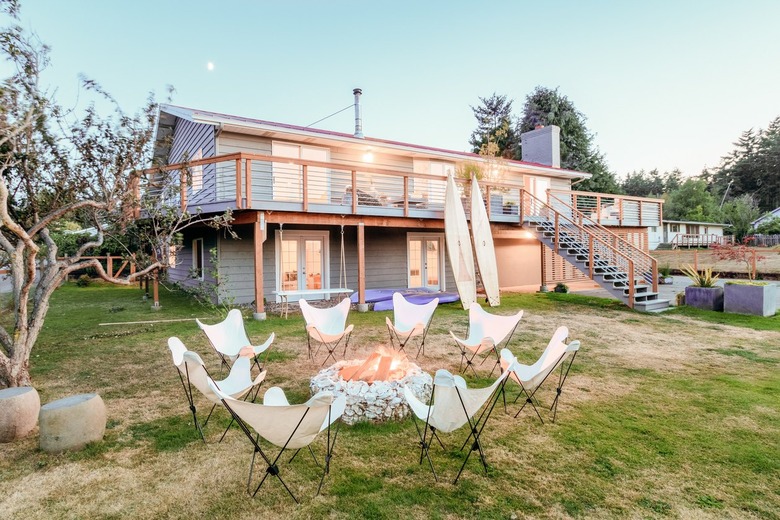
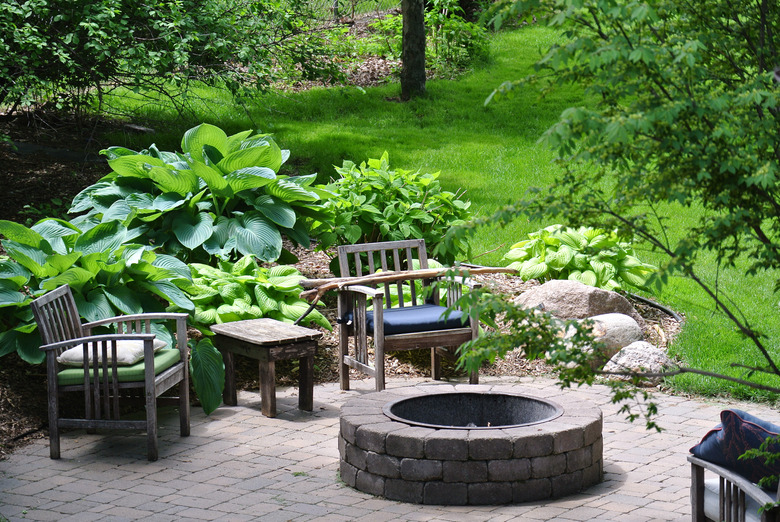
A fire pit doesn't have to be round and doesn't have to be sunk into the ground to provide a warm refuge on a chilly night, but if you want your DIY fire pit to become a permanent fixture in your backyard, there are good reasons to stick to this fire pit design. Recessing the pit into the ground lowers the top edge and makes the pit more accessible for children and pets while still providing a safety barrier from the flames, and the insulating earth surrounding an in-ground fire pit makes the fire pit area safer. Moreover, a circular pit is good feng shui because a circle signifies spirit and is a beneficial shape in any outdoor space — plus, it invites people to gather around the fire for conversation and s'mores.
Here's what to consider before you build your own fire pit — and a step-by-step guide on how to do it.
Warning
With the increasing incidence of destructive wildfires in various parts of the country, many communities are understandably nervous about open backyard fires, so safety should be priority number one. Before you do anything else, check with your local fire authority to make sure you build your own fire pit according to local building codes and regulations.
Considerations for a DIY Fire Pit
Considerations for a DIY Fire Pit
Before you head to the home improvement store or start digging, it's a good idea to know what materials and space requirements there are for a fire pit.
1. The Floor Should be Porous
A fire pit needs a solid floor, but the floor should also be porous to allow rainwater to soak into the ground. It's hard to start a fire when there's an inch or more of standing water in the bottom of the fire pit. You can provide a well-draining, solid bottom by lining it with fire bricks and sand, but it's easier to do it with several tamped-down layers of crushed gravel and fines.
2. There Should be Well -Draining Soil
If you have a choice, it's better to locate the fire pit in well-draining soil. The pit won't drain well if the soil is full of clay, but if that's the kind of soil you have, there's a way to deal with it. When you dig the hole for the fire pit, dig a deeper hole in the middle and fill it with gravel before you pour in the crushed rock that forms the bottom of the pit. This deeper hole will act as a dry well and give rainwater a place to go where it can slowly seep into the soil.
3. Circular Fire Pits Are Best for Cooking
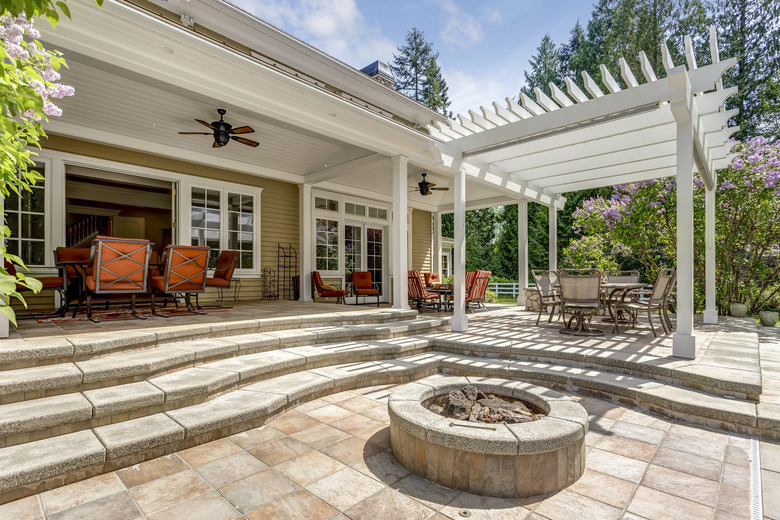
If you plan to use the fire pit for cooking, it's a good idea to incorporate a fire pit ring into your design. Square rings are available, but since you're building a circular fire pit, you'll want a round one, preferably with a grille if you plan on cooking. You can use the ring to outline the perimeter of the fire pit on the ground, although if you don't use a ring, marking out the perimeter of the pit — which should ideally have a 3-foot diameter — is no big deal. You can do it with a stake, some string, and some spray paint or a garden trowel.
Best Materials and Fuels for a Fire Pit
Best Materials and Fuels for a Fire Pit
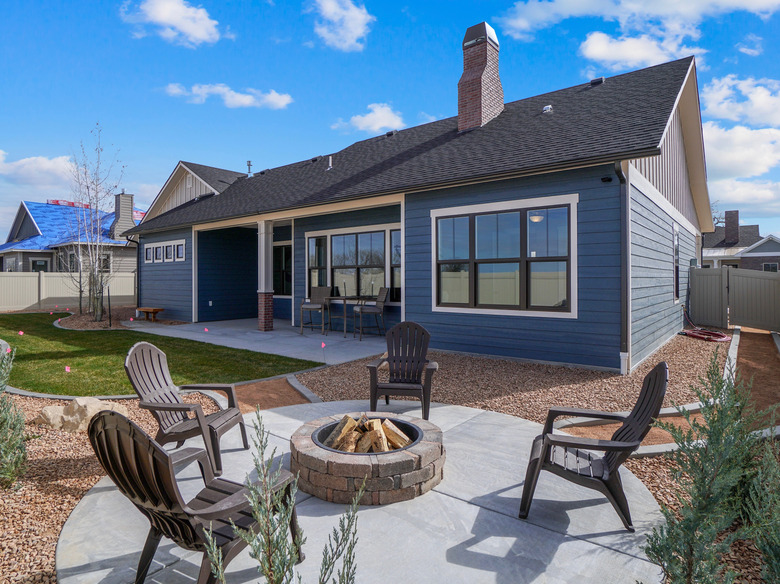
You obviously wouldn't make a fire pit out of a combustible material, which pretty much leaves metal, stone, brick and concrete as the four main options. Metal isn't ideal for the outer structure because it doesn't provide a thermal barrier, and the heat of the fire makes it corrode quicker, but it's a good liner material. Concrete and stone, on the other hand, are great materials for the outer structure, and using precast concrete blocks designed for retaining walls will make your DIY project a breeze, especially if you purchase retaining wall blocks with a trapezoidal shape that naturally form a circle when placed side by side.
When it comes to fuel, you can design your outdoor fire pit to burn wood, natural gas, propane or alcohol gel fuel, which comes in cans that you simply open so you can light the fuel on fire. In the interest of making an easy fire pit, you'll probably want to stay away from propane, which requires the installation of a burner, and you'll definitely want to avoid natural gas, which calls for installation of underground pipes as well as a burner. Gel fuel is an easy option, but it tends to burn with a low flame that may be fun to watch but won't provide as much warmth as wood, and you won't be able to cook anything except maybe marshmallows.
Things Needed
How to Build a Backyard Fire Pit
How to Build a Backyard Fire Pit
Now that you know exactly what specifications and fuels you need to have for your fire pit, it's time to build. Here's how to build a simple fire pit for your backyard:
1. Lay Out the Perimeter of the Fire Pit
If you purchased a metal ring, you can use it to lay out the perimeter of the fire pit. Place it on the ground and arrange a ring of trapezoidal concrete pavers around it. Spray a line of spray paint on the ground about 3 inches beyond the outside edge of the pavers.
If you don't have a ring or pavers handy, you can mark out the perimeter using a stake and some string. Pound the stake into the ground to mark the center of the pit and tie string onto the stake. Measure a distance of 18 inches and tie the can of marking paint at that distance. Keeping the string tight, walk around in a circle, spraying the paint on the ground to make a circle with a diameter of 3 feet.
2. Remove Turf From the Circle
Cut through the grass around the perimeter of the circle with a spade or trowel and then use the spade to remove the turf from inside the circle. Set the turf aside to fill in around the edges of the pit when it's finished. You can use any extra turf to fill in bare spots in the lawn.
3. Dig the Fire Pit
Warning
Call 811 before you dig to make sure you won't hit any buried utility lines.
Dig the pit with a round-blade shovel to a depth equal to about twice the thickness of one of the pavers. This will give you room for several layers of crushed gravel to bring the surface of the first course of pavers to ground level. Set the dirt aside for use in another part of the yard or garden.
4. Dig a Drainage Pit
Dig a hole in the center of the fire pit for drainage. Make it about 12 inches wide and 12 to 18 inches deep. Fill it with 3/4-inch drainage rock.
5. Construct the Base of the Fire Pit
Shovel crushed gravel mixed with fines into the bottom of the pit and spread it evenly to form a layer about 2 inches thick. Tamp the layer flat with a hand tamper and then shovel in more gravel, spread it and tamp it. Continue doing this until the base is thick enough to bring the top edge of the first course of pavers to ground level. It's important to construct the base in layers because you can't properly tamp the gravel if you spread it too thick.
6. Lay the First Course of Pavers
If you have a fire pit ring, set it in the center of the fire pit using a tape measure to ensure it's equidistant from all edges. Set one paver next to the ring with its edge almost touching and tap it firmly into the gravel bed using a rubber mallet. Check the level with a torpedo level and tap as needed to center the bubble along the paver and across it.
Lay all the rest of the pavers in the first course in the same way until you've formed a complete circle. If you used a fire pit ring as a reference, remove the ring before continuing.
7. Build Up the Sides of the Fire Pit
Stagger the next course of pavers so the center of each paver is directly over a joint in the course below. Using a caulking gun, spread concrete paver adhesive on the tops of the blocks in the lower course before setting each paver. Push down on each paver as you set it to make sure the adhesive makes good contact.
Continue laying pavers until the fire pit is as high as you want it. If your pavers are between 4 and 6 inches thick, four courses is usually enough.
8. Protect the Concrete From High Temperatures
The concrete blocks can crack when exposed to high temperatures, so they need to be protected. One way to do this is to set the fire pit ring in place and fill the fire pit with 3/4-inch gravel up to the bottom edge of the ring.
Filling the pit with gravel makes it difficult to remove ash from the pit, however, so an alternative is to lay a course of fire bricks around the inside wall of the pit. It's easier to get the bricks to fit on a curve if you stand them upright. Secure them to the concrete blocks with concrete adhesive and don't mortar between the bricks; the mortar will just crack. If you choose to use fire bricks in conjunction with a fire pit ring, plan the depth of the base to allow one brick to fit underneath the bottom edge of the ring.
9. Patch the Ground Around the Fire Pit
Fill in the gap between the outside of the fire pit and the ground using some of the soil you excavated from the pit. Then, use some of the turf you removed to extend the lawn to the edge of the pit. Water the ground well to help the grass get re-established.
Fire Pit Safely Tips
Fire Pit Safely Tips
Before you start to use your fire pit, there are a few safety tips you should keep in mind:
- If you live in a fire zone, it isn't safe to use your fire pit during certain times of the year, so check with your local fire department so you know those times.
- Make sure none of the patio furniture you use around the fire is combustible and keep a fire extinguisher, a garden hose or a bucket of sand nearby in case of emergencies.
- It generally isn't a good idea to have a big fire on a windy day, partly because someone is bound to get a face full of smoke and partly because embers can easily blow away.
- You generally want to limit the height of the flames to just a few inches above the top of the fire pit wall, and to prevent burning embers from escaping, you should consider covering the pit with a spark-arresting screen.
- Keep a metal poker with a wooden handle handy so you can remove the screen and rearrange the wood when necessary.