How To Build An Outdoor Fireplace
We may receive a commission on purchases made from links.
Building an outdoor fireplace is a fun DIY project with a major perk: It turns your outdoor space into a living room with an unbeatable view of the stars. Spend your days and nights dining al fresco with friends and family or stargazing solo by the warmth of the fire. An outdoor fireplace will make any time you spend on your patio that much more enjoyable.
While building a wood-burning outdoor fireplace may be a fun DIY project, it's a lot of work, and it's more than possible to make a mistake (or two). If you size the flue or chimney incorrectly, for example, you could accidentally fill the neighborhood air with smoke and have trouble keeping the fire going. You can get around this by installing a gas fireplace, but that's not a DIY-friendly project.
To avoid wasting time, effort, and money, many homeowners opt to purchase fireplace kits that include everything needed for a successful installation. Whatever route you take, you'll need to assemble your tools and get ready for some heavy lifting.
Tip
Before building your outdoor fireplace, check local codes. Some communities in fire-prone areas prohibit them, and in places where they are allowed, there may be stringent setback requirements that limit where in your outdoor area you can put a fireplace.
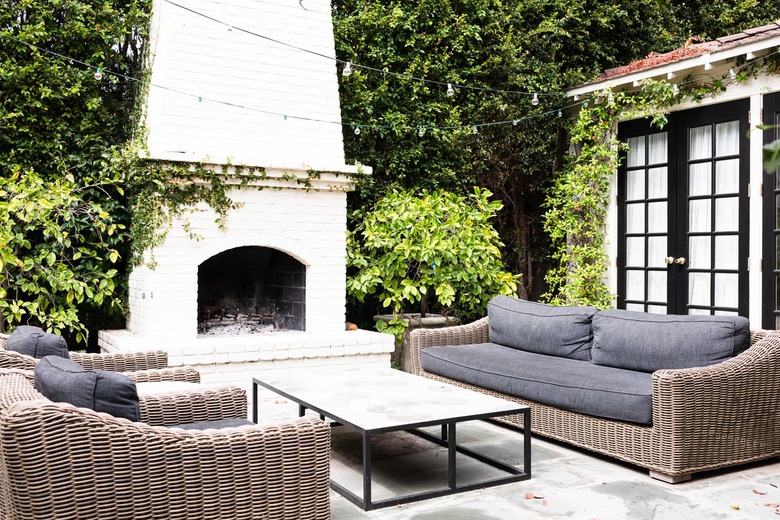
The Parts of an Outdoor Fireplace
The Parts of an Outdoor Fireplace
An outdoor fireplace is essentially a firebox with a chimney. They are a bit more involved structures than fire pits, which have only a firebox and no chimney. When planning your fireplace design, consider the following components:
Base
Something has to support the weight of the structure, and that's usually a steel-reinforced concrete pad. For heavy fireplaces, the pad may need to be as much as 8 inches thick. If local codes allow, you could build a fireplace on an existing patio, but if you do that, you should have its integrity assessed by a local contractor to make sure it can handle the weight. The contractor may recommend creating expansion joints around the fireplace to prevent the rest of the patio from cracking under its weight.
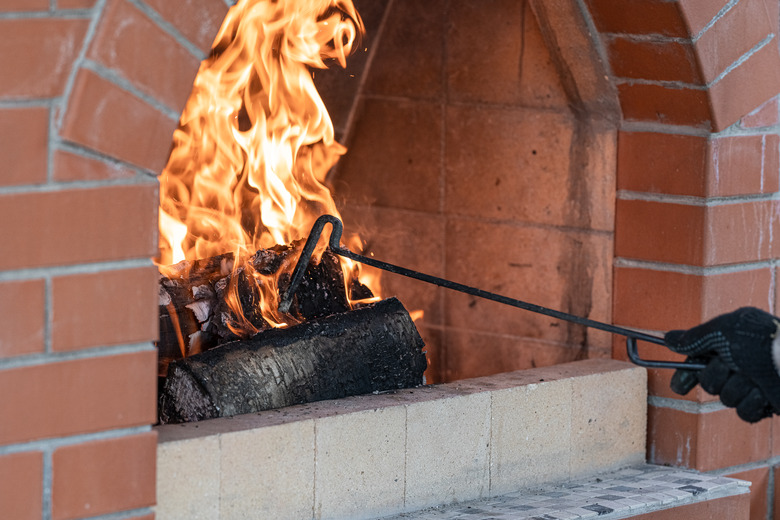
Firebox
The firebox is where combustion happens. You can buy metal firebox inserts, but the traditional method is to construct it with firebrick, which is a type of clay brick fired at high temperatures to help it deflect heat.
Lintel
The lintel is a length of heavy metal or angle iron that frames the top of the firebox and supports the weight of the structure above it. Expert masons can build the lintel from bricks, but if you're building your own outdoor fireplace, you'll probably want a metal lintel.
Smoke chamber
The enclosed area just above the firebox where combustion gases from the fire collect before being exhausted through the chimney is known as the smoke chamber. It has to be sized properly to create the proper updraft.
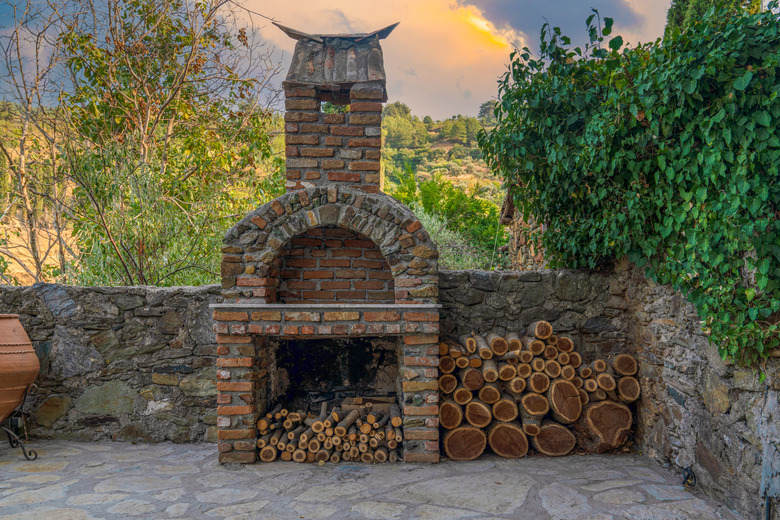
Flue
The flue dimensions for an open masonry fireplace depend on the size of the firebox opening. The flue area is typically equal to 1/10 of the firebox opening area, but that could vary depending on the height of the chimney. Taller chimneys need larger flue openings.
Chimney
Building codes generally require the chimney to rise at least 2 feet higher than nearby structures, such as the patio roof. The taller you make the chimney, the less likely it is that high winds will push smoke down through the fireplace opening and put out the fire. The chimney also has a capstone or a spark arrestor to prevent hot embers from flying throughout the neighborhood.
Costs for DIY and Professional Construction
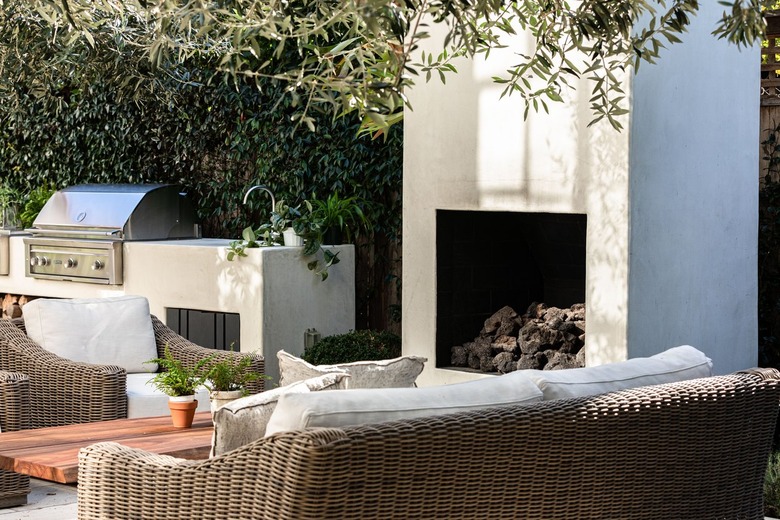
Costs for DIY and Professional Construction
You may be wondering how to build an outdoor fireplace from scratch out of stone or brick, which might involve grinding individual stones to certain specifications, and you may be thinking it's a lot of work. You're right; it is. That's why it's a far easier DIY project if you purchase a kit with precut parts and detailed instructions for assembling them. A kit for a large fireplace can cost as much as $9,000, but the average cost is around $3,250.
If you decide you don't have time to DIY this project or it's beyond your skill level, you may want to hire a pro to do it. Be sure to get multiple quotes because estimates may vary by several thousand dollars. The average cost for custom building a stone or brick outdoor fireplace is $14,000, but estimates may range from $8,000 to $20,000. You might want to compare that to the cost of installing a metal fireplace to coordinate with your outdoor kitchen, which could be as little as $300.
Building an Outdoor Fireplace Step by Step
Building an Outdoor Fireplace Step by Step
If you're building a wood-burning fireplace on your own, chances are good you'll be having a kit shipped to your door. If so, unpack the construction plans from the shipping container once it arrives and study them carefully. Each kit is a little different, and no general building procedure can cover all the possible design permutations. It's also a good idea to check all the components using the parts list in the instructions to make sure you have everything you need. Depending on the kit, you may have to purchase additional materials.
1. Choose a Location
Even before you purchase the kit, check local building regulations and setbacks, assuming a fireplace is even allowed in your community. California, for example, requires at least 25 feet clearance from any combustible materials. In addition, there may be setback requirements from property lines.
Code compliance isn't the only factor to consider when choosing a spot; proper drainage is also important. Don't choose a spot on soggy or muddy soil and make sure rainwater will flow away from the fireplace. If limited space forces you to choose a poorly draining location, you may have to install a drainage system before you begin building the fireplace.
2. Construct the Base
If you have a patio in good enough condition and strong enough to support a fireplace (and it's far enough away from your house or other combustibles), go ahead and build on that. If your plans call for a new concrete pad, excavate an area that extends at least 6 inches beyond the sides and back of the fireplace and at least 24 inches beyond the front. You can build forms for an above-ground base or set the base with its surface at ground level, but either way, plan on digging at least deep enough for a 3-inch layer of gravel underneath the concrete slab. Be sure to reinforce the concrete with 3/8- or 1/2-inch rebar.
As an alternative that doesn't require as much digging and eliminates the need to pour concrete, you can make a base from concrete pavers or firebrick. You still need to level and tamp the ground for the pavers, and you should dig deep enough for a layer of gravel followed by a layer of sand to support them. Keep a 6-foot level handy so you can level the pavers as you go. The base needs to be perfectly level.
3. Build the Firebox
Stack bricks, concrete blocks, or whatever material you're using to form the outline of the firebox. You can mortar bricks or cinder blocks to hold them together, but if you're making a stone fireplace using concrete blocks or stones with rough surfaces, it's better to use concrete construction adhesive, such as Loctite PL 500 Landscape Construction Adhesive. The heavy blocks will stay put without it, but it provides extra insurance. One or two beads of adhesive on the face of a block before you set another one on top of it is all you need.
Most kits will include a pair of lintel blocks to hold the lintel. These have a slight notch that should be facing the firebox opening. They go on the last course that forms the top of the firebox. Set the lintel in place and make sure it's level. It's not a bad idea to glue the lintel to prevent it from moving when you set bricks or stones on top of it.
Tip
Check the level of each course of block before you start the next one. You should also check the corners with a carpenter's square (framing square) to make sure they are square, and as the wall gets higher, use the level to make sure the inside and outside of the walls are straight and plumb.
4. Install the Firebrick
Stack firebrick on the inside of the firebox up to the level of the lintel. You can stack them vertically, horizontally, or in a combination of orientations — whatever it takes to completely cover the inside walls — and you don't need to stick them together with anything. If you're using a kit and following the directions, the firebrick should fit without having to cut any of them.
If you built your fireplace on a base of concrete or concrete pavers, you'll also need a layer of firebrick on the floor of the firebox. Set these in place before stacking the bricks along the walls.
5. Build the Smoke Chamber
Continue laying stones or bricks to build the walls higher and create the smoke chamber. If you're using stone, one way to do this is to set each course with a consistent offset from the outside. This creates a chamber that tapers to an opening at the top for the flue. If your kit comes with a ceramic flue, install it now according to the directions. Some kits don't include a flue, with the tapered opening in the firebox acting as the flue.
6. Build the Chimney
Lay several more courses of brick or stone for the chimney, which is typically narrower than the smoke chamber and extends straight up from it. If you have a capstone, which is a heavy slab that covers the chimney, the top course of stone or brick on the chimney must include gaps to allow smoke to escape. Some kits come with a chimney pipe and spark arrestor, and others include a metal chimney cap. Install any of these according to the instructions.
7. Install Trim Stones
Some kits come with decorative trim stones that go around the base of the smoke chamber and the top of the chimney. These need to be glued because they won't have anything on top of them to prevent them from falling. Spread glue on the bottom and sides of each one and tap it into place with a mallet.
8. Enjoy the Fireplace
Your new outdoor fireplace is ready for the first fire as soon as any construction adhesive you used has cured per the manufacturer's directions.