How To Create A Retaining Wall Around A Tree
We may receive a commission on purchases made from links.
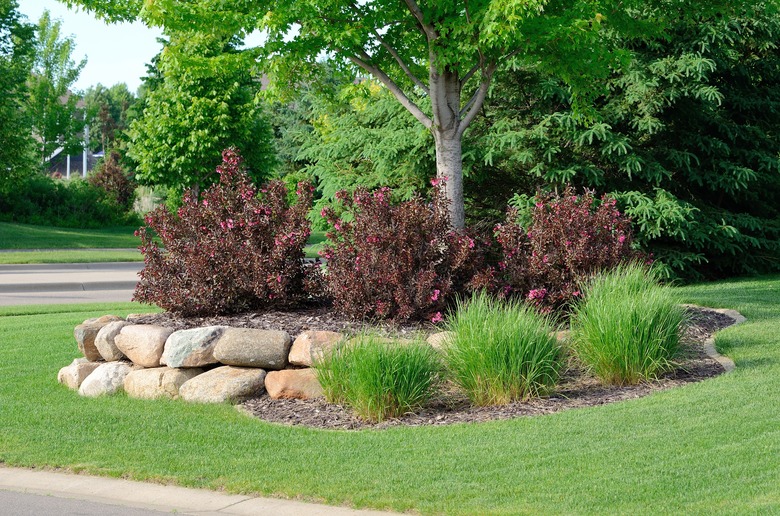
A stone retaining wall around a tree can create a uniform look to a yard, enhance curb appeal and add depth and interest to a landscape. A retaining wall around a tree can be created with almost any type of field stone or preformed pavers. Pavers or flat stones are much easier to work with since they are more uniform in size. Although it is also possible to construct a wood retaining wall, a stone wall is described here because wood is more susceptible to rotting than stone. Unlike edging pavers, a wall around a tree helps support the soil and protect the tree.
1. Determine Distance From Tree
Attach a piece of string the length that you want the wall away from the tree base to a large nail. Pull the nail taut and use it make sure the wall is built at the right distance from the base of the tree.
2. Dig a Level Ring
Dig a level circle around your tree between 3 and 6 feet in diameter. If the ground is already mostly level, then the ring should be about 4 to 6 inches deep. If you are digging into a slope, then you will need to dig to a depth that makes the circle level all the way around. Make sure the ring is wide enough to accommodate your stones or pavers.
3. Add Gravel at the Base
Place pea gravel at the base of the ring to a depth of about 1 inch. Use a construction compactor or piece of 4x4 lumber to tamp down the gravel.
4. Install the First Row of Stones
Place your stones on top of the gravel in the ring so that they are aligned properly. Use a carpenter's level to make sure they are straight and can be built upon.
5. Mix the Cement
Mix your masonry cement in a bucket with water according to the manufacturer's instructions.
6. Apply the Cement
Use a putty knife or offset spatula to apply a thin layer of the cement on top of the first layer of rocks.
7. Add the Next Stone Layer
Place the next layer of stones on top of the first layer. The joints of the second layer should meet in the middle of the first layer so that the joints are not lined up.
8. Build to the Desired Height
Continue layering in this manner until the wall is the height you desire. If you are building into a slope, it should be high enough so that there is about a foot of space between the slope and the top layer of stone.
9. Cure and Then Backfill
Allow the wall to dry and cure according to the cement manufacturer's instructions and then backfill the ring with topsoil or compost. Plant annuals or perennials in the ring to add interest to your yard and take advantage of the additional planting space.
Warning
Trees obtain oxygen and nutrients in the top few inches of soil via tiny feeder roots. You can safely add 2 inches of a topsoil and compost mix over the soil and roots without affecting the tree's health. An additional 2 inches of the mix can be added annually. Another option is using potted plants inside the stone ring, which allows you to easily change the plants according to the season.