How To Build A Retaining Wall With Interlocking Blocks

We may receive a commission on purchases made from links.
Retaining walls can be made of many materials, but interlocking blocks are especially popular for their striking simplicity as well as their relative ease of installation. Wood timbers, natural boulders, cut natural stone and concrete foundation blocks all have their place, but a retaining wall made of cast concrete interlocking blocks will be longer lasting and stronger. The advantage of interlocking blocks lies in their unique shape, which lends itself to a fairy simple installation—meaning it's not necessary to have an engineering degree to complete a safe and sturdy retaining wall.
Advantages of Interlocking Blocks
Advantages of Interlocking Blocks
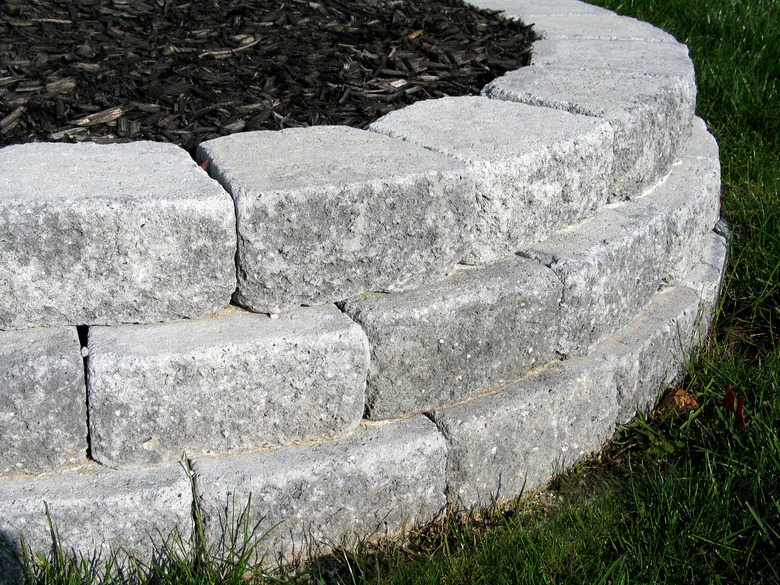
Interlocking blocks made from cast concrete are specifically engineered for building block retaining walls. The blocks are molded so there is a downward-facing lip at the back of the block, which hooks over the previous course of blocks. This creates an automatic step-back with each course, causing the overall wall to angle backward into the hillside. Not only does this make the wall quite strong but it greatly simplifies construction since the necessary backward slope, or "batter," of the wall is set automatically by the shape of the blocks.
Interlocking blocks come in many different sizes and several different colors, but all have slightly angled sides that allow the blocks to create gently curved walls if you choose. Sizes range from about 3 1/2 x 6 x 12 inches to about 8 x 10 x 16 inches.
Considerations for Planning
Considerations for Planning
For DIYers, limiting the block retaining wall to about 3 feet in height and using smaller interlocking blocks is highly advised. Taller walls may require complicated drainage features and larger blocks, which can weigh as much as 80 pounds or more. Walls over 4 feet high should be planned by a structural engineer and will usually require a building permit. With shorter walls, a simple backfill of gravel is usually sufficient for drainage, and smaller 4 x 12-inch blocks weighing 20 to 30 pounds are easy to work with. Major manufacturers of interlocking blocks, including Kasten, advise that DIYers limit their projects to blocks that weigh 65 pounds or less.
Interlocking blocks are available in several colors and finishes, including tumbled blocks that resemble weathered natural stone. Many types of interlocking blocks are stocked in bulk at home centers, and a landscape supply store will have an even larger selection for immediate pickup or delivery. Pallets of interlocking blocks are very heavy, so if possible, clear a convenient spot near your building site where pallets can be dropped off.
The methods for estimating materials will vary depending on the size of the wall and the type of blocks you select. Consult the installation instructions for your chosen blocks to learn how to calculate the number of blocks and other materials required.
Things Needed
-
Stakes
-
Layout strings
-
Compactible gravel (3/4-inch diameter)
-
Drainage gravel (3/4-inch river stone)
-
Topsoil
-
Shovel
-
Tape measure
-
Hammer
-
Wide masonry chisel
-
Circular saw with diamond blade
-
Caulk gun
-
Safety glasses
-
Utility knife
 cveltri/iStock/GettyImages
How to Build a Retaining Wall
1. Mark the Layout and Dig a Trench
Using stakes and string (or a garden hose if your wall will be curved), mark the location for the retaining wall. The strings should outline the back edge of the retaining wall.
Dig a trench twice as wide as the front-to-back measurement of the blocks (a 16-inch-wide trench for 8-inch-deep blocks, for example). The depth of the trench should equal the height of a single block plus 3 inches for a compactible gravel sub-base. For example, 6-inch-thick blocks call for a 9-inch-deep trench. The bottom row of blocks is a foundation layer that will be entirely buried.
Tip
If your building site also has a pronounced side-to-side slope, the trench may need to be stepped in a series of level tiers. Each tier will step up or down by a distance equal to the height of the blocks.
2. Lay the Base
Take your time with this step, as a solid, level base layer is crucial to the wall's structure.
Rake the bottom of the trench using a long carpenters' level to check for level. Then, firmly compact the soil using a hand tamper. Next, add a 2-inch layer of compactible gravel to the bottom of the trench. Rake it smooth and check for level and then compact it with the hand tamper. Check again for level and then add another 1-inch layer, rake it smooth and tamp again.
3. Lay the Base Course Blocks
Use a hammer and masonry chisel to knock off the rear lips on the blocks that will form the bottom layer of the wall. (Instead of knocking off the lips, some professionals like to lay this first row upside down and backward in the trench since the bottom course will be entirely buried.)
In the bottom of the trench, arrange the prepared blocks, making sure the front edges of the blocks follow your desired layout. Begin at the center of the wall and work your way to both sides. Adjust the blocks as needed using a rubber mallet to tap them into position. For straight walls, use a staked string line to keep the edges of the blocks aligned. After every few blocks, check with a carpenters' level to make sure the course is remaining perfectly level, both left to right and front to back.
If you are dealing with a side-to-side slope that requires a tiered trench, make sure the courses of blocks line up perfectly as the wall grows.
4. Lay Subsequent Courses
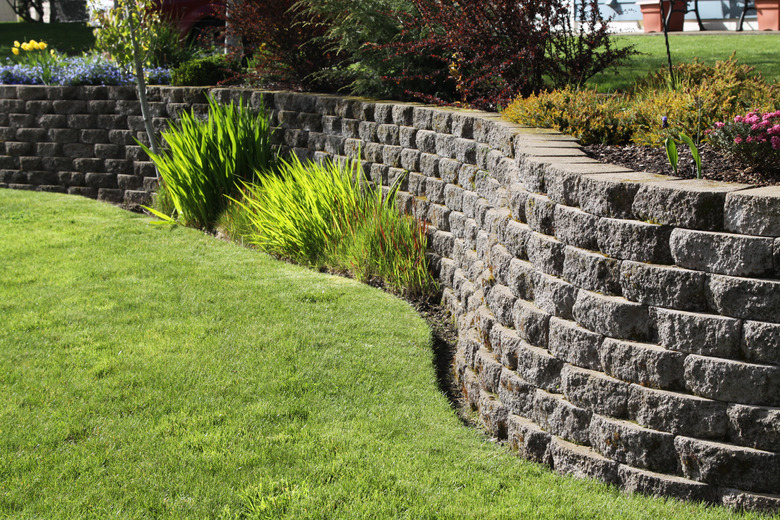
Start the second course at the center of the wall with the first block positioned so it is centered over a joint in the bottom base course. This pattern is known as "running bond," and it ensures stability of the wall by preventing vertical joints from overlapping. The rear lip on the block should overhang and just touch the back of the previous row.
Continue outward to the left and right from the center. Make sure every block is pulled forward so the rear lip touches the blocks beneath. Continue in this manner for each course of blocks until reaching the cap layer.
 davelogan/iStock/GettyImages
5. Cut Blocks as Needed
Warning
Always wear eye and hearing protection when splitting or cutting concrete blocks.
At the ends of alternate courses, you may need to cut or split partial blocks to complete the ends of the row. Splitting can be done by slightly scoring the top of a block with a wide masonry chisel and hammer, gradually deepening the score until the block cleaves along the scored line.
For a cleaner cut, use a circular saw with diamond blade to cut the block. Making a series of cuts at gradually deeper blade depths is usually the best way to cut blocks.
If the wall must make a sharp angle, you can cut the blocks at a 45-degree angle at the point where the wall changes direction. The cut faces of the miter can be joined together with exterior-grade concrete adhesive.
6. Mark, Cut and Install Caps
The top course is made with special cap blocks that are usually thinner than the wall blocks. Install the caps so the fronts overhang the underlying blocks by about 1 inch. Use exterior-grade concrete adhesive to glue them in place.
For curved walls, the cap blocks will need to be trimmed along the sides so they can conform to the radius of the wall.
7. Install Landscape Fabric
Although this step is sometimes omitted, it is a good idea to line the back of the trench behind the retaining wall with landscape fabric. This will prevent soil from washing through the fill gravel and plugging the joints between the blocks. Cut strips of landscape fabric and drape them over wall blocks, down across the bottom of the trench and up over the soil behind the wall.
8. Backfill the Retaining Wall
Fill the excavation behind the wall with drainage gravel. If you have lined with landscape fabric, the gravel is placed inside the fabric. Tamp as you go to make sure there are no voids. Ideally, you will have at least several inches or as much as 2 feet of drainage gravel between the wall and the soil bank. During rainfalls, the drainage gravel will allow rainwater to seep out the cracks between blocks rather than backing up to build pressure on the wall.
If you have lined the trench with landscape fabric, trim it off as you near the top of the backfill. It should not be seen once the backfill is complete.
As the gravel backfill approaches the top of the wall, finish with several inches of topsoil. Finish the installation by planting sod, grass seed or decorative plants in this topsoil layer behind the top of the wall.