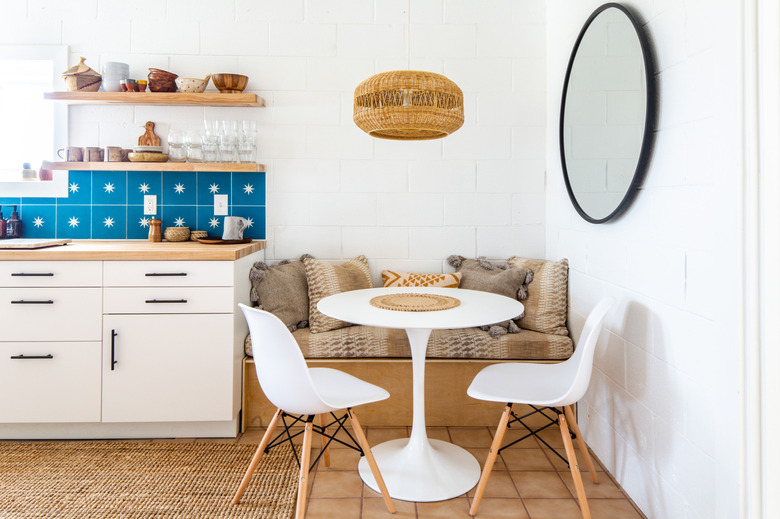
Building A Breakfast Nook (With Storage): A How-To Guide

Is there a quaint little corner in your kitchen just begging for a breakfast nook? Despite their name, breakfast nooks are an excellent place to eat any meal, host family game night or finish homework.
If you buy the right breakfast nook bench, it will even provide you with some extra storage. Of course, you can also build your own custom benches to work with whatever table you choose. Building your own takes some woodworking skill, but allows you to make your kitchen nook the perfect size for your space and family.
Breakfast Nook Overview
Breakfast Nook Overview
You'll create your breakfast nook by building and installing simple wooden bench seating along your kitchen walls. The bench frames will be made of 2x4 lumber that you'll cover with 3/4-inch medium-density fiberboard (MDF) to create an attractive finish. This particular project includes building a tilted backrest for the bench for added comfort and uses piano hinges to allow you to lift the bench seats and access the large storage area below. Your nook won't take more than a weekend to build and shouldn't require any specialty tools.
A DIY breakfast nook is a very accessible project, but it's not one that lends itself well to winging it. Planning out the details and getting them on paper will help you spot flaws in your plan and keep you on track during the build. If making a plan from scratch isn't your forte, there are a lot of free DIY plans available online. Do a quick measure, however, to make sure the finished product will fit your space well.
1. Take Your Breakfast Nook Measurements
Begin by measuring your kitchen to determine how long you want your benches to be. To determine the height and width of your benches, measure a comfortable dining table chair. You'll want the benches in your breakfast nook to be the same height and width as the seat of the chair.
Alternatively, you may opt to begin with your favorite dining table. According to RLPS Interiors, you should leave 10 to 12 inches between the top of your seat and the underside of the table. This will affect the height of the benches in your nook.
If you're building an L- or U-shaped breakfast nook, avoid the hassle of mitered corners. Instead, simply build two or three benches and push them flush against each other at a 90-degree angle when you install them. Plan for this in your measurements.
 Marisa Vitale
2. Cut Your Wood to Size
When you've finished planning your kitchen nook, make a cut list detailing how long each piece of wood must be and how many pieces of each length you need. Cut each of your 2x4s and MDF sheets to the desired lengths before you begin building your benches. This will save you the time and hassle of running back and forth to the saw once you get started. You can use a hand saw to cut your wood if it's all you have, but a circular saw or a table saw will make the job go much quicker.
When you cut the 3/4-inch MDF that you'll use to make the front, back and seat of the bench, lay it on top of a few scrap 2x4s so that the MDF doesn't bind the saw blade when you get to the edge of your cut. For a straight cut, attach a straightedge to your board to cut against rather than cutting freehand.
3. Assemble Your Bench Frames
Lay out your cut pieces and take a look to make sure every piece is the proper length and will go together well. If everything looks good, begin assembling your 2x4 frame. Start by building the base or bottom of the bench frame, essentially making a flat wooden rectangle that will rest on your floor.
Work your way up, attaching the side supports of the frame and then attaching the top boards of the frame, which will support the bench seat. The back frame pieces should extend from the bottom of the frame to well above the seat area to provide support for the bench back.
When joining the lumber pieces together, home improvement expert Ron Hazelton recommends using both wood glue and countersunk screws for a secure hold.
4. Join the Bench Frames
Take your bench frames and the cut MDF inside to your breakfast nook. There, position your bench frames the way they will go together in the nook and fasten them to each other using wood screws. The next step is to attach the MDF panels you cut to the front of your bench frames. Do so using wood glue and a finish nail gun. Again, you can hammer in the nails by hand if you must, but a nail gun will make things go much quicker if you have one or can borrow one.
Cut and install a narrow piece of MDF to run along the back of the seat area where the 2x4 back supports meet the main frame. This piece will receive the rear half of the piano hinge for the flip-up seat.
5. Attach the Back Frames
Cut long, wedge-shaped pieces of 2x4 to create supports for the angled back panels. Install the wedges onto the front faces of the tall back frame pieces with glue and nails. Place the narrow end of the wedge up and the wide end down where the bench seat will be. These wedges will give the back of your bench a little tilt, making it more comfortable against which to lean.
 Paul Anderson
6. Shape Your Bench Ends
Next, you'll cut the ends of your benches that will rest on the floor and go to the top of the bench's back. Because it's at the end of your bench, this piece will be highly visible on your finished product and as such can use a decorative touch. The simplest plan is to cut a nice curve in the top of the piece.
You can draw the curved shapes by hand or using a cardboard template. Cut the panel into the desired shape with a jig saw. Use the first panel as a template when cutting the end piece for the other end of your bench.
7. Attach the Back of the Bench
If you didn't do so earlier when going through your cut list, cut MDF pieces to the correct size to form the back of your benches. Attach the bench backs to the wedges you made earlier using wood glue and a nail gun. When the back is in place, attach your end panels to the ends of your bench using the same glue-and-nail method.
If desired, you can attach a piece of trim to the top of your bench back to hide the 2x4s that support it. Simply lay the trim across the top of the bench, cut it to size and then attach it with wood glue and nails. The trim should butt up against the curved bench ends you made and simply lay across the tops of the 2x4s behind the bench back.
8. Install the Bench Seat
Grab your bench seats or cut them from MDF if necessary and install them. Start by flipping the seat upside down and screwing a piano hinge to the back edge. When the hinge is secure, open it and attach the other side of it to the narrow MDF strip at the back of the seat. Start with two or three screws and then carefully check the fit of the seat before installing the remaining screws.
9. The Finishing Touches for Your Breakfast Nook
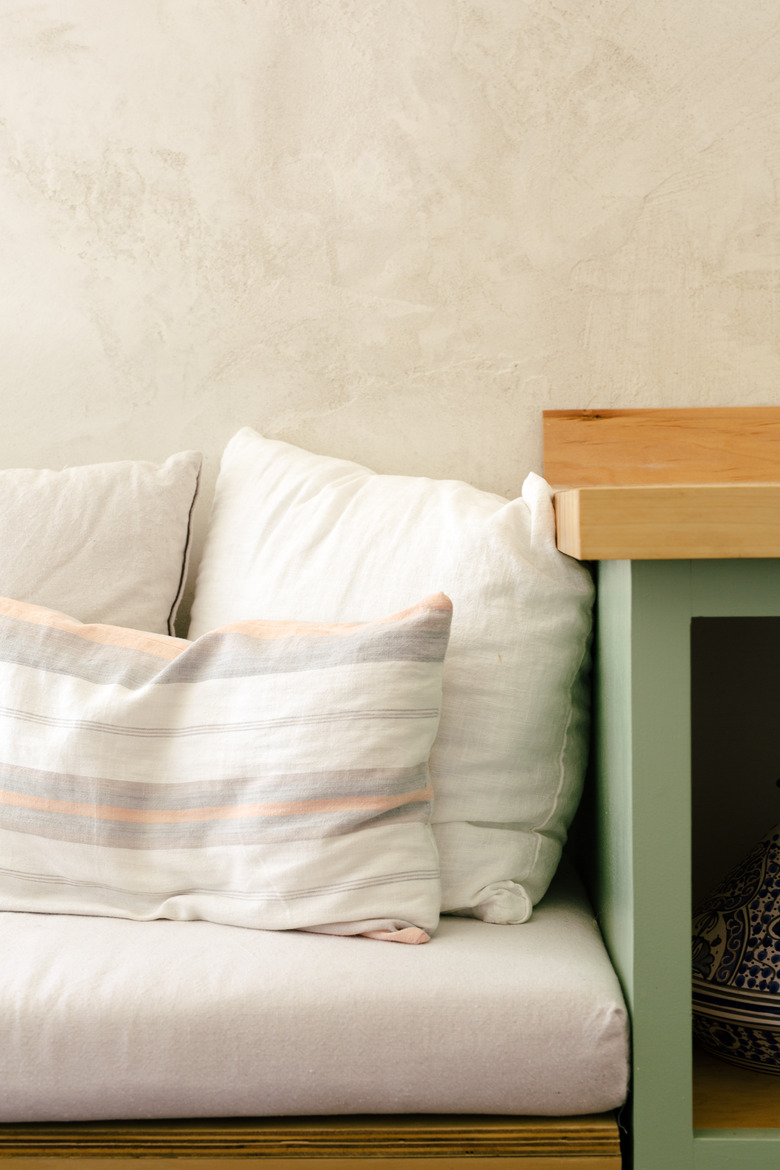
Slide your completed bench into the desired position in your breakfast nook and position your dining table in front of it. If desired, you can also add a lighting fixture over your table, jazz up any windows with fresh curtains or hang pictures in the nook. You can also add some throw pillows to make the space feel cozier. If you do, consider choosing pillows made for outdoor spaces like decks and patios. The fabric on outdoor pillows is easier to clean if someone spills food or drips onto them.