Floor Tile Installation: What You Should Know

We may receive a commission on purchases made from links.
Floor tile installation is one of the more challenging home improvement tasks, and dealers such as Shaw Floors generally recommend hiring a pro. You may be the type who is motivated by challenges, though, and you can definitely save money by doing the job yourself. If you want to be happy with the results and avoid the very real possibility of having to do the job over, it's important to know what you're getting into before you start.
Whether you're laying ceramic, vinyl or linoleum tiles, preparation of the subfloor to provide a stable, flat surface for the floor tile and proper layout are the keys to a top-notch finished floor. You'll need tools that you're unlikely to already own unless you do a lot of home improvement work, particularly a wet saw if you're installing ceramic tile. The process can be messy, but that's true whenever people get creative.
Preparing the Subfloor for Tile
Preparing the Subfloor for Tile
One of the best subfloors for ceramic tile, natural stone tile or vinyl tile is a crack-free, flat concrete slab, properly cured and completely smooth and flat. Few real slabs conform perfectly to these standards and often require a coat of self-leveling underlayment. When moisture is present or cracks are likely, an uncoupling membrane like Schluter-DITRA may be needed. It separates the tile mortar bed from the subfloor, allowing moisture to escape and preventing cracks from affecting the tiles.
 Vstock LLC/VStock/GettyImages
When installing tile on a plywood or oriented strandboard (OSB) subfloor, you generally need to install a layer of cementboard, or cement backerboard, to provide support as well as a moisture barrier. You usually need 1/4- to 1/2-inch backer board depending on the subfloor stability, and adding this thickness to that of the tile can result in a total flooring thickness of as much as 1 inch. This might not be a problem if you lowered the floor height by removing a previous floor covering, but if not, you will have to plan for the new floor height.
In some cases, you can avoid radical height increases by using an uncoupling membrane like DITRA, which is only 1/8 inch thick, instead of backer board. The manufacturer does not recommend this method over existing hardwood floors or for tiles smaller than 2 inches square. If you're in doubt about the most appropriate backing for the tiles, it would pay to consult with an experienced installer even if you're going to do the work yourself.
Tools You Need for Ceramic Tile Installation
Tools You Need for Ceramic Tile Installation
Tile installation involves four processes, and you may need to purchase or rent tools for each one if you don't already have them. The first process is subfloor preparation. Besides possibly removing the old flooring, it involves leveling the existing subfloor and installing an appropriate underlayment. The tools you're likely to need include:
- Floor scraper
- Leveling float for spreading leveling compound
- Drill or screw gun for installing cementboard
- Circular saw for cutting cementboard
The second process, which is laying out the tiles, requires measuring tools:
- Tape measure
- Framing square
- Chalk line
When it comes to laying the tiles, which is the third process, you'll need the following tools:
- Wet saw or tile cutter for cutting the tiles
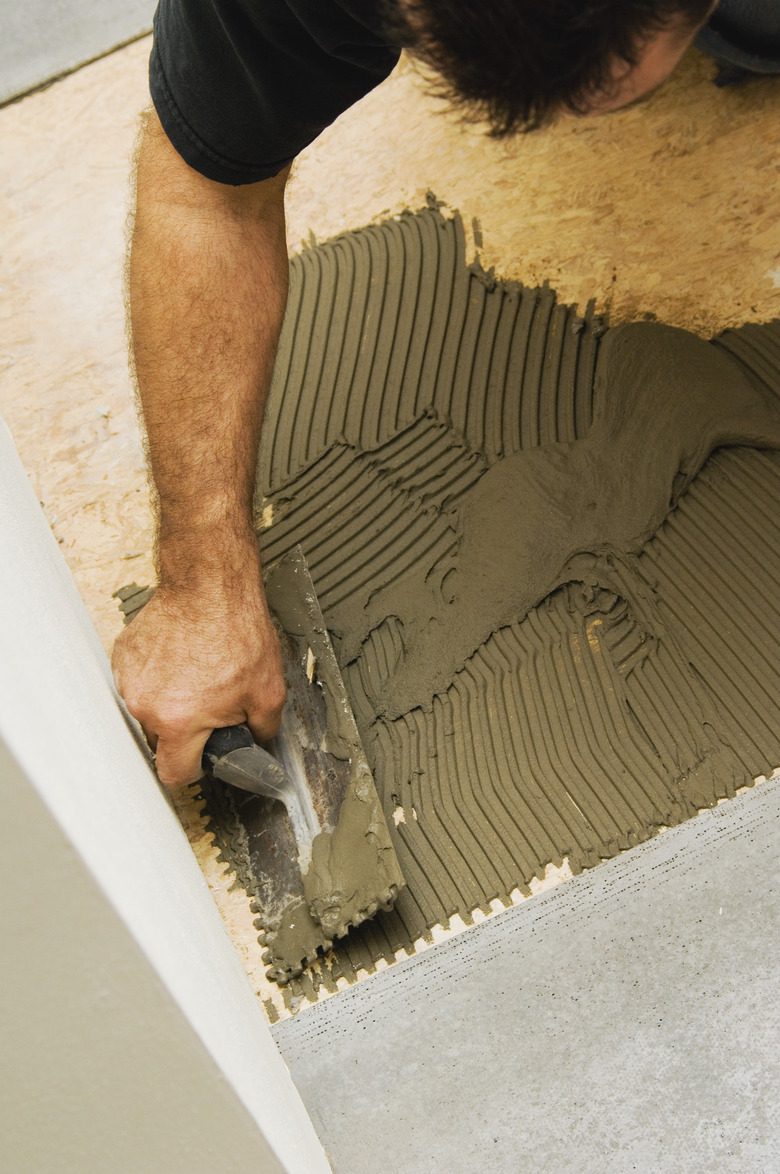
- Notched trowel for spreading thinset mortar; this should have a notch depth of 1/2 inch for tiles up to 16 inches and 3/4 inch for larger tiles
- Nippers for trimming tiles to fit in tight spaces
- Tile spacers for maintaining uniform grout lines
- Rubber mallet for seating tiles in the adhesive
The last process is grouting. You'll need a grouting float (basically a concrete float with a foam-rubber surface), a grout sponge and plenty of clean rags.
Tips for Linoleum and Vinyl Floor Tile Installation
Tips for Linoleum and Vinyl Floor Tile Installation
Both preglued and glue-in-place vinyl and linoleum tiles, often characterized generically as vinyl tiles, require a flat, dry subfloor just like ceramic tiles, but there's no need for cementboard or an uncoupling membrane. Sometimes you can lay vinyl tiles over existing hardwood and vinyl as well as concrete, but you may have to spread leveling compound to cover any cracks, knots or other defects.
Alternatively, if the subfloor surface is rough or uneven, you may choose to install a layer of 1/8-inch plywood underlayment over the existing floor to provide a flat surface. Usually it's easiest to fasten the undelayment with a power stapler. Be sure to use sheets that are designed as underlayment because these will have a smooth, knot-free top face.
You need the same measuring tools for laying vinyl tiles as you do for laying ceramic tiles, but the list of installation tools is much shorter. You'll need a vinyl tile cutter, for which you can substitute a sharp utility knife and a straightedge, and a notched trowel to spread the adhesive if the tiles aren't preglued. Don't forget to bring a good pair of knee pads.
How To Install Ceramic Floor Tile

How To Install Ceramic Floor Tile
Procedures for ceramic and porcelain floor tile installation are basically the same. Porcelain is just ceramic that has been fired at a higher temperature to make it harder.
1. Prepare the Subfloor
Remove all adhesive left over from the prior floor covering (if there was one) by scraping and sanding if necessary. An efficient way to remove old, dried adhesive from plywood and concrete is to go over the floor with a buffer fitted with a scraping attachment and vacuum all debris when you're done. You need to clean off old adhesive and debris even if you're laying cementboard.
Spread leveling compound on a concrete subfloor in poor condition. If you choose to install an uncoupling membrane, follow the manufacturer's instructions for subfloor preparation, which usually involves leveling the floor.
2. Install the Backer Board or Membrane
Spread a bed of mortar on a plywood or OSB subfloor and level it with a trowel. Lay the backer board into the mortar while it's still fresh and attach it using cementboard screws. Do not use standard screws because the cement materials can corrode them.
Space the screws 6 to 8 inches apart and no closer than 2 inches to the edges of the sheets. Butt the backer board sheets together, staggering the end joints for overall stability, and tape the edges with mortar and fiberglass tape to seal out moisture.
Lay a bed of mortar when using a decoupling membrane, unroll the membrane into the fresh mortar and seat it with a trowel. The membrane should extend all the way to the walls, but there's no need to tape the seams between sheets.
3. Determine the Starting Point
Start most tile installations in the center of the room. To find it, you find the midpoint of two opposing walls using a tape measure, snap a chalk line between them and then repeat with the other two walls. The intersection point is the place where the corners of the first four tiles intersect. You can drive a screw temporarily into this point so you'll know where it is after you've spread thinset, or you can simply leave the point uncovered when you apply the thinset.
In rooms with an irregular shape, the best starting point may not be the center. In such cases, it's a good idea to draw a schematic of the room, determine the best starting point on paper and then find that point on the floor using a tape measure and chalk lines.
4. Set the First Four Tiles
Spread enough thinset on the subfloor for the first four tiles using a notched trowel and place them, using spacers to keep them a uniform distance from each other. When using cross spacers, they should always be placed vertically so you can remove them easily. This means placing four of them at the corner where the tiles meet, not simply laying a single one flat inside the space.
Use a framing square to make sure the lines between the tiles align with the still-exposed chalk lines beyond the tiles. This alignment is crucial and will determine the alignment of all the other tiles, so triple-check it.
Once you're sure the tiles are properly aligned, tap the tiles with a rubber mallet to seat them and remove the temporary screw if there is one.
5. Work in Sections
Using one of the starter tiles as a reference, begin laying tiles in one direction toward the wall, setting spacers to keep the grout lines straight. Spread mortar in an area only when you're prepared to set a tile, leaving the rest of the floor clear so you can walk on it. That way, you can go back and remove the spacers from a section before the mortar sets, when they are still easy to pull out.
Extend each section to the floor perimeter, leaving all the pieces that need cutting for later. It's easier to do all the cutting at once.
6. Cut With a Wet Saw or Tile Cutter
Set up a wet saw with a diamond cutting blade outside or in the garage. If you have to use the saw in the installation room, lay plenty of plastic sheeting around it to catch the spray. A wet saw cuts tiles much like a table saw, but the blade passes through a water trough and sprays clay-laden water in all directions, so you need to wear goggles and old clothing that you don't mind getting dirty.
 BanksPhotos/iStock/GettyImages
If you don't like messes, you can also use a tile cutter, which is a manual tool that scores the tiles so they break cleanly. It's less expensive and easier to use than a wet saw, but it won't cut narrow strips. For that, you need a wet saw, which is, according to Rubi Tools USA, a better all-around tool.
7. Use Nippers to Make Notches
Make the tiny cuts you need to fit a tile around an obstruction or into a tight space using nippers, which is a tool that looks like wire snippers but has blades perpendicular to the handle instead of parallel. Use the nippers to nibble away at the tile in small increments until you get the cut-out shape you want. This tool leaves a rough edge, but the grout usually camouflages it.
8. Grout the Tile
Wait 24 hours or more for the thinset to harden, then remove all tile spacers to prepare for grouting. Mix powdered grout with water to a peanut-butter-like consistency; alternatively, you can use premixed grout, which is ready to apply right out of the container. Spread the grout over the tiles, using a grout float to push it into the gaps between tiles. Scrape off excess grout from the tile faces with the float. Sponge the tile faces clean with a grout sponge, rinsing it frequently in a bucket of clean water.
9. Clean the Grout Residue
Give the grout several hours to set and then wipe the haze from the tiles using a clean rag. If you need a stronger solution, mix a solution of one part distilled white vinegar to four parts water. This is a mildly acidic solution that dissolves the haze, but don't use it on stone or porous tiles such as terra cotta ones because it can damage them. Instead, purchase a grout-cleaning product intended for use on the type of floor tile you have.
10. Seal the Grout
Allow the grout to cure fully (per the manufacturer's directions) before applying a polyurethane or acrylic grout sealer according to the product directions. This final step is important for sealing out moisture and preventing stains.