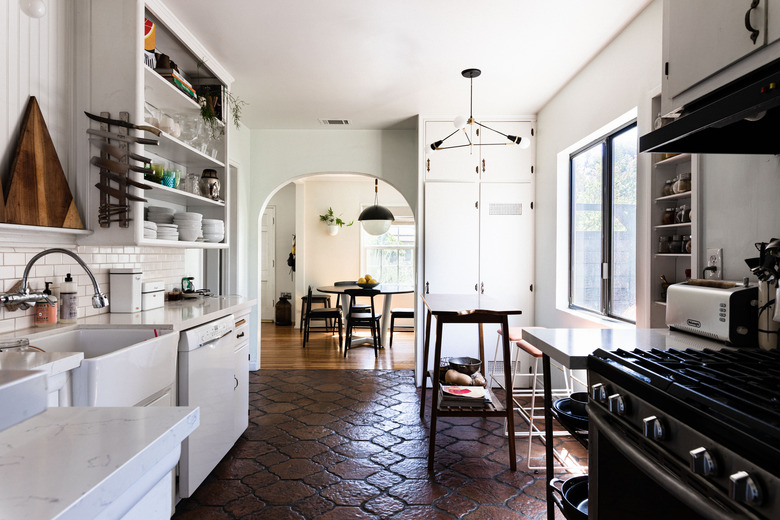
How To Prepare Floor For Tile
If your home improvement plans include a new tile floor, you should know that you can successfully install tile over a wood subfloor, a concrete pad and even a floor with an existing floor covering, such as tile, vinyl or hardwood. The basic requirements for the tile substrate are the same in all cases. It must be:
- Smooth and flat
- Free of moisture
- Rigid and inflexible
- Able to bond to thinset mortar
The rigidity standard recommended by the Tile Council of North America (TCNA) is L/360, which means that the floor shouldn't flex more than the length of the floor joists divided by 360. For example, if the floor joists are 16 feet long, the maximum deflection is 0.53 inch. If it's any more than that, the tile and/or grout may be prone to cracking.
Options for Underlayment
Options for Underlayment
Until the late 1900s, it was common practice to lay tile in a bed of hard-pack mortar, and while that's still an available option, most contractors and DIY tilers prefer to use other methods. Mortar beds, which take skill to do correctly, declined rapidly in popularity when cement backer board, or cementboard, came on the market in the 1970s. Today, cementboard is the number one underlayment choice for plywood subfloors, which generally need the extra rigidity that cementboard offers.
When it comes to concrete slabs and floors with existing tile, rigidity isn't as much of a concern, and in preparing the subfloor, the main goals are to provide a smooth, level surface and sometimes to control moisture. Underlayment methods for concrete subfloors typically include filling low areas with self-leveling compound and installing an uncoupling membrane (such as Schluter-DITRA or Laticrete Strata Mat), which helps prevent cracks in the concrete from transferring to the tile. If the concrete is already flat, dry and crack-free, no other preparation may be needed.
 Codi Ann Backman
Preliminary Preparation of the Subflooring
Preliminary Preparation of the Subflooring
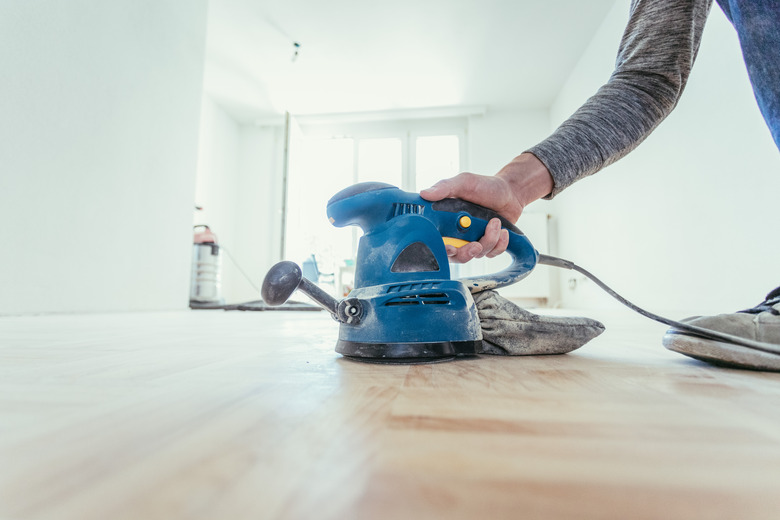
The first step in any tile installation is to evaluate the subfloor to determine whether it's even a good candidate for tile. Some aren't. For example, the floor may exceed the flex standard recommended by the TCNA, and adding extra materials may raise the floor height beyond what you can accommodate.
Many defects are correctable. If the subfloor flexes, you can usually add more plywood, and if it's moisture damaged, you can replace the damaged sections. You can repair cracked and damaged concrete with mortar and by using a grinder to flatten out ridges and bumps. In general, the procedure for preliminary preparation of the subfloor involves the following steps:
- Test the rigidity and add reinforcement where needed. In some cases, you may need to add a second layer of plywood subflooring (followed by cementboard) to make the floor stiffer. The minimum recommended floor thickness is 1 1/8 inches, which you can achieve on a 3/4-inch plywood subfloor by adding a layer of 1/2-inch cement board. If you want to use an uncoupling membrane instead of cementboard, you may need to add another layer of 1/2- or 5/8-inch plywood to achieve the recommended subfloor thickness.
- Replace moisture-damaged subflooring materials and address the cause of the moisture.
- Check wood subfloors for squeaks and eliminate them by driving screws into the joists.
- Remove floor coverings that are unsuitable for tile, including carpeting, existing tiles in poor condition and any material installed as a floating floor. You can tile over sheet vinyl, vinyl tiles and ceramic or porcelain tiles in good condition, but you should clean and etch them with a commercial product to ensure a good bond with the new tile's thinset adhesive. It's also a good idea to etch concrete by washing it with a strong trisodium phosphate (TSP) solution and rinsing with clean water.
- Scrape old adhesive from the floor and vacuum it thoroughly. If you're preparing concrete, take the additional step of wiping it down with a damp rag.
 Patrick Daxenbichler/iStock/GettyImages
How to Install Cementboard
How to Install Cementboard
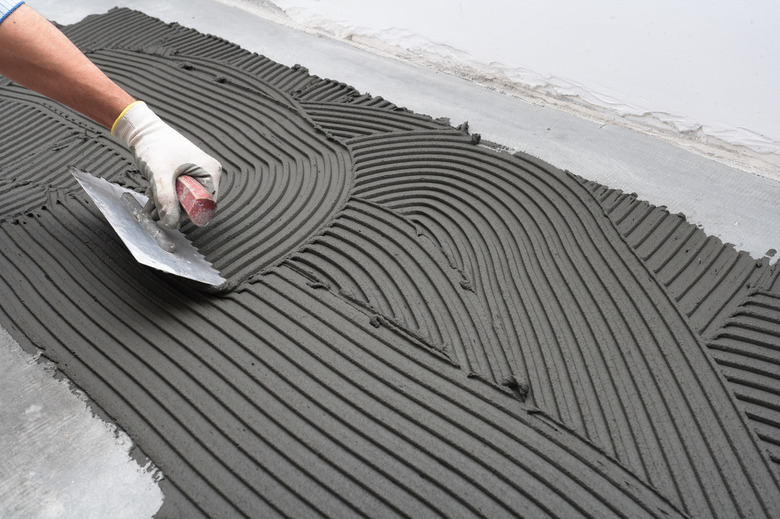
Cementboard is sold under brand names such as Durock, WonderBoard, Permabase and Hardiebacker, and except for small differences in weight and composition, they are basically equivalent. All products come in 3 x 5-foot sheets and should be installed with special corrosion-resistant, self-countersinking screws, which you can buy along with the cementboard. You'll also need thinset mortar for adhering the cementboard, and fiberglass mesh cementboard tape to seal the seams.
- Precut the cementboard sheets by scoring with a utility knife or use a carbide-tipped scoring tool, which won't dull as quickly. You can use a jigsaw with a carbide blade to cut notches and curves.
- Lay out the sheets to make sure everything fits. Be sure to stagger the end joints at least 2 inches away from the plywood subfloor joints. Remove the sheets and number them if necessary so you can remember where they go.
- Mix powdered thinset mortar with water to a peanut-butter-like consistency and spread a layer of thinset on the subfloor with a 1/4-inch notched trowel. Don't mix any more thinset than you can use in 30 to 40 minutes because once it starts to set, you can't use it.
- Lay the sheets in the fresh thinset, wiggling them a little to ensure a good bond.
- Fasten the sheets to the subfloor with cementboard screws, spacing the screws 6 to 8 inches apart and keeping them a minimum of 1 inch from the edges to avoid crumbling. Sink all the fasteners no more than 1/16 inch below the surface of the cementboard.
- Finish the seams as if you were installing drywall. Spread a thin layer of thinset along the seams using a trowel, and lay cementboard tape along the seams. Cover the tape with another thin layer of thinset, and smooth it all flat.
Once the thinset hardens, you should have a smooth, flat substrate. If any of the seams bulge, flatten them with coarse sandpaper. Vacuum thoroughly before you start tiling.
 alexandrumagurean/E+/GettyImages
How to Install an Uncoupling Membrane
How to Install an Uncoupling Membrane
Uncoupling membranes such as DITRA usually have a synthetic fabric or fleece on one side and cavities that resemble dimples on the other, which is why some contractors refer to it as dimple mat. It's plastic and provides complete waterproofing, making it a good underlayment for a concrete slab or a concrete floor in a wet location. Its biggest advantage is the fact that it separates the floor tile from the subfloor so any movements or cracking in the subfloor won't crack the tiles or grout.
Rather than laying ceramic or porcelain tile directly on concrete, a professional installer usually lays an uncoupling membrane first. You can also use an uncoupling membrane over existing tiles or on a plywood subfloor, but Schluter Systems does not recommend using DITRA over existing hardwood, which is too smooth to grip the thinset. The same is true for other brands of decoupling membrane.
- Spread a layer of thinset on the floor using a 1/4-inch notched trowel.
- Unroll the membrane onto the fresh thinset, fabric side down. If you use a product with fabric on both sides, such as Nobleseal TS, either side can go down.
- Cut the sheet as close to the wall as possible using a utility knife. Roll out another sheet next to the first, butting the edges together without overlapping them. Continue until the floor is covered.
- Tamp the sheets into the mortar to seat them using a grouting float or a regular concrete float.
- Tape the seams for maximum waterproofing, if necessary for the application. Use only the tape recommended by the manufacturer.
How to Use Self-Leveling Compound
How to Use Self-Leveling Compound
You can use leveling compound on a plywood or concrete subfloor, and it's the best underlayment when installing new tile on a new floor in which you're installing radiant heat. Like thinset, it has a limited working time, but it's easy to pour, so it's best to mix what you need for the entire floor at once. That means you have to calculate the square footage of the floor, check it against the coverage specified on the product package, add a 20 percent overage and do the mixing in multiple 5-gallon buckets.
If you're using the compound on a plywood subfloor, be sure to seal the plywood seams with patching compound, or you can fill the seams with silicone caulk and cover them with housewrap tape. Since leveling compound is a liquid, it will seep through the seams if you don't use a sealer. Construction Pro Tips also recommends sealing the plywood with a coat of primer.
- Install sill sealer on all the walls. This is a 3 1/2- to 5 1/2-inch foam gasket that you staple to the drywall. Caulk the sill sealer to the floor with siliconized acrylic caulk. Once the leveling compound has hardened, you can trim the foam flush to the floor with a knife.
- Construct cardboard or plywood dams around toilet flanges and around any floor drains. Build a dam in each doorway by screwing a 2- to 3-inch strip of plywood to the floor or the wall.
- Staple metal or plastic lath to the floor to reinforce the underlayment. Avoid using metal if there's a radiant heat system underneath. Keep the lath 1 inch away from the walls to avoid damaging the sill sealer, and overlap the sheets by 3 inches.
- Mix the leveling compound with water according to the instructions on the bags. When properly mixed, the product should have a syrupy, pourable consistency.
- Start at the corner of the room farthest from the door and pour the compound on the floor, keeping the bucket low to prevent splashing. If you do get any on the walls, let it harden before trying to remove it.
- Spread the compound on the floor as you pour it. The best tool for this is called a gauge rake, which is like a large metal squeegee with a depth gauge on each end. In most cases, you'll want to set the depth to 1/2 inch.
- Work your way from the corner in which you started to the exit door, and when you're done, be sure to seal the door so no one walks on the floor before the compound sets. Clean your tools and buckets immediately before the compound hardens.
 Paul Anderson
Getting Ready to Lay Tile
Getting Ready to Lay Tile
Once you've finished with the prologue of preparing the subfloor, you're ready for the main act of tile installation. This starts with careful measurements to determine the center of the floor, which is where most pros like to lay the first tiles. The subfloor will probably need a good vacuuming, and you'll need to make sure you have an ample supply of tile spacers on hand. You should also assemble all the other tools you need, including a tile cutter or wet saw for making straight cuts and a pair of tile nippers for making curved cuts.
When you have everything you need, it's a good idea to lay out all the tiles you don't need to cut to make sure everything looks the way you want. If you wait until after you've set the tiles in thinset to make this evaluation and you aren't satisfied, it will be too late. The last thing to do before you take up the tiles and begin spreading thinset is to plan a working strategy that allows you to finish the job and get out of the room without having to walk on any tiles while the adhesive is fresh.