How To Lay Tile: A Homeowner's Guide
Homeowners choose to lay tile on floors, walls, countertops and even outdoor patios for several reasons, but economy isn't necessarily one of them. Having a professional undertake the tiling can cost a pretty penny — anywhere from $13.50 to $63 per square foot indoors and as much as $83 per square foot outdoors, according to 2021 data from HomeAdvisor. Considering that the materials account for less than half of the final invoice, there's a lot of money to be saved by doing the job yourself.
Tiling takes skill and is one of the more challenging DIY projects, but it's also a chance to exercise your creative muscles, and if you take the time to do the job right, there's every reason to expect to be thrilled by the results. A tiling job that looks great and lasts for many years begins with a thorough preparation of the substrate, and for this you have more than one option. You also need to use the right tools, materials and techniques to get results of which you can be proud.
Begin by Evaluating the Space
Begin by Evaluating the Space
The substrate requirements for wall tiles and floor tiles differ somewhat, but in general, you need to pay attention to a few factors common to both:
- Moisture: The amount of moisture present in the subfloor or wall affects the ability of the adhesive to bond the tiles. When moisture is present, you need to provide a moisture barrier. On walls, this usually takes the form of plastic sheeting behind the tile substrate. On floors, a spreadable liquid is often preferable.
- Framing stability: Porcelain and ceramic tile need a rigid substrate, which is partially determined by the joist or stud spacing. In general, spacing of more than 24 inches is unacceptable and calls for additional framing or blocking.
- Substrate condition: Even if you plan to use an underlayment, which is done in most cases, the underlying substrate, be it existing wallboard or subfloor material, must be in good condition. Don't even think of installing tiles on a concrete pad that is crumbling and cracking or on a spongy wood subfloor or one consisting of a nonapproved material such as particleboard because even with an underlayment, the tiles and grout will crack.
Make any needed repairs before you prepare the space for tiling. If you overlook this important step, you'll be sorry when the tiles start cracking and popping out.
 Stephen Paul
Choosing and Installing Underlayment
Choosing and Installing Underlayment
Cement backerboard, or cementboard, is the most popular underlayment for both wall and floor tiles. It's rigid, water-resistant and cost-effective, but it isn't the only option, and it may not be the best one. When it comes to wall tiles, you could also choose:
- Foam tile backer, which comes in sheets that are lighter than cementboard sheets. It's more expensive and a bit more challenging to install, but it's completely waterproof and doesn't need a moisture barrier.
- Glass-mat drywall panels are similar to drywall sheets, and you install them the same way. They are approved for tile installation in wet areas such as shower stalls and tub areas. If you can find them, they may be the least expensive option.
Cementboard is also the most popular choice for floor tile because it offers rigidity as well as a smooth working surface, but it has disadvantages. It raises the height of the floor by as much as 1/2 inch, and it must be fastened to the subfloor, which makes it unsuitable for use on concrete slabs. Some other options include:
- An uncoupling membrane such as Schluter-DITRA, which is an 1/8-inch-thick plastic sheet that you unroll onto a layer of thinset. It prevents the tile bed from moving with the subfloor.
- Self-leveling mortar provides a level surface without the need for any other underlayment. It's far easier to apply than a hard-pack mortar bed, which is the traditional underlayment for floor tiles, and unlike a mortar bed, you can do it yourself.
The choice of underlayment depends on the size of the tiles. Membranes aren't suitable for tiles that are less than 2 inches square. If you're going to install large-format wall or floor tiles, you need the rigidity of cementboard or a mortar bed, possibly reinforced by an extra layer of plywood on the subfloor.
How to Install Underlayment
How to Install Underlayment
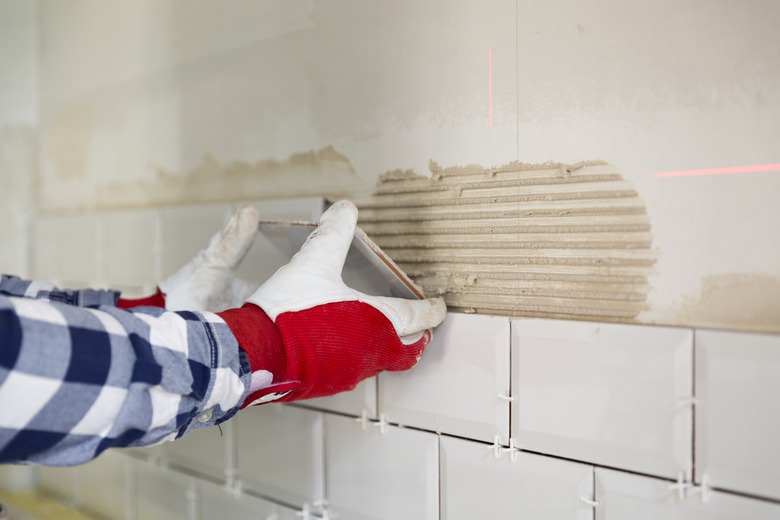
The procedure for installing backerboard on a wall is similar to that for hanging drywall except that it's usually easier to install cementboard and foam board sheets horizontally instead of vertically. You screw the sheets to the studs with special fasteners available wherever you buy the backerboard, spacing them 6 to 8 inches apart and keeping them an inch from the edges to avoid crumbling. Cementboard seams must be finished with fiberglass tape and mortar to keep out moisture, whereas you use special polyurethane sealant to finish foam board edges.
When installing floor tiles, you first trowel on a layer of thinset mortar before laying the backerboard or uncoupling membrane. Unroll the membrane into the fresh mortar and tamp it down, or if you're using cementboard, lay the sheets and fasten them with cementboard screws, maintaining the 6- to 8-inch spacing. You finish cementboard seams with fiberglass tape and mortar, but you usually don't have to tape the seams of an uncoupling membrane unless the subfloor is subject to excessive moisture. If taping is required, use tape designed for the product you're using.
How to Lay Tile
How to Lay Tile
1. Collect Your Tools and Materials
You'll need tools for measuring, spreading adhesive, cutting tiles, applying grout and cleaning up. They include measuring and marking tools, a notched trowel for spreading adhesive, a tile cutter or wet saw and a pair of nippers, a grout float and sponge, a bucket and plenty of rags. Don't forget the tile spacers, which are small plastic crosses that keep the tiles a uniform distance apart.
In addition, you'll need tile adhesive. Thinset mortar with a latex additive works well for both wall and floor tiles, but you may prefer to use mastic for wall tiles. Do so only in dry areas because mastic is water-soluble, and moisture degrades it. One more thing to remember is a pair of knee pads if you're laying floor tile.
2. Plan the Layout and Determine the Starting Point
A tile installation usually starts in the middle of the wall or floor, but if the surface has an irregular shape, you may prefer to start somewhere else. If so, consider making a scale drawing on graph paper to get a rough idea of the layout. Determine your starting point on paper and transfer that to the work area.
To locate the center of the floor or wall, find the midpoints of two opposing walls using a tape measure, and snap a chalk line between them. Repeat with the two perpendicular walls — the intersection of the chalk lines is your starting point. Double-check the lines with a framing square to make sure they are perpendicular to each other.
3. Mix the Thinset Mortar
Mix only the amount of thinset you can use in about 30 or 40 minutes because once it starts to set, you can't use it and must discard it. Fill a bucket with water and pour in the powder incrementally while you stir until you get a peanut-butter consistency. Let the mixture sit undisturbed in the bucket (a process called slaking) for 5 to 10 minutes, which is necessary for it to develop adhesive properties, and then mix again.
By the way, never discard thinset mortar down the drain. It will clog your pipes.
4. Spread the Thinset or Mastic
Apply enough adhesive to the substrate to hold the first four tiles, using a notched trowel. If you're laying large-format tiles, butter the backs of the tiles with adhesive at the same time. After you've set the first four tiles, continue spreading adhesive in small workable sections as you continue with the rest of the tiling.
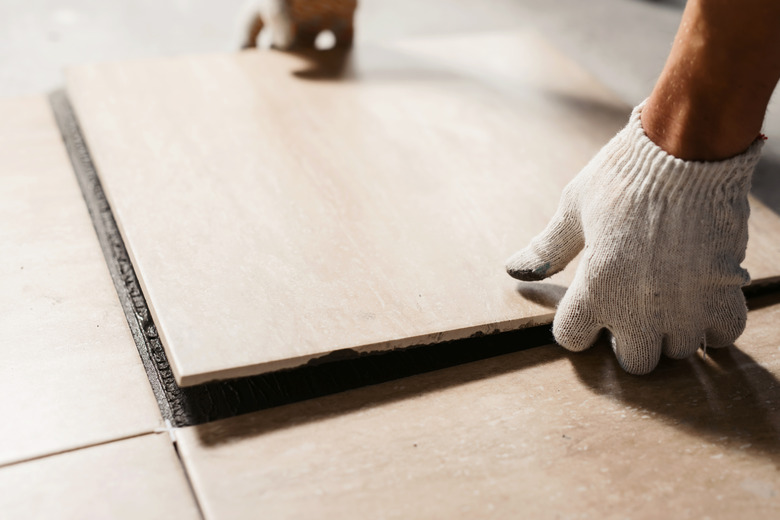
5. Seat the Tiles in the Adhesive
Set the first tile into the adhesive, wiggle it back and forth to break the ridges in the adhesive, press down and then lift the tile to check the coverage. If less than 80 to 90 percent of the back is coated, the adhesive is too thick and needs to be remixed.
 artursfoto/iStock/GettyImages
Once you're sure the adhesive is bonding, set the first four tiles with spacers between them, wiggling and pressing each one into place and setting the spacers vertically so you can remove them easily. Double-check the grout lines with a framing square to make sure they are parallel to the chalk lines. Once the grout lines are straight, you can use these starter tiles as a reference for laying the rest of the tiles.
It's usually best to lay all the full tiles before you get to the edges of the work area and have to cut tiles to fit. That way, you can do all the cutting at once. In large areas, it's a good idea to spread thinset and lay tiles in sections that are small enough to allow you to come back and remove spacers before the adhesive hardens.
6. Cut Tiles With a Tile Cutter or Wet Saw
The cleanest way to cut ceramic tiles is to use a tile cutter, which consists of a scoring blade that slides on a rod. Set the tile on the platform under the blade, align the cut line with the rod and then draw the blade along the line to score the tile. Move the tile to the edge of the platform and snap along the score line.
Many tilers prefer to use a wet saw, which is a small table saw with a carbide or diamond blade that is flooded with water as it spins to keep it cool. Wear goggles and old clothing when using a wet saw because the saw sprays clay-laden water in all directions. To cut a tile, push it slowly through the saw, keeping the blade on the off-cut side of the tile. Wet saws effectively cut all types of tile.
Cut notches and curved shapes with tile nippers, which look like large toe-nail clippers with handles. Nip incrementally in small bits until you get the shape you need. If necessary, you can smooth the cut edge with a carbide file.
7. Grout the Tiles
You can mix powdered grout with water, or you can use premixed grout. Spread it liberally on the surface of the tile with a grout float, which is like a concrete trowel with a foam surface. Use the float to force grout into all the grout lines, ensuring even coverage with no voids, and then scrape off excess grout and return it to your tray.
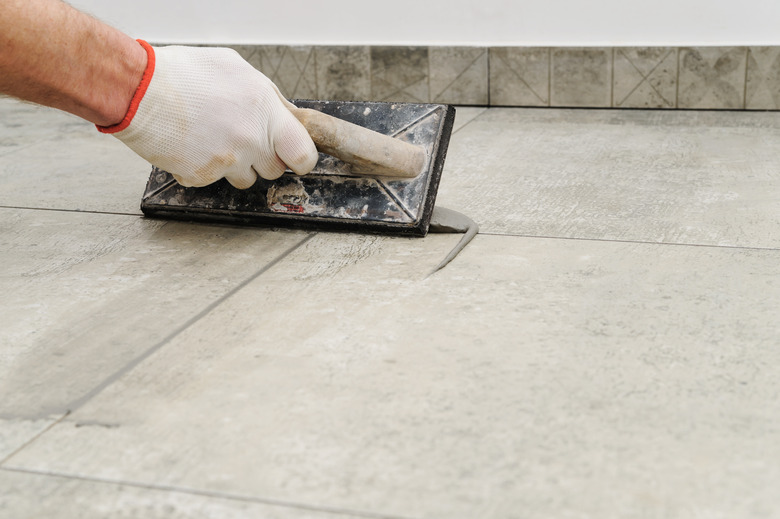 yunava1/iStock/GettyImages
If you're installing porous ceramic tiles, it's a good idea to apply grout release agent before grouting. It prevents excess grout from collecting on the surface of the tile.
8. Clean the Grout Haze
Use a commercial grout haze remover and a dry rag or sponge to remove the haze left on the tile. The best time to do this is after the grout has set for two or three hours. Use a sweeping motion that goes across the grout lines to avoid removing any grout or roughening the surface.
After removing the haze, The Tile Shop advises running an almost-dry sponge along the grout lines to smooth the grout.
9. Seal the Grout
If your grout needs sealing — not all grout does — apply it with a foam brush or with the applicator that comes with the sealing product you use. The grout needs to cure before you seal it, so check the manufacturer's specifications for cure time. Wipe excess sealer off the tiles as you go to ensure it doesn't form a residue.