How To Replace Fireplace Tile
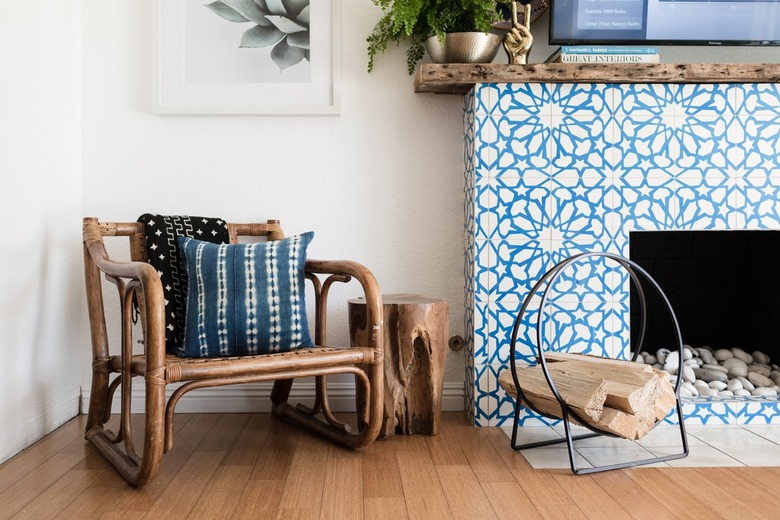
Has that worn-out, faded tile around your fireplace got you down? Replacing it might be easier than you think. The job doesn't necessarily have to involve removing the old tiles. You can flatten them out with fresh mortar and then lay new tiles on the mortar. You can even lay faux tiles, such as peel-and-stick Smart Tiles, over the old tiles even without mortaring over them first. Both options will add thickness to the fireplace surround, though, which may change the fireplace proportions in an undesirable way, so you might want to go all out and remove the old tiles.
Whichever method you choose will be easier if you remove the mantel before you start, and that may or may not be easy. The sides of the mantel are usually supported by brackets screwed into the wall, so all you have to do is unscrew them. The part that extends across may also be held by brackets but it may not. Some mantels are glued to posts set into the wall and are difficult to remove. If that's the case, you can still do the tile replacement; you just have to take extra care not to damage the mantel.
Things Needed
-
Hammer
-
Bucket
-
Sponge
-
Rag
-
Screwdriver
How to Replace Fireplace Tile
How to Replace Fireplace Tile
Tile removal is a messy job, so move all furniture from the area and cover the floor with a drop cloth. Wear goggles to protect your eyes from sharp shards of glasslike ceramic.
1. Remove the Old Tiles
Unless you want to save the tiles for some reason, there's no reason to be delicate about removing them. Go ahead and break them up with a hammer and use a blunt chisel along with the hammer to pry off pieces that don't fall off on their own.
2. Clean Off Glue Residue
Use the chisel or a stiff paint scraper to scrape residue off the backing. You can also put a disc sander on your drill and sand off the residue. If the backing isn't salvageable, unscrew it from the wall and discard it. If you do this, you'll need to replace it with new tile backerboard.
3. Install New Backerboard (Optional)
Cut pieces from a new sheet of tile backerboard that have the same dimensions as the ones you removed. You can cut backerboard with a circular saw and a diamond-grit blade. You can also score straight pieces with a utility knife and snap them apart. Screw them to the mantel with cement board screws.
4. Lay Out the Tiles
Dry fit the tiles by sticking them to the backerboard with masking tape to get an idea of how they will look and the best way to arrange them. It's typical to start the layout at the top middle and work your way toward the sides and then down, but depending on the tiles, you may find a better way. Cut tiles when needed using a tile cutter or a wet saw. Keep track of the layout by numbering the tiles or arranging them on the floor in the desired pattern.
5. Mix and Spread Mortar
Mix thinset mortar with water in a bucket until it has the consistency of peanut butter. Pour in latex additive in the proportion recommended on the container to make it more flexible. Trowel it onto the backerboard and use a notched trowel to flatten and spread it.
6. Set the Tiles
Lay the tiles in the fresh mortar in the desired pattern using spacers to keep them a uniform distance apart. Wait overnight for the mortar to set and then remove the spacers.
7. Grout the Tiles
Mix sanded grout with water until it is approximately the same consistency as the mortar. Spread it onto the tiles with a trowel and use a sponge to force it into the gaps. Soak the sponge in clean water, wring it out, and use it to clean off excess grout. Let the grout set overnight.
8. Clean Off Grout Haze and Apply a Sealer
Use a piece of cheesecloth to wipe away the cloudy residue left by the grout. When the tiles are clean, apply a protective sealer. Glazed tiles don't need to be sealed, but the grout does, so if you installed glazed tiles, apply a grout sealer to the grout with a small paintbrush and wipe the excess from the tiles with a rag.
9. Replace the Mantel
Screw the parts of the mantel you removed back to the wall.