This Holiday Advent Calendar Is Actually Paper Trees, And It's Beyond Lovely

We may receive a commission on purchases made from links.
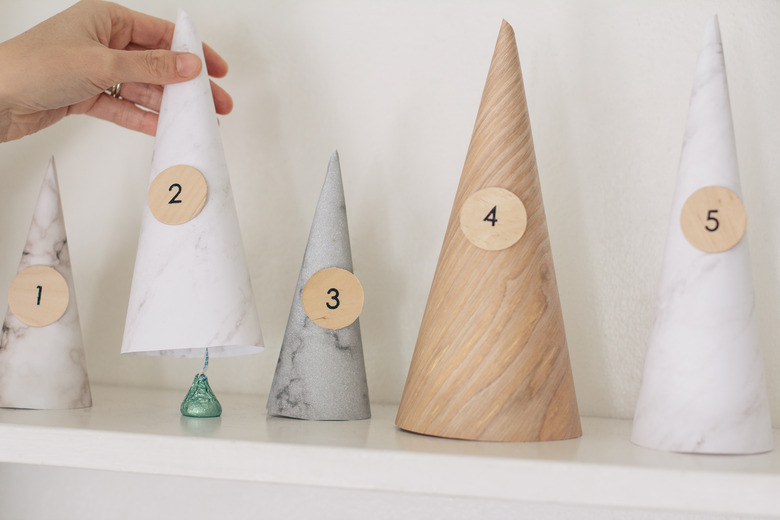
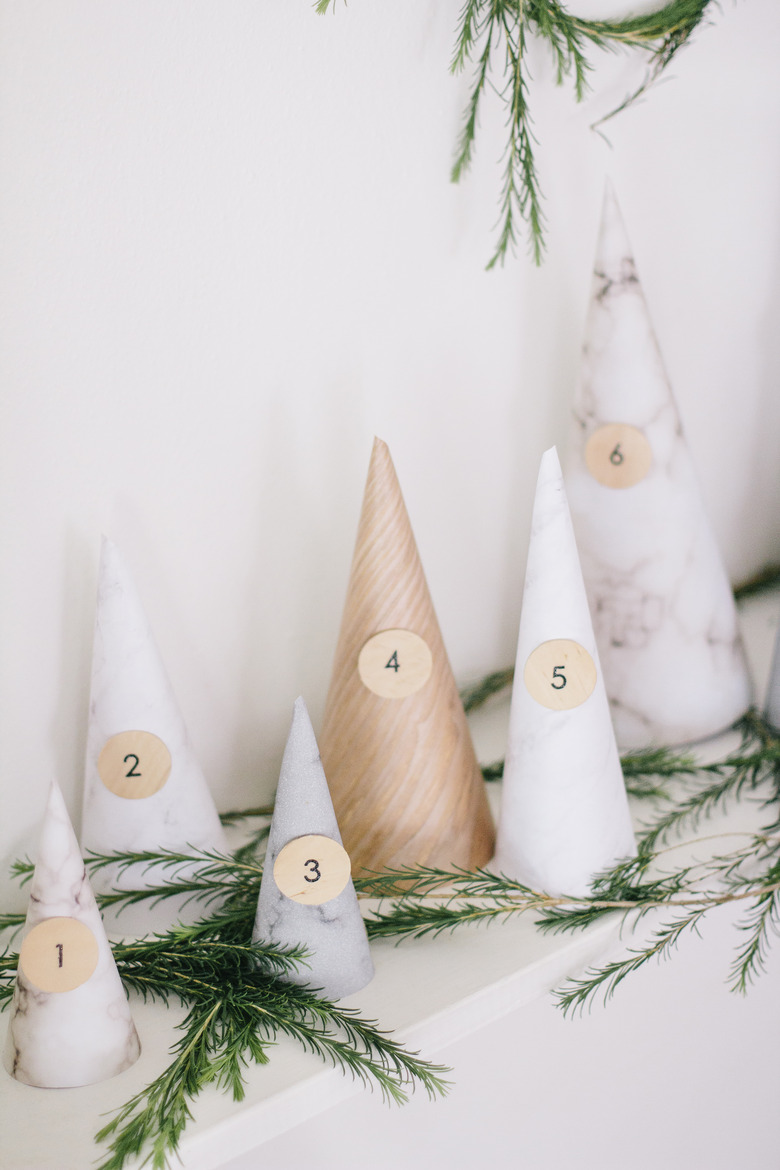
Celebrate the countdown to Christmas with a winter wonderland of pretty paper. Being a hub for all things concerning the home, our modern spin on the advent calendar is a nod to the natural surfaces you'd encounter in a home: wood and stone. With an assortment of marble patterns and light oak tones, this gorgeous paper forest and its neutral palette would play well with your existing decor. Personally, we think it'd make a lovely holiday display on your mantel, shelf, or table. Simply hide tiny treats or festive notes under each cone, tuck a few sprigs of greenery around the "trees" to create a forest feel, and let the merriment begin.
 Trisha Sprouse
Step 1
Cut a piece of string that is 24 inches long. Tie one end of it tightly onto the tip of a pen or pencil.
 Trisha Sprouse
Step 2
Hold the loose end of the string down firmly at one corner of the paper. Pull the string taut and drag the pen across the paper to create an arc.
Tip: To create paper cones of various sizes, simply adjust the amount of string you hold down at the corner. A shorter string length creates smaller cones and a longer string length creates larger cones.
 Trisha Sprouse
Step 3
Cut along the line you drew with scissors.
 Trisha Sprouse
Step 4
Stick double-sided tape along one of the straight edges of the paper.
 Trisha Sprouse
Step 5
Roll the paper into a cone shape and press the ends together to secure the tape. (Note: If you're using a heavier cardstock, glittered, or textured paper, hot glue would work better than tape.)
 Trisha Sprouse
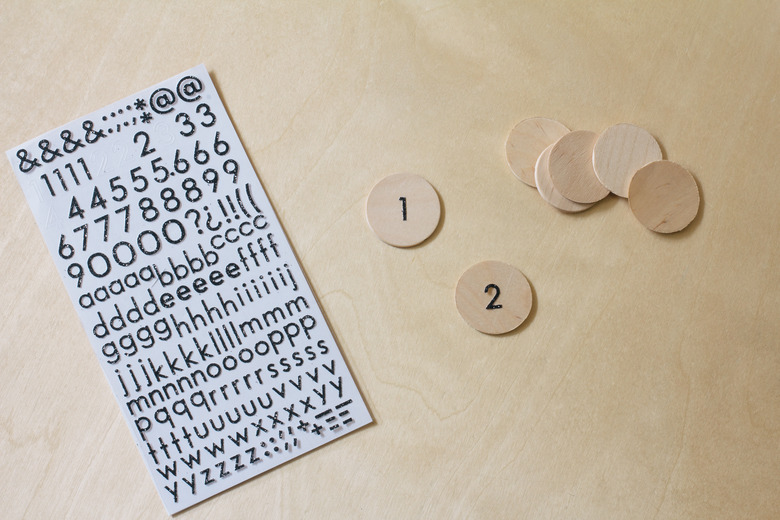
Step 6
Adhere number stickers to the center of the wood circles, from 1 to 24.
 Trisha Sprouse
Step 7
Use double-sided tape or hot glue to adhere the numbered wood circles to the center of the paper cones.
 Trisha Sprouse
Step 8
Now tuck small treats under each paper cone like bite-size candy, tiny toys, or rolled-up notes.
 Trisha Sprouse
We love the idea of creating a holiday bucket list and writing little notes with festive things to do each day of the season, like decorating gingerbread houses, singing carols, drinking hot cocoa by the fire, driving around to see lights, or building a snowman. For a boozy adult version, tiny liquor bottles would also be fun!
 Trisha Sprouse
 Trisha Sprouse