Charming Forest Holiday Scene You Can Create Using Wood Beads

We may receive a commission on purchases made from links.
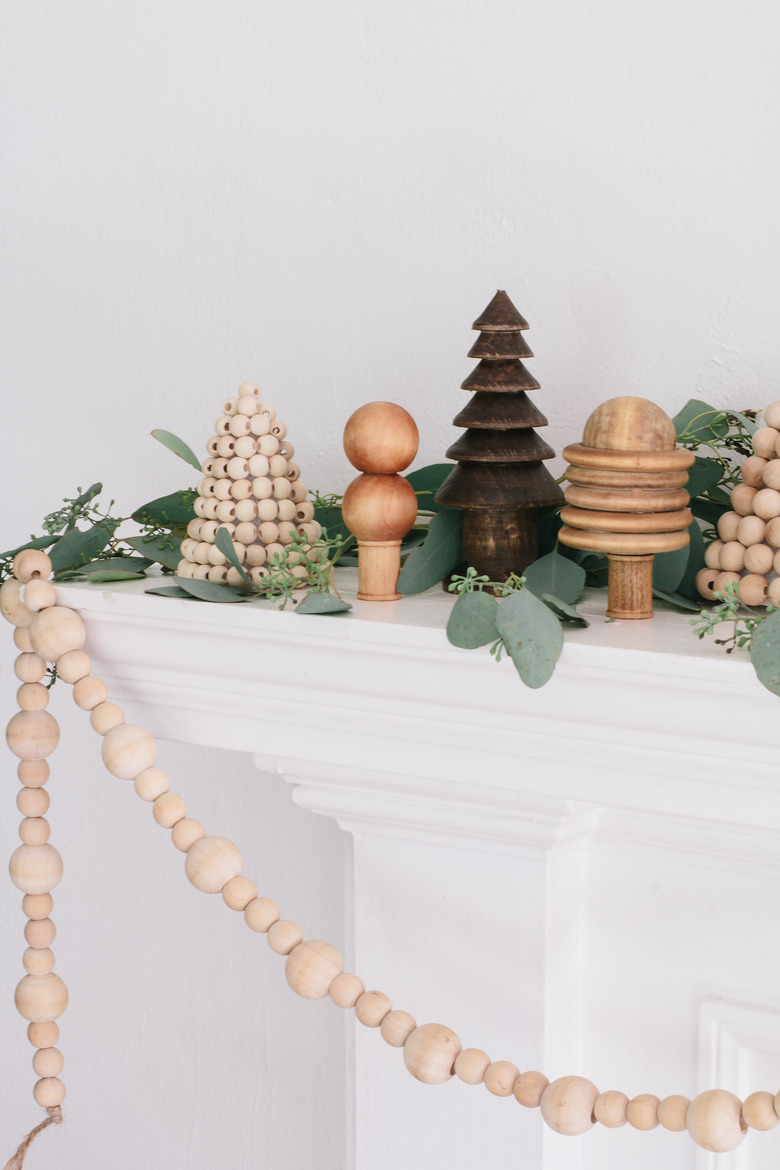
Calling all minimalists! Create a festive forest scene for the holidays with tiny wooden trees that combine a clean Scandinavian aesthetic with the earthy tones and textures found in nature. They're simple to make using wooden beads, and you can easily design an entire wonderland while watching your favorite holiday movie. Displayed on a mantel, windowsill or shelf, you'll be singing fa-la-la-la-la at how enchanting your little forest looks with a few simple sprigs of eucalyptus. So grab some wooden beads (and perhaps some holiday cookies for snacking), and get gluing.
Things Needed
-
Low-temp hot glue gun
-
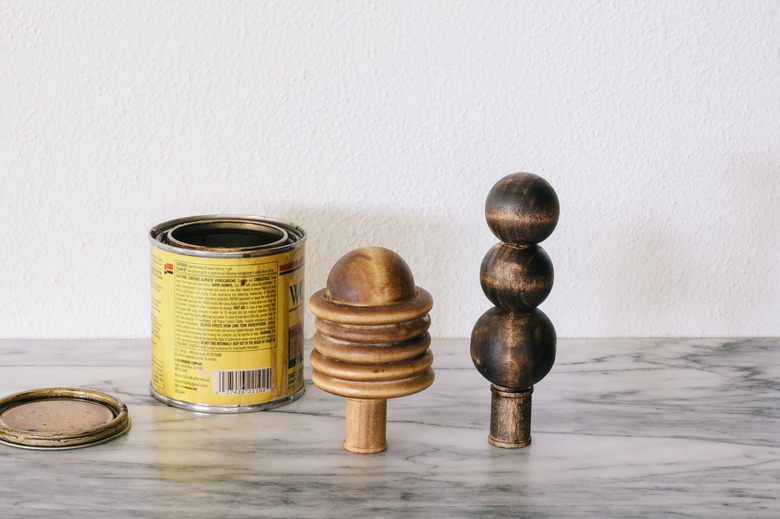
Wood stain (we used Special Walnut and Golden Oak)
-
Paper towel or cloth
Note: When sourcing your wooden beads, you'll likely encounter some that are beads with holes for stringing, some that are balls (no holes in center), and some that are dowel caps (with flat bottoms). All of them will work for this project.
 Trisha Sprouse
The Spruce Tree

The Spruce Tree
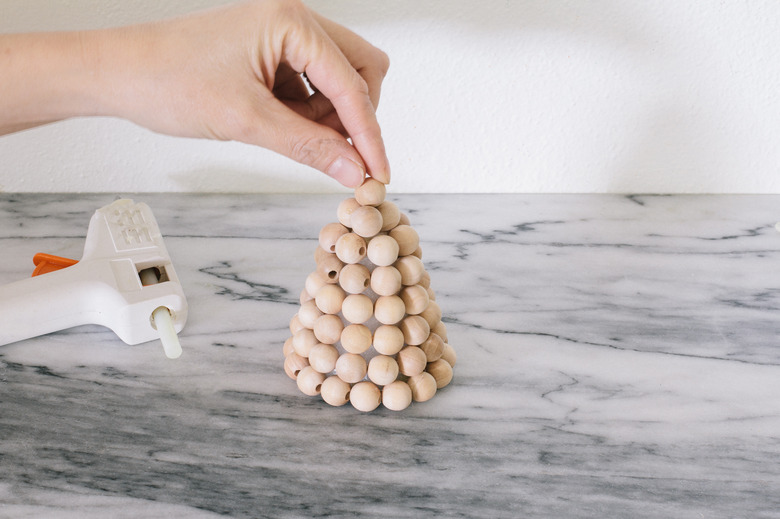
Step 1
Starting at the bottom, glue a row of 3/8-inch beads around the base of the foam cone. Position the holes of the beads so they're facing sideways and not forward.
 Trisha Sprouse
Step 2
Continue gluing rows of beads around the cone, pushing them as tightly together as possible for a snug fit. On some rows, you'll end up with a space where you can't fit the last bead — just try to keep these spaces all roughly lined up in the same area on the back of the tree so it's easy to conceal. Alternatively, you could add smaller beads to fill in any empty spaces.
 Trisha Sprouse
Step 3
Add a single bead on top of the last row to form a pointed tree shape.
 Trisha Sprouse
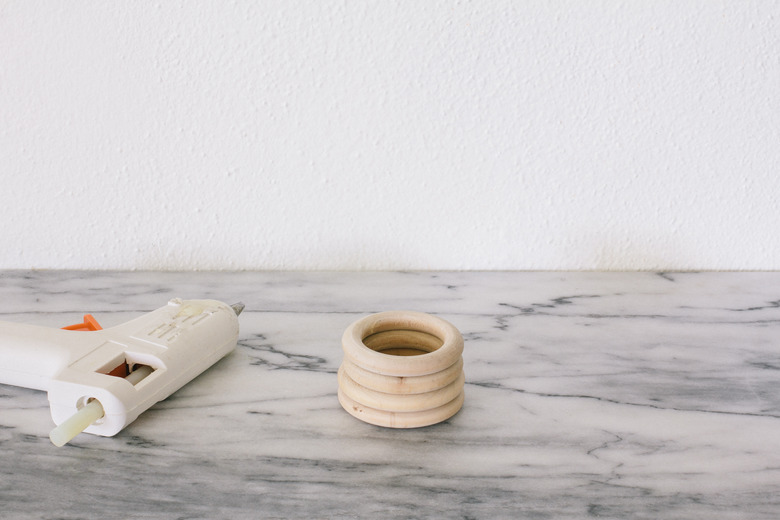
The Elm Tree

The Elm Tree
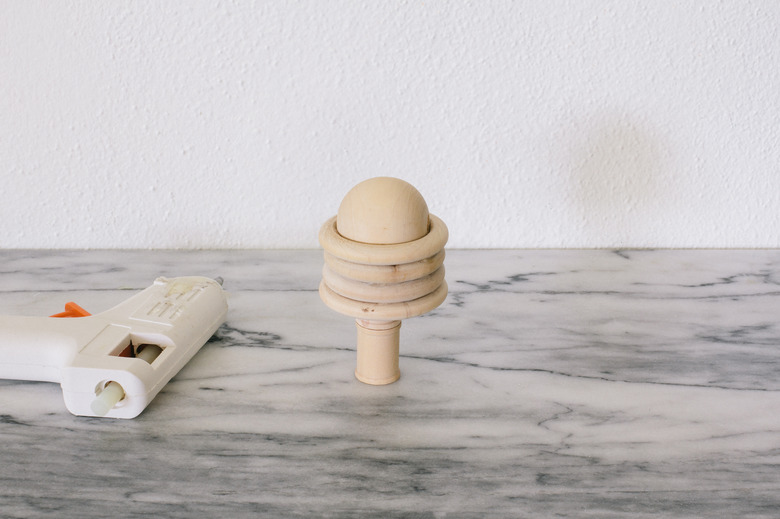
Step 1
Stack and glue four or five wooden rings together.
 Trisha Sprouse
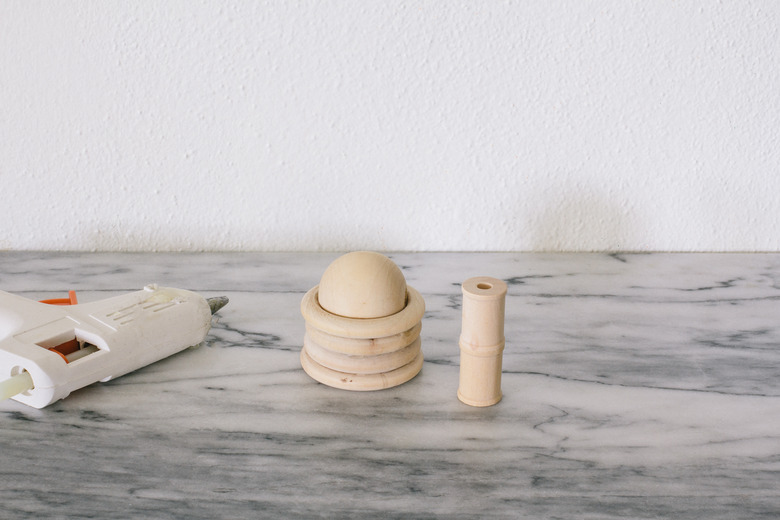
Step 2
Glue a 1 1/2-inch wooden bead on top of the wood rings. Also stack and glue two wooden spools together to form the trunk of the tree.
 Trisha Sprouse
Step 3
Place the stack of wooden rings on top of the wooden spools, and glue them together.
 Trisha Sprouse
The Boxwood Tree

The Boxwood Tree
Step 1
Start with a 1 1/2-inch wooden bead on the bottom and glue two 1 1/4-inch wooden beads on top.
 Trisha Sprouse
Step 2
Glue the beads on top of a wooden spool.
 Trisha Sprouse
To create some variation in the wood tones, apply a tiny bit of wood stain (we used Special Walnut and Golden Oak) to some of the trees with a paper towel or cloth. Wipe off any excess and let dry.
 Trisha Sprouse
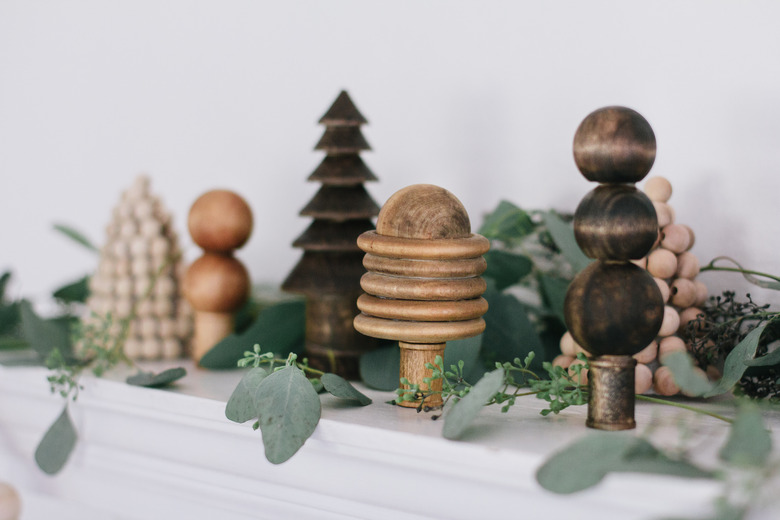
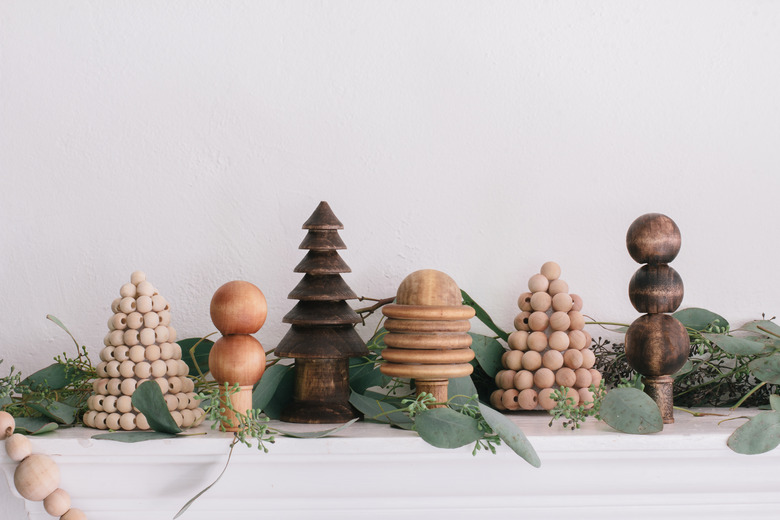
We rounded out our tiny forest with a wooden pine tree from the craft store, and then styled it with a wooden bead garland and a few simple stems of seeded eucalyptus. So simple and yet so festive!
 Trisha Sprouse
 Trisha Sprouse
 Trisha Sprouse