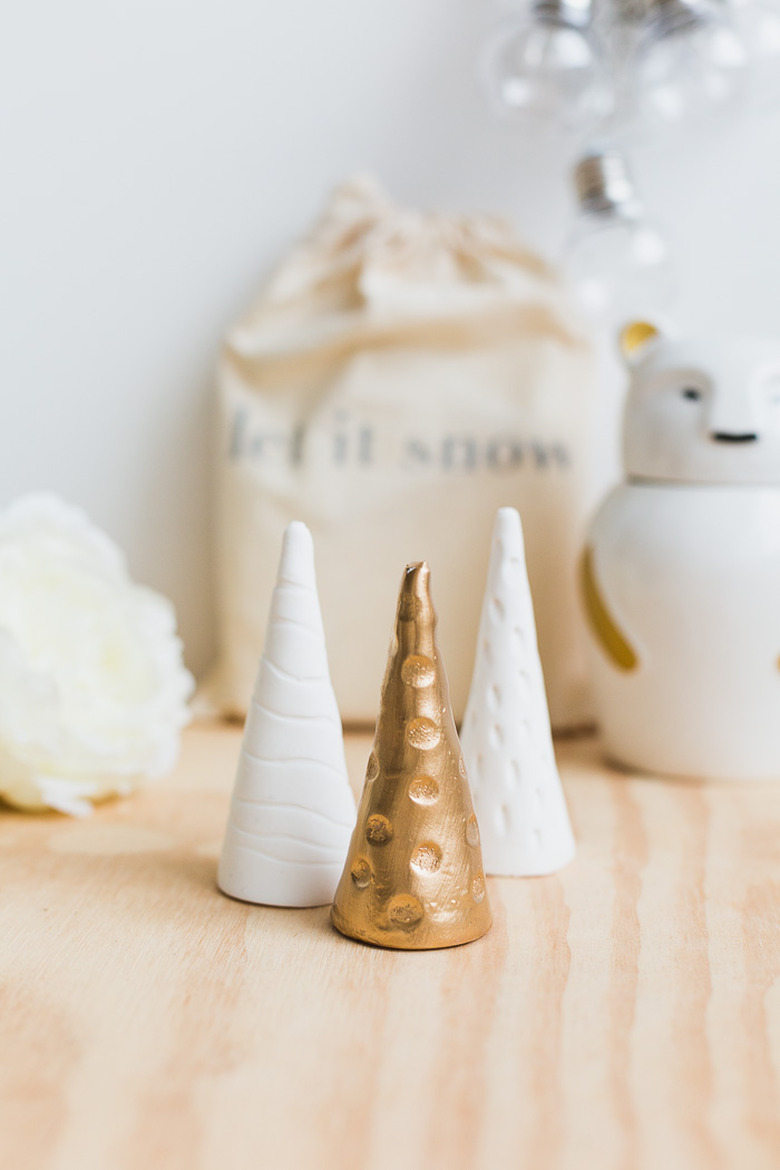
These DIY Clay Christmas Trees Are Simple And Sweet Holiday Decor

We may receive a commission on purchases made from links.
Welcome to your answer to easy holiday DIY decor: mini handmade clay Christmas trees. For this tutorial, we've gone for a gold and white theme (a festive classic), but there's nothing stopping you from having a little fun with pops of color. You can customize them to go perfectly with your holiday decorations. Don't you think this would be a fun weekend project to do with your family and friends?
 Francesca Stone
Things Needed
 Francesca Stone
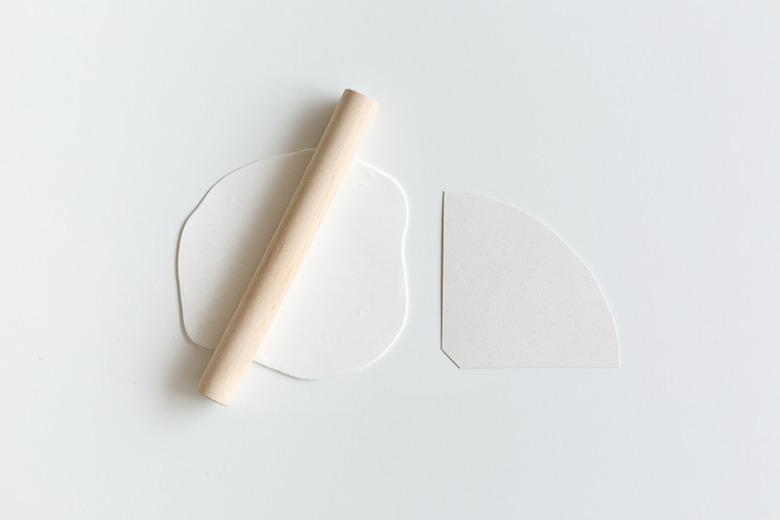
Step 1
Print out the cone-shaped template onto paper, and then cut it out. Roll out your polymer clay on a nonstick surface (baking parchment paper works very well) until it is around 3mm thick.
 Francesca Stone
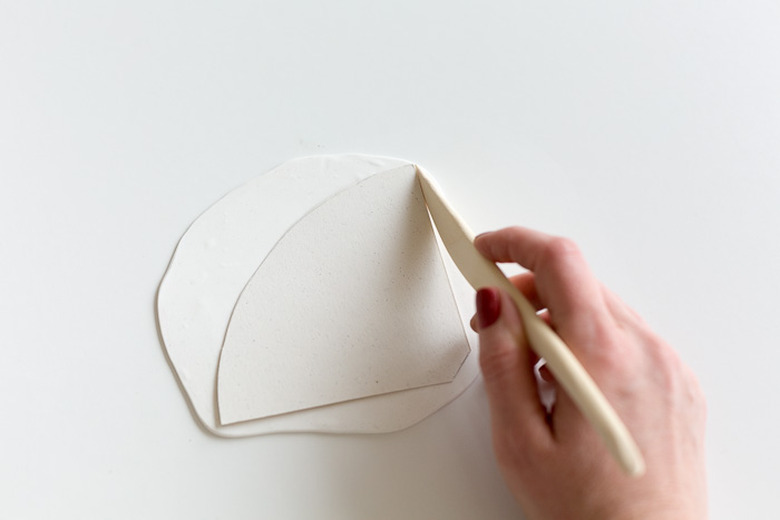
Gently place the template on top of the clay and cut around it using a wooden tool. Remove the excess clay, and then smooth down the edges.
 Francesca Stone
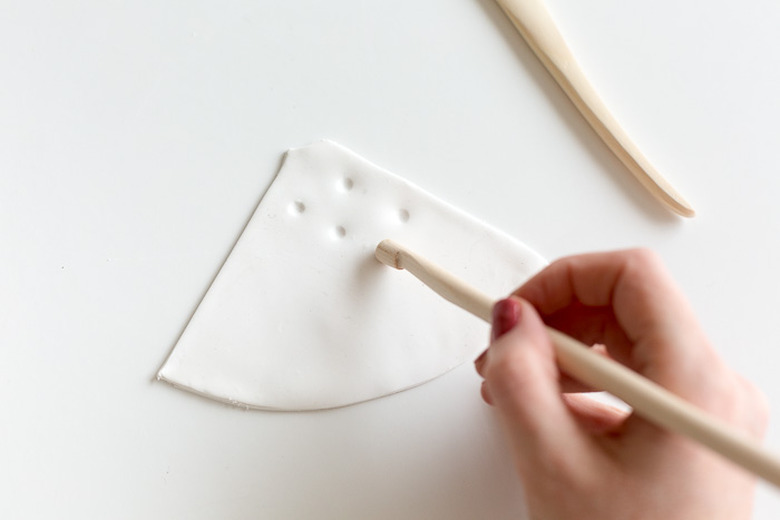
Using clay tools (or other items such as pen lids, kitchen utensils, or even your fingers), make marks and patterns in the clay.
 Francesca Stone
Step 2
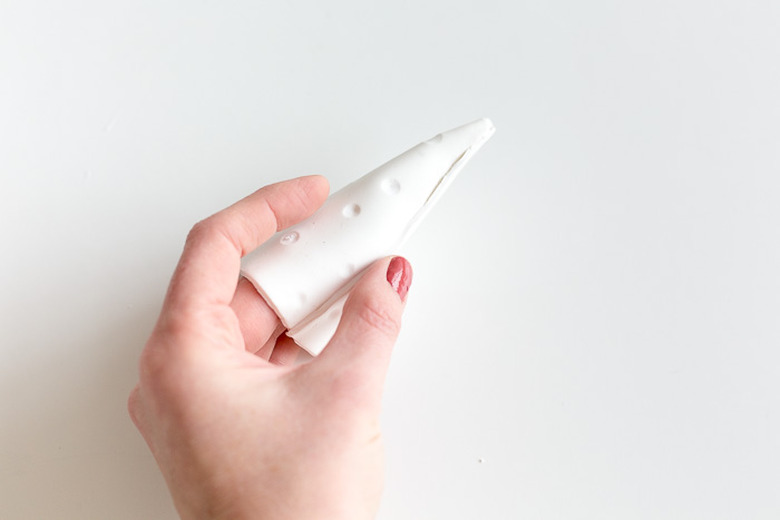
To create the cone shape, gently lift the clay off of the surface and join the two straight edges together, leaving a small overlap. Use your fingers to gently squeeze the sides together, and then smooth down the seam where the sides are joined.
 Francesca Stone
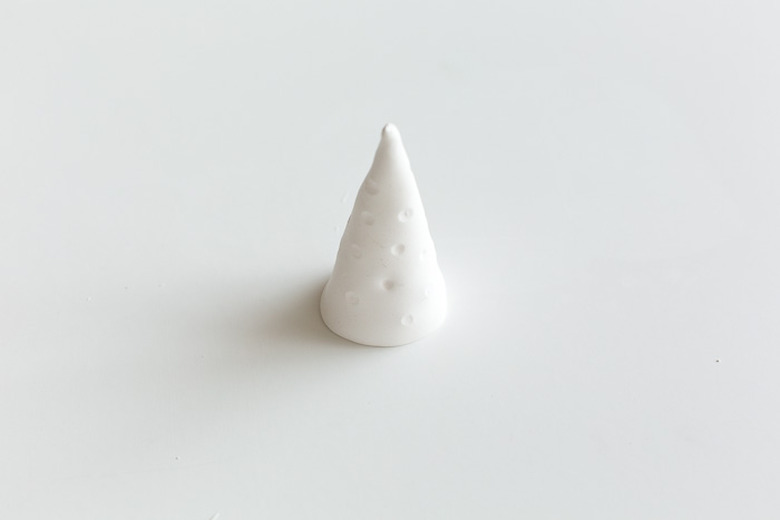
When you're happy with the cone shape, bake the polymer clay in the oven according to the instructions on the packet.
 Francesca Stone
Step 3
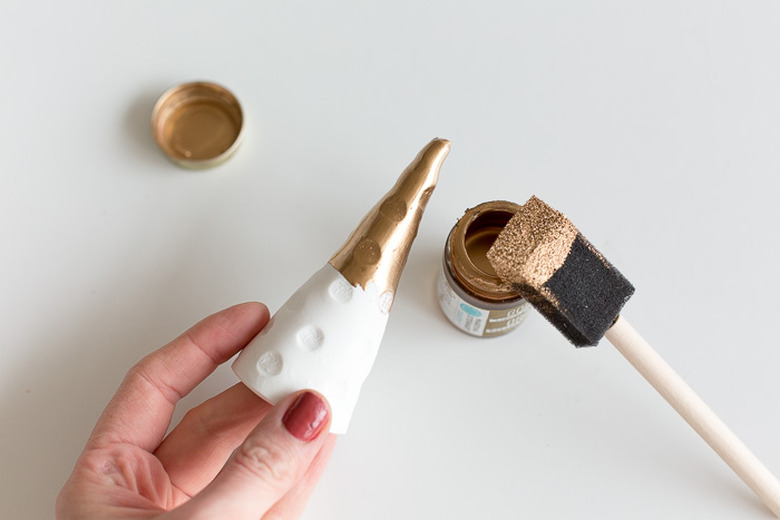
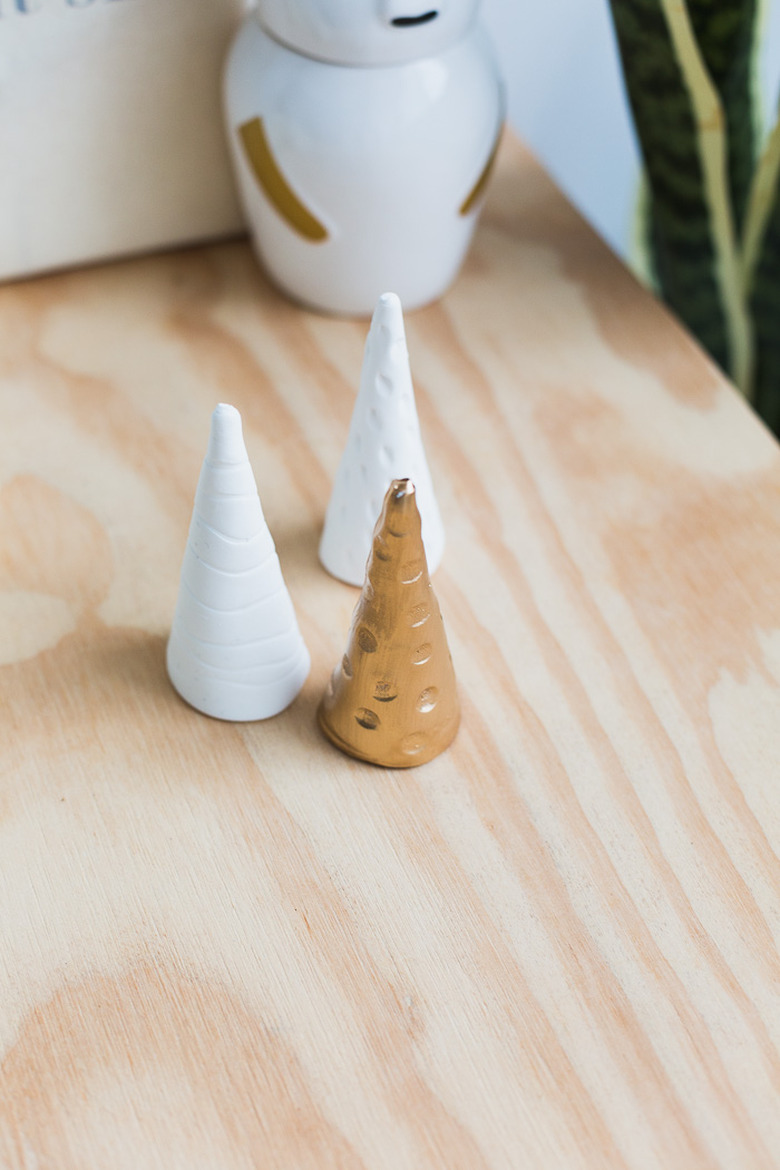
Once the cones have cooled, you can paint or decorate them as you wish. For this tutorial we used gold gilding to get a bright shiny result. We also left two cones white for a snowy, wintry feel.
 Francesca Stone
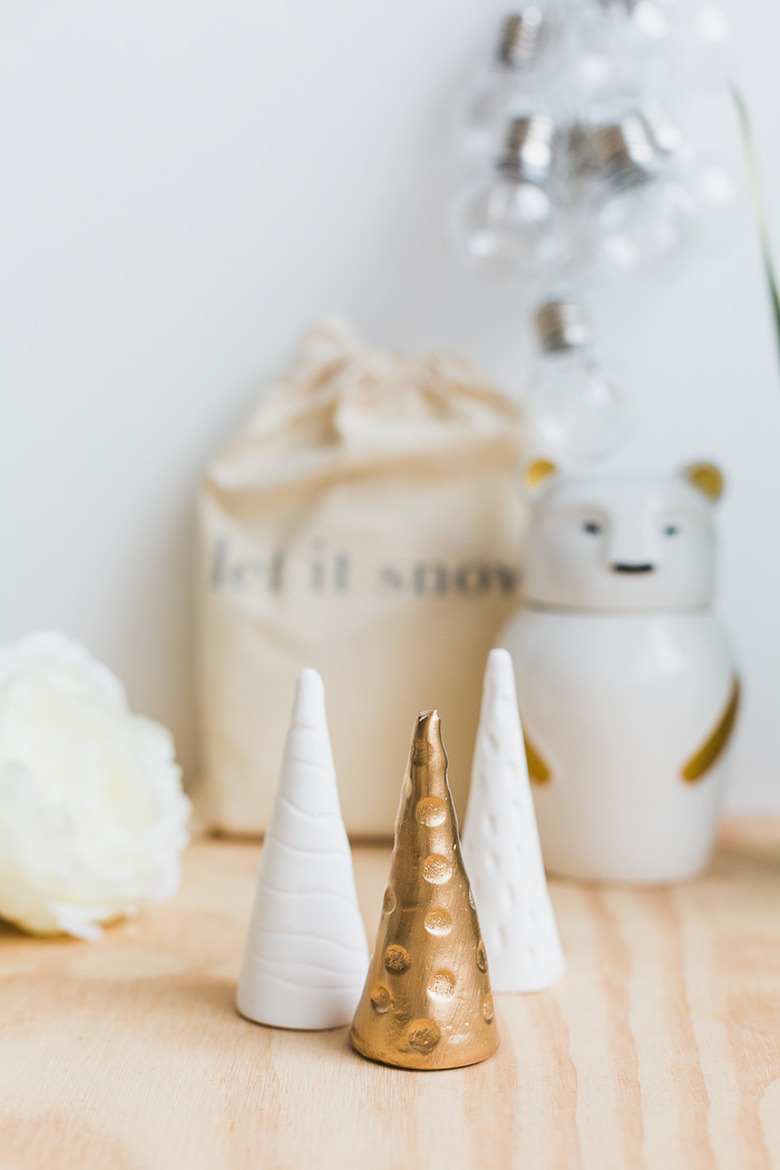
Place them on shelves, coffee tables, or even pair them with paper trees on your dining table for a truly festive tablescape. Or, you could create a small forest and use them as your yearly advent calendar. Just number all your trees and place treats underneath. Simple and sweet, right?
 Francesca Stone
 Francesca Stone
 Francesca Stone