We Highly Encourage You To Make This Cable Organizer For Your Desk

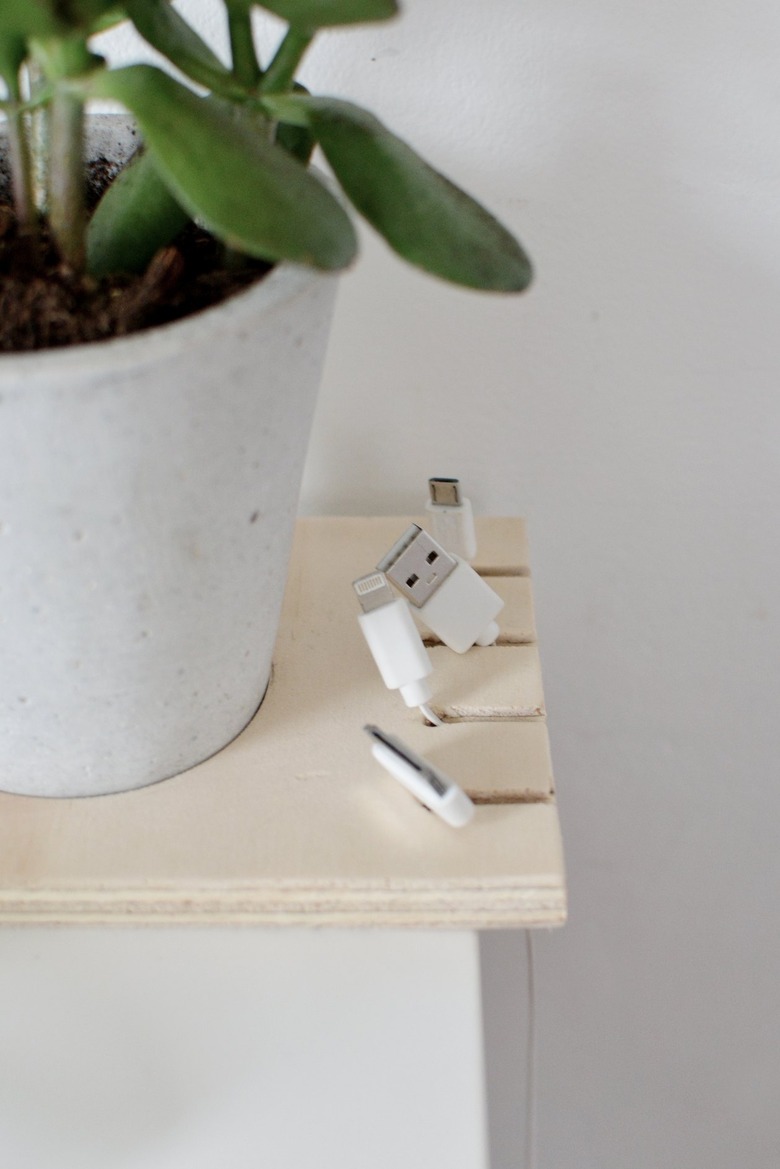
If there's one thing that's bound to ruin the form and function of an organized desk, it's a bunch of unruly wires and cables. Luckily there's a simple solution: a DIY desk organizer that arranges all your tech essentials into one tidy spot. We've created this minimal plywood piece that keeps cables separated, and it also provides a space for displaying your favorite plant. Because, why not?
 Caroline Burke for Hunker
Things Needed
-
Plywood board, 4-3/4 inches by 6 inches
-
Saw or jigsaw
-
Sandpaper
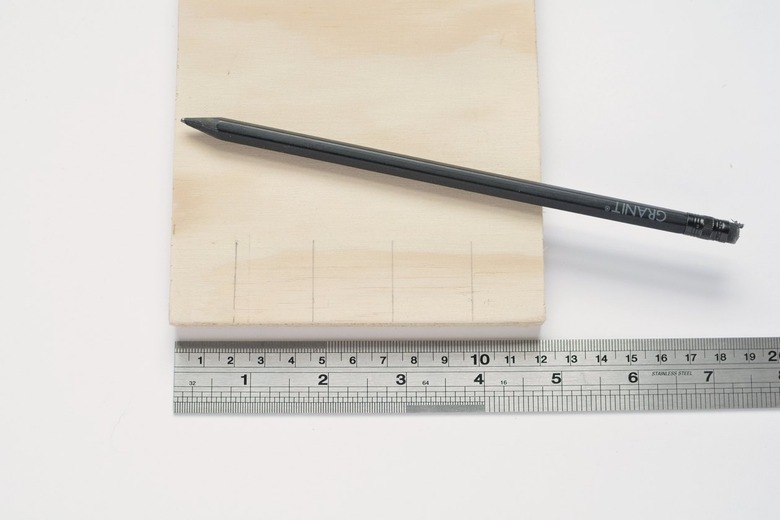
Step 1
Grab a ruler and mark the following points at one of the shorter ends of the plywood: 3/4 inch, 1-3/4 inch, 2-3/4 inch, and 3 3/4 inch. Draw a 1-inch pencil line at these points.
 Caroline Burke for Hunker
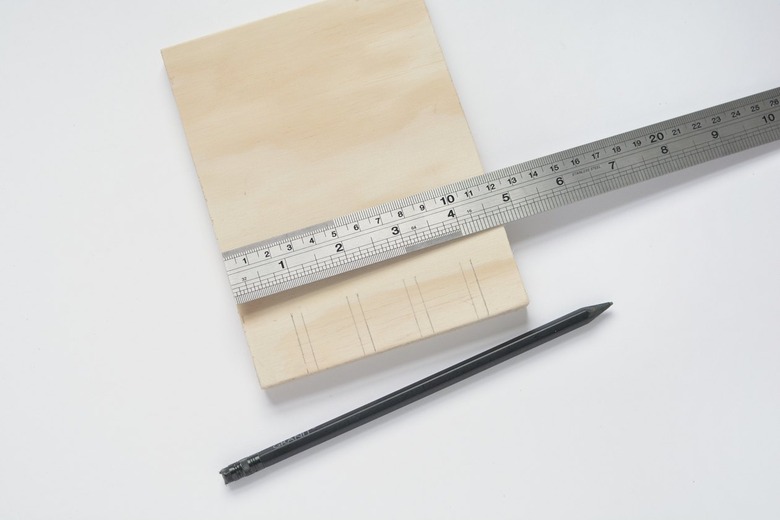
Step 2
Repeat the above step, however this time draw pencil lines at these measurements: 1inch, 2 inch, 3 inch, and 4 inches. These lines indicate where your cables slots will be. (You can also customize these measurements according to how many slots you'll need.)
 Caroline Burke for Hunker
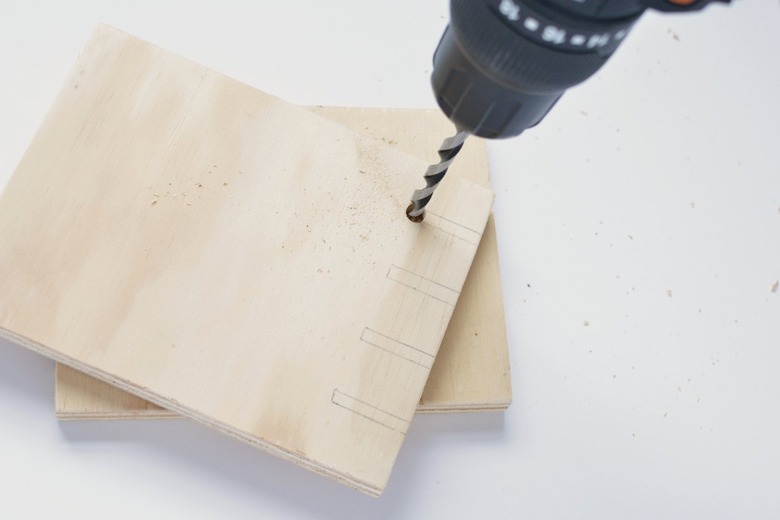
Step 3
Take a pencil and box off the top of the slots. Drill through the top of the slot using a power drill with a wood drill bit no wider than a 1/4 inch.
TIP: Place some scrap wood underneath to protect your work surface when drilling.
 Caroline Burke for Hunker
Step 4
Secure the plywood with a hand clamp and cut along the pencil lines with a jigsaw or hand saw to reveal the slots. Use sandpaper to smooth any rough edges.
 Caroline Burke for Hunker
Step 5
You can leave the cable organizer as it is, but we wanted to incorporate a snazzy plant feature into ours. To do this, measure the width of a small plant pot (ours was three inches wide.) Then take a hole saw with the same diameter and draw around it with a pencil to indicate where the plant pot will sit on the organizer.
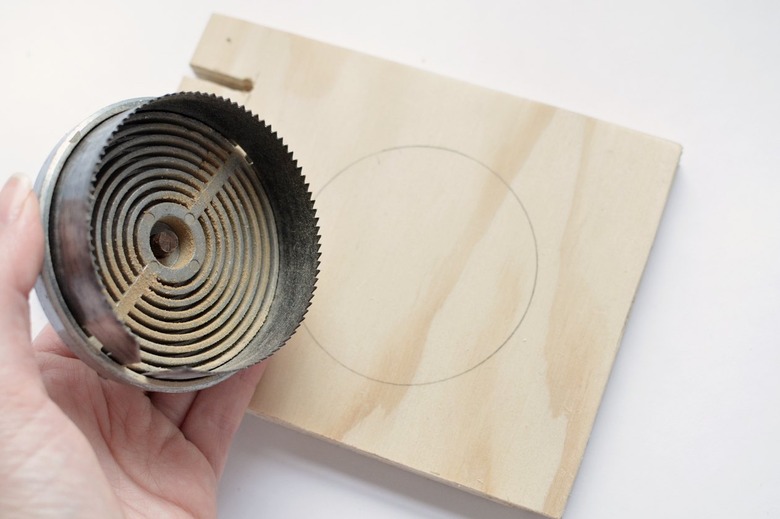 Caroline Burke for Hunker
Step 6
Insert the hole saw attachment to your power drill and cut out the hole you've marked in the previous step. Pop in your planter to finish.
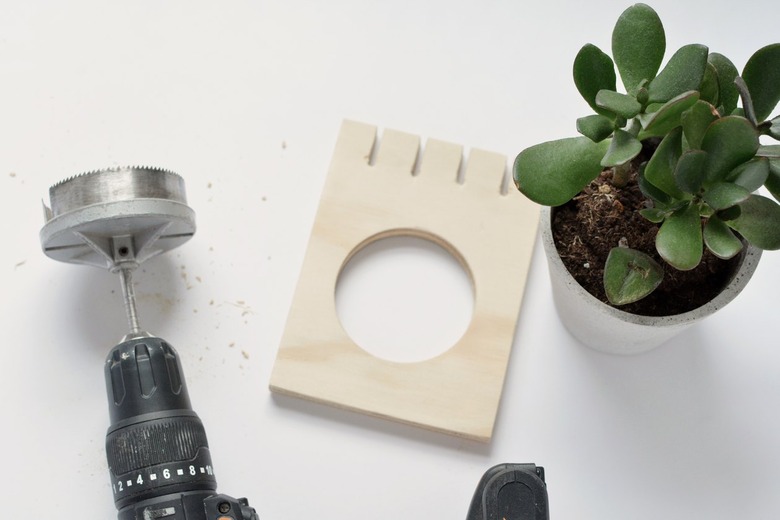 Caroline Burke for Hunker
TIP: Instead of the plant, a scented candle, or pen pot would also look great.
 Caroline Burke for Hunker
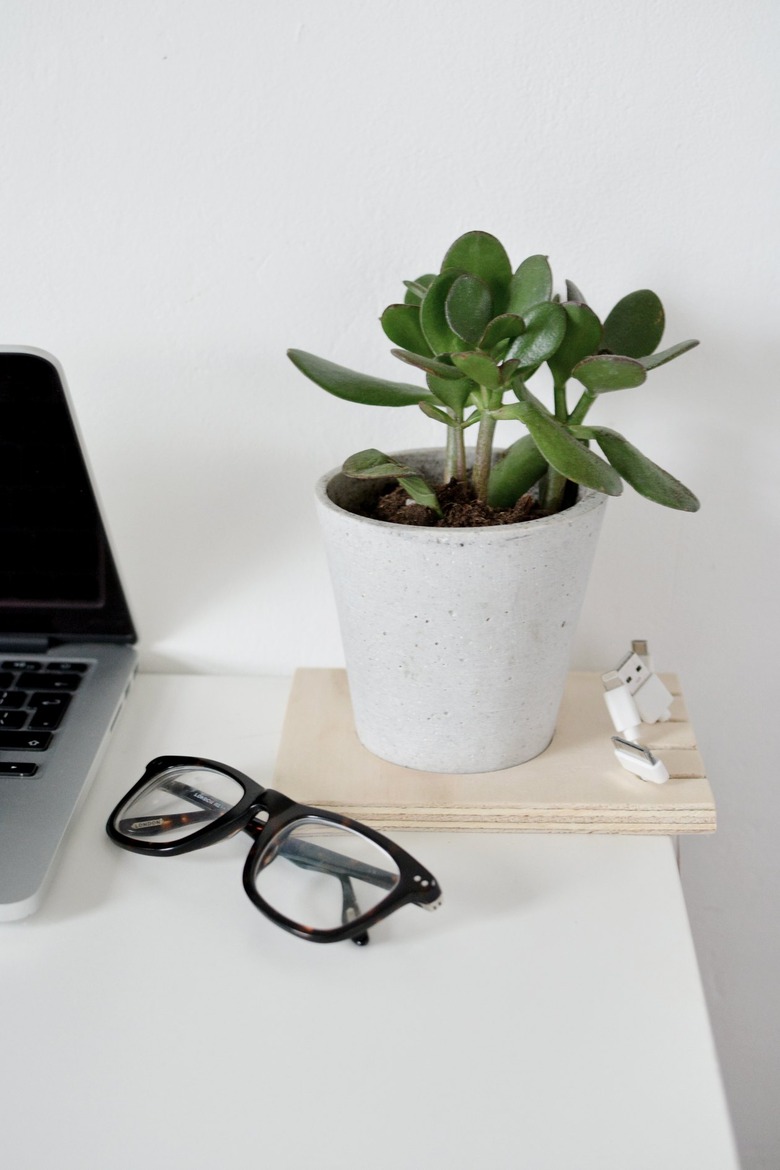
Voilà, one tangle-free workspace!