How To Install A Ceiling Fan: Step-By-Step DIY Instructions
We may receive a commission on purchases made from links.
A popular and manageable DIY project is replacing a ceiling light fixture with a ceiling fan. The wiring is already in place, so there is no need to snake electrical cable through walls and ceilings. However, standard electrical boxes used for most light fixtures are not suitable for supporting ceiling fans. In this case, the old box must be replaced with a properly rated ceiling fan box as part of the fan installation.
Tip
The new ceiling fan can be controlled by the original light switch (if the fan has pull-chain switches) or by a new switch that includes fan speed control. A fan can also have remote control. And because many ceiling fans come with light kits, you won't lose the overhead light source when replacing a ceiling light fixture.
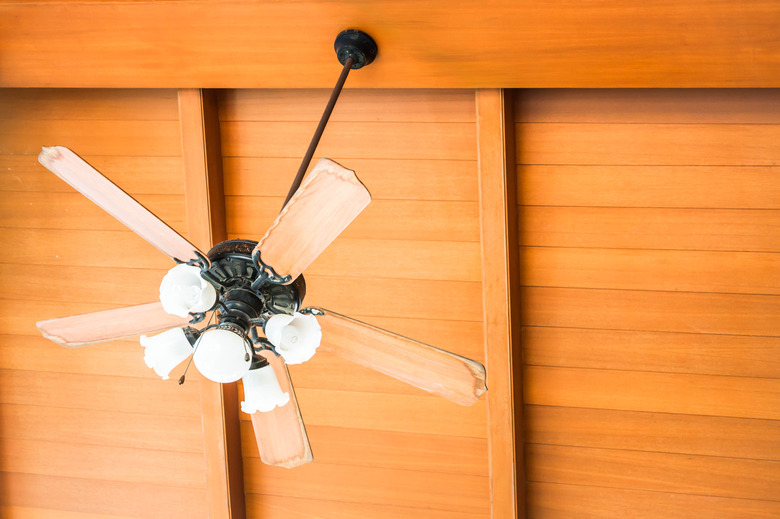
How High to Hang a Ceiling Fan
How High to Hang a Ceiling Fan
Hang your ceiling fan so that the blades are 8 or 9 feet above the floor (the National Electrical Code says they cannot be lower than 7 feet). If you are installing a ceiling fan in a room with ceilings above 8 feet, choose a fan with a downrod.
To find the right size of downrod for your ceiling fan, subtract the height of the fan motor, which is usually around 12 inches, from the ceiling height. Then, subtract the desired hanging height from that number.
- For a 10-foot-high ceiling: 10 – 1 foot for the fan = 9 feet, and 9 – 8-foot hanging height = 1-foot downrod.
Ceiling fans need to be installed so that the blades are at least 18 inches from walls and other obstructions. Most manufacturers offer installation kits for fans that will be installed on sloped ceilings.
Ceiling Fan Installation Costs
Ceiling Fan Installation Costs
Installing a ceiling fan is a doable DIY project for handy homeowners who know how to work with electricity. Ceiling fans can cost from $100 to $900 or more, with most quality products costing between $160 to $350. Fans that are wet-rated, meaning they are designed to withstand outdoor weather conditions, tend to cost more than those rated for indoor use only.
Unless you hire out the installation, you won't need to pay for labor. Aside from a few simple tools, most fans come complete for installation materials, including the wire nuts to make the electrical connections. The only thing you may need is a downrod that can add from $10 to $100 to the cost. The longer the downrod, the higher the cost.
So if you're handy and motivated to complete a DIY, ceiling fan installation will cost between $110 and $1,000, depending on the model you choose. Hiring a professional to install the ceiling fan will cost a bit more on top of that.
For installation by a licensed electrician, expect to add $60 to $120 per hour in labor charges. If the electrician is replacing an existing light fixture with a ceiling fan, it should take one to two hours for the job. Another option is to hire a handyperson who will charge $30 to $60 per hour for the job.
If you want a fan where there is no existing light fixture, you will need an electrician to install 120-volt power to the area. The installation will involve a new switch, new wiring, and a new opening in the ceiling for the fan. This will cost about $200 to $250 for labor and materials, excluding the cost of the fan.
|
Ceiling fan |
$100 – $900+ |
|
Downrod |
$10 – $100 |
|
Professional installation |
$30 – $120 per hour |
|
Professional electrical work |
$200 – $250 |
Things Needed
-
Phillips screwdriver, open-end wrench, or pliers
How to Install a Ceiling Fan
How to Install a Ceiling Fan
1.Turn Off the Electrical Power
At the breaker box, switch off the power to the circuit on which you will be working. Double-check that the power is off by removing the switch plate cover on the switch that controls the light. Use a voltage tester to make sure the two wires attached to the switch are not energized. The voltage tester will light up if power is present. Be sure to test the connections at both terminals.
2. Remove the Existing Light Fixture
Each lighting fixture is different. There may be a nut in the center of the fixture that attaches it to the mounting bracket, or there may be screws that hold the fixture against the ceiling.
- Remove the bulb cover and bulbs.
- Release the light fixture body.
- Remove the wire nuts that connect the fixture wiring to the house wiring.
- Unscrew the mounting bracket from the electrical box in the ceiling and remove it.
3. Install the New Electrical Box
Install the electrical box rated for ceiling fans following the manufacturer's instructions.
Warning
Never use a standard electrical box for mounting a ceiling fan, as these are not designed for the forces of weight and movement imposed by the fan. Use a ceiling fan box with a weight rating that is greater than the weight of your fan.
4. Install the Mounting Bracket
The fan comes with a mounting bracket that you attach to the electrical box with screws. Pull the house wiring through the mounting bracket.
5. Install the Downrod
Place the fan motor on the floor or on a table. Most fans come with a short downrod for flush-mount installations. If the downrod is already attached to the motor, you may need to remove it to complete this step. Remove the downrod by loosening the setscrews and removing the cotter pin and rod. Alternatively, you can substitute a longer downrod if the installation calls for it.
- Feed the fan's wiring through the downrod.
- Insert the downrod into the mounting collar on the motor.
- Secure the downrod by inserting the cotter pin rod and the cotter pin in the marked opening and tightening or installing the setscrews on the collar using a screwdriver, wrench, or pliers as appropriate.
- Cut the fan wiring, leaving about 6 inches protruding from the downrod.
- Strip about 1/2 inch to 3/4 inch of insulation from the ends of the wires.
6. Install the Fan Canopy
There may be a collar cover as well as a canopy included with your ceiling fan to hide the connections. If you are using a downrod, the collar cover hides where the downrod is attached to the fan motor. The canopy hides the connection between the fan or downrod with the mounting bracket as well as the wiring. If there is a downrod, slip the collar and/or canopy over the downrod as applicable.
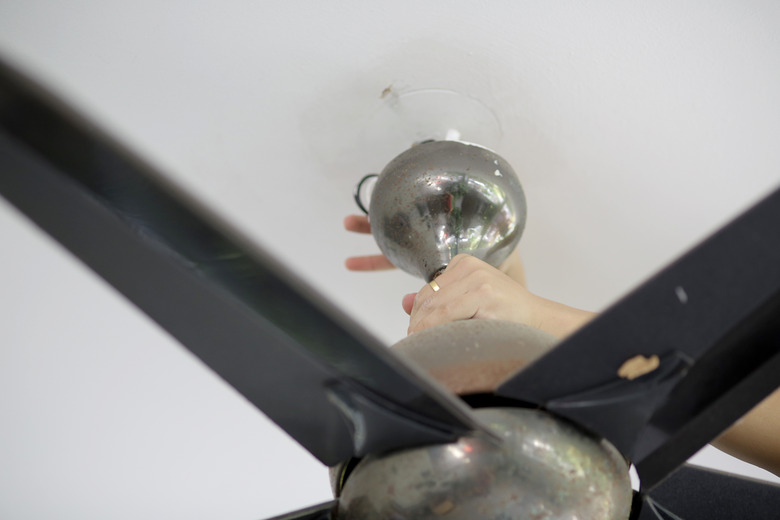
7. Install the Hanging Ball
The hanging ball connects the fan to the mounting bracket. Secure it to the downrod by tightening the setscrews and inserting the cross pin.
8. Hang the Fan
Lift the fan and insert the hanging ball into the open side of the mounting bracket. Rotate the fan until you hear the ball click into position. Alternatively, the ball may have a slot or tab that fits into a tab or slot on the mounting bracket.
9. Make the Wiring Connections
In general, making electrical connections involves connecting like-color wires to one another.
- Use the wire nuts that came with the fan to connect the green or bare copper ground wire from the fan to the house circuit's ground wire.
- Connect the black power wire from the circuit to the fan's black wire.
- Connect the white neutral wire from the circuit to the fan's white neutral wire.
- Fold the wires and connections into the electrical box.
If the fan comes with a remote, you will wire the circuit to the remote's receiver. The receiver will often connect to the fan motor via push-in connectors. If there is no remote but there is a light kit, you will connect the blue or striped wire from the light to the black power wire and the fan's black wire — that means there will be three wires joined in one wire nut.
10. Attach the Canopy
Push the canopy up and secure it to the mounting bracket with screws. If there is a downrod, push the collar into position and secure it.
11. Install the Fan Blades
Attach the fan blades to the blade arms that extend from the bottom of the motor. Most are attached using screws, but there are some fans that feature a quick-connect assembly in which the blades have keyhole slots that secure onto mounting lugs on the blade arms.
12. Install the Light Kit
Attach the push-in connector from the light housing to the connector attached to the fan motor. Attach the light housing to the motor with the screws provided.
13. Restore Power and Test the Fan
Turn on the circuit breaker to the fan circuit and test the fan for proper operation.
If you're a visual learner and need to see how exactly you should install a ceiling fan before diving in yourself, check out this video from Del Mar Fans & Lighting.